If you are a Microsoft product fan, then you will surely get a kick out of what we are about to share with you in this article.
We’re going to focus on the Windows 10/11 operating systems, where Microsoft is about to introduce an app that should have been added years ago.
In case you didn’t know, the tech giant known as Microsoft is working on a PC Manager app that’s designed to boost your computer’s performance.
The Beta for Microsoft’s PC Manager is out now
Much like the popular CCleaner, the beta version of Microsoft’s PC Manager includes storage management and the ability to end tasks quickly and control which apps start up with Windows.
The source code is already baked into Windows, but this PC Manager app puts it all in one useful location, which is really advantageous.
And, to make it better, there’s even a browser protection section that makes it easier to change default browsers than what exists in Windows right now.
The application itself displays in English so it is unclear if it supports other languages besides Chinese and English and Microsoft has yet to make an announcement regarding it.
Note that most web browsers support translations, but you may also activate the first button on the page to start the 5 Megabyte download of the app.
However, the app checks out fine on Virustotal there is only one hit by CrowdStrike Falcon, and it is labeled grayware.
PC Manager’s storage feature includes the ability to manage apps or remove those that are rarely used, and there’s also a full cleanup scan available or a scan to find large files on your drives.
Furthermore, the process management feature is a more simplified version of the Task Manager so you can quickly kill processes that might be eating up RAM.
When you press the main boost button the PC Manager will clear temporary files and free up memory, which could be useful on older PCs.
As we’ve mentioned, the public beta of PC Manager has appeared on an official Microsoft site, but the site is Chinese, which suggests that this app is designed for a very specific market.
Also, if you were planning on getting this for Windows 7 or Windows 8, you won’t be able to.PC Manager is designed for Windows 10 and above and is targeted more at low-spec laptops and PCs.
Have you already tried the PC Manager Beta? Share your experience with us in the dedicated comments section located below.
Android emulation is possible on Windows, but many users reported Blue Screen of Death errors while using the BlueStacks software.
This can be a big problem and cause stability issues with your PC, but in this article, we’ll show you how to fix this problem.
Why does Bluestacks keep crashing?
Users have noticed this error, and it is triggered by a few different elements, the most common being:
Outdated or corrupted drivers – Curropt drivers are a huge factor and sometimes will even mean that the BlueStacks engine won’t start. We discuss how to fix this below.
Errors in the Hyper-V feature – If the BlueStacks isn’t opening or constantly crashing, it’s possible that there’s an issue with the virtualization and everything is not configured correctly.
Third-party applications – Third-party applications can cause this error to appear, which will require a detailed fix in some cases.
Compatibility issues with antivirus – While antivirus software keeps you safe, it may not interact with some legitimate applications in some cases. You should use only the best antivirus software.
Blue Screen of Death errors can be pretty problematic, and sometimes these errors can appear in different variations while using BlueStacks, including:
BlueStacks keeps crashing Windows 10 – Sometimes BlueStacks can keep crashing on your PC. This can occur due to the Hyper-V feature, so be sure to disable it.
BlueStacks BSOD memory_management – Third-party applications can cause this error to appear. You will have to identify and eliminate the trigger applications.
Blue screen after installing BlueStacks – Your antivirus can also cause problems with BlueStacks to appear.
BlueStacks quit unexpectedly – This is very similar to the restarting error, and just like it is with other variations, you should try some of the solutions recommended below.
How can I fix Bluestacks crashes on PC?
Before you go into any of these solutions, you may decide to change emulators altogether. However, many users who have switched to get LD Player have had a positive experience.
The BlueStacks Blue Screen of Death error will prevent you from having an excellent gaming experience. However, after fixing this problem, you can enjoy playing the best Android games on your computer.
We recommend you use a professional solution that offers you many benefits. First, it safely repairs and secures your computer, bringing it into an optimized state.
2. Disable the Hyper-V feature
A tested and reliable solution is to disable Hyper-V Windows feature on your device in order to repair Bluestacks crashing errors really fast.
1. In the Search field, enter Windows Features. Select Turn Windows features on or off.
2. When the Windows Features window appears, locate Hyper-V and disable it. After doing that, click OKto save the changes.
3. Restart your PC to apply the changes.
3. Reinstall the BlueStacks software
A Blue Screen of Death can sometimes appear while using BlueStacks if the installation is damaged. To fix this problem, users are suggesting reinstalling the software entirely.
There are several ways to do that, but if you want to remove BlueStacks, you need to use third-party software.
This is an excellent uninstaller software, and it can remove any application from your PC and all its files and registry entries.
By using the uninstaller software, you’ll ensure that there will be no traces of Bluestacks on your computer, and you will be ready for a fresh install.
4. Reinstall your graphics card drivers
Press Windows Key + X and choose Device Manager from the list.
When Device Manager opens, expand Display adapters, right-click your graphics card and choose Uninstall device.
If available, check to Remove driver software for this device option and click on Uninstall.
Restart your PC to apply the changes, then run Bluestacks and verify if it is still crashing your PC.
If you find this process tedious, you can always use third-party tools to update all your drivers automatically.
Try out a highly-efficient software such as Outbyte Driver Updater that updates all your drivers, including the ones for your graphics card. It’s simple, fast and secure technology allows it to improve the performance of your graphic card.
5. Disable or uninstall your antivirus
Click on the hidden access arrow in the Taskbar.
Click on your antivirus icon, hover over Avast shields Control and select Disable for 10 minutes (This step varies for different antivirus software).
Run Bluestacks and verify if it is still crashing your PC.
If you’re getting Blue Screen of Death on your PC while using BlueStacks, the problem might be related to your antivirus software.
If the problem is still there, you must uninstall your antivirus and try rerunning BlueStacks.
You should now see a list of options. Select the Safe Mode with Networking by pressing the corresponding keyboard key.
Run Bluestacks and verify if it is still crashing your PC.
7. Perform a Clean boot
Press Windows Key + R to open the Run dialog.
Type msconfig, and click OK.
Navigate to the Services tab and check to Hide all Microsoft services checkbox, then click the Disable all button to disable the services.
Head over to the Startup tab and click Open Task Manager.
Right-click the first entry on the list and select Disable from the menu. Do this for all entries on the list.
Go back to the System Configuration window.
Click Apply and OK to save changes and restart your PC.
Once your PC restarts, check if the problem is still there. If the Blue Screen of Death doesn’t appear anymore, one of your startup applications or services was certainly causing the issue.
To pinpoint the cause, you must enable the disabled applications and services.
Once you find the problematic application, remove it, or keep it disabled to prevent this issue from reappearing.
You should note that there are a few variants to this error, including, BlueStacks crashing on Windows 11 and BlueStacks 5 crashing on Windows 11. But these solutions should work for any of these.
We hope that our solutions helped you solve this problem and if you have any suggestions, please let us know in the Comments section below.
When you face problems like Projecting to This PC lag, don’t worry. You can easily get rid of this problem and enhance your experience with Windows 11.
We also have solutions to solve Wireless Display install failure. However, this article will show you the ways to troubleshoot the lagging problems with the Projecting to This PC feature.
Why does Projecting to This PC lag?
Projecting to This PC feature is indeed a great feature on Windows 11. However, sometimes, it may not work because of the following reasons:
Outdated drivers – If the display driver, network driver, and some other chipset drivers are not up to date, this problem may appear.
Outdated version of Windows – A problematic version of Windows may be a major reason.
Poor Wi-Fi – If the Wi-Fi signal is very weak or there are network overlaps, any wireless display will struggle to deliver a smooth experience.
Problematic system components – Corrupted system components on Windows may make it unstable and problematic.
Problematic BIOS/Motherboard firmware – If your motherboard BIOS or firmware software is outdated, the latest features and updates on your PC will not deliver enough performance.
The way to solve this problem is to sort out these reasons first. Then, you can take steps to fix that you can find the next part of this article.
How do you fix Projecting to This PC lag?
Before trying the actual steps, we suggest you do a few things first. These are:
Restart your PC.
Make sure you are using Wi-Fi rather than an Ethernet connection.
Use a 5 GHz WiFi connection rather than 2.4 GHz. If necessary, check out these best 5 GHz routers.
Now, you can try these methods to solve lag issues with the Projecting to This PC feature.
1. Check for Windows Update
Press Windows + I on the keyboard to open Windows 11 Settings.
Go to Windows Update and click on Check for updates.
If any updates are available, click on Install/Download button.
2. Update display and network drivers
2.1 Use the Device Manager
Open the Start Menu.
Type Device Manager and press Enter.
Right-click on the Display Driver and choose Update.
Choose the preferred method to update.
Do the same for Network adapters and other chipset drivers.
2.2 Driver updater automatically
To update drivers on Windows, Outbyte Driver Updater is one of the best tools available. It can automatically detect outdated or missing drivers and install them with just a single click.
To solve Projecting to This PC lag, updating all of the drivers using Outbyte Driver Updater will be the best idea.
Outbyte Driver Updater
Update all drivers in a few clicks to keep your system in top condition.
Power it on and press F8 or F2, or Del, depending on the motherboard you are using when it shows the logo on the monitor.
In your BIOS/UEFI settings, figure out the option to update the firmware.
After that, try to use the Miracast feature again and see if it has fixed the problem or not.
We already have a guide on how to update BIOS. Follow that if necessary. To know how you can access the BIOS or UEFI dashboard of your PC, search for the instructions on the PC/Motherboard manufacturer’s website.
4. Try in Clean Boot
On Start Menu, type the following text and hit Enter to open the System Configuration tool. msconfig
Go to the Services tab.
Check on Hide all Microsoft services and click on Disable all.
Restart your PC.
Try to use the Projecting to This PC feature again and see if it has fixed the problem or not.
If you don’t find this feature helpful, you can undo the changes you have made in this method.
5. Repair system components
Open the Start Menu.
Type cmd, right-click on the Command Prompt, and choose Run as administrator.
Type the following command and hit Enter to execute it. sfc /scannow
Doing these things will surely solve the lag in the Projecting to This PC feature. However, if the problem still persists, you can reduce active background tasks and see if it helps.
This article has featured the best method to fix the lagging issue while using Project to This PC feature on Windows 11. If you have any questions or suggestions, you can write them down in the comment box.
Some Steam users have reported on the Steam forum that some games instantly close on loading screens.
Consequently, the games aren’t starting for them. Also, it happens that the Steam game launches and then closes with no error message.
Why does my game keep closing on Steam?
The Steam game keeps crashing issue can be caused by a plethora of reasons, but the most common ones are the following:
Game integrity – Sometimes, specific files can become damaged or corrupted during the installation process of an application or game. In this case, you will have to reinstall the game altogether.
Third-party antivirus software – Antiviruses are known to interfere with applications that they wrongly deem as harmful. Such might be the case with the Steam games crashing error in Windows 11. You may want to change to a better antivirus that won’t cause issues.
Outdated graphics drivers – Driver updates resolve issues with compatibility and security, as well as errors and faulty code, and they can even occasionally add functionality to the underlying hardware. Thus when one driver is outdated, it can cause problems across applications and games.
ClientRegistry.blob – ClientRegistry.blob is the file that Steam uses to store the registration data of the games that you have installed on your computer. Sometimes, the file can get corrupted and thus affect Steam games.
Follow along to find out what to do to fix the Steam preparing to launch, and then nothing happens.
How do I fix a Steam game that keeps crashing on startup?
Before following the solutions below, make sure to check out the following aspects:
Check the game’s system requirements to ensure your PC supports it.
Temporarily disable your antivirus or add your game to its whitelist.
1. Update the graphics card driver
1.1 Update it manually
Right-click the Start icon, then select Device Manager.
Expand theDisplay adapters folder, right-click your graphics card, and select Update driver.
Select the Search automatically for drivers option then reboot your PC once the process ends.
1.2 Update it automatically
A more efficient way to keep all your drivers up to date, including the graphics card driver, is to use software that does this automatically.
This way, you will significantly reduce the number of errors associated with drivers, which will impact your productivity and mood.
Outbyte Driver Updater is a great tool to have when speaking about updating drivers. They use rich database driver files ready to be installed.
Outbyte Driver Updater
Automatically keep all drivers updated so you avoid these kinds of errors.
If you are running a new version of Steam, you won’t find the ClientRegistry.blob because Steam doesn’t use it anymore.
Open File Explorer by pressing Windows + E, then go to the Steam folder. The location will usually be: C:\Program Files (x86)\Steam
Next, find the ClientRegistry.blob file, right-click it, and select Delete or the Bin icon.
Games might not run if Steam’s ClientRegistry.blob file is corrupted. As such, deleting a corrupted ClientRegistrty.blob file is another potential resolution for Steam games that instantly close upon launch.
Remember that you’ll also lose local Steam settings after deleting that file.
3. Run the game in Compatibility Mode
Press Windows, type Steam, then select the Open file location option under the result.
Right-click Steam and select Properties.
Here, navigate to the Compatibility tab and select Run this program in compatibility mode for, followed by Windows 8, from the drop-down menu. Then, click the Apply and OK buttons to save the new setting.
Then open Steam to relaunch the game.
Running it in compatibility mode might fix the issue if it’s a slightly older game title. Compatibility mode runs software with settings from a previous Windows platform. This also helps when Jedi Survivor is crashing on startup.
Verifying game caches can fix corrupted game files. As such, this might be a potential fix for Steam games that instantly close when you run them.
1. Open Steam, then right-click the game you are having issues with and select Properties.
2. Click the Local Files tab, which includes four options. Then select the Verify Integrity Of Game Files option to validate the cache.
5. Delete the appcache folder
Open File Explorer by pressing Windows + E, then go to the Steam folder. The location will usually be: C:\Program Files (x86)\Steam
Next, find the appcache folder, right-click it and select Delete or the Bin icon.
Then relaunch Steam as an administrator by pressing Windows, typing steam, and selecting Run as administrator under the result on the right.
In Windows, applications receive additional rights when run with the administrator account. This grants them the ability to make changes to the system files, update the registry, and access other areas that are typically off-limits.
Some readers suggested cutting the internet connectivity completely before running the game. This, of course, is only a temporary solution.
Also, restart your PC and listen for any unusual beeping from your motherboard. In that case, the GPU or CPU are overheating and you should address the problem quickly.
The above solutions will fix the Steam causing PC to crash issue in Windows 10 as well as 11. But for more methods, you can check out our guide on what to do if Steam games won’t launch.
If you have further questions about the resolutions, or perhaps even your fixes, please post them below.
The antivirus market is quite huge and you can find a multitude of software nowadays. What you must know is that you can use traditional antivirus tools or enhanced AI antiviruses, which are more reliable.
According to experts, the sphere that needs AI’s help desperately is Internet security. In that manner, the big players in the antivirus business are steadily turning to this new technology.
Since artificial intelligence itself is a young technology, its implementation in modern antivirus solutions is still in the early stage. However, you can easily find machine learning engines that detects new emerging malware.
So it is not rushed to compile a list of the best AI-powered antivirus programs, and we’ll take the risk to discover which of them is the antivirus of the future.
All said here, this list should be your starting point when choosing your first behaviour-based AI antivirus for Windows 10.
Which antivirus uses AI?
Simply said, many antivirus software have AI technology and provide reliable malware protection. Among the most popular AI-based antivirus are TotalAV or Bitdefender software.
Hence, you can benefit from advanced antivirus shield and behaviour-based threats detection to get enhanced web security. Let’s see which are the most beneficial ones in the following list.
What is the best artificial intelligence antivirus to get?
TotalAV combines a local antivirus engine with cloud-based threat intelligence, so new malware samples are recognised quickly without waiting for a large definitions update. Unknown files are checked against continuously updated data, and known threats are stopped in real time.
It is a simpler product than TotalAV and does not publish details of its detection model, so the text does not claim neural networks or classification algorithms. What you get is real-time protection, WebShield for phishing and malicious sites, and a password vault in the higher plans.
Local engine plus cloud threat intelligence
Real-time protection
WebShield for phishing and malicious sites
Password vault in the higher plans
TotalAV
Use one of the best AI-powered antivirus, to keep you safe from existing and upcoming computer threats.
While Bitdefender’s developers don’t market their product as an ultimate AI antivirus, it certainly stands out as one of the premier solutions on the market.
For example, Bitdefender has nearly perfect scores from AV-TEST and its top virus detection rate. And there’s a big reason for that.
Bitdefender combines functionality, effectiveness, and simplicity. So, you’ll get strong antivirus protection, along with firewall and file security, packed in a simple and easy-to-use package.
And if you’re worried about spreading ransomware attacks, Bitdefender got you covered. This security solution features an advanced anti-ransomware shield, that will keep your data safe.
If we solely talk about artificial intelligence, Bitdefender wants to base its whole service on this technology in the near future.
According to the company, it invests a solid part of its yearly budget into artificial intelligence research.
The company claims it already uses advanced artificial intelligence features in its antivirus scans and security solutions.
Bitdefender Total Security
An AI-powered antivirus, Bitdefender does a very good job of delivering unmatched protection services.
Guard.io is an AI-based extension designed to protect your private information while you browse more securely and quickly.
It has advanced anti-phishing protection that blocks harmful sites, including emails or websites that tries to steal your payment or personal data.
It can also help you stop unwanted notifications and eliminate malicious and invasive ads that can be damaging to your device.
Guard.io removes malicious extensions that control browser settings, invade privacy, and install malware, adware, or spyware.
Furthermore, it protects your identity at all costs because it alerts you in real time when your information is leaked online in a data breach. This allows you to act in time to protect your identity from being stolen, manage your digital footprint, and control which sites have access to your personal details.
Guard.io
Keep your online browsing safe and secure with Guard.io’s beneficent features.
Avira is one of the best free AI antivirus tools that applies several unsupervised and supervised AI and machine learning techniques to aid malware analysis.
For malware analysis, it uses the coarse-to-fine strategy, exploring the data from clusters, and through the complex techniques of supervised learning, determining if the data is malware or not.
In addition to these AI techniques, the free version of Avira can also update your software and work as a basic password manager.
This complete antivirus tool comes with clever ad-tracking functionality, a shield for email and social network scams, or cleaning features to erase your digital traces.
You also benefit from free VPN protection that can hide your online behaviors and secure sensitive information online.
In the end, it’s worth knowing that Avira also contributes to speeding up your system and increasing overall performance.
Avira
Use a comprehensive cybersecurity solution that is based on AI technologies to protect your computer.
Even the free version of Avast antivirus benefits from the advanced intelligence system, which is using machine learning to automatically collect and extract data from the entire user base.
After finding a new malware sample, Avast antivirus is automatically updated with new models, providing crucial, up-to-the-second protection.
In addition, with the Behavior Shield tool, Avast Free Antivirus will keep an eye on your installed applications and report to you any new suspicious behavior.
Besides that, Avira includes strong network security that can encrypt your connection and filter malicious websites before any action.
Plus, you’re entirely secured from elaborate phishing attacks or scams that may steal important data.
It’s also worth noting that you have VPN support with the SecureLine VPN that anonymizes all your data online.
Avast Free Antivirus
New security threats can appear suddenly, block them with this free antivirus with an AI engine.
Reviewers and people who know their antiviruses agree that Cylance Protect is the future of this industry.
And indeed, Cylance is marketed as the first full-fledged artificial intelligence-powered antivirus.
But first of all, Cylance is mainly for business users, as it’s client-oriented protection. The administrative console is entirely cloud-based, but all the decisions are made on the endpoint.
Cylance technicians brag about the high accuracy of malware removal, as the software caught all random virus samples, including some ransomware.
Cylence’s approach to dealing with malware is quite unique, and that’s where machine learning comes in. It uses about 6.2 billion indicators to determine whether an application or executable is malware or not.
If only one requirement is met, Protect will recognize it as malware. This can lead to some false positives, but it’s rather unlikely to happen.
As we already said, artificial intelligence is still an emerging feature of the antivirus industry.
Hence, we still don’t have enough material, or enough software to write a top-notch, deep review of each product.
Additionally, there are many new players in the field, which yet have to catch the attention of the general public.
That’s exactly the case with DeepArmor. This is the youngest member of our list, but a very promising one.
Similar to Cylence, DeepArmor breaks each file on your computer into thousands of pieces. And if one piece appears to be threatening, DeepArmor will wipe it away.
This method applies to each unscanned file on your computer. So, as soon as you download a new file, it will go through DeepArmor.
Also, to cover already present files on your computer, run a deep scan as soon as you install this antivirus.
So, DeepArmor isn’t the immediate choice as your primary antivirus solution but definitely is something to look for in the future.
Which antivirus protects you using AI and machine learning?
AI-based antivirus software can make decisions based on what it learns or experiences. It is very effective as a part of the safekeeping platform because it can use reason to analyze network threats.
It can manage a huge amount of information and based on its data, it can create threat models and prevent possible damage. It can also identify a threat long before it happens.
Another advantage is that it can work 24/7. Thus, you can choose to use any AI antivirus solution from the list below and be sure that it can protect your device successfully.
Microsoft recognized the importance of artificial intelligence in the antivirus industry and included some essential AI features in Windows 10’s built-in guard.
Windows Defender uses machine learning to prevent malware attacks. This approach is much needed since it’s expected from Microsoft to deliver a reliable security solution.
It goes without saying that Windows Defender indeed deserves to be on the list of the best AI antivirus software for Windows.
We conclude our list now, but it’s far from finished. We’re only at the beginning. As technology advances, we’ll get more and more new features, and ways to keep our computers safe.
That means there probably are some yet-to-be-released antivirus programs that deserve to be in this conversation.
As we already mentioned a couple of times throughout this article, this list should head you in the right direction for choosing your future antivirus, rather than give you an immediate answer.
On the right, select the VPN connection you want to disable
Click Disconnect if you want to disconnect or Remove if you want to delete it.
Alternatively, you can delete it by accessing the Adapter Settings window, right-clicking the VPN connection you want to remove, and selecting Delete from the context menu.
2. On a third-party VPN software
Launch your VPN client. (We typically use ExpressVPN)
Check if you’re connected to any server.
Click on the Power button to disable the connection.
Close the VPN interface.
Open Task Manager and go to the Processes tab.
Make sure all tasks related to the VPN are closed. This could include ExpressVPN.exe ExpressVPN.AppService, ExpressVPN System Service (or something similar if you use another VPN. Right-click on all related processes and hit End Task.
In terms of digital security and privacy, there’s no reason to turn off your VPN. You can only disable your VPN connection in specific situations like your VPN slows down your Internet connection.
Plus, in case you’re setting up the Internet connection on your Windows, it’s better to keep the VPN disconnected.
Disabling or removing VPN connections on Windows 10 couldn’t be easier
All things considered, if you follow the steps in our guide, you’ll be able to remove or disable VPN connections on Windows 10 even if you’re not exactly tech-savvy.
Although disabling or removing a manual VPN connection might seem a bit complicated, it’s not.
6. Outlook Anywhere is not configured to use NTLM Authentication
Navigate to File and click on Account Settings choosing the Account Settings option again.
Select the Exchange account and click Change.
Click on More settings and then go to the Connection tab.
Click the Exchange Proxy settings button, and under Proxy authentication settings, choose NTLM Authentication.
The Outlook Anywhere feature allows you to access your Exchange account remotely from the Internet while working outside your organization’s firewall.
When using Outlook Anywhere to connect to your Exchange server, we need to choose the authentication method among Basic Authentication, NTLM Authentication and Negotiate Authentication.
Users reported that using NTLM Authentication can significantly reduce the number of password prompts.
Did the solutions described above help you solve this Outlook issue? Please let us know in the comments section below, as your feedback is critical to us.
Also, if Outlook seems so full of issues, you can try a more straightforward method of communication, like automated chat software, to improve business communication.
Some users have claimed that they encountered an error message that reads The program can’t start because Windows.Storage.dll is missing from your computer.
However, encountering a missing DLL file is a common error. Hence, we will provide a detailed guide to downloading and fixing the problem.
What happens if DLL files are missing?
DLL (Dynamic Link Library) files are essential for running programs and apps on the computer. These files contain instructions other programs use to perform certain operations, such as locating free space on the device, storing saved changes in the programs, etc.
Hence, when the DLL file needed for a program goes missing, the app will fail to work, and an error message will be displayed. The error message can appear in any of these instances:
Error loading WINDOWS.STORAGE.DLL. The specified module could not be found – As stated, the file is missing from your computer and can not be located.
There was a problem starting WINDOWS.STORAGE.DLL – This error case indicates that the Windows.storage.dll file is faulty or corrupt.
WINDOWS.STORAGE.DLL could not be located – If the Windows.storage.dll is not included in the app/program folder, this error message will pop up.
Cannot register WINDOWS.STORAGE.DLL – This means that the file is registered wrongly and needs to be in the System registry.
What causes missing Windows.storage.DLL files?
Firstly, the primary cause of the missing Windows storage DLL error is a corrupt or faulty file caused by an overwrite of the DLL file.
Also, the Windows.storage.dll file may be missing on your device if there was a mistake in the installation process. Also, uninstalling an app or program might delete the files.
The antivirus may sometimes flag the DLL files as malicious and whitelist them to protect the PC if installed from an untrusted site.
This can also cause your device to be ridden with malware and viruses. However, you can fix them using anti-malware and antivirus tools.
Meanwhile, the Windows.storage.dll error will occur if the file is not registered either to the system or application folder. Take a look at this guide if you encounter a corrupt registry in Windows 11.
Let’s proceed to the various ways to download and troubleshoot the Windows.storage.dll error.
How do I download and fix missing windows storage DLL files in Windows?
Before anything, try to perform the following preliminary checks:
Ensure you download the latest version of the application or software that’s missing the Windows.storage.dll file.
By default, you should find the file in the Download folder. Extract it inside another folder.
Copy and paste the DLL file into the following directory: C:\WINDOWS\System32
Then left-click the Start button, search cmd, and Run as administrator.
Input this command and press Enter: regsvr32 windows.storage.dll
Restart your PC for the changes to effect.
Downloading DLL files online can be dangerous due to many unreliable sites. Ensure your antivirus is on before attempting this to safe keep your PC.
Sometimes, the application that is missing this DLL file, can’t find it in the System 32 folder so you will need to paste it directly into the app’s main folder.
So, if the issue persists after performing the solution above, locate the program in the Program Files folder on your PC and paste the DLL file there.
Press the Windows key, type command in the search bar, and select Run as administrator.
Enter the following command into the Command Prompt and press Enter: sfc/scannow
Wait for the scan process to complete and restart your computer.
Check if your DLL file has been restored.
If you encounter second thoughts about doing this manually, you can try using a dedicated tool to perform an extensive scan of your device and eventually fix or replace not only Windows files, and registry keys but DLLs as well.
Press the Windows key, type command in the Search bar, and select Run as administrator.
Copy & paste the following command and press Enter: DISM /Online /Cleanup-Image /RestoreHealth
Wait patiently until the process is complete.
Restart your computer.
If the SFC Scanner fails to restore your missing Windows Storage DLL files, the DISM (Deployment Image & Servicing Management) tool is another solution similar to SFC Scanner.
However, if you encounter an error with the DISM when using the command line, you should consider checking the fixes in the guide.
These are the best ways to download and fix the WIndows.storage.dll issues. Ensure to follow the steps for optimal results.
As you consider downloading your DLL files, remember to protect your computer with antivirus solutions against malware and viruses.
Also, we have a comprehensive guide on fixing any DLL errors on Windows 11. This might come in handy should you need to download files apart from the Windows.storage.dll.
If you have any questions or suggestions, please do not hesitate to use the comments section below.
The DRIVER_OVERRAN_STACK_BUFFER blue screen can appear on both Windows 10 and Windows 11. Many users reported the error while gaming or right after startup, but the troubleshooting steps below should help you fix it.
1. Make sure that you have the latest drivers installed
Drivers are a key part of the operating system because Windows 10 uses drivers to work with the hardware.
Users reported issues with Atheros wireless driver, so update this driver first and then move to other drivers. Also, many attributed Driver Overran Stack Buffer to Nvidia, so update it as well.
Using the Device Manager to update your drivers is simple, but that might not be the best solution.
According to users, Device Manager doesn’t always download the latest drivers, so if you want to have the latest drivers installed, it’s advised that you download the necessary drivers manually.
To do that, simply visit your hardware manufacturer’s website and download the latest drivers for your device. But that would take time, especially when updating many drivers.
Alternatively, you can use an automatic driver updater that will certainly save you from the hassle of searching for drivers manually, and it will always keep your system up to date with the latest drivers.
Updating key drivers is the first fix to try when you see the driver overran stack buffer Windows 11 error. The same approach applies to driver overran stack buffer Windows 10, especially with graphics or wireless drivers, which are the most common culprits.
2. Run the Hardware and Devices troubleshooter
Press Windows + R to open Run, paste the following in the text field, and hit Enter:msdt.exe -id DeviceDiagnostic
Now, follow the on-screen instructions in the troubleshooter to complete the process.
Once done, verify if the Driver Overran Stack Buffer while playing Valorant is fixed. If not, the next solution should help.
3. Use a third-party repair tool
DRIVER OVERRAN STACK BUFFER is a pretty scary BSoD error but you don’t have to get discouraged because you can solve this issue in multiple ways. However, manual tweaking solutions can take time and imply skills.
However, there’s a quicker and faster way of repairing your system in the form of specialized system repair tools which will fix your BSOD automatically by replacing the broken files with new ones.
4. Run tests on system memory
The installed RAM can also be the reason behind Driver Overran Stack Buffer, and there are a few tools that could fix things. But before you run these, remove the RAM sticks and then reseat them.
After that, run Windows Memory Diagnostic to identify issues with the RAM. It’s a built-in tool that can find several problems with the RAM.
In case that doesn’t work, you can run Memtest86+, a highly-effective third-party tool to find and fix problems with the RAM. If it highlights any issues, look for its resolution or replace the RAM stick(s) altogether.
5. Update the BIOS
Many users who reported Driver Overran Stack Buffer during Windows 10 install managed to get things up and running after updating the BIOS. Also, this is an effective fix, even in other situations, so make sure to give it a try.
Though, remember that this is an advanced process, and you will have to be extra cautious. Make sure to read the instructions available on the manufacturer’s website before the update.
Press Windows + R to open Run, type appwiz.cpl in the text field, and click OK.
Locate and select the problematic program and then click on Uninstall.
Now, follow the on-screen instructions to complete the process.
Third-party software can also cause BSoD errors to appear, therefore it’s important that you find and remove the problematic software.
Users found the following to cause the error, so if you have any of these, uninstall it.
Daemon Tools
Rapport plug-in for Internet Explorer
Folder Lock
Bear in mind that uninstalling the program might not fix the error since many antivirus programs tend to leave certain files behind once you uninstall them.
To ensure that your antivirus is completely removed from your system, we advise that you use dedicated removal tool. Many antivirus companies have these tools available for download, so be sure to download one for your antivirus software.
7. Reset Windows 10
If none of the methods so far have worked, as a last resort, factory reset Windows 10. This would help identify if the problem is related to the software or the hardware. In case it’s the latter, the DRIVER OVERRAN STACK BUFFER would reappear.
This is when you will have to find out the malfunctioning hardware and get it repaired or replaced. If you can’t do it, consult a professional or contact the computer manufacturer.
If you still encounter the driver overran stack buffer Windows 10 error after multiple fixes, consider performing a reset to rule out software conflicts. On the other hand, for driver overran stack buffer Windows 11, a combination of system file repair and memory tests usually resolves the crash without requiring a reset.
DRIVER OVERRAN STACK BUFFER Blue Screen of Death error is usually caused by problematic applications or outdated drivers, and you can easily fix it by using one of our solutions.
Other issues and cases related to the DRIVER OVERRAN STACK BUFFER error
Driver overran stack buffer on startup: According to users, sometimes this error occurs right on startup. This can be a big problem since you won’t be able to use your PC at all.
Driver_overran_stack_buffer ntoskrnl.exe, tcpip.sys, asustp.sys, nvlddmkm.sys, ntfs.sys, win32k.sys, fltmgr.sys, netwsw00.sys, hal.dll, halmacpi.dll: Usually, this error message will show you the name of the file that is causing the problem. Once you know the file name, you need to do a bit of research and see how to fix the problem.
Driver overran stack buffer crash: Users reported that once this error appears on your PC, your computer will crash and automatically restart.
In some cases, just like with the Driver power state failure error, the issue may lie with the hardware, so we encourage you to check it and ensure it’s working properly.
This isn’t the only driver-related issue and many reported DRIVER VIOLATION errors on their PCs. Luckily, there are ways to fix all of these issues.
What causes the driver overran stack buffer error?
This blue screen usually happens when a driver writes outside its memory buffer. Common triggers include outdated drivers, corrupt system files, faulty RAM, or disk errors.
Can hardware cause this error?
Yes. Faulty RAM or a failing SSD/HDD are common hardware causes. Running Windows Memory Diagnostic or MemTest86+ helps identify memory problems.
Can overclocking cause driver overran stack buffer?
Yes. Overclocking tools can destabilize system memory and GPU drivers, leading to the error. Disabling the overclock and restoring default settings usually fixes it.
When debugging recurring BSODs after updates or driver changes, also review the kernel stack locked at exit issue; its fixes (driver rollbacks, integrity checks, and safe‑boot isolation) often overlap with the steps that resolve driver overran stack buffer.
If you have any other suggestions or questions, don’t hesitate to drop them in the comments section below, and we’ll be sure to take a look.
OBS, or Open Source Broadcaster, is a free and open-source software tool that can be used to stream and record programs. It’s pretty popular, and users love it.
Despite that, as with any other program, OBS isn’t immune to errors and glitches. Unfortunately, one of the most common is that none other than the OBS has crashed error.
While some manage to access the platform, they are abruptly interrupted when they start to stream.
Why does OBS keep crashing my PC?
There are a handful of factors that will make your OBS stream crash. Amongst these include:
Faulty or out-of-date OBS software – When you have faulty or corrupted software, there are chances that certain parts of the application will stop functioning normally or even cause crashes.
Outdated hardware drivers – This is a common cause of program crashes in the Windows OS. Updated RAM ensures that there is proper sync in program usage.
Overclocking of RAM -Your device will generally crash when it is pushed beyond its limit. And this is not peculiar to the use of OBS.
Conflicts with 3rd party apps – In some cases, OBS may not interact with other tools on your device, especially antiviruses, leading to crashes.
Some of the other variations of this issue, as stated by users worldwide, include OBS crashing while streaming 2022, OBS crashing when I start streaming, OBS crashing games, and OBS crashing on Discord.
However, several workarounds can help you if OBS keeps crashing while streaming.
How do I stop OBS from crashing?
1. Reset the graphics card app
Press the keyboard hotkey Windows + Ctrl + Shift + B.
This should initiate the reset process for the GPU.
Methods differ with the various apps though they usually involve opening the app and hitting the Reset button, which is most likely housed within the Settings section.
2. Change OBS compatibility
Right-click on OBS and click Properties.
In the Properties dialog box, select Compatibility.
Select the Run the program in compatibility mode for checkbox, and from the dropdown box that gets enabled, select Windows 10.
Click on Apply and OK.
Also, click the button at the bottom of the Change settings for all users.
Change the Compatibility mode to Windows 10 using the same process mentioned above.
Click on Apply and OK for the Properties dialog box to close.
Also, right-click on the OBS program and select Troubleshoot compatibility. Then, follow the on-screen instruction to rule out incompatibility as one reason the program behaves erroneously.
This can be another way to deal with the error, as compatibility conflicts often result in mistakes cropping up.
All you need to do is apply the above procedure, then try relaunching the OBS program. There shouldn’t be any errors this time.
3. Uninstall and reinstall OBS
You shouldn’t be having any issues with a fresh installation of OBS on your PC. This is why you can apply these steps and fix your software issues fast.
1. First, open the Run accessory by pressing the Windows key + R.
2. Type the command below and hit Enter. appwiz.cpl
3. Select OBS from the program list and click Uninstall.
4. Follow the on-screen instructions to obliterate the app from your PC.
Select Game Mode from the left side pane and switch the feature to Off.
This might seem odd as the Game mode that comes with Windows 10 Creators Updates and OBS are not likely to have any direct link between them.
Despite that, some said disabling the Game mode on their PC did help get rid of the OBS crashed error. Therefore, don’t hesitate to apply the above steps too.
If you have read till this point, we hope the constant OBS crashing problem has been solved.
Have you applied the above tips? Let us know which one worked for you in the comments area below.
Sometimes, you may get stuck on the Checking for updates message, or the update doesn’t go as planned. This is where a Windows Update Repair Tool comes to your aid.
These are highly effective at their job and can fix a plethora of update-related issues, ones arising both before and after an update.
To make things easier for you, we have listed only the best Windows Update repair tools, and you can choose one based on the features offered by it:
Outbyte Driver Updater – Quick and seamless
Acronis True Image – Offers a plethora of repair options
Tweaking Windows Repair – Simple and effective
Windows Update Troubleshooter – A free built-in tool
Deployment Image Servicing and Management – Does a lot more
What is Windows Update repair tool?
A Windows Update repair tool deals with everything pertaining to updates on the PC. Some of these take care of installing the latest driver version for each device, while others eliminate errors that may arise after an update.
Also, you may have encountered cases where a particular update simply doesn’t install, no matter what. The repair tool will come in handy here as well.
You can easily find a repair tool here for these versions of Windows:
Windows Update Repair Tool Server 2012: Update errors are common here, but one of the tools will get things running, as they did for other users.
Windows Update Repair Tool Server 2016: Though support has ended for this edition of Windows, a reliable repair tool would still fix things like always.
Windows Update Repair Tool Windows 10: One of the most used OS, though notorious for update errors. But a dedicated tool can fix issues while installing updates and after it.
Windows Update Repair Tool Windows 11: The latest iteration from Microsoft often throws the Windows Update error, but repair tools have already been optimized for it and have performed well so far.
Is the Microsoft Fix it tool for Windows 10 available to download?
No, the Microsoft Fix it tool for Windows 10 isn’t available for download anymore, but you can still access all the required troubleshooters from the Settings app.
Moreover, for update-related issues, you can run the Windows Update troubleshooter. The best part, it comes built-in, and you don’t have to download the Windows Update troubleshooter manually.
If the issue is unrelated to the driver, you must take a different approach. In fact, before getting to issues in the first place, why not use Acronis True Image?
This is the best backup tool that you can try out and avoid any unpleasant situations from the very start. You may do so for full system images or individual files.
Then, a few clicks are more than enough in order to restore your entire system to the same or even different hardware. The choice is always yours to make.
These are some of the main features that this Acronis program brings to the table:
Comprehensive tools to create a mirror image of your system
Backup options for individual files and folders
Malware scanning features
Great features to stop the latest cyberattacks
Active disk cloning
Acronis True Image
Be one step ahead and use Acronis True Image. For complete backups, this is the undisputed choice.
Updating all your drivers with just a simple click and having complete access to a huge database of drivers sound too good to be true. Even so, that’s precisely what you’re about to get from Outbyte Driver Updater.
Moreover, you’ll see a detailed report of all of your out-of-date device drivers to know where the issues may come from.
However, do note that Outbyte Driver Updater doesn’t simply update outdated and missing drivers but also fixes corrupted ones.
On top of that, this program has a user interface that’s easier to use than most competitors.
Outbyte Driver Updater key features that you’re about to take advantage of:
Accurate scans for out-of-date or missing drivers
Reveals lots of detail on your drivers
Generous database of 18 million driver files
Drivers backup options
Engaging user interface
Outbyte Driver Updater
Outbyte Driver Updater is the best tool to help you find and update the drivers on your PC. Ready to give it a try?
Windows update errors are some of the most common errors encountered, and they are usually categorized by when they actually trigger:
Some usually prevent you from updating your PC
Some appear while you’re trying to update your PC
A few appear after you finish updating your PC
Whichever ones you are currently facing, know that one tool can easily handle them all, and it is called Tweaking Windows Repair.
Not only does it specifically say that it can handle Windows Update errors, it can also help with optimizing the process as well, allowing you a better experience updating your OS.
Here are the benefits offered by Tweaking Windows Repair:
Windows Update Troubleshooter – A free built-in tool
This tool is the default troubleshooter on Windows 10. You have the ability to open this tool from the search bar by just writing troubleshoot in the search area.
From the troubleshooting window, all you have to do is select Fix Problems with Windows Update, and this handy tool will simply and automatically resolve the update issue.
Here are the best parts of using this small but useful tool:
If you’re experiencing troubles with Windows Update, all you have to do is make sure that you’re connected to the Internet and then download the Windows Update Troubleshooter for the version of Windows that’s running on your computer.
To use this tool on Windows 10, simply head over to Settings > Update & Security > Troubleshoot and then select the Windows Update Troubleshooter.
After the troubleshooter does its magic, you have to try running the Windows Update again and then install all available updates.
This handy tool will help you fix Windows Update troubleshooters and files that got corrupted during installation.
Check out the most valuable features that are included in this small tool:
You will be able to use DISM image management commands to mount and get data about the Windows image files or virtual hard disks.
You can also use this tool to capture, split, and manage Windows image (.wim) files.
DISM can install, uninstall, configure, and update Windows features, packages, drivers, and international settings in a .wim file or VHD (virtual hard disks) via the DISM servicing commands.
The DISM commands are used on offline images, but the subsets of the DISM commands are also available to service a running operating system.
DISM is installed with Windows and distributed in the Windows Assessment and Deployment Kit.
DISM replaces various deployment tools, including PEimg, ImageX, Intlcfg, and Package Manager.
These are some of the best and quickest ways that you can use to get rid of the annoying problems related to Windows updates. So, make sure to download one today!
Many users reported that Alt Tab is not working, and that can prevent users from switching between apps quickly. However, there are few ways that can fix this issue.
Why is Alt Tab not working?
Problems with Windows Explorer or your settings can cause this issue. In some cases, your keyboard or other peripherals can lead to this problem.
How do I fix Alt-Tab if it’s not working in Windows 10?
Before trying the slightly complex solutions, restart your PC and ensure that your keyboard is properly connected. Disconnect other peripherals and try if other shortcuts are working.
1. Restart Windows Explorer
Press Ctrl + Shift + Esc to open the Task Manager.
Now locate the Windows Explorer process, right-click it and choose Restart from the menu.
2. Fix the problem by modifying Registry Values
1. Press Windows + R to open Run, type regedit in the input field, and press Enter or click OK.
2. Paste the following path in the address bar and hit Enter: HKEY_CURRENT_USER\Software\Microsoft\Windows\CurrentVersion\Explorer
3. In the right pane, look for AltTabSettings DWORD.
4. If this DWORD isn’t available, you need to create it. Right-click on the right pane, hover the cursor over New, select DWORD (32-bit) Value, and name it AltTabSettings.
5. Double-click the AltTabSettings DWORD and change its Value Data to 1. After doing that, click on OK to save the changes.
Several users reported that they already had this value in their registry, and they fixed the problem simply by deleting the AltTabSettings DWORD.
To delete, right-click it and choose Delete from the menu. When the confirmation prompt appears, click on Yes to proceed.
3. Make sure you have enabled the App Switching feature
Press Windows + I to open Settings, then click on System.
Choose Multitasking from the left, and then select the desired option from the two drop-down menus about Alt-Tab.
4. Use an alternative software solution
Another option is to use a dedicated clipboard manager tool. These can remove the function of the Alt-Tab shortcut.
Such software such as allows you to create a clipboard history by saving, organizing, and accessing files, folders, or text from the same place.
You can use it to save texts, links, files, or images into a dedicated space that you can customize and access with just one click.
You can save an unlimited number of fragments in the clipboard history. Moreover, you can customize your favorite clipboard fragments and set sound alarms for specific processes.
Comfort Clipboard is such a software that additionally creates a safety net in case of crashes for all already copied items. It’s compatible with all clipboard formats so you can use it with any other software.
Comfort Clipboard
Keep all your important data in one place and smartly organised.
In the Search bar, enter advanced, and select View advanced system settings.
Click the Settings button in the Performance section.
Now make sure that Enable Peek option is checked. Finally, click on OK to save changes.
6. Disable/enable the hotkeys
Press Windows + R, enter gpedit.msc and click OK.
Group Policy Editor will now start. In the left pane, navigate the following path: User Configuration \ Administrative Templates \ Windows Components \ File Explorer
In the right pane, double-click on Turn off Windows Key hotkeys.
Next, select Enabled and click on OK to save changes.
If that doesn’t work, repeat the same steps, but this time select Disabled. Now check if your hotkeys work. Again, if nothing works, select Not Configured and save changes.
If you can’t access Group Policy or want to make these changes quickly, you can perform them using a registry file.
After downloading the registry files, double-click the registry file to run it. When the confirmation dialog appears, click on Yes.
7. Reset Windows
If none of the methods work, performing a factory reset for Windows 10 might do the trick, though it should rarely come to that.
You will lose app installed apps and configured settings after the reset, and even personal files when doing a complete reset. So, make sure to back up your files.
NOTE
➡ There are several ways to update your drivers in Windows 11, but we reckon the easiest one is to use a specialized tool that does all the hard work for you. ➡ Simply install Outbyte Driver Updater and run a full scan to have it display all the drivers that require updating, repairing, or replacing. ➡ You can specifically select the ones you want (such as the keyboard and graphics driver in this case) or update all of them in just one go.
Running outdated versions of the keyboard and/or graphics driver can have unwanted effects. It’s time you take care of this, and using the driver updater makes the whole process quick and effortless.
That was all! Now you know how to quickly fix the Alt-Tab not working issue in Windows 10. If you’re on the latest version, we have a guide on what to do if Alt Tab is not working on Windows 11, so don’t miss it.
You can also disable Alt Tab on Windows 11 if you don’t want to use it. Do keep in mind that problems with this feature can occur, and we have a guide on how to fix slow Alt-Tab, so don’t miss it.
If nothing else works, you can always use Alt Tab alternatives, until you manage to fix the issue.
Not all of us have or use the same brand of gadgets( PCs, laptops, tablets, etc.), so knowing how to navigate the specifics of the brand you are using is of the utmost importance.
As an example, checking and updating BIOS is a process that is a bit different from manufacturer to manufacturer. Even accessing it differs from one brand to another. But we are going to focus on Asus for the time being.
What should I be booting into Windows Recovery Environment?
Well, the System Recovery Options menu, which you will see in a minute, contains several tools, such as Startup Repair, that can help you recover Windows from a serious error.
Also, this set of tools can be found on your computer’s hard disk and on the Windows installation disc as well. You are probably wondering about each individual option and its purpose, so we are about to shed some more light on that.
System recovery option
Description
Startup Repair
Fixes certain problems, such as missing or damaged system files, that might prevent Windows from starting correctly.
System Restore
Restores your computer’s system files to an earlier point in time without affecting your files. If you use System Restore from the System Recovery Options menu, you cannot undo the restore operation. However, you can run System Restore again and choose a different restore point, if one exists.
System Image Recovery
You need to have created a system image beforehand to use this option. A system image is a personalized backup of the partition that contains Windows and includes programs and user data, like documents, pictures, and music.
Windows Memory Diagnostic Tool
Scans your PC’s memory for errors.
Command Prompt
Advanced users can use Command Prompt to perform recovery-related operations and also run other command line tools for diagnosing and troubleshooting problems.
Now that we know what we are dealing with, let’s get to the important part and show you how you can boot your Asus device in Recovery Mode on Windows 11.
How can I boot into Asus Recovery Mode on Windows 11?
1. PressWin+Ito accessSettings.
2. Select the System tab, then click on Recovery.
3. Next to Advanced setup, click the Restart now button.
4. Click on Restart now.
5. After the system has rebooted, selectTroubleshoot.
6. Select Advanced options.
7. Click on Startup Settings.
8. Press the Restart button.
9. Use the number keys (4/5/6) to select which Safe Mode version you want.
The process for booting your Windows 11 Asus device into Safe Mode is simple and can be done within minutes.
What you need to do is restart your PC, and then choose your desired Safe Mode to boot into from the list in the Advanced Options section.
This is the entire process. Pretty easy, right? Indeed, this is all you need to know about booting into Asus Recovery Mode on your Windows 11 device.
Email tracking tools are useful for providing essential insights and features including announcing you know when the recipient opened your sent emails and if any of the links included in them were clicked on, among other things.
We picked the most reliable email tracking tools available to make your choice easier. Check out their features and decide which is the best choice for your needs.
What os the email tracking software used for?
Email tracking software is an essential tool for marketing. A good tool should provide insightful information about your campaigns and help you measure their efficiency.
It will provide answers on who opened your emails and even which links they clicked on, their location on a world map, and more.
The software listed below is also useful when considering the following criteria:
Outlook email tracking – Outlook is just another email client, and all of the entries listed can efficiently track its emails.
Free email tracking software – All of the listed tools have some form or another of a free subscription service, so you don’t need to worry about expenses.
Best email tracking – It goes without saying that all tools listed here are the best in their field.
Software for Gmail – Just like in the case of Outlook, all of the listed programs can track Gmail emails
We’ve listed all their meaningful features below so you can make the right decision in choosing the perfect solution for you.
Atomic Email Tracking Software allows you to monitor your sent emails, letting you know who received the email, what links were clicked on, what is the effectiveness compared to the previous campaigns, and more.
Atomic Email Tracking Software allows you to monitor the effectiveness of your email campaigns. Using this tool, you will always know which subscribers read your newsletters and which of the links are being clicked on.
This service is easy to use even for beginners, and it doesn’t require any changes in the existing mailings.
Check out more features provided by Atomic Email Tracking Software:
Traces all sent emails and gathers the statistics about your email campaigns
Access data on email opens, click-throughs, pages that were visited, and more
View the percentage of your recipients who open your email messages
Learn how often they click the links and which links are clicked mostly in a selected mail campaign
Check the proportion of readers from abroad and from your country
Yesware is one of the most used tools when it comes to email tracking. It is an excellent program for SMBs, and it lets you perform all kinds of actions from tracking emails from clients to optimizing sales.
The program comes with a user-friendly interface that will be easily understood and used even by beginners.
Other great features worth mentioning include email templates, automatic follow up for sales automation, and also tools for scheduling so that your emails will be able to be distributed whenever you choose to.
Yesware provides a 28-day free trial, and after this trial is over, you will get various pricing plans.
Let’s go through some if its best features:
When you are creating a message, you will be able to choose whether to track it or not
Load emails automatically into the CRM program that you are using
You see who opened the email, what links were clicked on, and which attachments have been downloaded
Access all the information via the dashboard of your email account
GetNotify is a free email tracking tool, but on the other hand, they request donations that will allow you to unlock more features for a specified period of time.
Even if this program is quite simple, it comes with a lot of features for email tracking.
You will also have the ability to use your own image file as a tracking image. This is great because you can choose an image that you like best, such as an email signature, for instance, to increase the odds that users will click to load it.
Take a look at some of its key features:
Find out the amount of time that was needed until the email was read
Get the date and time that your email was opened and reopened
General geographic location that your email was opened in
W with any email provider, and it can track multiple leads
If you use Microsoft’s browser, Edge, then you might be aware of their Find on Page feature. it is designed to help users narrow down their search for texts and keywords on a site or page while using Microsoft Edge.
And now, Microsoft is testing out new filtering options for this feature as spotted by u/Leopeva64-2 on Reddit that will help to further enhance its user experience. They include: Include related matches, Match case, Match whole word, and Match diacritics.
The first filter option, Include related matches will help users find closely related to the inquiry they made while using the Find on Page feature. Next up is, Match case which will you narrows down their search of specific words that start with a particular case(lower or upper). The Match whole word filter option on the other hand displays the words and syllables you searched for, this is regardless of whether they are used to form another word. And finally, Match diacritics which will help you identify accented characters on a web page.
If you are part of the Edge Canary Channel then there is a probability that you might have access to this feature. All you have to do to access this feature is to, launch the page in which you want to search the text and then click on the ellipses at the top right corner of the browser and then scroll down and select Find On Page. You can also use the toggles of each one of these filter options to either turn them on or off based on your preference and need for this feature.
In other Edge related news, check out the latest features added to Microsoft Edge. Be sure to also share your thoughts with us in the comment section below.
Sfc /scannow is a Command Prompt command that allows you to scan your Windows system for errors and repair them. This is a valuable feature, but several users reported that sfc /scannow is not working anymore.
This can be a big problem, but there are several solutions that you can try. Follow along!
How long should SFC Scannow take?
The sfc /scannow process should take a couple of minutes up to one hour. If the process takes longer than one hour, it might get stuck.
Follow along as we have prepared a list of solutions for you to try to fix any sfc /scannow, not working issues.
Why is SFC Scannow stuck?
This is because your computer contains specific corrupt system files, which prohibit it from carrying out tasks associated with the sfc /scannow command.
If you’re unlucky and DISM scan will fail as well, then you might have to reconsider reinstalling your operating system.
Here are some of the most common issues the users reported, which we will cover today:
Sfc /scannow stuck at verification, at beginning system scan – You might be able to fix the problem simply by replacing the corrupted files.
Sfc /scannow frozen in Windows 10 – To fix this issue, it’s advised to restore your PC using System Restore and check if that solves the problem.
Windows resource protection sfc /scannow not working – Running the CHKDSK tool will work in this instance. Follow the second solution below to find out how to.
Sfc scannow nothing happens – When this is the case, you need to use the DISM scan instead and check if that solves the issue.
Sfc scannow stops scanning – This is a strange issue, and it might be caused by Turbo Memory feature. Simply disable this feature and check if that solves the issue.
Sfc /scannow fails Windows 10, 8.1, 7 – This problem can appear on almost any version of Windows, and Windows 8.1 and 7 aren’t exceptions. However, you should be able to fix this issue by using one of our solutions.
Sfc /scannow stops you must be an administrator – SFC scan requires administrative privileges in order to run, and if you’re having any issues with SFC, be sure that you’re using Command Prompt as an administrator.
System repair pending sfc /scannownot working – Uninstall or disable the Turbo Memory feature in order to make sfc /scannow work again.
Windows Resource Protection could not start the repair service – Resetting your PC should do the trick in this scenario.
Sfc /scannownot showing progress – After entering Safe Mode as we have shown below, you will be able to successfully run the scan.
Sfc /scannow/offbootdir not working – If the offline version of the scan is unsuccessful in running, you may connect to a network and use the online version.
How do I fix the SFC scannow if it’s not working?
Before attempting any of the troubleshooting methods below, make sure to check the following:
Check your hardware, especially the RAM, since it can cause such issues.
It is advised to disable or uninstall the Turbo Memory altogether.
1. Run the DISM scan
Press Windows, then enter cmd and select the Run as administrator option on the right.
When Command Prompt opens, enter the following command and note that it can take a while: DISM /Online /Cleanup-image /Restorehealth
The DISM scan allows you to repair your system, and if sfc /scannow is not working or if it can’t fix the problem, you can use DISM to fix it.
2. Run the CHKDSK scan
Tap Windows, then type cmd into the search bar and select Run as administrator.
When Command Prompt starts, enter the following command and press Enter. You’ll be asked to schedule a scan and restart your PC. Enter Y and then press Enter: chkdsk /f C:
Sometimes the data on your hard drive can get corrupted, causing the SFC scan to get stuck. However, you might be able to fix the problem by running a CHKDSK scan.
3. Try to run the SFC scan from Safe Mode
If you’re not familiar, Safe Mode is a particular segment of Windows that runs with default applications and settings, making it perfect for troubleshooting. You can try to run this process from Safe Mode.
2. Once your PC restarts, you’ll be presented with options. Select the desired version of Safe Mode by pressing the corresponding key.
3. Afterward, open Command Prompt as an administrator by pressing Windows, typing cmd,and clicking Run as administrator.
4. Type the following command and press Enter to see whether it works now:sfc /scannow
Several users reported that they were able to run the SFC scan from Safe Mode, so be sure to try that.
4. Perform a System Restore
Please restart your computer and start into Safe Mode as we have shown in our dedicated guide.
After your PC starts up, press Windows + R, then input rstrui and press Enter.
The System Restore window will open. Click Next to proceed.
Select the Restore point you wish to return to and click Next.
Follow the on-screen instructions to complete the process.
System Restore is a valuable feature that allows you to fix various problems. Many users reported that this issue was resolved after restoring their PC with the System Restore tool.
If you’re interested in more info on how to create a restore point and how that would help you, look at our dedicated article to find out everything you need to know.
You might have to reset your PC if other solutions don’t work. This procedure will delete all files from your C partition, so be sure to create a backup. For example, to reset Windows, do the following:
Click the Start icon, click the Power button, press and hold the Shift key, and select Restart from the menu.
A list of options will appear. Select Troubleshoot.
Click Reset this PC.
Select the Keep my files option.
Select your account and enter your password if prompted. If asked to insert the installation media, be sure to do so. If you don’t have it, follow our dedicated guide to create one. Then select the Reset button and proceed with the on-screen steps.
If this method doesn’t work, you should repeat the reset process and choose to Remove everything followed by Only the drive where Windows is installed.
6. Take control of the system32 directory
Before we start, we have to mention that this is an advanced solution, and if you don’t perform it correctly, you can cause issues with your system.
In addition, the system32 directory is closely related to your system, so that any changes can affect your Windows installation. In the worst-case scenario, your Windows might not be able to boot, so keep in mind that you’re using this solution at your own risk.
Several users reported that they solved this issue simply by taking control of a system32 directory. There are many ways to do that; the best might be to use a third-party application.
Press Windows + R to open the Run utility, then type sfc/revert and click OK.
Restart your computer afterward.
If sfc /scannow stops, it’s usually due to corrupted files, and you can fix this problem by following the above methods. However, there are other ways to fix corrupted files; we recommend you check that out.
If you have any more suggestions or questions, don’t hesitate to leave them in the comments section below, and we’ll be sure to take a look.
Windows Hello and Windows Hello for Business are two of Windows biometric authentication options. They both let you sign into your device using fingerprints, iris scans, and face recognition. But they operate slightly differently.
Windows Hello is a biometric authentication system that uses a combination of sensors and software to unlock your device. It can also be used to authorize the use of enterprise apps, websites, and services.
On the other hand, Windows Hello for Business is a security feature that allows users to sign in with biometric authentication. In addition to providing an additional layer of security, it also helps organizations reduce their reliance on passwords.
Windows Hello for Business offers several benefits over traditional password-based sign-ins:
Stronger security – You don’t have to worry about your most sensitive data. It is protected from unauthorized access by using a strong form of multi-factor authentication (MFA).
Better user experience – Users can sign in quickly. With a simple glance at their PC, they can unlock it eliminating the need for them to remember passwords.
Reduced IT costs – Windows Hello for Business eliminates the need for administrators to manage passwords across the organization. This can help improve security while saving time and money on IT operations.
Is Windows Hello for Business considered MFA?
Yes. Windows Hello for Business can be considered MFA. It is a technology that allows you to use your face or fingerprint to log in to your device.
It also enables you to use these biometrics as part of two-factor authentication (2FA). This means that when you sign in with your password, the system will also ask for one other piece of information. This can be an app PIN or a physical security key.
What’s the difference between Windows Hello and Windows Hello for Business?
Both Windows Hello and Windows Hello for Business offer biometric authentication but one is more advanced than the other. Basically, Windows Hello for Business has all the features of its predecessor but with advanced features.
The two technologies have many similarities, but there are also some key differences to consider:
Users
Windows Hello is a biometric login system that uses facial recognition, iris scanning, or fingerprint detection to unlock your device.
It’s a fast and convenient way to sign in without having to enter a password every time you turn on your PC. This makes it more suitable for single users who want to secure their one devices.
Windows Hello for Business is more suitable for large organizations. It offers a PC security solution for businesses that uses Windows Hello facial recognition technology for user authentication. It’s available on both consumer and enterprise devices.
Windows Hello users can sign in by setting up a PIN code for the first time. Then, when they turn on their device they enter it whenever they sign in. The beauty of this convenience PIN is that it is unique to the device you are using.
In the event that someone was able to uncover it, they would still not be able to use it on another device to access your account.
Windows Hello for Business uses the same technology as Windows Hello. It can be used to authenticate both personal and work accounts on devices that support it. But it also has some additional capabilities that make it more suitable for business use.
Both methods require the user to enroll their biometric data on their device before they can use it to sign in. This means users can go password-free and still be able to sign in to their devices.
As you might expect, the biggest difference is that Windows Hello for Business supports multi-factor authentication (MFA).
In addition to this added security feature, Windows Hello for Business also supports multi-user sign-ins. This means that multiple people can use the same device without needing separate profiles or settings.
Integration with Active Directory
It is pretty obvious at this point that since Windows Hello is mostly used by individuals, there is no need for integration with an AD device.
Windows Hello for Business integrates with Active Directory (AD), which is the most common directory service used by enterprises. With Active Directory integrated, it’s easy for IT administrators to deploy and manage Windows Hello for Business in their organization.
Like most services, Windows Hello for Business is not without its limitations. At the moment, only Windows users can access the service. Also, there is a limit on the number of users who can be enrolled on a single Windows 10 device which is 10.
One of the buzzwords in security for the past few years has been biometric authentication. Not only does it make the experience of logging in more convenient, but it makes it much more secure as well.
Better yet, there are many options for this form of authentication that are easy to implement at home and in small business environments. Our choice, if we had to pick just one option as the winner, would be Windows Hello.
If you would like to explore other third-party multi-factor authentication software, don’t hesitate to check out our recommended article on the same.
Should you face issues like Windows Hello not working, we also have an excellent guide to help you bypass this problem.
Tell us your preference between Windows Hello and Windows Hello for Business in the comments section below.
High latency after Windows 10 upgrade is one of the most common issues and can cause big-time trouble during your gaming sessions.
Reports show that ping spikes are common. High ping usually affects Wi-Fi connection, but it’s also been reported on an Ethernet connection. Some even mention packet loss when experiencing high ping, which can be a big problem if you’re watching online videos.
Why is my ping so high?
Many complain about experiencing high ping after updating the operating system. However, there are many issues that can cause high ping:
Outdated drivers – This particular situation hints that, after an update, some network settings might no longer match either the drivers or network-related software. To correct the issue, update your drivers, as described below.
Ndis.sys – In some cases, latency problems can be caused by certain files, such as ndis.sys, that you will need to repair, since it is an important system file.
A high ping error happened in multiple games as reported by our readers. Some of the most common requests that we addressed today are how to fix high ping in CSGO, Fortnite, Valoeant, Roblox, and Minecraft.
Quick Tip:
Some third-party driver updating tools can help with scanning your system and detecting outdated drivers. Besides, they can also suggest the latest tools to download.
Before you start fixing this issue make sure that your drivers and the Windows 10 OS are up to date. This tool keeps track of all your drivers and updates them on a regular basis.
How can I fix high latency/ping in games?
Before you move on to troubleshooting methods, check the following situations:
Try out other games as well to make sure it’s not the current game’s fault.
Restart and try other channels on your router.
Switch to an Ethernet connection, or move closer to your router.
Think about removing devices from your network that aren’t being used or aren’t needed.
1. Use a stable VPN solution
Connecting to a VPN network is one of the simplest and safest solutions to high latency/ping. We recommend you use a VPN provider with a large number of servers across the whole globe.
Good VPNs nowadays can automatically connect you to the best server for your configuration. You can also pick your preferred configuration manually if you like that option better.
An additional important feature that can remove ping and lag is the split tunneling provided by various VPN software, such as ExpressVPN.
This feature lets you connect to a VPN for one task while using your original IP address for others. You can use it to prioritize gaming. It can really help with a smoother experience.
2. Check the apps in Task Manager
Press Ctrl + Shift + Esc to open Task Manager then click the Network column to sort the processes based on their network usage.
Click the top processes that are the most demanding and click End task. This is how to fix sudden high ping spikes.
3. Update your drivers
Press Windows + I then go to Update & Security.
Next, click View all optional updates.
Expand the Driver updates section, tick all the updates listed then select Download and install. This is how to reduce ping in Wi-Fi or Ethernet cases.
Alternatively, you can head to your manufacturer’s website and go to the Drivers section. It is usually found under the support page. For example, Lenovo users may go to Lenovo’s support page then look for network drivers specifically and install the latest ones.
According to users, if you’re experiencing high latency in games, you might be able to fix the problem simply by disabling your antivirus or firewall.
Sometimes, your antivirus software can interfere with your network connection and cause this or other errors to occur.
If disabling the antivirus doesn’t help, you need to remove it using its dedicated removal tool. Many antivirus companies offer removal tools for their software, so be sure to download one for your antivirus.
8. Now right-click the subkey that represents your network connection. Usually, it is the first one. Then choose New followed by DWORDor QWORDdepending on your system’s architecture.
9. Enter TCPackFreqency as the name of the key. Then double-click it and input 1 inside the Value datathen click OK.
10. Now create another DWORD/QWORD like before and set its name to TCPNoDelay then set its Value data to 1 and click OK.
11. Navigate to the following key, then create a new DWORD/QWORDas we have shown above, name it TCPNoDelayand set itsValue data to 1, then click OK:Computer\HKEY_LOCAL_MACHINE\SOFTWARE\Microsoft\MSMQ
12. Next, right-click anywhere in the window to selectNewfollowed byKey.
13. Enter Parametersas its name, then right-click it to create a NewDWORD/QWORD as we have shown above. You need to nameTCPNoDelay and set its Value data to 1.
After making these changes, the problems with high latency should be resolved.
Possibly, your network configuration is not the best. Either you have outdated network adapters or your router is not in the best condition.
If you encounter these issues there are a few things you can try:
Switch to a wired connection – many swear by Ethernet cable as a quick and cheap high ping fix
Update your network driver adapters – your drivers should always be up to date for the best performance
Disconnect from your VPN or proxy or switch to a different server – some proxies& VPNs can significantly slow down your connections if you do not configure them properly
End all unnecessary tasks that use up your bandwidth – if you have any standby app that requires an Internet connection, make sure to end it
All of these are quick and tested solutions, but if the problem persists, consider contacting your ISP to get professional support.
How to fix high ping in Windows 11?
The methods described above are effective for both Windows 10 and 11, so make sure to try them out, one by one.
We hope that at least some of these solutions helped you to solve the ping problem in Windows 10 and that you’ll have a pleasant gaming experience from now on.
For other problems with gaming in Windows 10, you can check out our article about solving problems with games in Windows 10. If you have any questions or comments, just write them down in the comments section below.
DirectX 11 and DirectX 12 are the present and future of gaming graphics API. Both have different capabilities and performance characteristics.
The main difference between DirectX 11 and 12 is that the former is designed for use on systems with single GPU configurations. You can download DirectX 12 on Windows 11 as it is designed for use on systems with multiple GPUs.
Should I use DirectX 11 or 12?
The main difference between the two APIs is that DirectX 12 can improve performance by reducing CPU usage. Instead of having to process every frame on your computer’s graphics card, you’ll only have to do it once, then send it to the GPU for processing.
With this in mind, it should already be clear whether you should go for DirectX 11 or 12. The biggest advantage that DirectX 12 brings is lower CPU overhead.
Because it uses less CPU time than earlier versions of DirectX, it allows your PC to run games more smoothly by handing off work from the CPU onto the GPU instead.
This means that if you have an older PC that’s struggling to keep up with modern games’ demands for visual fidelity, upgrading your graphics card might not be enough. Upgrading your CPU may be required as well.
If your CPU is not multicore, it is best to stay away from DirectX 12. This is because if your games are slow or laggy, this move will make it worse. DirectX 12 is designed for high-end gaming PCs built with newer hardware. It’s unlikely that you will see any improvement if you don’t have the right hardware.
When should I go for DirectX 12?
DirectX 12 has several improvements over previous versions of DirectX 11. The most obvious difference between the two is that you need a PC running Windows 10 or 11 to use DirectX 12. Your graphics card also has to be DirectX 12 compatible.
You can still use DirectX 11 on Windows 7 and 8, but you’ll get better performance out of your PC if you upgrade to Windows 11. Windows 11 has been named the best OS yet for gaming and it is easy to see why.
It’s also important to note that DirectX 12 is not compatible with all games yet. Luckily, more titles are being added all the time.
What’s the difference between DirectX 11 and DirectX 12?
DirectX 11 and DirectX 12 are two different versions of the same thing. In other words, they both provide the same functionality and they can be used in parallel on the same system. The only difference is that DirectX 12 is a newer version and it has some advantages over DirectX 11.
DirectX 12 isn’t just for gaming, either. Developers also find it perfect because of its lower overhead. This means they can squeeze more out of your computer’s hardware than with older versions of DirectX.
Multi-core support
DirectX 11 only uses one core on your CPU for graphics tasks like rendering. But with DirectX 12, you can use up to six cores or even more if your CPU supports Hyper-threading.
The ability for multiple CPU cores to work on different system tasks simultaneously allows for some significant performance increases over previous versions of DirectX.
This gives you a big performance boost when playing games on low-end computers, and reduces lag when playing online with many players.
At this point, it is important to mention that switching to DirectX 12 from DirectX 11 will not magically boost performance. Users on forums have complained that their FPS dropped significantly after switching to DirectX 12.
The reason for FPS drop and stuttering is that the game engine tries to use all the CPU cores at once, and if your PC doesn’t have enough power, it will drop frames.
Another factor is that some graphics cards do not support DirectX 12 yet, or they have limited support for it. This can cause problems if the driver does not handle certain features correctly.
However, high-end systems can see even greater performance gains due to their increased number of CPU cores and other factors such as memory bandwidth speeds.
DirectX 11 didn’t provide any support for asynchronous compute shaders. Each device had its own queue of work to do and could only work on one thing at a time.
In a traditional game, graphics processing tasks are processed on a single core at a time. This meant that GPUs weren’t always being used efficiently; they’d idle while waiting for CPU or memory system instructions.
One of the biggest improvements in DirectX 12 is adding asynchronous compute shaders. Asynchronous compute shaders allow developers to program GPUs to execute multiple tasks simultaneously. This saves time as they don’t have to wait for each other.
This allows tasks to be completed faster, which improves overall performance. In addition, this should also result in reduced power consumption and heat output from your CPU. Theoretically, this should make your computer more efficient.
Do you need DirectX 12 for Windows 11?
Yes, DirectX 12 falls on the list of minimum system requirements for Windows 11 and is a must. And since it was launched back in July 2015, most modern PCs are compatible with it. So DirectX 12 is, most likely, a requirement your PC will meet.
Along with DirectX 12, you need a graphics card compatible with WDDM 2.0 (Windows Display Driver Model).
Does using DirectX 12 improve FPS?
The answer is yes, it does improve FPS — but only if you’re using a supported graphics card. It uses less CPU time and it allows for more work to be done at the same time. This means that games that use DirectX 12 can run faster on the same hardware.
Because DirectX 12 uses less CPU time, games that use it can also run better on lower-end CPUs. If you previously had issues playing certain games because your PC wasn’t powerful enough, this presents an opportunity to play these games.
Finally, after the side-by-side comparison, it wouldn’t be complete without a recommendation. Both technologies certainly have their uses in gaming and graphics, but which one should you use? Which is more efficient, faster, and ultimately better for gaming?
To give a simple answer based on our testing, it all depends on your hardware. If you’re using Windows 10 or 11 and a relatively modern video card, you should use DirectX 12.
To use DirectX 12 at all, your computer has to be designed with the technology directly in mind. Otherwise, you may see performance issues while using it.
If you’re on Windows 7, or worse yet, Vista or XP, DirectX 11 will probably be best for your needs.
Speaking of Windows Troubleshooter, users describe the following issues:
A problem is preventing the troubleshooter from starting 0x8e5e0247 – This issue is a Windows Troubleshooter problem in Windows 7 and it’s caused by the Intel Rapid Storage Technology on Toshiba laptops. Updating the driver fixes this problem.
Windows Troubleshooting error code 0x803c010b – This error is triggered by the Printer troubleshooter and it usually manifests on HP printers.
An error occurred while troubleshooting 0x80300113 – This error appears when running the Internet Connection troubleshooter and it usually goes away after a system restart.
Windows troubleshooter not working 0x80004005 – The error code appears when you update your system but this dedicated guide on how to fix error 0x80004005 will provide more information.
Windows Troubleshooter is stuck, or not loading/showing – If your troubleshooter got stuck on Windows 10, this is mainly caused by system errors.
Validating the integrity of the troubleshooter failed 0x80131018– Simply change your group policy as we have shown below in order to fix this.
Windows 7/10/11 troubleshooter not working– The solutions below are applicable in all Windows iterations, but the steps will differ quite a bit.
Windows network/update/activation/audio troubleshooter not working – No matter which troubleshooter isn’t working, run the SFC scan in order to repair your computer files.
Whatever the variation, the solutions below will help you fix the problem quickly.
How do I fix Windows Troubleshooter?
1. Start Cryptographic Services using Service Manager
This is the most common solution, and it should fix the problem immediately because if the Cryptographic Services process is not running in the background, your troubleshooter won’t work.
1. Press the Windows and R keys simultaneously to launch Runthen type services.msc and hit Enter or click OK.
2. Scroll down until you find Cryptographic Services and double-click it in order to set its Startup typeto Automatic. Also, click Startto immediately start this service. Click OKto save the changes.
3. Apply the changes and restart your PC. Your problem should be solved now and troubleshooter issues such as the Windows Update Troubleshooter not working should work smoothly.
2. Disable User Account Control temporary
Press Windows then type uac and click the top result to open it.
Move the slider all the way down to Never notify and click on OK to save changes.
3. Disable any antivirus software
Sometimes your security software is the one preventing the troubleshooter from searching for solutions on Internet (mainly Microsoft KB articles) or from sending the required information to Microsoft servers.
Try to temporarily disable your security software and see if the troubleshooter works now. In some cases, you might have to completely uninstall your antivirus and switch to a different antivirus solution.
Currently, a great antivirus tool you can use is ESET HOME Security Essential because it always keeps your device protected against any type of cyberthreats thanks to its high and accurate detection rate.
It also has banking and payment protection that secures your online transactions and a firewall, network inspector, and more to safeguard access to your data, network, and webcam.
Press Windows + R to open a new Run window then type gpedit.msc and click OK.
In the left pane, navigate to Computer Configuration followed by Administrative Templates and System.
Expand the Troubleshooting and Diagnosticsfolder andselect Scripted Diagnostics.
In the right pane, you should see three entries available. If their State is Disabled, double-click them.
Set their state to Enabled or Not configured and click OK.
Keep in mind that Not configured is the normal state for these settings. If all three settings are set to Not configured, there’s no need to change them.
Press Windows enter cmd and click Run as administrator under Command Prompt.
Paste or type the following command, press Enter and wait for the process to finish: sfc /scannow
Afterward, type the following command and press Enter as well:DISM /Online /Cleanup-Image /RestoreHealth
According to users, you might be able to fix this problem by running the SFC DISM scan. Sometimes your Windows installation can become corrupted, causing the Windows Troubleshooter has stopped working to appear.
6. Make changes to your registry
Press Windows Key + R and enter regedit then click OK.
Navigate to the following key by entering it inside the search bar at the top: Computer\HKEY_CURRENT_USER\Software\Microsoft\Windows\CurrentVersion\WinTrust\Trust Providers\Software Publishing
In the right pane, double-click the State DWORD and set its Value data to 23c00, and click OK.
If the value data is already set to 23c00, your registry is configured properly and this solution doesn’t apply to you.
7. Create a new user account
Press Windows + I then go to Accounts followed by Family & other users.
Click the Add account button next to the Add other user option.
Select I don’t have this person’s sign-in information.
Now select Add a user without a Microsoft account.
Enter the username and password for the new account then click Next.
Sometimes the Windows Troubleshooter has stopped working error message can appear because your user profile is corrupted. To fix the issue, you need to create a new user account and check if the same issue appears.
Once you create a new user account, switch to it and check if the issue reappears. If the problem doesn’t appear on the new account, it means that your old account is corrupted. Now you need to move your personal files to the new account and use it instead of the old one.
If you still have problems with your troubleshooter after applying these solutions, report them in the comment section below, we would love to solve your problem.
Mail, formerly Windows Mail, is the popular email client from Microsoft that comes installed on your Windows by default. Though not as popular as other email services like Outlook, Gmail, and so on, the app can hold its own despite its minimalist design.
In fact, one of the testaments of the Mail app, and part of the reason we’d suggested setting it up on your PC, is the simplicity and ease with which you can edit your contacts on it. In this article, we’ll dive into step-by-step methods to look up and edit your Mail contacts on your PC. So let’s get started.
How to look for and edit contacts on Mail app
Naturally, before you can edit any contact, you’ll have to look or search for it. On Windows Mail, you can pull up any contact through the Switch to People option, located in the extreme left-hand column.
So, to get started, click on the Switch to People option (it has an icon that vaguely depicts a person). As soon as you do this, a dialog box titled People will pop up on your screen.
From this dialog box, you can not only add new emails to your account but also tweak them and make changes right then and there. For example, a new dialog box will open once you click on People. Click on Yes to go ahead.
Then, click on the plug sign to start adding new contacts. In the new dialog box, you can then drop in all the latest details into your Gmail account: a phone number, name, email address, and so on.
When you’re done, click on Save.
Editing contacts on your Mail app
Making any tweaks to your contacts from your Mail app doesn’t have to be too much of a hassle. Hopefully, our short guide helped you see how that’s precisely the case. But this isn’t the only thing to look out for in the Mail app. In fact, the Mail app comes packed with a host of features that make it a delight to use. So we’d recommend you check them all out.
In some instances, PC is not using all RAM. If your system is showing less RAM than installed, then the RAM might not be properly connected to the motherboard. Using integrated graphics will allocate some of your RAM to it, making it unusable. Certain settings can also cause this problem.
Before we start, check your RAM and make sure it’s compatible and properly installed. If modules don’t have the same timing, you might need to replace them. In some cases, rearranging the RAM also helps.
What can I do if my PC is not using all RAM?
1. Use msconfig
Press the Windows key + R, type msconfig, and press Enter.
System Configuration window will now appear. Navigate to the Boot tab and click on Advanced options.
Check the Maximum memory option and enter the amount you have in MB. 1GB is 1024MB, and since we have 4GB RAM on our PC, that’s 4096MB. For your PC, be sure to enter the correct amount of RAM in MB. After you’re done, click on OK.
Save changes and restart the computer.
2. Turn off Auto RAM Virtualization
1. Press the Windows key + S and enter advanced. Choose View advanced system settings from the menu.
2. When System Properties window opens, click the Settings button in the Performance section.
3. Performance Options window will appear. Go to the Advanced tab and click on Change.
4. In the Virtual Memory window, uncheck Automatically manage paging file size for all drives option. Now select each drive on the list and choose No paging file option. Click OKto save changes.
If you’re using Hyper-V virtualization on Windows and have created a checkpoint, you may find yourself in a situation where you need to delete the checkpoint. However, sometimes things go wrong and there’s no option to delete a checkpoint.
These checkpoints are created by default every time when you perform some actions like stopping or starting a VM or even when you shut down the host computer. The main purpose of these checkpoints is to restore previous states of virtual machines when something goes wrong with them.
Why can’t I delete a checkpoint on Hyper-V?
There are several reasons why you can’t delete a checkpoint on Hyper-V. Below are some of the common reasons:
The checkpoint is currently in use – In order to delete a checkpoint, it must first be stopped. When you stop a virtual machine, it will automatically save its state so that it can be started back up again at a future date. This process requires some disk space to store information.
Virtual machine migration – If you have migrated a virtual machine from one host to another using checkpoints, then there will be multiple checkpoints created for that particular virtual machine. This can cause confusion if you attempt to delete them all at once.
Poor connection with the host – If you are having issues establishing a stable connection with the host computer, you may be unable to delete a checkpoint. Check your network connection and ensure that the host service is running on your computer.
You don’t have sufficient permissions – When you try to delete a checkpoint, Windows checks to see whether you have permission to do so. If you don’t have permission, you cannot delete checkpoints.
Third-party tool created the checkpoint – While you can use Hyper-V Manager to delete checkpoints, you can’t delete checkpoints created by a third-party tool.
What can I do if there’s no option to delete a checkpoint?
Hit the search icon, type Turn Windows features on or off and click Open.
Locate the Hyper-V feature and uncheck it then click OK to save changes.
Restart your PC then repeat the same steps only this time, check the Hyper-V feature.
5. Delete checkpoint with Powershell command
Hit the Windows key, type PowerShell in the search bar, and click Run as administrator.
Type in the following command and press Enter (Replace VMName with your virtual machine name): Get-VMSnapshot -VMName <VMName> | Remove-VMSnapshot
In some cases, you’ll find that Hyper-V is not authorized to connect. If this is your predicament, we have an expert article that has all the fixes to avert this problem.
Users also complain about other issues such as can’t install Hyper-V but we have extensively covered various fixes to help you circumvent this issue.
Another pressing problem is the Hyper-V running out of memory. Check out our guide on the same as we have also addressed this issue.
Let us know if you have been able to resolve this problem in the comments section below.
Not all BSOD errors are severe and some can be solved by simple troubleshooting. One such error is the driver power state failure in Windows 11.
Many users have reported encountering this issue when they boot Windows 11. It’s a common error and is easy to fix, as we will show in the following sections.
What causes a Windows driver power state failure?
Driver conflicts–Many of our readers also reported that the driver has stopped responding and has recovered after an update. Rolling back recently installed drivers is a way to get rid of the problem, as described below.
Misconfigured settings – Because this error is often related to misconfigured settings, make sure to use our detailed steps to switch to High-performance power plan and check the power settings.
Malware infection– If there is malware infection behind this issue, it’s time to use reliable antivirus software to scan your PC and remove all infected files. Refer to the below procedure in this regard.
How can I fix the Windows 11 driver power state failure error?
1. Run the power troubleshooter
Press the Windows key + I to open Settqings and choose Troubleshoot in the right pane.
Select Other troubleshooters.
Click the Run button before the Power option.
Wait for the check to complete and follow the onscreen instruction to make the necessary changes.
Restart your PC.
Sometimes, the simplest fix is the most effective. Running the Windows power troubleshooter has proved to be effective in fixing driver power state failure issues for many users. Ensure to restart your PC after applying the fixes to effect the changes.
2. Install optional updates
A lot of users overlook the optional updates when updating their PCs. This section carries some important updates like driver updates and other components.
1. Press Windows + I to launch the Settings app and select Windows Update from the tabs listed on the left.
2. Next, click Windows Update on the right.
3. Select Advanced options from the ones listed here.
4. Click on Optional updates under Additional options. You will find the number of updates available mentioned to the right of the option. If there are none (0) available, you can skip the following steps and directly head to the next method.
5. Finally, click on the available updates.
6. Now, tick the checkbox before the outdated device or component, and click on Download & install.
This has proved effective in fixing the Windows bluescreen driver power state failure error for ASUS users and some other PCs.
3. Rollback recently installed drivers
Press Windows + I to launch the Settings app.
Select Windows Update from the tabs listed in the navigation pane on the left.
Click on Windows Update on the right.
Select Update history from the options listed here.
Click on Driver updates to view the ones that have been automatically updated in the recent past and make a list of all the devices that appear here.
Next, press Windows + S to launch the Search menu.
Enter Device Manager in the text field at the top and click on the relevant search result.
Locate the devices, the drivers for which have been updated recently, as found in the Settings.
Right-click on each device and select Properties from the context menu.
Navigate to the Driver tab and click on Roll Back Driver.
Now, select a reason for removing the update and click on Yes at the bottom. In case you select For another reason, enter why you rolling back in the Tell us more field.
Wait for the roll-back process to complete. It should typically take a few seconds, but you wouldn’t receive a prompt or confirmation for the same. A quick way to identify is to look out for the Roll Back Driver option. When it’s greyed out, the previous version has successfully been installed.
When you encounter the driver power state failure error in Windows 11, the prime approach should be to look out for the recently installed drivers and remove them.
But, do remember that only the drivers updated via Windows Update will be listed under Update History. If you have manually updated any driver, be sure to roll back those too.
4. Update drivers
Press the Windows key + X and select Device Manager.
Locate the problematic device, right-click on it, and select Properties from the context menu.
Navigate to the Drivers tab and make a note of the Driver Version.
From the search results, locate and open the manufacturer’s website.
Check if a newer version of the driver is listed here. You already have the current version and can identify from it if an update is available.
In case an update is listed, download it. It is likely to be in the .exe format.
Now, navigate to the folder where the downloaded file is stored and double-click on it to launch the installer.
Follow the on-screen instructions to complete the installation process.
After the update is installed, restart the computer for the changes to come into effect.
If rolling back to the previous version of the driver didn’t help, or the driver wasn’t updated recently, you can check if there’s an update available. Outdated drivers are as likely to cause the Windows 11 driver power state failure error on Dell XPS 15, HP, Lenovo, and other popular PCs.
Check if updating the driver from the manufacturer’s website fixed this issue for most users.
Another quick way to update the drivers installed on the computer is to use a third-party solution. We recommend Fortect Driver Updater, a dedicated tool that will automatically update the drivers and keep them all up-to-date.
Enter Control Panel in the search box at the top, and click on the relevant search result that appears.
Select System and Security from the option listed here.
Next, click on Change what the power button do under Power Options.
Click on the Change settings that are currently unavailable option.
Now, untick the checkboxes for Turn on fast startup, Sleep, and Hibernate, and click on Save Changes at the bottom.
Restart the computer for changes to come into effect.
Check if disabling fast startup fixed the driver power state failure error in Windows 11 on restart.
Fast startup is a feature that reduces the boot time for Windows by not completely shutting down the system. However, it’s known to cause compatibility issues with the connected device and lead to driver power state failure BSOD error.
6. Switch to High performance power plan
Launch the Control Panel as discussed earlier.
Click on System and Security.
Click on Change batterysettings under Power options.
Select the High performance power plan.
Simply switching the power plan to high performance has fixed the driver power state failure error in Windows 11 for many users. When the computer is in this mode, the connected devices do not go into sleep mode, thereby eliminating the occurrence of the error.
7. Change the device’s power settings
Launch the Device Manager as discussed earlier.
Locate the problematic device, right-click on it, and select Properties from the context menu.
Navigate to the Power Management tab.
Untick the checkbox for Allow the computer to turn off this device to save power and click on OK to save the changes.
If nothing else worked, you can change the faulty device’s power setting. You will have to do it for all the devices that might be causing the error.
After you change the settings, restart the computer and check if the driver power state failure error in Windows 11 is fixed.
8. Scan for malware or virus
Press Windows + S to launch the Search menu.
Enter Windows Security in the text field at the top and click on the relevant search result that appears.
Click on Virus & theat protection.
Click on Scan options under the Quick scan button.
Select the Full scan option and then click on Scan now.
A system infected with malware or virus is also likely to exhibit the driver power state failure error in Windows 11. When you use Windows Security to run a scan, it not only identifies the malware or virus but also takes corrective measures to remove it.
While there are a bunch of other third-party antiviruses available out there, we choose Windows security for two reasons. First, it comes along with Windows and is free to use, and second, it offers the same level of protection as any other paid tool available in the market.
That’s all there is to fix the driver power state failure error in Windows 11. Execute the methods in the sequence that they are listed to solve the error in no time. Also, if none of them work, you always have the option to reset Windows 11 to its factory settings.
Solitaire for Windows 10 is a great game to play if you have little time to spare. To help you out, we have selected the best Solitaire apps that you can download on your computer or play online.
Windows 10 already comes with the Solitaire collection. Our team also reviewed other classic Microsoft games, such as Minesweeper.
What makes a great Solitaire game?
While we can’t say that we agree with those who think that the best Solitaire app can come from another third-party developer, we did try out a few Solitaire apps for Windows 10 and 11.
You can notice some major differences between them. We compared them to the original Microsoft version in order to have the same starting point.
We analyzed the overall look and feel of the apps, as well as the gameplay and ease of use of the functions that come with each game.
Also, the games we tested were free versions, as we did not think it was necessary for someone to pay for an already free game. The games tested are as follows.
Which are the best free Solitaire apps for Windows PC?
The app is created by the same developer who made the Spider Solitaire app that is featured in the number 2 position.
The game includes pretty nice card graphics, hints, undo, achievements, animations, a scoring system, and everything you’d expect from a good card game.
In order for users to unlock other themes, they must buy the premium app, which is not much.
There’s no better Solitaire game in the Microsoft Store than Microsoft Solitaire Collection, bar none.
Sure, the game is not perfect. It has its flaws and some technical issues here and there. But when you compare it to other games, Microsoft’s game is light years ahead of the third-party competition.
Besides the regular Solitaire game mode, you can also play modes like Spider, FreeCell, Pyramid, and TriPeaks.
On top of that, there are various daily challenges to add liveliness to the game.
And you don’t even have to download this game, Microsoft Solitaire Collection now comes preinstalled in Windows 10.
Klondike Solitaire Collection Free has a collection of solitaire versions, including Klondike, Klondike by Threes, Klondike Two Decks, and Easthaven.
It has smooth animations and multiple card sets and backgrounds to choose from.
You can also save your game progress, as well as undo or redo an unlimited number of times. Among the most important features are the Autoplay option and Statistics tracking.
If you’re a Solitaire fan, you certainly must try this one.
Pyramid Solitaire Saga is not exactly a classic Solitaire game, but nonetheless, it has the same gameplay.
Besides the classic Solitaire gameplay, you will also have to find some clues, catch some scarabs, and complete each episode to reveal hidden treasures and explore new worlds.
There are all sorts of other things connected to the game except for the usual Solitaire card game.
You will get lots of different scenarios, puzzles, boosters, treasures, and lots and lots of levels.
Also, it’s easy to sync the game between devices and unlock full game features when connected to the Internet.
It’s worth noting that the app is also available on mobile phones and tablets, and it is completely free to play.
Now, if you don’t want to download any Solitaire apps on your Windows computer, you can go to SolitaireCardGames and play the game you want online.
There are 15 Solitaire game versions that you can choose from such as Solitaire Big, Double Solitaire, Pasjans, Solitaire Time, Klondike Solitaire, Pyramid Solitaire, and more.
The website also offers useful information related to Solitaire, including details about the game’s history, how to play the game, as well as a series of Solitaire strategies that will come in handy. Enjoy it!
Encrypting your files protects you from prying eyes and unauthorized access by individuals who are looking to access or steal your data. But recently, many Windows users have reported that the ability to encrypt contents to secure data is greyed out in Windows 11.
No more worries! We’ve got you covered and will help you resolve this issue by providing fixes allowing you to encrypt your files and folders again.
Why is the encryption option greyed out in Windows 11?
An error inside the registry value is the main cause of this issue. The error inside the registry value can be caused by the following:
Improperly uninstalled applications– Sometimes, uninstalling an application manually will leave some traces behind that interfere with your OS’s functionality.
Viruses, trojans, spyware – Viruses are known to cause a plethora of issues, and this is no exception. That’s why we strongly recommend choosing one of the best virus removal tools.
A large number of unnecessary files – Junk files not only slow down the PC but also cause bugs and errors.
For those who are reporting that the Encrypt contents to secure data is greyed out in Windows 11 Home, you should be aware that the Encrypted File System (EFS) is not included in the Windows Home edition of the operating system, so it’s normal for it to be greyed out.
To utilize EFS, you will first need to update your Windows to either the Education, Enterprise or Pro editions. Only then will you be able to encrypt your files.
What can I do if Encrypt contents to secure data option is greyed out?
1. Use Windows Registry to enable the EFS
Press Windows Key + R to open the Registry and enter regedit then click OK.
Enter the following address inside the search bar at the top, then double-click the NtfsDisableEncryption key and set its Value data to 0 and click OK: HKEY_LOCAL_MACHINE\SYSTEM\CurrentControlSet\Control\FileSystem
Restart your computer to apply the changes made.
2. Use the command prompt to enable EFS
Press Windows type cmd and click Run as administrator under the result on the right.
Enter the following command and press Enter: fsutil behavior set disableencryption 0
Once the command has been executed, restart your computer. The Encrypt contents to secure data greyed out in Windows 11 issue will be solved.
3. Check if the Encryption File System (EFS) service is running
Press the Windows and R keys at the same time to launch Run then input services.msc and hit Enter or click OK.
Locate the service named Encryption File System in the service window and double-click it.
Click on theStartup type and select Automatic. After that, click Apply and then OK.
Press Windows enter cmd and open the top result as an administrator.
Enter the following command and press Enter. Note that you should change the drive letter in case you want to convert another one: convert C:/ fs:ntfs
If you’re using FAT32 as your file system, change it to NTFS. As encryption can only be done on the NTFS file system.
5. Run DISM and SFC scans
Press Windows enter cmd and click Run as administrator under the result.
Type the following command and press Enter: sfc /scannow
Once the scan is done, type the following command and press Enter again: DISM.exe /Online /Cleanup-image /scanhealth
Reboot your computer afterward.
Doing this will repair all the corrupted files, and you can encrypt all your files and folders again.
Microsoft introduced the Encryption File System (EFS) with the launch of Windows 10, allowing you to encrypt your files and folders from being accessed by others.
But, since it isn’t available in the Home edition, you may opt for a third-party tool to encrypt your files and folders, such as Folder lock.
Don’t forget to leave a comment in the section below and tell us whether you have thought of any more solutions for the Encrypt contents to secure data greyed out in Windows 11 issue. Thanks for reading!
The Windows operating system, especially Windows 11, could have a lot of bugs, lags, and other annoying issues. And using specialised troubleshooters tools to help you solve problems with your PC such the one we present is essential to have a smooth pc experience.
Sometimes we have to perform various system tweaks to fix Windows problems, which could be very complicated and sometimes risky.
But luckily, there are a lot of troubleshooting tools out there that will do all the work for us. Using a troubleshooting tool could save us a lot of time and is safer than monkeying in our system or registry on our own.
So we’ll present you with the best troubleshooting software and tools for your Windows operating system, and we hope they will help you to solve all your problems.
System Mechanic Ultimate Defense is another PC troubleshooting software. It is one of the most known and most ‘old but gold’ optimization and tuneup utilities on the market.
The most notorious features are Windows customization and various recovery tools, troubleshooting options that you can select and customize, an Internet connection tweaker, and even an antivirus.
Its interface is intuitive and highlights all the necessary processes you need to do to avoid system issues. You will know exactly when you will need to fix your registry, clean some junk files, or run an HDD defragmentation.
This software has a free version that can be used on every PC. However, the paid version includes all the necessary features to tweak your system.
We recommend the pro version, as it will help your PC improve its performance with all its available features. We also have to mention that it comes with a 30-day money-back guarantee. Thus we regarded it as one of the best Windows PC troubleshooting tools.
Most Important features:
Cleans out clutter
Removes bloatware
Privacy and security protection
Speed booster
System Mechanic Ultimate Defense
Don’t sit around with an error-filled PC. Get it fixed with the help of this incredibly handy software tool!
There are a lot of third-party system troubleshooting tools for Windows, but we decided to also choose Advanced System Care, due to its trusted performance by users.
IOBIT Advanced SystemCare can assist you in optimizing your computer and keeping it free of faults and problems that damage its performance.
The application has a variety of modules that can help you Speed Up, Protect, Clean, and Optimize your PC.
It also features a Tool Box where you can find several IOBIT-based utilities to help you fix, tune, and care for your PC. It also has an Action Center where you may license and update other IOBIT products and key Windows components.
One of the most popular features of IOBIT Advanced SystemCare is the Performance Monitor.
Its new Resource Manager keeps track of your system components like CPU load, disk use, and RAM allocations. It allows you to terminate tasks, minimizing resource use and enhancing PC performance.
Most Important features:
AI-powered optimizer
Startup speed up
Gaming performance booster
DNS protector
IObit Advanced System Care
Advanced SystemCare is a more powerful PC optimization utility from the world’s leading system utilities and security software vendor.
Simply stating that your Windows 10 PC has an issue is not exactly correct since hundreds of errors and things can go wrong in a system as complex as Windows 10.
However, this complex OS can be easily fixed by a simplistic third-party tool that is meant to fix pretty much anything on your PC software-wise and boost it to new heights.
Tweaking Windows Repair may seem dated, but rest assured that the features and tech that back it up are more than enough to get your error-filled PC up and running to levels comparable to when it was brand new.
The program is available in two versions, with the Pro version offering a higher variety of tools, although they are also more complex to use.
If you are ready to enjoy an error-free Windows 10 experience, go ahead and give Tweaking Windows Repair.
Most Important features:
Automatic updates
Memory cleaner
Windows quick link menu
Run speed tweaks
Tweaking Windows Repair
If your Windows 10 experience is interrupted by constant errors or slow response times, give Tweaking Windows Repair a go.
Ashampoo WinOptimizer pushes the strings to make your Windows PC faster and more private. It is a great PC troubleshooting software.
The new Boot Center deconstructs the boot process into component segments, including autorun entries and activities, plus it immediately identifies performance bottlenecks.
You’ll appreciate the new 1-Click Optimizer, which finds more online browsing traces, garbage files, and unnecessary Registry values and provides more details and features than before.
The powerful Privacy Manager prevents Windows from calling home and sharing sensitive user data with Microsoft and other software manufacturers.
The System Information module provides comprehensive information about your PC’s hard and software and assistance in locating hidden resource hogs on your hard disks.
WinOptimizer has data-rich dashboards that provide rapid shortcuts to essential modules for a more condensed but always up-to-date perspective.
The tweaking module enables individual Windows customization and will undoubtedly appeal to you if you are a PC tuning enthusiast.
Most Important features:
Old Windows versions deleting
Clear cleaner UI
Cookie manager
Window scaling and docking
Ashampoo WinOptimizer 19
This comprehensive software improves system efficiency, resolves system faults, and minimizes file clutter on a well-organized, customizable dashboard.
Wise Registry Cleaner should definitely be on your list of troubleshooting tools. There are a lot of registry cleaners and maintainers out there, but we decided to choose Wise Registry Cleaner.
This tool appears to be the best because it provides deep and safe cleaning of your registry, with many tweaking options.
Wise Registry Cleaner is also very well-designed, and you won’t have any problems finding and performing the desired task.
But cleaning your registry with Wise Registry Cleaner requires rebooting, which could be annoying sometimes, but it is often required to change the system and registry files properly.
Most Important features:
Multi-users Registry cleaning
PC performance booster
Windows backup and restore
Scheduled auto cleaning
Wise Registry Cleaner
Your registry can be the source of most of your PC-related problems. Tweak and fix them with Wise Registry Cleaner!
AVG PC TuneUp is a troubleshooting tool that contains utilities for optimizing system startup, defragmenting the hard drive, and cleaning damaged keys in the Windows Registry.
This utility can also restore mistakenly deleted files, check your hard drive for faults, modify hidden settings, and customize the appearance of Windows.
AVG PC TuneUp also includes a file shredder, a thorough system report generator, and the great 1-Click Maintenance tool, which allows you to automatically and routinely scan for some of the most common issues that your computer may experience.
If your computer is always in use and the hardware consumes a lot of energy, there is a PC Mode in the software that decreases the energy consumption.
The AVG Tuneup duplication finder module searches for and removes duplicate files but does not remove them also.
This isn’t just another generic PC support tool, it’s innovative, perceptive, and packed with useful features.
Furthermore, if you’re looking for assistance in enhancing your framework, it’s most likely the ideal software you’ll get.
Most Important features:
Junk files remover
Auto program updater
Auto maintenance
PC speed up
AVG PC TuneUp
This comprehensive troubleshooter includes improved utilities to boost your PC’s speed and Disk and Browser Cleaners to free up hard disk space.
What tool is used to troubleshoot problems with Windows?
By default, users use the built-in troubleshooter in Windows, which you can access by doing the following:
Press Windows key + S and enter troubleshoot. Select Troubleshoot settings from the menu.
Click on Additional troubleshooters.
Now select the troubleshooter that you want to run.
Using Windows Troubleshooter is sometimes the best choice because it doesn’t require downloading and installing any additional software.
Remember that this feature is designed to only run on local computers. So if you want to fix a PC remotely, you might need to use remote troubleshooter software instead.
If you’re dealing with more serious issues, we recommend using PC repair tools since they offer better features for advanced problems.
Hopefully, we helped you narrow your choices for a Windows PC optimizer troubleshooting tool because they are great assets for a performant device.
Moreover, you may want to check out our list of the five best BSoD fixers to solve yet another Windows issue.
We hope you have now installed any of these excellent PC troubleshooting software.
What’s your choice to troubleshoot your Windows PC? Leave us a comment in the area below.
Your PC can sometimes be filled with unnecessary temporary files and programs that can slow it down. This is when you need to scan and delete the junk files on the computer.
You can take the manual approach, but it isn’t always very effective and is highly time-consuming and risky. Many inadvertently removed critical system files and had to reinstall the OS.
Use specialized software to clean up your PC to ensure you don’t delete anything valuable. And we have the perfect ones for you.
What files should I delete to free up space?
If you are wondering how to delete junk files from your PC, here are a few quick ways:
Empty the Recycle Bin: The Recycle Bin stores files for a certain period after they are deleted, but if you are certain about not needing them again, empty it right away.
Use Disk Cleanup: It’s a built-in utility that allows users to easily scan and delete junk files and necessary items on the computer.
Set up Storage Sense: It is another handy utility offered by Microsoft that automatically removes unnecessary items at a set frequency.
However, remember that none offer the same efficiency level as specialized software. These will find even the smallest of the files created by apps and remove them all. However, when it comes to scanning and deleting junk files, there’s no match for these.
Is it safe to delete junk files?
As long as you are careful not to delete any critical files, there’s no harm in it. And it’s recommended that you regularly scan and delete junk files in Windows. Moreover, you can choose to backup your system to make sure you can undo any damage.
If you don’t delete unwanted files in Windows 10, they will soon consume a large part of the storage, and you may run out of free space.
Follow along to find out more details about each software!
What is the fastest way to delete unnecessary files?
Another great application that can delete junk files is Revo Uninstaller. It’s considered one of the best junk file cleaners in the market and has been appreciated by users.
It has a very simplistic and straightforward UI, with various options placed systematically to allow quick access.
Regarding the features, here are some of the best features that this app has to offer:
Can uninstall any application and remove all files associated with it
Hunter Mode allows you to pinpoint and uninstall unknown applications
The autorunManager feature allowsyou to control which applications start automatically with your PC
Ability to remove junk files and speed up your PC, and permanently delete files and folders
Pro version features:
Forced Uninstall – Remove leftover files from any application that wasn’t uninstalled properly
Quick/Multiple uninstall – Set a queue for applications you want to remove and remove them one by one
A real-time installation monitor allows you to see live changes on your PC while a certain application is being installed
Ability to create system and registry backup before making any changes
Revo Uninstaller
This practical tool will remove all the unnecessary files on your PC super fast and automated.
Easy Duplicate Finder is another simple junk file cleaner for Windows 10. This application has a rather friendly user interface allowing you to find and remove duplicated files easily.
With efficient functioning and a simple interface, it’s bound to be one of the best tools for scanning and deleting junk files in Windows.
Regarding the features, here are a few notable ones this tool offers:
Extremely simple to use interface
Several scanning modes
Ability to remove duplicates from cloud storage services
Folder comparison mode
Ability to find true duplicates
Easy Duplicate Finder
Have a try with this appreciated tool that will eliminate all duplicate files to free up your disk space.
If you need a junk file remover, you should tryWise Registry Cleaner. Thissoftwarecomes in two versions, Free and Pro, and they have very few differences.
So, if you are not yet ready for the paid version, go ahead with the free one. Though, most users prefer the paid version more.
Regarding thefeatures, here are a few notable features that this tool offers:
Ability to scan theregistryand remove the corrupted or unnecessary entries
Can quickly restore theregistryto the previous state if you encounter any issues
You can add a CleanRegistryshortcut on your desktop in order to clean the registry whenever you want
Three different modes of scanning: normal, safe, and deep
Support for exclusions allowing you to skip certain sensitive areas of your registry
Multi-user support (in Pro version only) – Thanks to this, you can clean the registry for all users on your PC, as long as you have administrative rights
Wise Registry Cleaner
Rely on this software to clean junk files, defragment the registry, or restore your system.
AVG TuneUP – One of the biggest names in the space
Finding the best PC cleaner isn’t always easy, but if you’re looking for software to delete junk files in Win 10, AVG TuneUP might be just what you need.
Developed by one of the biggest names in the market, AVG TuneUP boasts of highly efficient cleaning of junk files along with other performance enhancements.
As for thefeatures, here’s what this tool has to offer:
It will automatically clean yourregistryand fix various issues
Automaticmaintenancewillclean browserleftovers, track cookies, cachefiles, etc.
Sleep Mode technology putsresource-intensive or background programsto sleep in order to improve your PC performance
Abilityto find and remove unwantedsoftwaresuch as bloatware or oldsoftware
Remove cachefiles, oldbackups, and temporaryfilesthanks to the Disk Cleanerfeature
BrowserCleanerfeaturethatwillremove leftoverfilesfrom all your browsers
Abilityto updateoutdatedsoftwareautomatically
AVG TuneUp
Tune up your system efficiently by removing junk files to free up valuable space with AVG software.
If you’re looking for the best PC cleaning tool, you might want to try Wise Disk Cleaner. The application is simple to use, but it also packs a lot of useful features.
In addition to boosting the computer’s performance, it can also improve your browsing experience.
Here are a few most notable features:
Ability to remove unnecessary files and free up precious disk space
Advanced options that allow you to remove all sorts of junk files
Ability to clean browsing history, cache files, and cookies of your browser
Can also clean various traces left by your operating system
Built-in defragmentation tool
Ability to schedule cleaning sessions
Wise Disk Cleaner
Get rid of all junk files from your PC and immediately increase your system’s speed performance.
CCleaner is probably one of the best software to delete unnecessary files in Windows 10. It seamlessly removes junk files and also has a plethora of other features.
Since it offers an unpaid version, you can clean junk files in Windows 10 for free.
Regarding the features, here are the most notable ones:
Ability to clean temporary files, cookies, history, and other files from all major and less popular browsers
Can clean Recycle Bin, recent documents, temporary files, log files, clipboard, DNS cache, error reports, memory dumps, and jump lists
Remove temporary files and recent file lists related to various third-party applications
Software Updater (Professional version only)
Real-time monitoring (Professional version only)
Scheduled cleaning (Professional version only)
CCleaner
Guard your PC using complete cleaning of useless files, junk files monitoring, or browser cache deleting.
Developed by MacPaw, CleanMyPC is a great utility for scanning and deleting junk files on the computer. It doesn’t just help boost the PC’s performance but also offers the option to reduce boot time by listing all the startup items.
Also, with respect to uninstalling apps, it does so cleanly, and no trace of the app is left behind, not even the Registry entries.
Here are some of the benefits of using CleanMyPC:
Enhanced online security and privacy
Allows users to identify and disable irrelevant extensions easily
Shreds the deleted files, thus ensuring that others cannot recover and misuse them
Removes the hibernation files, usually one of the biggest files on the computer
Group Policy is a feature in Windows that allows administrators to centrally manage settings and preferences for users in an Active Directory environment. But for some, the Group Policy is not creating a Registry key, and that’s what we will be fixing today.
The problem is slightly advanced in nature. Though most users don’t bother reconfiguring either the Registry or the Group Policy, owing to the intricacies involved and the risks associated with the changes.
Why is Group Policy not creating Registry keys?
There are different reasons why Group Policy is not creating Registry keys, and we have created a list of the common ones.
Presence of corrupt files: This one is not easily identifiable but caused the issue for many.
Authentication restrictions: Certain authentications must be cleared before the changes can be applied.
Misconfigured security settings: In many cases, it was a particular security setting that prevented policies from reflecting in the Registry.
Forced update is required for changes to apply: The changes to policies don’t reflect immediately (may take up to 2 hours), and a force update is required.
Broken Registry items: Problems with the Registry itself can be an underlying cause.
Does Group Policy affect Registry?
Yes, changes made it the Group Policy ideally reflect in the Registry. Though the inverse is not true, the changes you make to the Registry will not be seen in the Group Policy.
The Group Policy Editor doesn’t look through the Registry keys to identify the changes made here.
Also, another important point to be noted here is that Group Policy takes precedence over Registry. Simply put, if a particular setting is configured differently in both, the one in Group Policy is applied.
How do I fix Group Policy if it’s not creating Registry keys?
Before moving on to more technical solutions, here are some simple troubleshooting steps to try first:
If the two don’t work, you may need to take a more technical approach.
1. Force update the policies
Press Windows + R to open Run, paste the following command in the text field, and hit Enter:gpupdate /force
Once done, wait for the update to complete.
The computer looks through the configured policies at a certain interval, but you can always force update them and have the changes reflect immediately. So, if Group Policy is not creating Registry keys, it should appear now.
2. Reconfigure the permissions
Oftentimes, it’s the lack of permissions that is responsible for Group Policy not creating a Registry Key in Windows.
So, make sure to allow Full control to both Admin and System for the required key in the GPO (Group Policy Objects).
3. Check the Hive
When creating a Registry key from the Group Policy Management Console, you are required to choose the Hive, and this is where most users make a mistake.
Verify that you have chosen the right Hive here, and only then proceed to save the changes. Any issues here and the changes wouldn’t reflect in the Registry.
Another common issue we noticed behind Group Policy not creating Registry key was the Security Filtering. Reverting it to default should get things running.
Also, check if the computer on the domain has Tamper Protection turned on. If that’s the case, disable it on all computers where you want the Group Policies to reflect.
5. Manually create the required key in Registry
Press Windows + R to open Run, type regedit in the text field, and click OK.
Click Yes in the UAC prompt.
Now, navigate to the desired location and create the required key.
If the other methods didn’t work, you can always manually create the necessary key followed by a DWORD or String Value in the Registry. However, it should always be used as a last resort.
Whether you want to record a tech or sports podcast, recording a podcast is usually easy. Set up a mic, start the audio recorder, and you are good to record. However, the tough part comes after the podcast is recorded and goes on the editing table.
Why do I need an audio editor for podcasts?
Depending on the type of podcast, one may spend a good amount of time editing the podcast to keep only the best bits for the audience.
While we cannot help you with the editing work, what we can certainly do is help you find the best software for editing podcast that will make your work a little bit easier.
There are quite a few digital audio workstations available for you to edit podcasts, and some offer useful features like voice changer, text speech, and higher sample rates.
In this article, we have gathered some of the best podcast editing software that is easier to use while offering adequate tools to edit podcasts.
Adobe acquired Cool Edit Pro in 2003 and renamed it Audition. Many professionals are currently using Adobe Audition alongside other Adobe editing software like Premiere Pro for video editing.
Adobe’s audio editor is immensely powerful yet intuitive to use at the same time. It is among the best Digital Audio Workstation you can buy for the money.
Adobe Audition offers features like multitrack recording that allows you to record on multiple tracks using multiple microphones for productivity.
It also has the ability to apply effects to clips or entire tracks, adaptive noise reduction, spectral analysis to rub out background sound, and batch processing to apply effects to multiple files with a single click.
The Essential Sound panel makes the process of adding an effect like in Make Distant or Over the Intercom much easier especially for beginners.
Besides, you can adjust and match loudness using the controls. It can also repair the audio using repair and restoration tools. Audition supports a good number of audio file inputs including AAC, AU, FLAC, MP4, MP3, etc.
However, for beginners, take a look at our next suggestion to learn the basics of audio editing before you try to upgrade to Adobe Audition.
Here are some of its key features:
Great integration with other Adobe tools
Wide array of effects to choose from
Professional-level multi-track editing
Vast support of audio file types
Advanced editing capabilities for professionals
Adobe Audition
Adobe Audition is a powerful tool and offers the flexibility required to edit podcasts and music, so try it out now!
WavePad is a professional-grade audio editor coming from NCH software known for its excellent multimedia software.
This tool is feature-rich but doesn’t overwhelm the users with its feature thanks to its intuitive user interface.
The basic podcast editing tools include cut, copy, paste, insert, silence, auto-trim, compression, and pitch shifting.
You can add audio effects like amplify, normalize, equalizer, reverb, and more to the podcast as well.
It also supports audio formats like VOC, gsm, WMA, real audio, AU, AIF, etc. Wavepad makes the import process that much simpler.
The batch processing features enable you to apply effects and convert multiple files into a single function. Then there is a bookmark feature for easier recalling and assembling segments in the audio.
Advanced features in the tool include spectral analysis, text-to-speech, voice changer, and sample rates up to 192 KHz.
The free version of WavePad can be used for non-commercial use and includes many of the features from Master’s edition which can be easily upgraded to Master’s or Standard edition if needed for commercial use.
Take a look at its best features:
Batch processing audio files
Text-to-speech and voice changer
Audio spectral analysis
192 KHz high sample rating
Easy to use for beginners
WavePad Audio Editor
Adjust your podcats with simple and advanced amplifiers for voice and audio in a complex environment.
Pro Tools is an industry-standard professional audio recording and editing software that can be used by both professionals and home creators.
For traditional studio engineers, Pro tools offer the best upscale audio recording and manipulation tools for a long time now.
Over the years the developers added more advanced features to make it a complete DAW software package.
Avid also offers a free limited version of the tool called Pro Tools First that allows you to create up to 16 audio tracks for free.
It also gives access to all the music creation and editing tools along with 500 MB of loops and excellent sound effects.
Pro Tools is not just a podcast editing tool, but a music creation software as well. In addition, it also allows the pro users to collaborate with other Pro Tools users and create a collaboration project.
Being a DAW software, Pro Tools comes with tons of virtual instruments, MIDI enhancements, samples, sounds, and more to keep your creativity flowing.
Pro Tools supports a number of file formats including AAF file, XVAC Long GOP files, and 1080p50 files to make it easier for audio editing and mixing tasks in case the tracks use different formats.
The latest version comes with audio manipulation features such as batch fades, and commit. The lack of VST plugin support can be a deal-breaker for some audio producers.
Pro Tools certainly isn’t targeted at beginners, however, do give the Pro Tools a shot to see if it is something that you are looking for. You can always opt for the premium plan later.
These are some of its best features:
A lot of built-in virtual instruments
Great file format support
Access to a vast library of loops and effects
16 audio tracks for free
Project collaboration features
Avid Pro Tools
As the name states, advanced software that triggers your utmost creative music podcasts.
Podcastle is hard to ignore while you’re trying to edit your podcasts because this tool was made specifically for that.
And not only you can upload and edit your podcasts with a simple but effective set of tools, but you also have some special features along.
For instance, Podcastle helps you record your podcasts, it even has a text-to-speech function in case you’ve written it already.
Not only that, but you also have access to a library of songs you can set in the background and make it sound professional.
Of course, after you add a track, there are some essential effects to apply like a compressor or an equalizer to improve the sound quality.
But probably the best part of Potcastle is that it’s a cloud web-based app you can access from any device anywhere.
So you can start editing your podcast on your smartphone by recording something, and then come home and finish the project on your PC.
Apart from the music, there is a whole library of sound effects like explosions, beeps, swooshes, and other crazy sounds that will make your podcast a lot cooler.
Let’s review some of Podcastle’s best features:
Web-based app, accessible on any device
Great library of music and sound effects to choose from
Simple and efficient multi-track sound editor
Add effects on all the track or on some portions
Drag and drop functionality, easy-to-use interface
Podcastle
Edit and create new podcasts with a web-based tool that can be accessed on any device anywhere!
If there is a discussion on audio editors anywhere, Audacity will make the entrance by default. Audacity is a free open source audio editor developed by a group of volunteers.
The biggest strength of Audacity is its usability despite its huge collection of editing tools. Even a beginner can start using the tool for the basic audio editing task in no time.
If you dedicate more time, you can make use of its other advanced features as well. Like many DAW software, Audacity also comes with VST, LADSPA, LV2, Nyquist effects plugin support to extend the functionality.
You can use it to record podcasts, remove background noise, apply effects, cut and combine clips, and more.
The results show no compromise whatsoever and are on par with much premium software in the same category.
It is a multi-platform software, so you can use it on Windows, Linux as well as macOS.
Audacity also supports multiple file formats for import. You can further customize the track with smooth fading, humming, and syncing.
There is a batch processing option as well to apply effects to multiple tracks at once.
Audacity is an excellent audio editor and a great free alternative for beginners as well as professionals who can’t afford a premium audio editor yet.
Hindenburg Journalist is one of the underdogs in the podcast editing or even audio editing software market.
If you are into radio journalism, Hindenburg Journalist can be the right choice for editing and producing audio tracks.
It is a multitrack editor and looks like any other audio editor from the UI. Hindenburg Journalist can record uncompressed audio that can be used to produce the best quality tracks when on the editing table.
With support for multiple audio formats, Hindenburg can play any format while taking care of sample rates, bit rates, and stereo and mono files.
Apart from the basic editing features like cut, copy, paste, replace, insert, and other tools, it also comes with sound adjusting features that include the ability to create EQ for out-of-the-speaker sound.
Hindenburg also comes loaded with Sound Cloud and Libsyn integration for uploading podcasts directly from the software.
Hindenburg Journalist is an excellent tool and supports multiple platforms. Being a podcast editing software, it offers unmodified audio files, automated levels, and a voice profiler with other essential features.
Reaper is a multi-channel audio recording software that can be used for recording and mixing purposes. For the features on offer, Reaper is reasonably priced at $60 for individuals.
The user interface of Reaper is not the most intuitive as it starts with a blank canvas and leaves the user guessing where to start.
However, the software is fast and highly efficient when it comes to the editing and mixing of tracks.
Reaper offers all the basic audio editing features like copy, paste, insert, and effects. However, it does miss out on built-in virtual instruments and loops.
The latest version of the Reaper comes with new features that include Notation editor, support for VST3 plugin, FX browser improvements, FX parameter automation, and media explorer improvement, etc.
Reaper is a highly flexible software that offers some of the best tools for audio editing at a fraction of the cost when compared to another premium DAW software.
Make sure to grab the free evaluation copy before making the purchase.
There are tons of DAW software, and we have mentioned a few of them earlier in other recommendations, however, for this guide, we tried to find the software that can help you edit a podcast or voice over for a video.
You could also be interested in our list that includes the best audio editors for Windows because it may provide other options.
Do you use any of the software mentioned above or prefer a different podcast editor? Do let us know your pick in the comments below.
Gaming on a PC needs enough system resources to improve performance. Call of Duty Vanguard’s high CPU usage is a problem users encounter when playing the game. It results in in-game stuttering and lags on Windows 11.
Why does Call of Duty Vanguard cause high CPU usage?
Running outdated drivers on your PC is one of the primary causes of the problem. However, other factors can cause Call of Duty to use 100% CPU. Some of them are:
Malware or adware attacks: Call of Duty Vanguard’s high CPU usage problem may occur if there’s a malware attack on your PC. You can check our recommendations for the best anti-malware to use in combating malware and adware attacks.
Outdated Call of Duty Vanguard client: Users can encounter difficulties with their games if the game client is outdated. It can make the game incompatible with the OS version on the PC.
Let’s proceed to the various ways to fix this issue.
How do I fix Call of Duty Vanguard’s high CPU usage?
Before proceeding with any advanced troubleshooting for fixing the COD Vanguard’s high CPU usage, observe these preliminary checks:
Close apps running on the PC that you’re not using.
Disable antivirus software activities on your PC to see if it improves the game.
Restart your PC and check if the high CPU usage problem is fixed.
Peradventure, you’re unable to fix the Call of Duty Vanguard’s high CPU usage after these checks, proceed with the solutions provided below:
1. Set application priority to Normal
Right-click on the Start button at the bottom of the screen and select Task Manager.
Go to the Details tab and locate CODvanguard.exe.
Right-click on it, select Set priority and choose Normal.
Restart your PC and launch Vanguard to check if the problem is gone.
Restart your computer and launch the Call Of Duty Vanguard to see if the high CPU usage problem persists.
2. Update your computer’s policy to speed up the CPU
Press Ctrl + Shift + P keys to open the Windows Terminal (Admin).
Type the following command and press Enter: gpupdate
Wait for the process to complete; input the following, and press Enter to close the window: Exit
It will speed up your PC’s CPU performance and fix your game’s high CPU usage.
3. Scan your system for malware and adware
Left-click on Start from the taskbar, type Windows Security in the search bar, and press ENTER.
Select Windows Security from the search results and choose the Virus & threat protection option.
Click on the Scan options blue link, tick the full scan option, click Scan now and wait for the process to complete.
The scan will detect any malware infection on your device. We recommend downloading the top-rated virus removal tools to help secure your device.
A great option you can try using is TotalAV because it offers a high detection rate and will successfully protect your device by removing any harmful threats, including malware and adware.
Left-click the Start button, select Settings, and click on Windows Update.
On the Windows Update page, select Check for updates.
If there’s an update available, Windows will automatically search for it and install it. Restart your computer and see if the Call Of Duty high CPU usage issues persists.
Many users experience Call of Duty Vanguard packet loss, resulting in several other issues with the game. It impedes the game’s performance and causes it to lag significantly. Likewise, users can encounter Call of Duty bugs affecting their games.
Hence, this guide will explore the causes and provide possible solutions to fix the problem.
What causes packet loss in Call of Duty Vanguard?
Packet loss in Call of Duty Vanguard can occur for numerous reasons. Often, outdated network adapter drivers on your PC cause packet loss in your games.
However, some of these factors can also cause the Call of Duty Vanguard packet loss:
Network congestion: When the network is overloaded, it can affect the data exchanged between your computer and a game server. So, network congestion on your routers and servers can cause COD Vanguard packet bursts and packet loss.
Outdated router firmware: Issues with the network device affect every connection on the network, resulting in problems like packet loss in your games. So, keeping the router firmware up-to-date can guarantee how it works.
Issues with your hardware: You can experience packet loss in Call of Duty Vanguard if there is a glitch with your hardware. For instance, connecting your network with a low-quality cable, issues with network adapters, etc., can cause difficulties.
Unstable connections on the network: You can experience issues with your game if some devices on your network have overloaded the CPU. Thus, the device’s unable to process data, resulting in network issues for others.
How do I fix packet loss in Call of Duty Vanguard?
We recommend you go through the following preliminary checks before trying any solutions:
Disconnect every single device connected to the network or router.
Power cycle your router and connect only your device to preserve more internet speed.
A wired network connection for your gaming PC will significantly improve network performance and reduce packet loss on Call of Duty Vanguard. Also, there are tweaks available to optimize Ethernet settings for gaming. So, if you want to personalize your connection, it is advisable to check the article.
Close the game and restart your PC, then check if you can fix the packet loss in Call of Duty Vanguard.
If you’re unable to resolve the packet loss in your game, proceed to the fixes below.
1. Update the Network adapter
Press Windows + R key simultaneously to prompt the Run window, type devmgmt.msc, and click Enter to open the Device Manager.
Expand the Network adapters directory, right-click on your network card, and select Update driver.
Click on the option Search automatically for drivers option. Follow the on-screen prompts to complete the update.
Restart your device to sync the update properly and check if that helps fix the issue. Read more about how to update network drivers on Windows 11 if you wish to try another method.
2. Use a VPN
Many users confirm that connecting to a VPN can drastically reduce packet loss in Call of Duty Vanguard. It helps secure your PC, improve the network quality and unlock geo-restrictions.
There are many excellent VPNs in the market, so check our guide to make an informed decision on the VPN to use on your Windows 11.
A top-notch VPN service is ExpressVPN because it can help you solve packet loss by reducing ping, resolving ISP throttling, and lowering latency.
Besides hiding your IP address and mixing your traffic with other users’ sources, ExpressVPN also encrypts your traffic between secure VPN servers and your device, thus third-parties can’t read your data and communications.
ExpressVPN
Make the most out of your gaming experience and let ExpressVPN fix the packet loss.
Right-click the Start button at the bottom of the screen and select Task Manager.
Select the CPU and Memory usage option in the Task Manager.
Select the applications using lots of CPU and memory space on your PC, then click on the End task option from the drop-down.
Restart your computer and launch your game to check if the high CPU usage problem persists. Ending tasks for background apps will close apps that could increase network congestion.
These are the best fixes for the Call of Duty Vanguard packet loss problem. Ensure to follow the steps for optimal results.
The Windows 11 HDR Calibration app lets you calibrate your monitor’s HDR (high dynamic range) display to optimize it for playing games and other HDR content on your PC.
This app tests how your monitor’s display functions by going through a series of tests to set the minimum and maximum brightness levels, color saturation levels, and create a new color profile made specifically for your display.
The app also customizes how vividly you want colors to appear for both HDR and SDR (standard dynamic range) content when HDR is enabled. The tool is available via the Microsoft Store for 22H2 and 21H2, but you can’t use it on Windows 10.
Windows 11 HDR requirements
Obviously, besides running Windows 11 on your PC and having an HDR display, you also need to be running the latest Intel and AMD processors and have HDR turned on in Windows Settings (Settings > System > Display > Use HDR). You also need to have a decent GPU to run the app’s tests; at least NVIDIA GTX 10xx or later (Pascal+).
Download and install Windows 11 HDR Calibration app
Here’s what you need to do to install and use the Windows 11 HDR Calibration app to configure your monitor’s display:
Once you click Get started, you will be taken directly into the first of the app’s three HDR tests. As you can see the directions displayed within the app. You will need to “drag the slider until the pattern is no longer visible on each screen.”
The first HDR test checks for Minimum Luminance which detects the darkest visible details. Drag the slider until you can no longer see the pattern and click Next when you are ready for the next test.
The second test is for Maximum Luminance which detects the brightest visible details. Drag the slider until you can no longer see the pattern and click Next when you are ready for the next test.
The third test is the Max Full Frame Luminance Test, which detects how bright your display can get. Drag the slider until you can no longer see the pattern and click Next when you are ready for the next HDR test.
The fourth and final test is for Color Saturation. Drag the slider to adjust the saturation from less saturated (default on the left) to more saturated (image represented on the right). The change for color saturation might be more subtle and depends on your display’s characteristics. Click Next when finished.
Finally, you will be taken to the last screen. Here you can review and save your new color settings. Here you can indicate a profile name where you want your new settings to be saved. Click Finish when you are ready to use your new color profile.
Once you click Finish, you will see a confirmation that your new color profile “has been successfully associated with this display.”
Click OK when you are finished.
If at any time you want to delete a color profile that you created, you can do it by using Color Management in Control Panel. Here’s what you need to do to get there.
Select the Start button and type “color management” and select it from the list of results.
In Color Management, select the All Profiles and pick the color profile you want to delete and select Remove.
3. Click Continue to confirm you want to delete and remove the indicated color profile. 4. Close Color Management by selecting Close (located underneath the Remove button) when you are finished.
Microsoft notes that it is important to run the Windows 11 HDR Calibration app anytime you change your display setup. However, it is important to note that most HDR-certified displays typically work as intended right out of the box without any additional calibration. Check the display requirements for HDR video in Windows for more technical information.
If you have multiple displays, Microsoft notes that you should use the Windows 11 HDR Calibration app on your HDR-capable display first, before trying to calibrate other displays.
Do you think the Windows HDR Calibration app is a bad or good idea? Let us know in the comments!
If you’re getting an error that states Protected content cannot be viewed on this device when you try to project on a PC, we’re here to help. The project button can also be greyed out.
Protected content like movies or music may be restricted on your PC due to copyright, Windows Defender Firewall blocking access, incorrect pairing settings, or private/public access misconfiguration. Here’s how to fix it:
How to fix the Protected content can’t be viewed on this device error?
Start by making sure you’re in a region where the content you want to watch is available. Otherwise, try using a VPN. Also, disconnect remote connections and use your PC from an admin account.
If these won’t work, follow the steps below:
1. Allow Cast to Device functionality on your PC
Click the Start button, type Allow an app through Windows Firewall in the search box, then press Enter.
Locate Cast to Device functionality,Connect/Connected Devices Platform, then check the box for Private & Public.
Click OK.
Restart your computer and check if the problem persists. If Cast to the Device fails to work after enabling it, check the fixes provided in this guide.
2. Add the Wireless Display optional feature
Click the Start button and select Settings.
Now, click on Apps from the left and select Optional features from the right.
Next, click on View features to the right of the Add an optional feature menu.
Type in wireless display, check its box, and click the Next button below.
Many routers come with outdated firmware known to cause various problems. It can be responsible for issues with accessing protected content.
Hence, we recommend you contact the manufacturer for assistance on how to install the new firmware on your router. Check this guide for our recommended list of the best Wi-Fi routers.
Alternatively, you can read about protected content issues on streaming services. We recommend you check ways to fix Protected content errors on platforms like Roku and Disney+.
If you have further questions, you can leave them in the comments section. Also, if you have a suggestion on a solution that has worked for you and is omitted here, kindly comment.
Many users report that they can’t use the Projecting to this PC feature on their Windows 11 because it is always off.
Hence, it prevents users from accessing the feature on their computers. So, users have no choice but to find other screen mirroring software on their Windows 11 PCs.
Why is projecting to this PC always off?
The Projecting to this PC feature on Windows 11 mostly runs into problems because of an outdated or faulty wireless adapter driver.
However, a handful of other factors can cause the projection feature to be off. Some of these are:
Disabled Projection feature: When the quality is not enabled, it’ll display as always off, making it inaccessible to any wireless connection. Also, a disabled Project screen in Windows 11 can result in the feature being greyed out.
Issues with the wireless network adapter’s driver: The wireless network adapter’s driver is responsible for the activities of the Windows Projection. Hence, problems with it will impact the functionality of those features.
Outdated Windows: When Windows is outdated, it deprives the computer of updates and patches essential for its performance. So, issues similar to Projecting to this PC may arise, especially for Windows 11 users.
We’ll take you through how to fix the general issue regardless of the causes on your PC.
How do I fix Projecting to PC if it’s always off?
We recommend you go through the following preliminary checks before proceeding with any advanced troubleshooting:
Unplug external devices connected to your PC that can interfere with the wireless network connection.
Restart your PC to fix startup problems that may cause problems.
If these checks fail to fix it, advance to the options below.
1. Enable Projecting to this PC via Group Policy
Press Windows + R keys to open the Run window, type gpedit.msc in the search space, and press Enter to open Local Group Policy.
In the Local Group Policy Editor, navigate to the Computer Configuration directory, then select the Administrative Templates.
Click on Windows Components from the drop-down folders, then open the Connect folder.
Double-click on the Don’t allow this PC to be projected to policy in the Connect folder.
On the right side of the screen, tick the Disabled option to allow this PC to be projected, then click OK.
Close the Local Group Policy Editor and restart your PC. If you encounter an issue editing your Group Policy, look at this guide to find out what to do.
2. Update your wireless network adapter driver
Right-click the Start button, select the Device Manager, and double-click the Network adapters tab.
Right-click your Wi-Fi network adapter and select the Update driver from the drop-down.
Select the Search automatically for drivers and wait for the update process to complete.
Updating your PC’s wireless network adapter driver can fix issues causing the Projecting to this PC to be always off. We recommend you check other ways to update drivers on Windows 11 if this fails to work.
3. Update Windows
Press Windows + I to prompt the Settings app.
Click Windows Update and click the Check for updates button to allow Windows to search for available updates.
Wait till it downloads and install the updates and restart your PC.
All faulty drivers and programs will be fixed or restored by updating the Windows. However, it isn’t uncommon for Windows Update not to open; so our guide should help fix that.
Click the Start button, select the Power button, hold the shift key and click Restart to load the Advanced Startup menu.
Select Troubleshoot.
Click Startup Settings from the Advanced options.
Press the F4 or 4 keys to Enable Safe Mode and click Restart.
After your PC reboot in Safe Mode, you should be able to access the feature without issues. Also, starting Windows 11 in Safe Mode may help fix system or boot errors responsible for the problem.
This is as good a time as any to give your Windows desktop or laptop a well-deserved scrub with specialized PC repair and optimizer tools.
For some optimizer software, that can be exaggerated marketing hype. But the best system maintenance utilities do deliver an overall performance boost.
Most Windows repair and optimization software includes hard disk cleaners, registry cleaners, startup managers, RAM optimizers, and program uninstallers.
What is PC repair and optimizer tool?
PC repair and optimization tools are computer maintenance software that ensures your PC runs without any slowdowns. In time, negligible corrupted files, errors, and other issues pile up and slow down your computer.
That being said, our research has discovered some fantastic third-party software options that can help you with your PC endeavor:
The best third-party repair tools for Windows that we found are:
Yes, Windows 10 has many built-in tools that can help repair your PC in case of issues. For example, Startup Repair resolves problems preventing the OS from booting.
Besides, there are several others: DISM and SFC scan to fix corrupt system files and Windows images, Check Disk to identify and eliminate problems with the hard drive, and the System Restore utility.
Now let’s dive deeper into all the abovementioned options and understand what each software option offers.
At the top of our list is a program that we consider a full-package deal, and that is Fortect because it can fix the damage caused by malware or file mishandling, and repair all other stability issues.
Often, malware is the leading cause of faulty registries, missing files, and an overall sluggish PC system. Fortect fixes that by removing all files affected by malware from your PC and replacing them with healthy files.
Not only will it look up your Registry and compare it to its built-in database, but it will also repair and replace the ones that it considers to be damaged.
The program can be set to monitor your system in real time, so any damage brought to your files will be fixed as soon as it appears.
The dashboard is incredibly sleek and easy to follow through, and otherwise complicated system repairs will now be reduced to a matter of pressing two or three buttons and just waiting for the program to work.
Perks of using Fortect:
Restore your PC to maximum performance
Free up disk space
Optimize the Registry
Restore and replace DLL files
That being said, if you want to truly get your money’s worth in terms of PC optimization and protection, then Fortect is the software for you.
Fortect
Fix any errors on your PC and bring it back to full speed with the help of this amazing PC optimizer!
Glary Utilities Pro 5 delivers a more significant overall performance boost for Windows desktops and laptops than most other system maintenance utilities.
Although the software has a freeware and Pro version, there’s little difference between them. The $27.96 Glary Utilities Pro is for commercial usage and has automatic updates, but the freeware package still includes all the tools in Pro.
As such, this is one of the best freeware system optimizers you can add to Windows platforms from Win 2K to 10.
Glary Utilities Pro boasts more than 20 system maintenance tools for Windows.
For system optimization, Glary Utilities includes disk cleanup, startup manager, RAM optimizer, disk defrag, duplicate file eraser, internet history cleaner, and registry defrag tools.
One thing it lacks is a system analyzer that suggests optimizations, but that aside there’s little missing. The software even includes a more novel Split files tool, which isn’t something you get in every system maintenance utility.
Glary Utilities also has some handy PC repair tools. For instance, its 1-Click Maintenance tab incorporates a registry cleaner, shortcut fixer, and disk repair tools.
You can utilize this software to repair system files and restore deleted files. Glary Utilities even has a malware remover, which is a rare tool for system maintenance software.
Glary Utilities
If your PC feels sluggish, you may need a little boost from a tool like Glary Utilities!
Ashampoo WinOptimizer for Windows 10 packs in most tools most users will need for general system maintenance and optimization.
WinOptimizer is now retailing at a discounted price, which is an absolute bargain for optimization software with many options to explore. There’s also a stripped-down WinOptimizer FREE; you can download it below from the official server.
WinOptimizer includes system maintenance, system analysis, optimization, customization, and file tools. In addition, it has a handy 1-Click Optimizer for system maintenance that incorporates the internet, registry, and hard drive cleaners.
WinOptimizer users can optimize their PCs with Internet Tuner, Service Manager, Startup Tuner, Uninstall Manager, and SDD Wizard tools. The software’s file tools enable you to thoroughly erase files, recover them, and check for disk errors.
System maintenance utilities aren’t usually suitable for customizing Windows. Still, WinOptimizer also has some handy Windows customization tools for adjusting system settings, saving desktop icon layouts, editing program shortcuts, and customizing context menus.
Ashampoo WinOptimizer
Clean your PC and make it run like it used to when it was brand-new with Ashampoo WinOptimizer!
System Mechanic Ultimate Defense is one of the most accessible optimization software to utilize and delivers a genuine system boost. In addition, the System Mechanic Pro package blocks malware and includes enhanced search and recovery tools.
Both software versions are compatible with Windows 10, and you can also download an unregistered version from this website page.
Iolo System Mechanic is one of the seven software products in the comprehensive security, privacy, and optimization package Phoenix 360.
System Mechanic Ultimate Defense has the full suite of system maintenance tools. In addition, it includes a registry, shortcut, hardware diagnostic, and HDD repair tools.
System Mechanic provides a RAM optimizer, registry defrag, duplicate file remover, driver update, extensive HDD cleaner, Windows optimizer, startup manager, and net booster tools for system optimization.
The best thing about this PC repair and optimizer tool is its system analyzer which provides you with system status and an overview of the essential maintenance required.
So this Windows optimizer doesn’t lack anything and can notably enhance startup speeds and repair thousands of software issues.
System Mechanic Ultimate Defense
Fix your PC and improve its speed and performance with Iolo System Mechanic!
IObit Advanced SystemCare is an excellent PC repair software that provides a comprehensive suite of tools and a few novel features.
The Pro edition provides additional real-time protection, a more rigorous one-click maintenance tool, and combats malware. The Ultimate edition is almost both an antivirus and a system optimizer. You can run this software on your Windows 10 platform.
IObit Advanced SystemCare includes a great all-in-one Scan option incorporating various system optimizations.
Alternatively, you can utilize its disk cleaner, RAM optimizer, startup manager, internet, and program deactivator (Task Manager) tools separately.
The software comes with three separate optimization modes, including a Game Mode that automatically switches off superfluous processes and background software to free up RAM for games.
The Performance Monitor desktop widget is more novel addition to Advanced SystemCare Pro, which displays CPU, RAM, disk, and network usage resource monitors.
Advanced SystemCare is also a solid choice for PC repair. Unlike a lot of system maintenance packages, SystemCare combats malware. You can also utilize its Win Fix, Disk Doctor, Shortcut Fixer, and Registry Cleaner tools to fix Windows issues.
SystemCare Ultimate even has a full antivirus scanner. So this system optimizer package includes more maintenance tools than most alternatives.
IObit Advanced System Care
Optimize, repair, and clean your PC data in the safest way possible with Advanced System Care!
Norton TuneUp is one of the most well-known antivirus and optimization software out there, used by millions worldwide.
This remote service will scan your PC files automatically and clean your PC of useless files, slowing it down.
Moreover, the software does all these with almost no input from the user because the process is automatized, only needing your permission before launching and doing everything by itself.
After you’ve installed the product on your PC, all you need to do is call the number from the page to get in touch with a Symantec Professional who will guide you and do everything needed.
TuneUp will also clean your Windows start-up of unnecessary processes that slow it down when it boots up and remove any leftover files from your installations.
It will check your entire system at a way lower price than some physical computer stores would charge to clean it for you.
Norton TuneUp
Make your computer feel brand new with Norton TuneUp by removing unwanted and leftover programs and files.
The next entry on our list is a software tool that is all about old-school design and efficiency, just as all Windows optimizer software should be.
That being said, if you try Tweaking Windows Repair and overlook the dated UI, you’ll be surprised at just how many tools will be available to clean up your PC.
The program is available in free and Pro versions, each with its various tools, although the Pro version is the one that can be considered a whole package deal.
It includes support for automatic Windows updates, a memory cleaner, a quick link menu, generic performance enhancement tools, and more.
All in all, if you notice your Windows 10 PC running a bit sluggish lately, go ahead and give it a boost by tweaking Windows Repair.
Tweaking Windows Repair
Need some good old-school PC tweaking? Then you need to add Tweaking Repair Tool to your digital library!
Another great software that can optimize your PC and help you deal with unnecessary files is CCleaner. This tool will ensure that your PC is faster and more stable with fewer crashes.
The application is optimized for cleaning temporary files, so you can easily clean your Recycle Bin, recent documents, temporary files, and other files that might interfere with your PC’s performance.
In addition, the application has a built-in registry cleaner, so you can easily clean your registry and remove old and unused entries that are slowing down your PC.
CCleaner also works as a browser cleaner, allowing you to remove temporary files, history, and cache from all your browsers, right from this application.
The application also works as an uninstaller, allowing you to remove third-party software from your PC easily.
Another feature that users can find useful is the ability to manage startup items, so you can easily disable all unwanted applications that are starting automatically with your PC.
Overall, CCleaner is a great tool if you need to free up some space and remove old and temporary files from your PC.
The application also has other useful features that will help you optimize your PC, so if you want to make your PC faster and more stable, we suggest you try out CCleaner.
Overview:
Registry cleaner
Ability to remove old and temporary files
Browser cleaner
Startup manager
Uninstaller
CCleaner
Now you can clean and keep your computer safe with CCleaner, one of the best choices on the market!
AVG TuneUp is among the most highly rated multiplatform system optimizers you can use to optimize your desktop, laptop, tablet, or phone.
The software is compatible with Windows and Mac platforms, and you can add AVG Cleaner apps to Android and iOS devices.
You can also install this software on as many devices as required, so you won’t need to invest in more than one AVG TuneUp package for multiple desktops or laptops.
AVG PC TuneUp is an optimizer with not one but four all-in-one scans for general maintenance, speeding up Windows, increasing free disk space, and fixing software issues.
However, if required, you can also utilize the software’s 32 tools separately. AVG TuneUp boasts a full toolkit that includes the following: hard drive cleaner, duplicate file eraser, RAM optimizer, and registry cleaner.
This intelligent software also comes with a disk defragger, file recovery tool, uninstall manager, file shredder, shortcut fixer, and startup manager.
The latest version also comes with Programs-On-Demand technology that minimizes the resource usage of some programs and automatically updates third-party software.
AVG PC TuneUP
Give your PC a much-needed boost of speed with the help of this world-famous PC optimizer.
Those are some of the best PC optimizers to get your Windows desktop or laptop in shape for 2022.
Using any of these computer repair programs will give your PC a slight boost. The older the PC, the greater the growth. With time, errors and issues pile up, and we tend to avoid solving them.
These tools solve these errors in no time, find hidden mistakes that slow down your PC, and enjoy a better experience on your computer.
They can considerably boost overall system performance for more antiquated hardware. You can also utilize those maintenance utilities to resolve various Windows software issues.



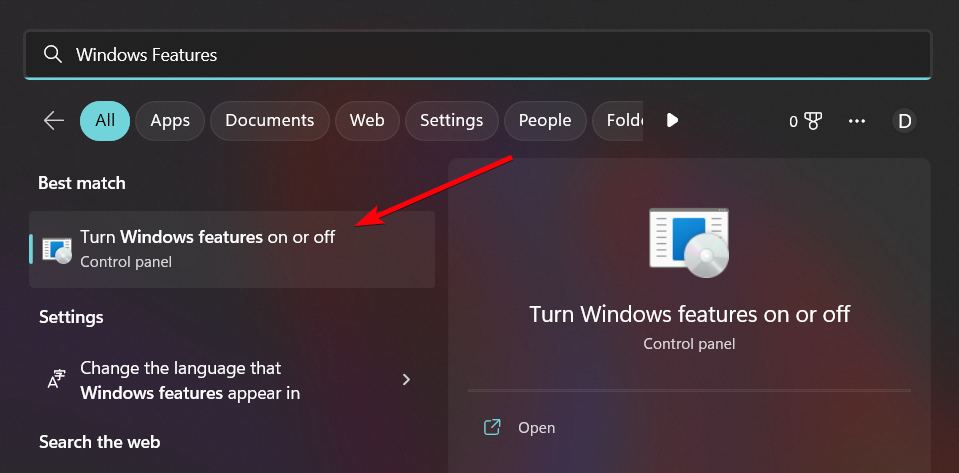


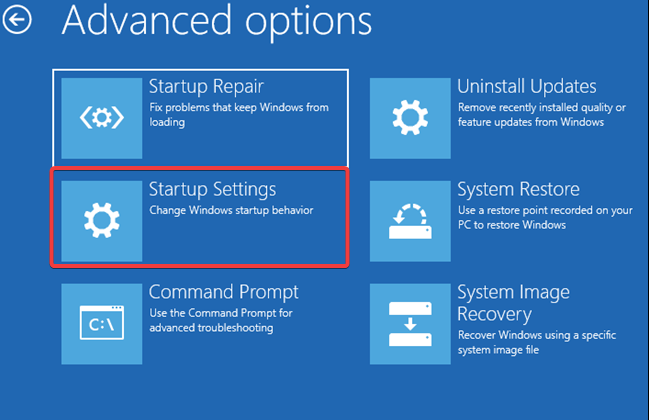


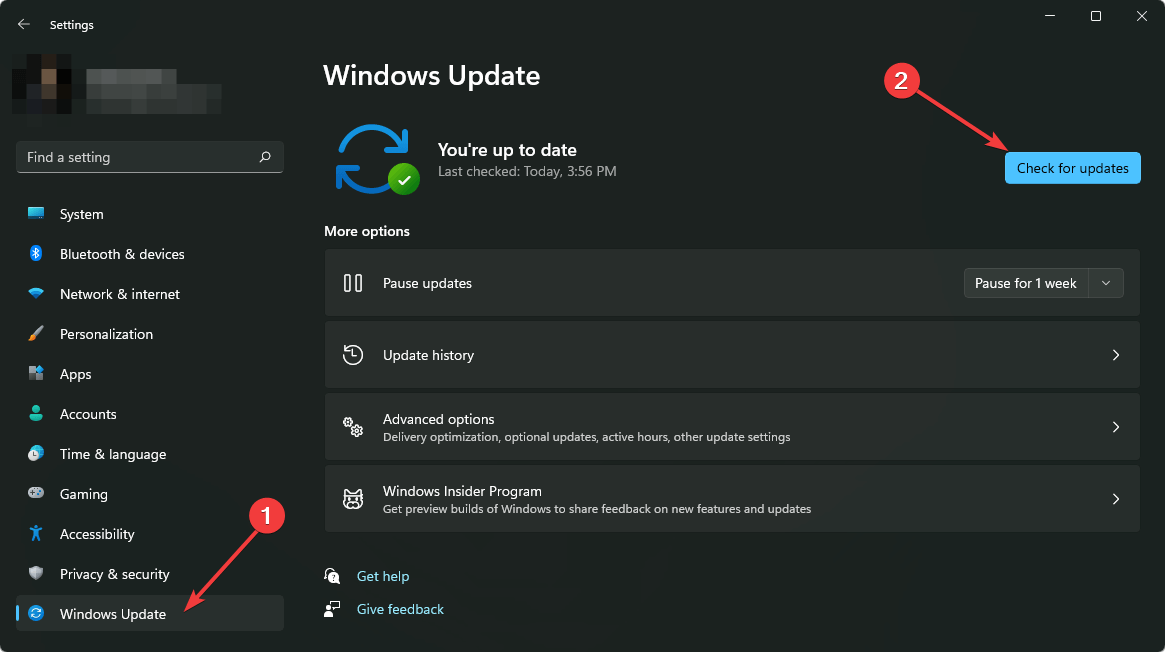




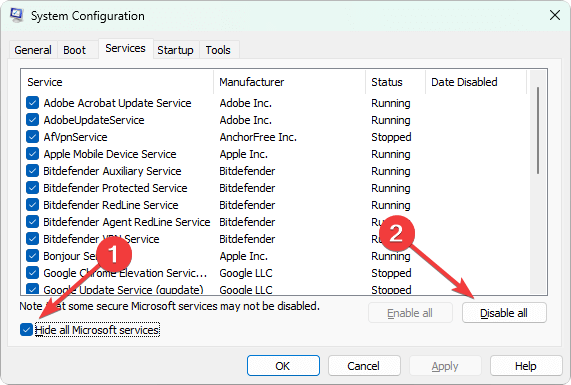


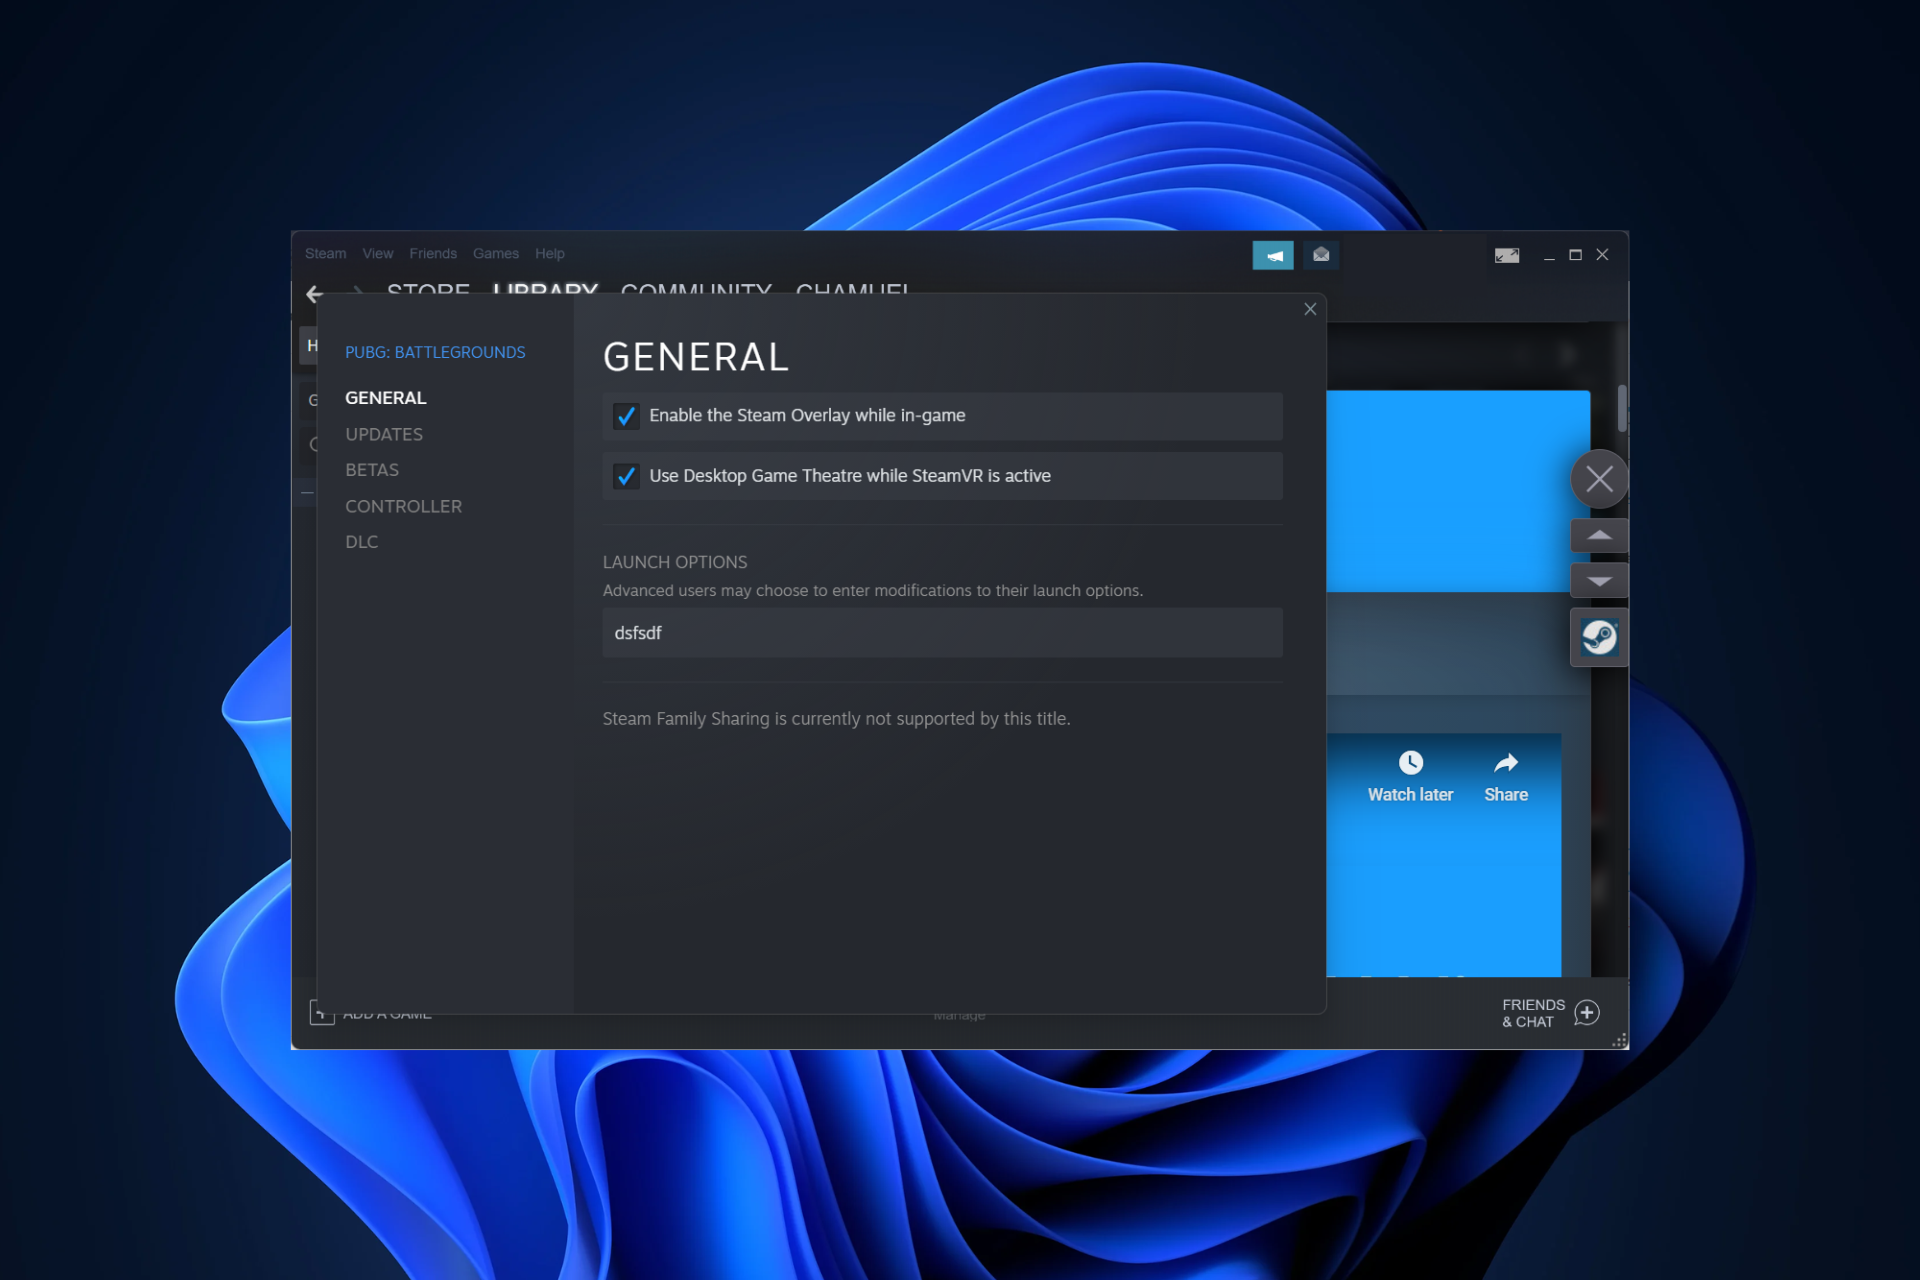
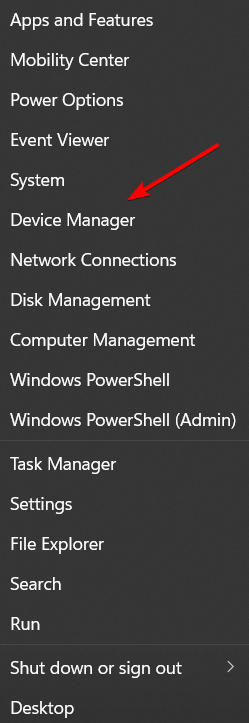
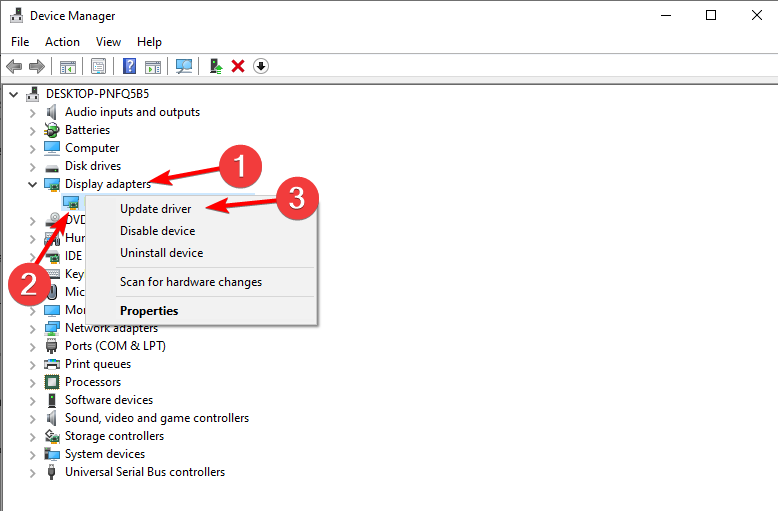




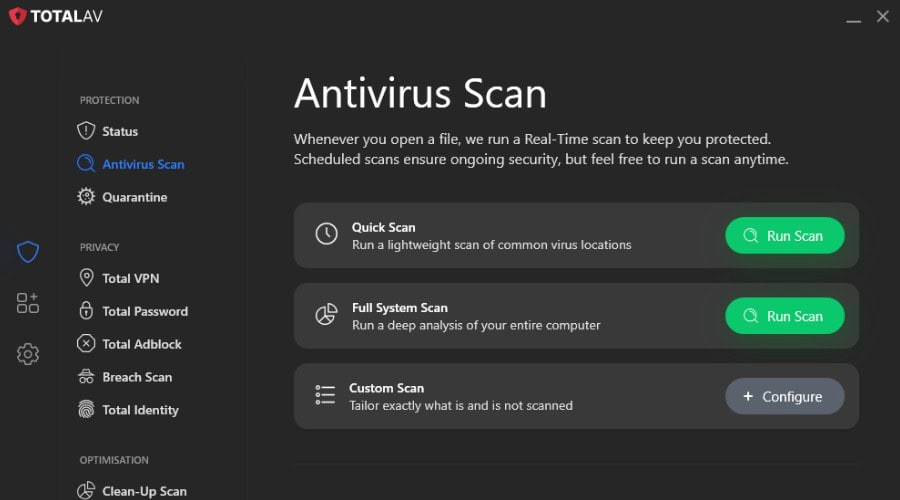

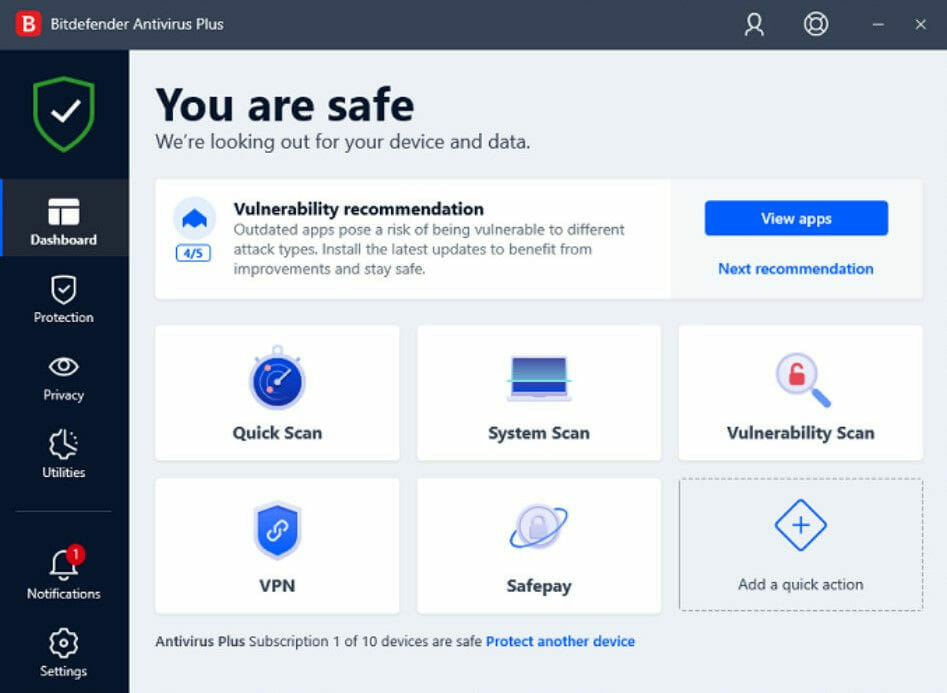

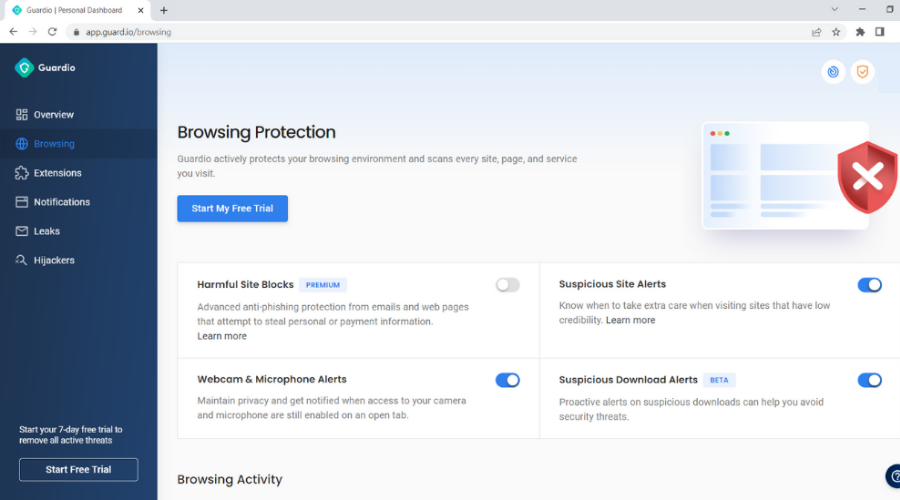

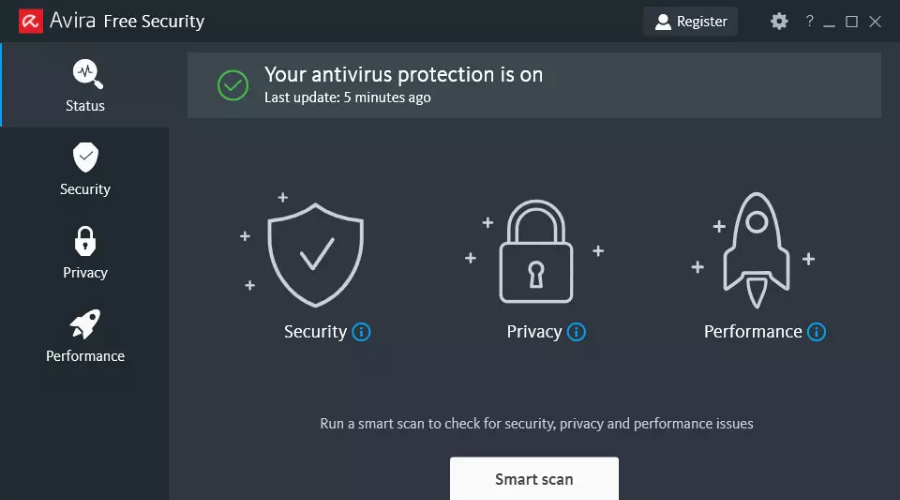

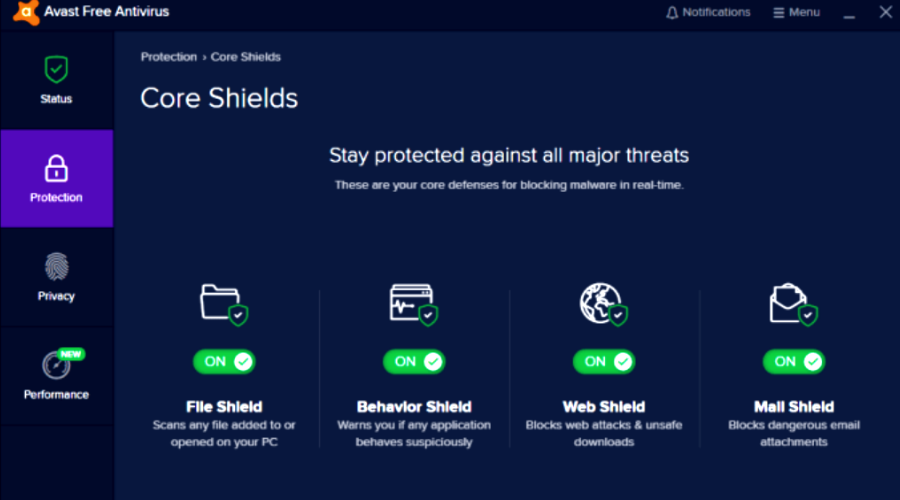



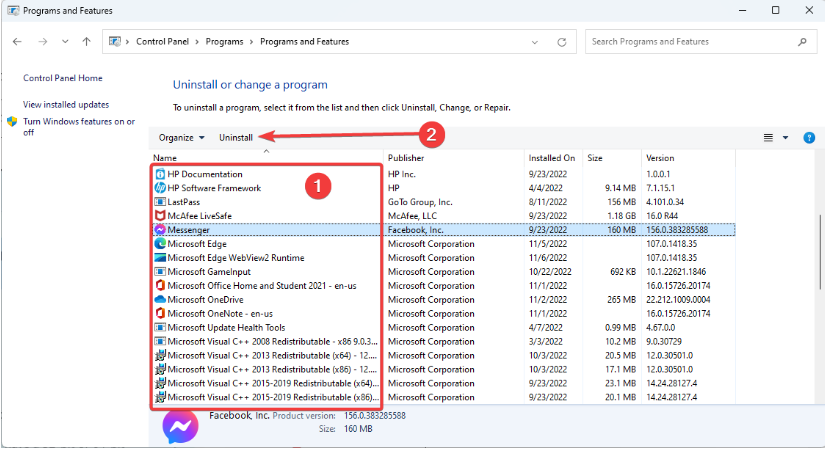


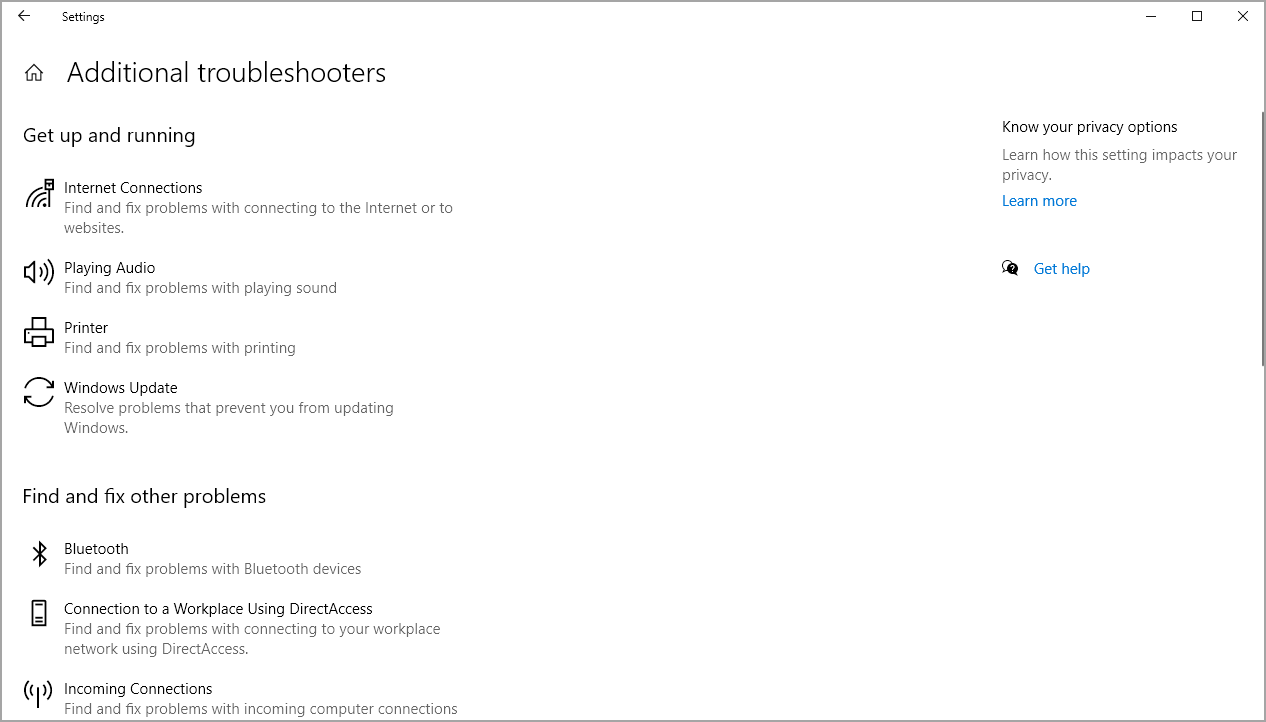



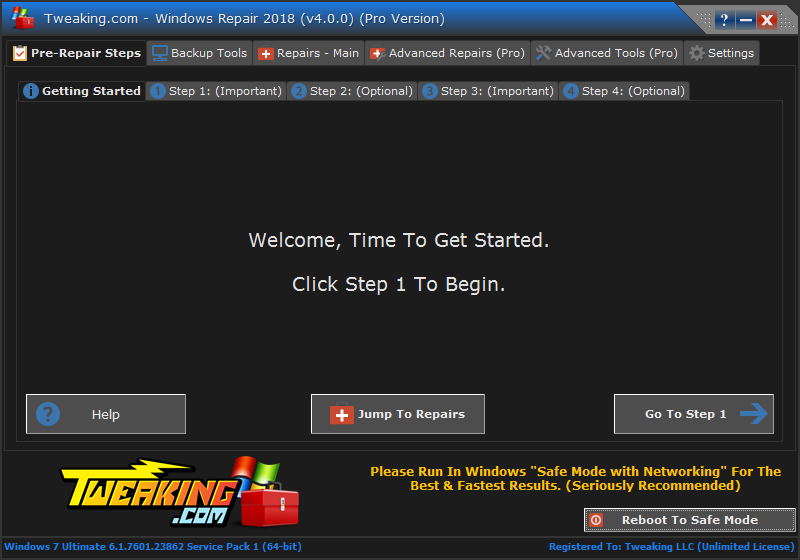


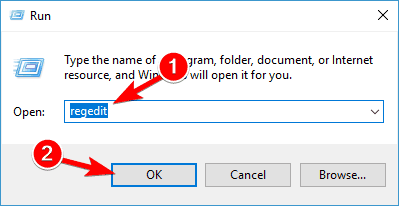







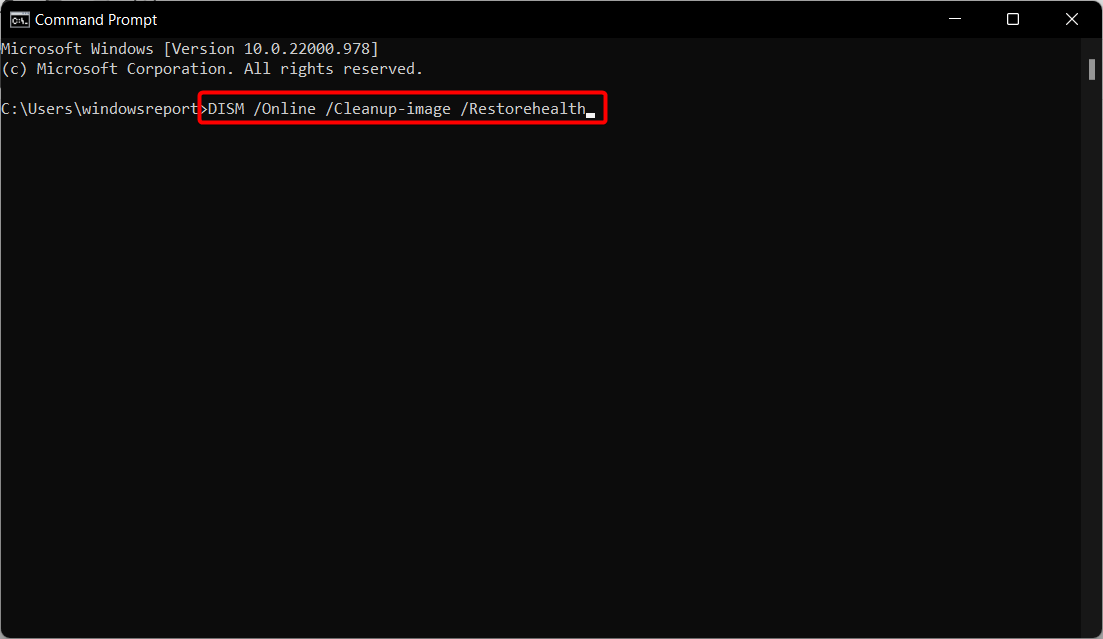


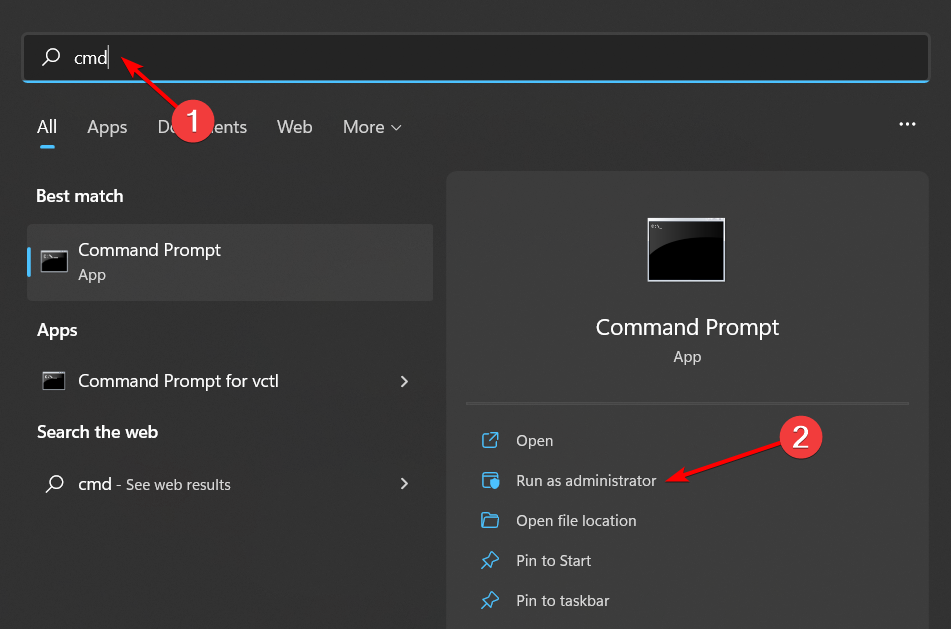



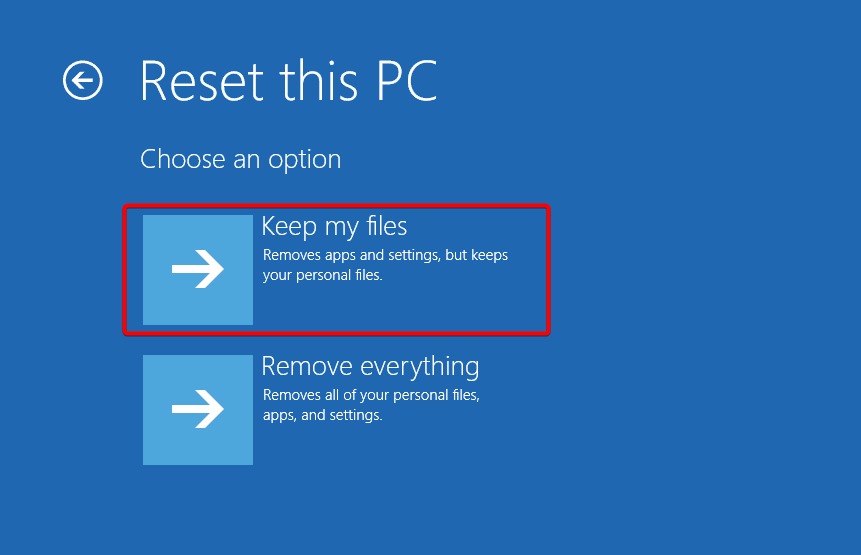
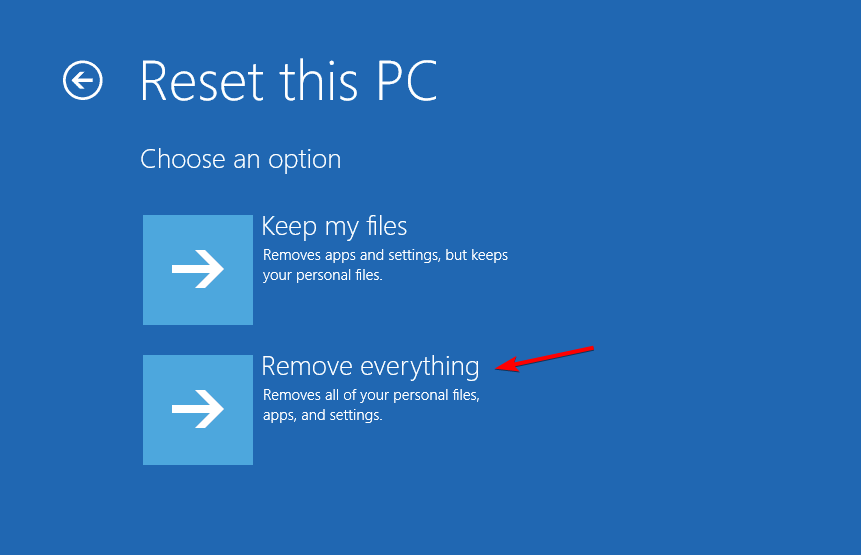




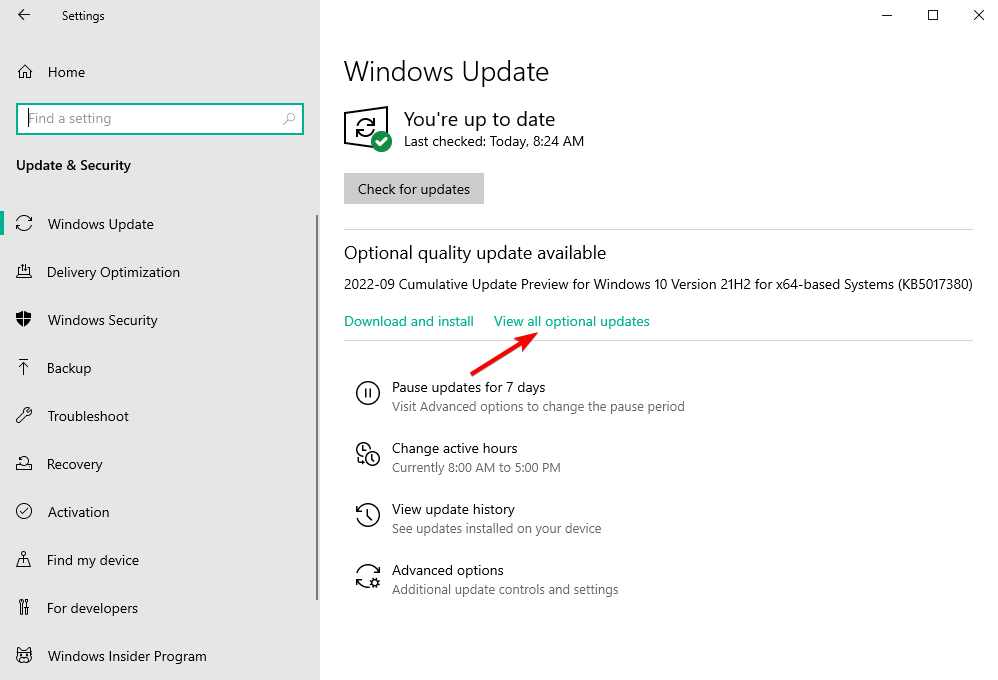
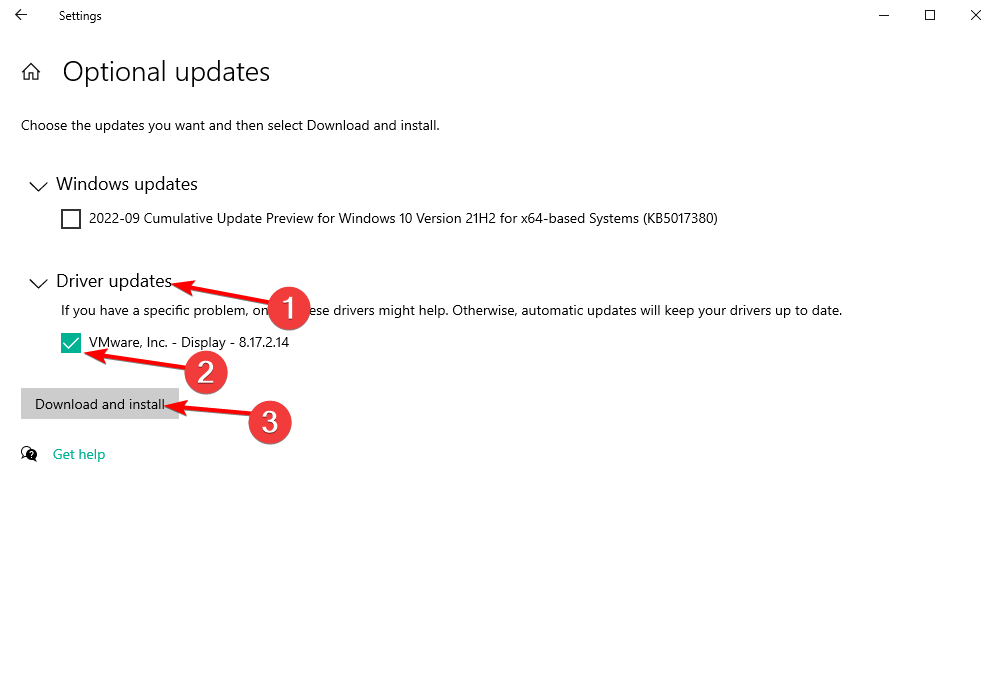
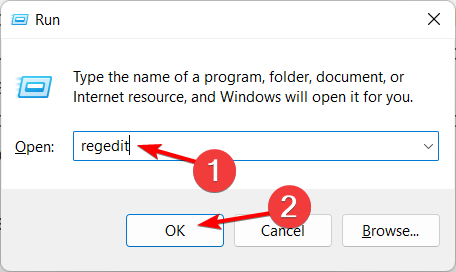





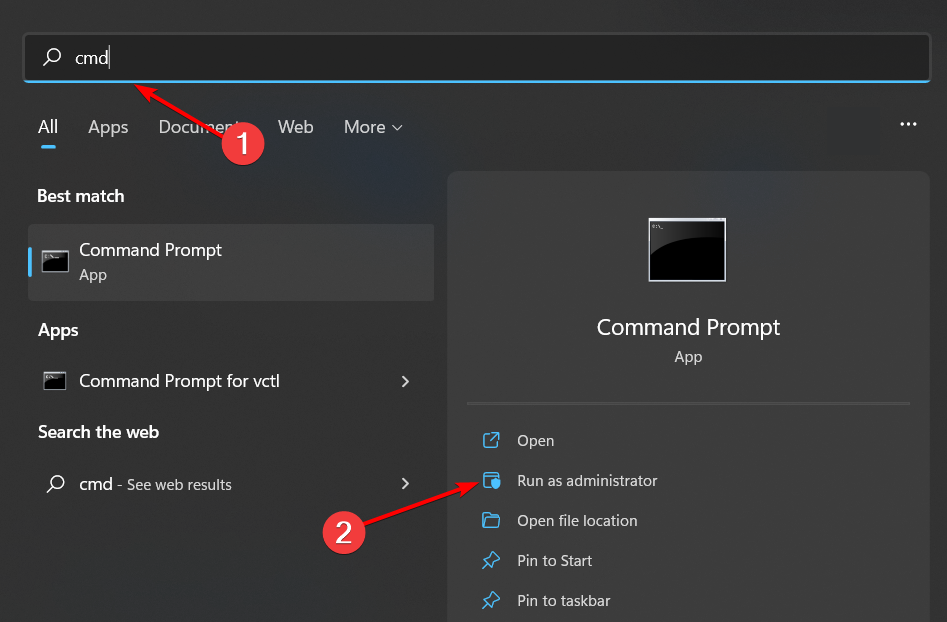


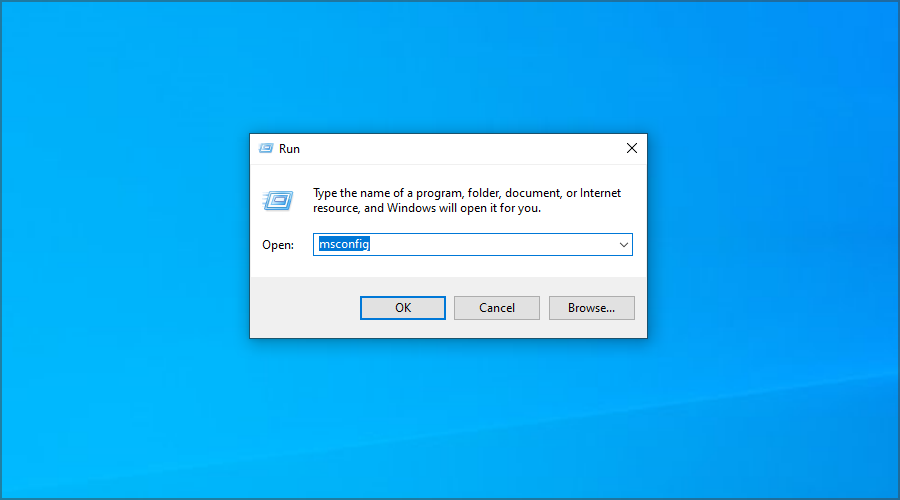
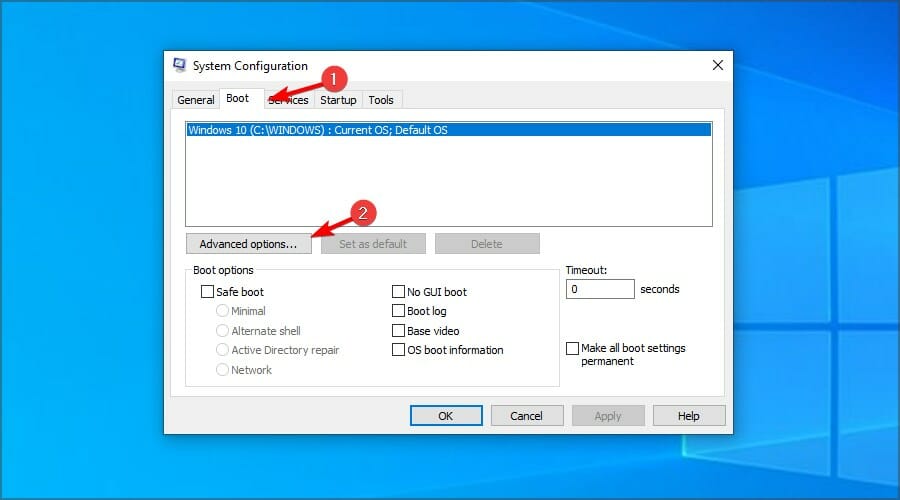
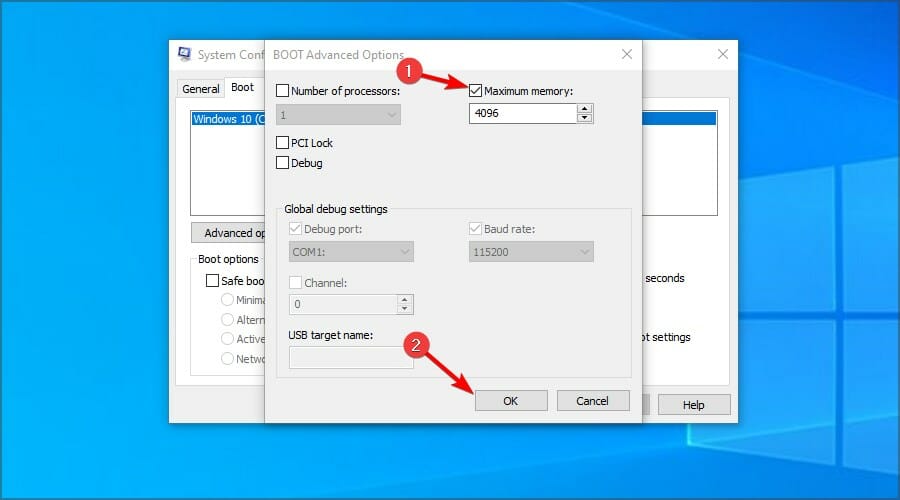


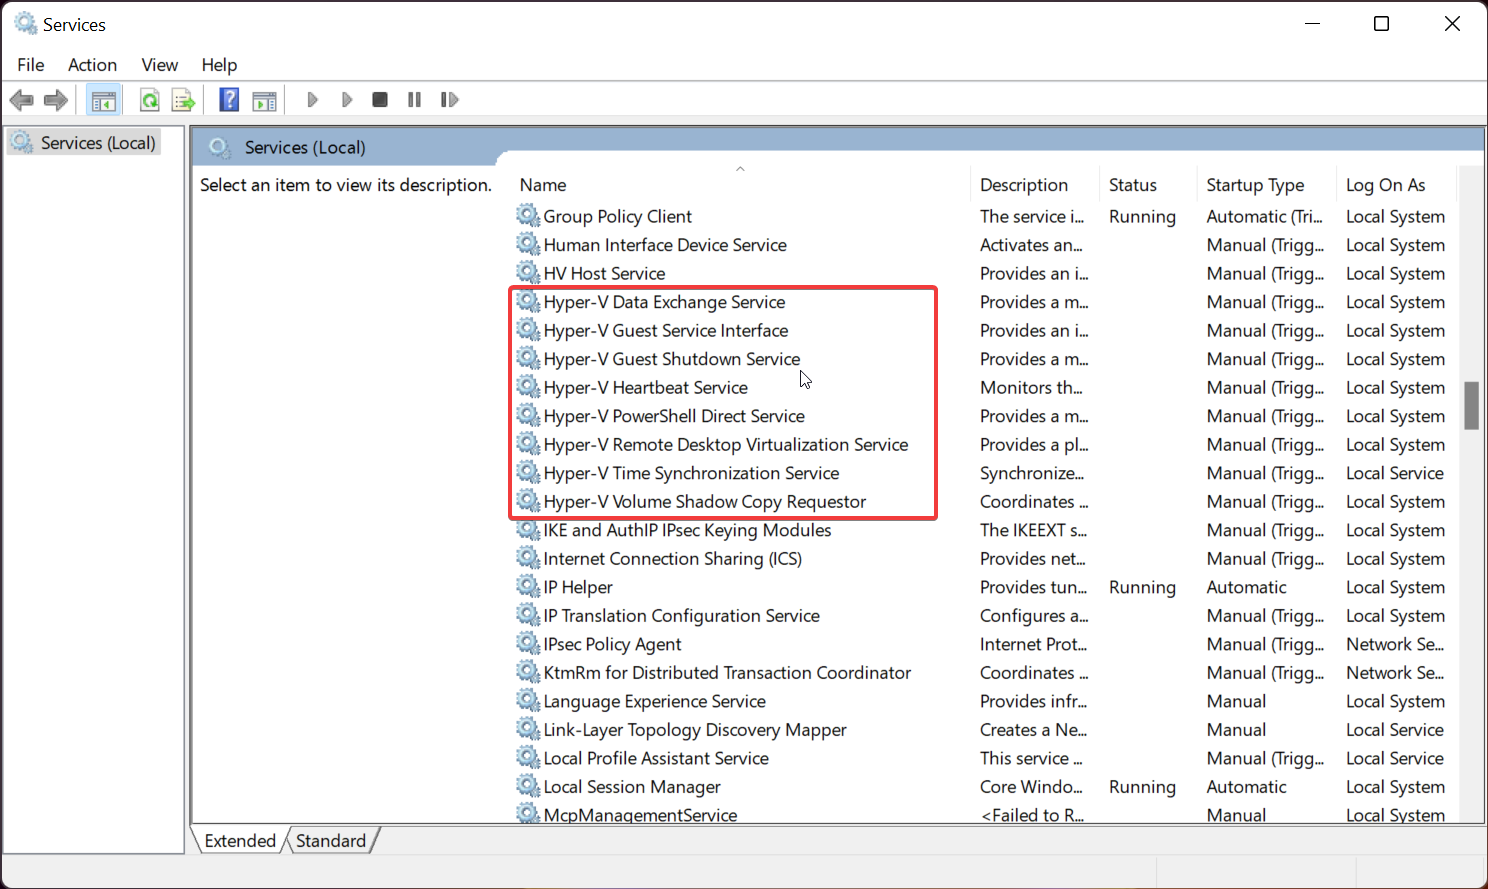


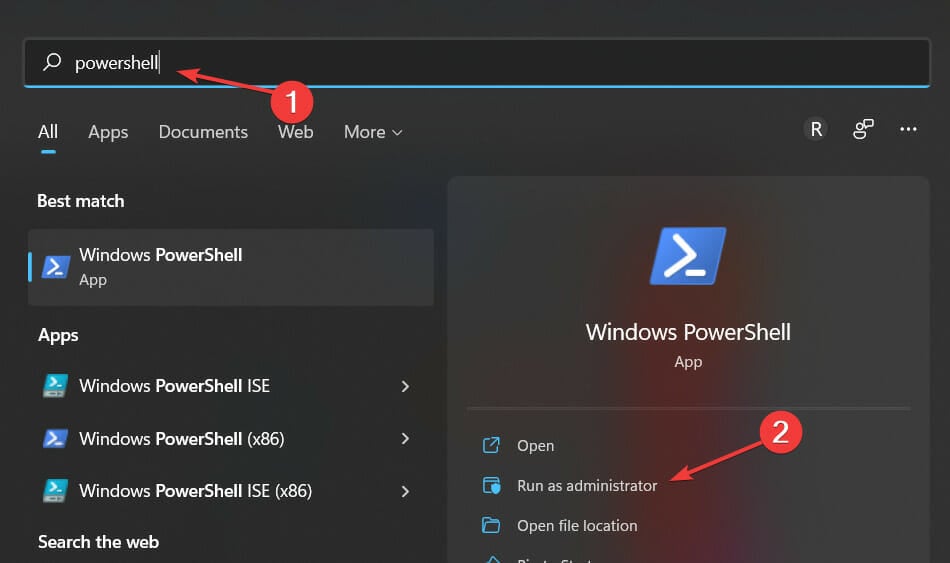


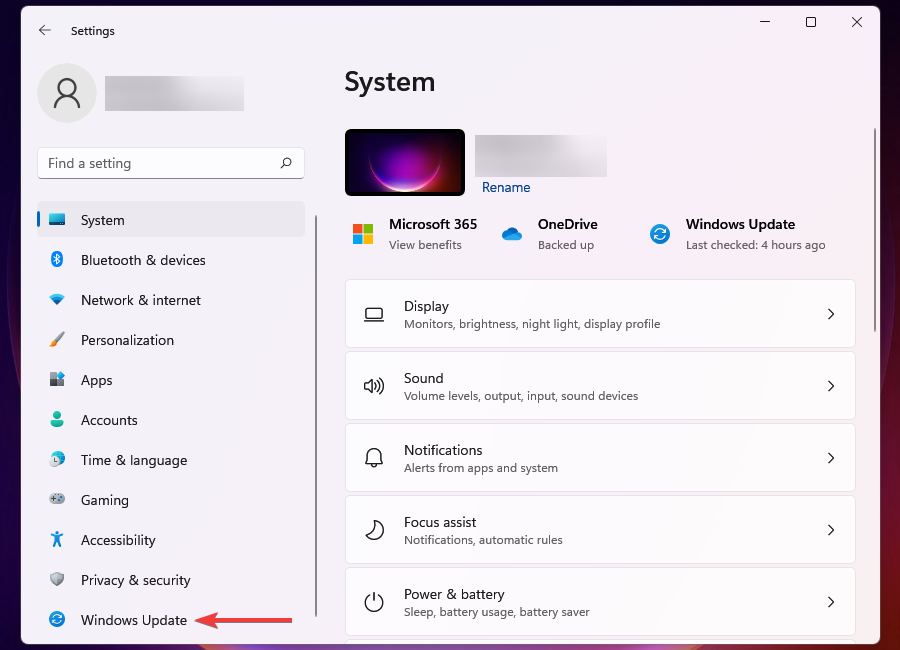
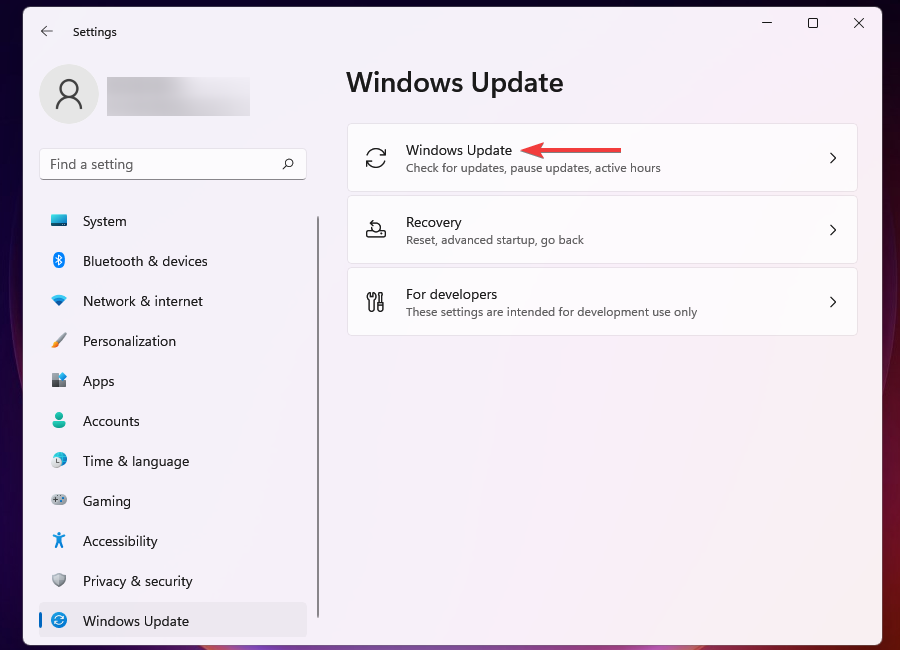
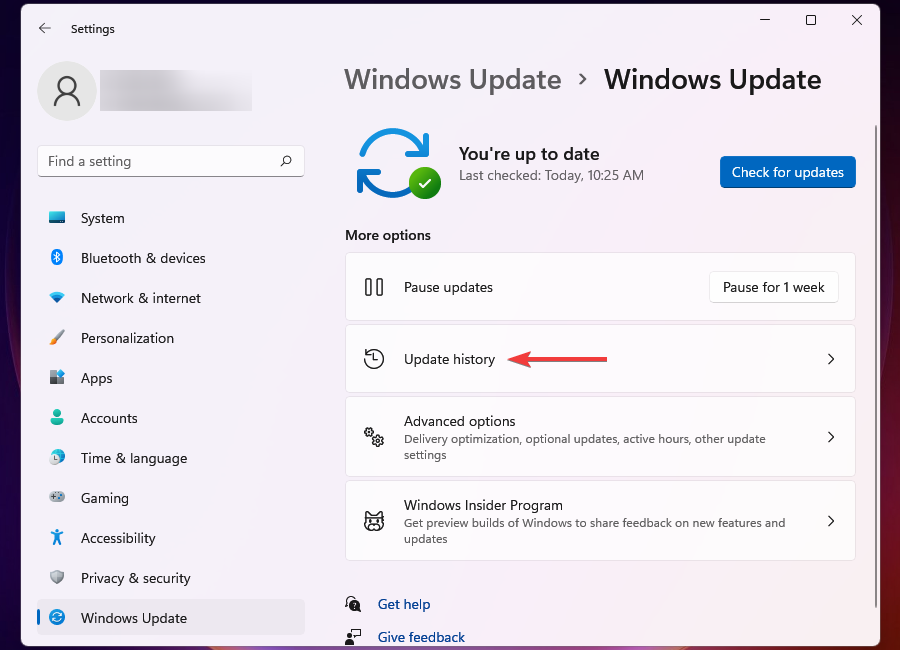
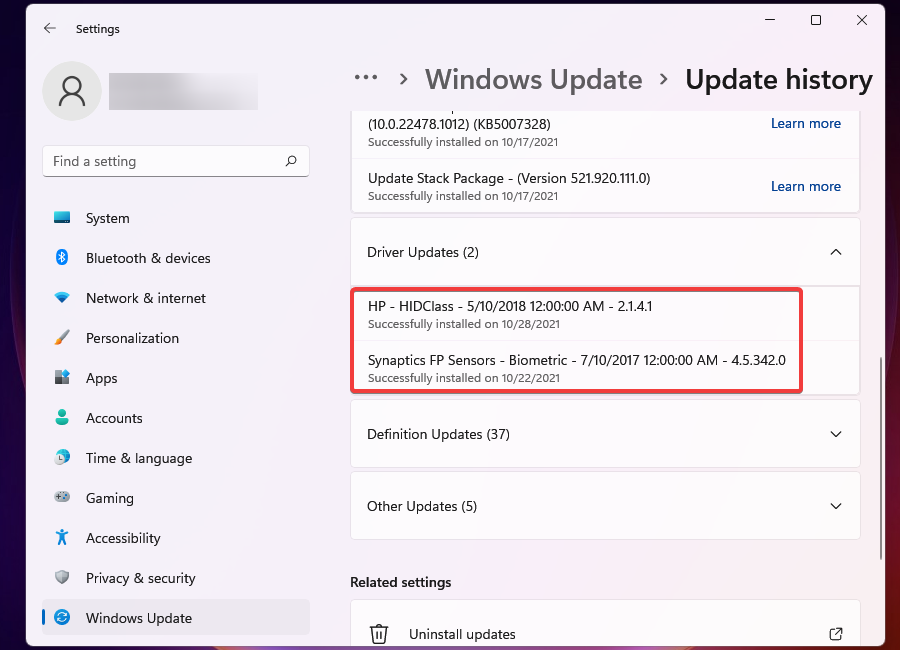
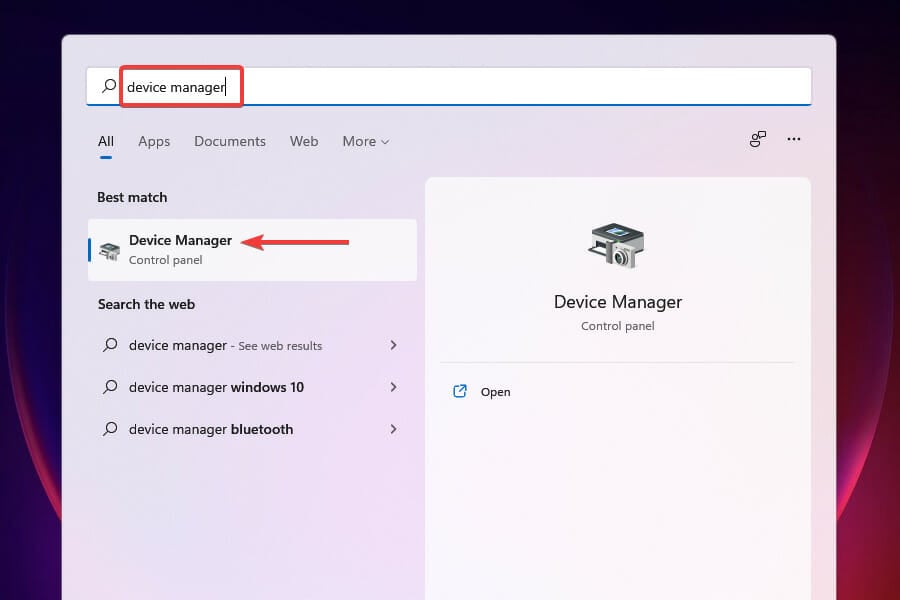
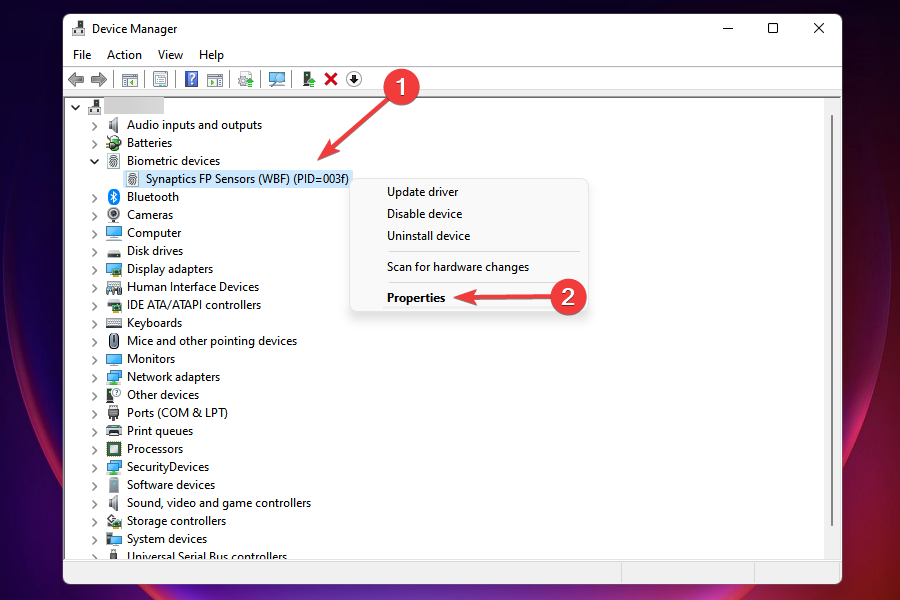
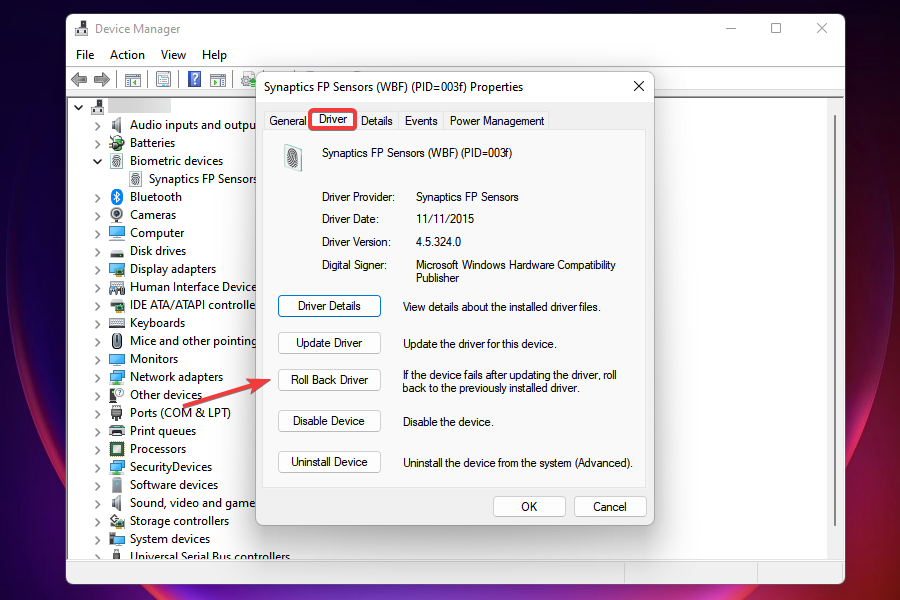
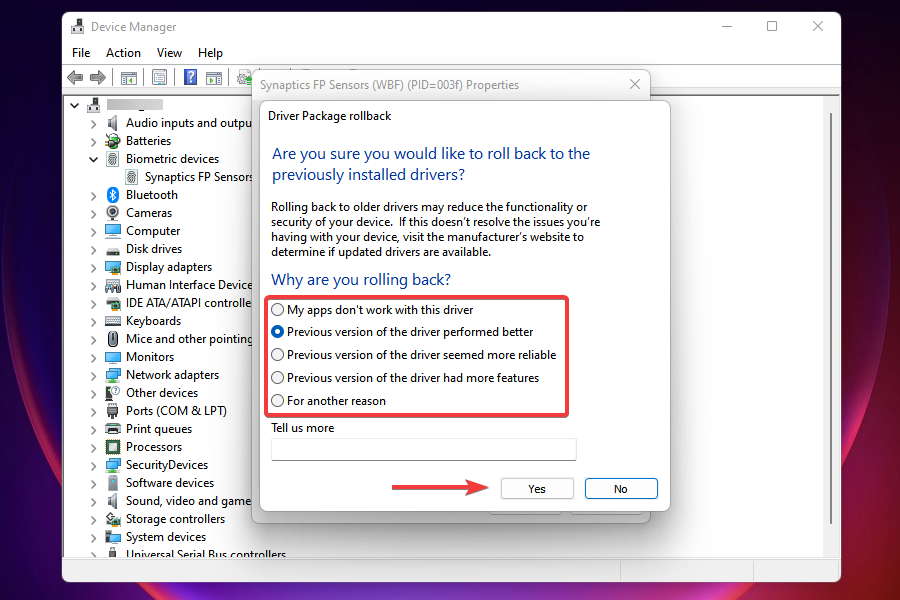
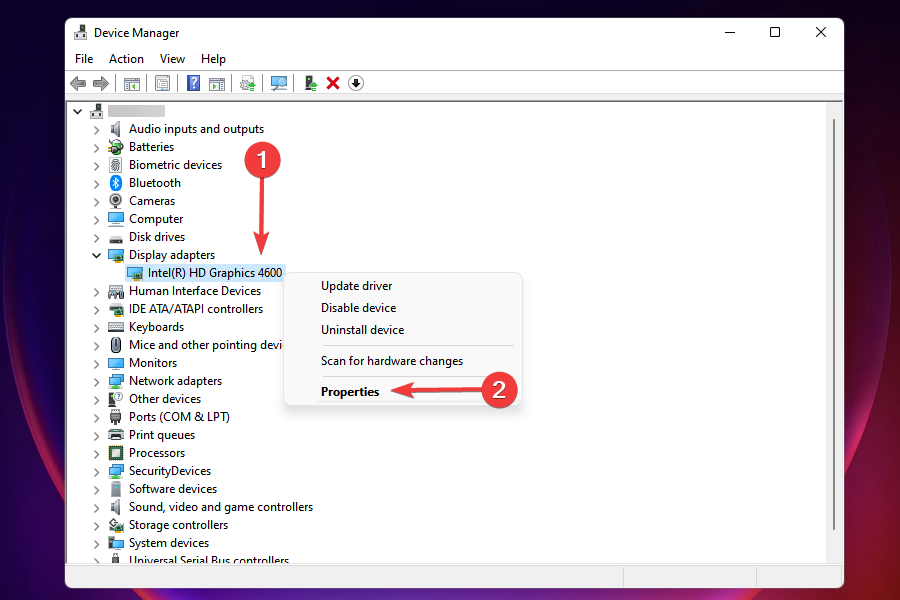
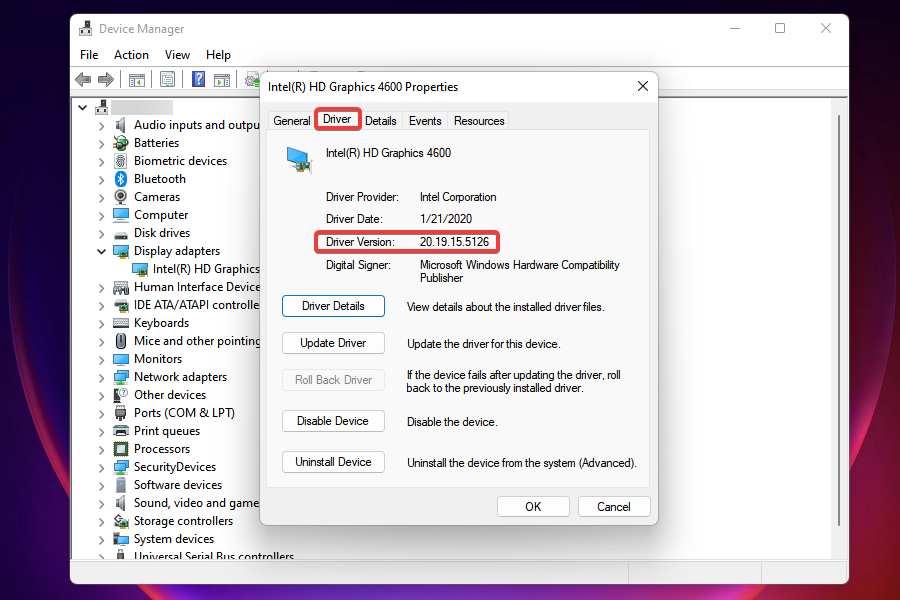
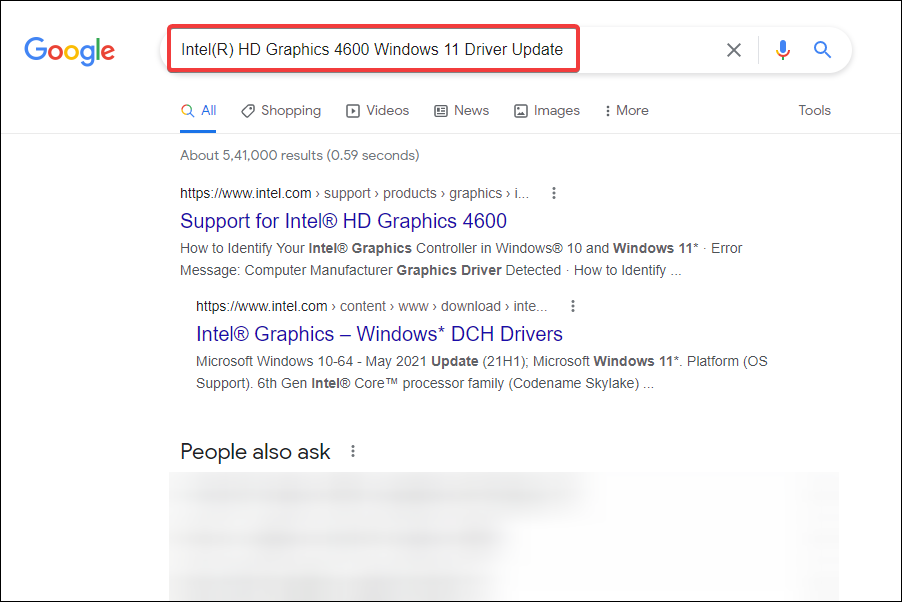
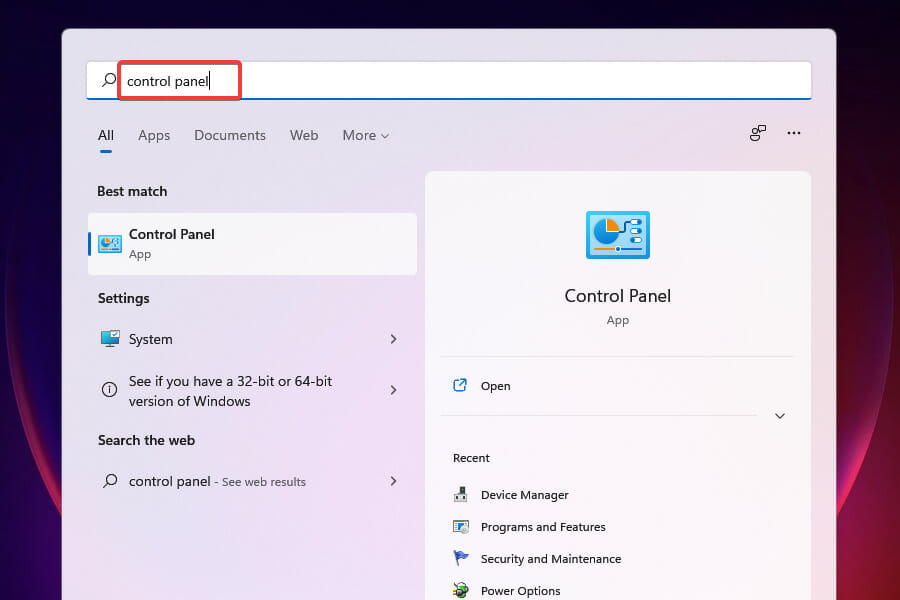
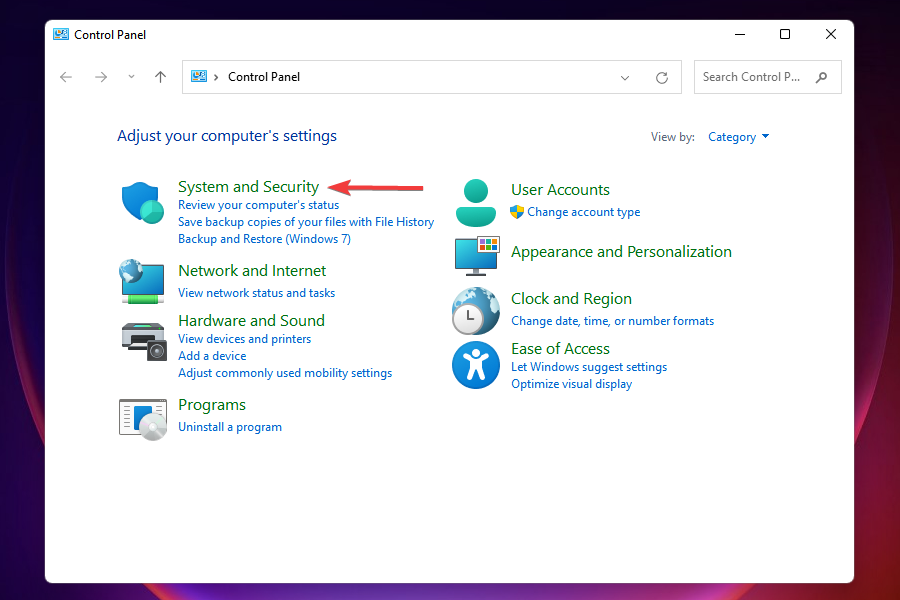
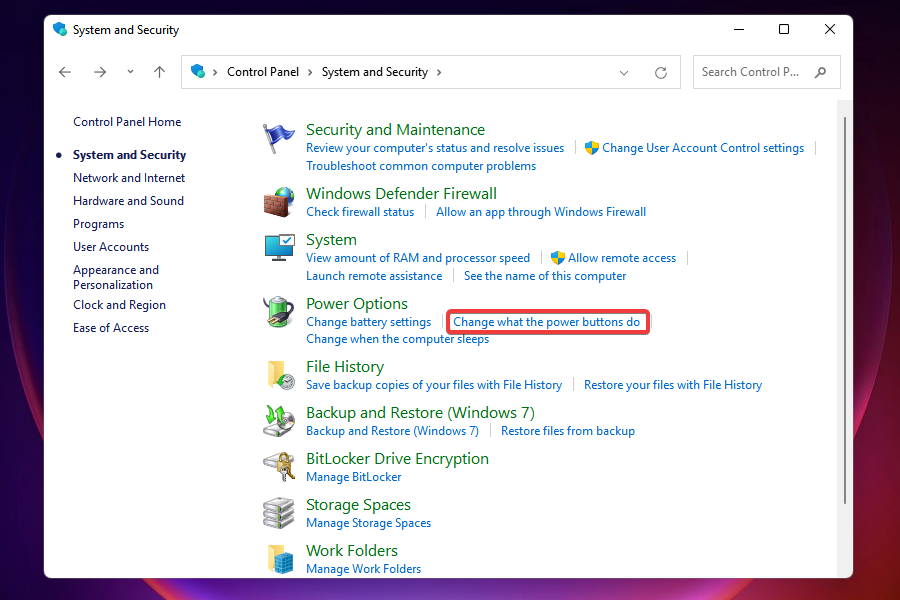
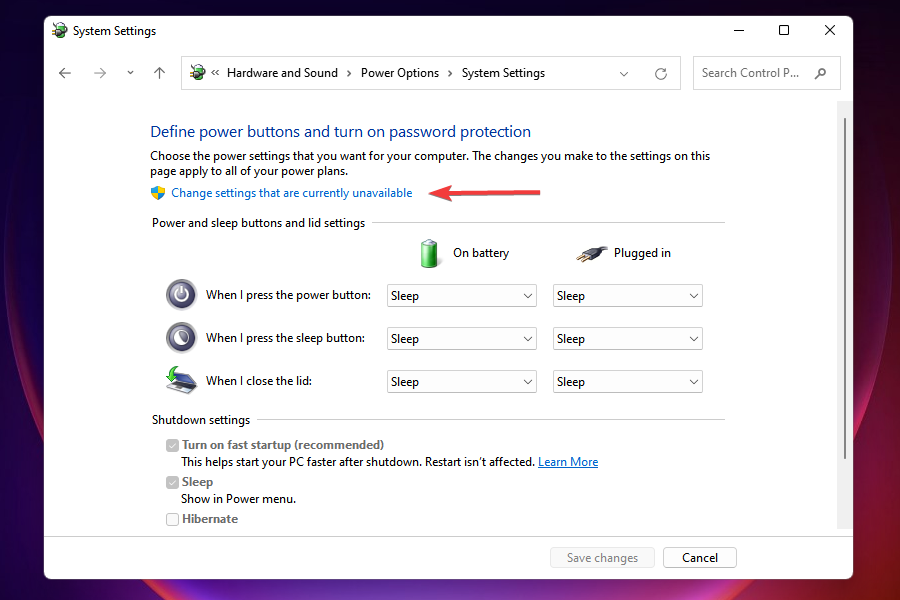
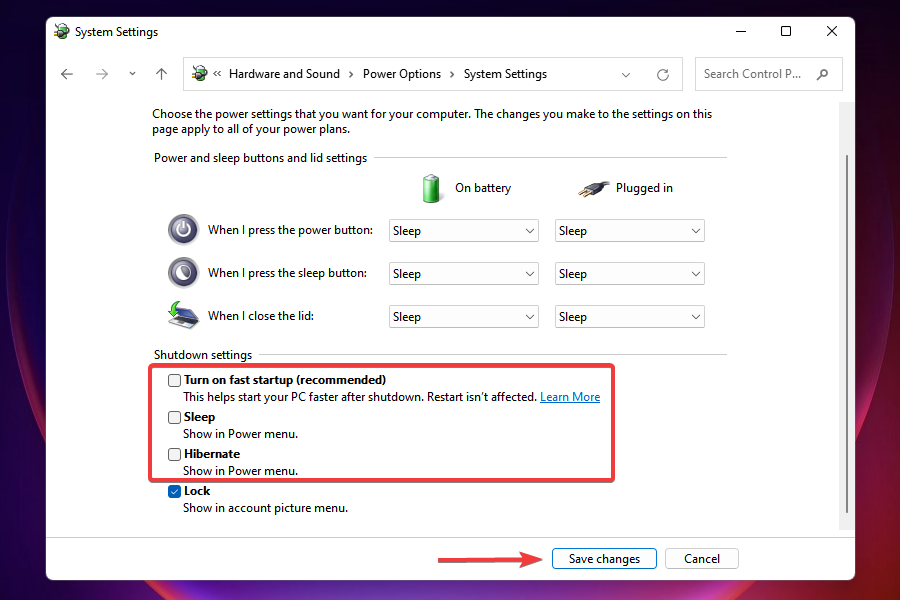
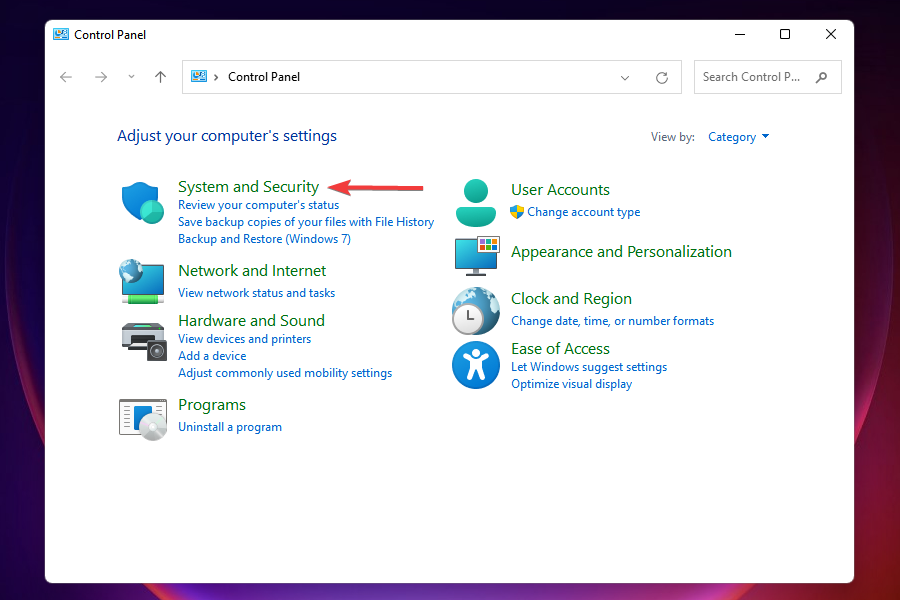
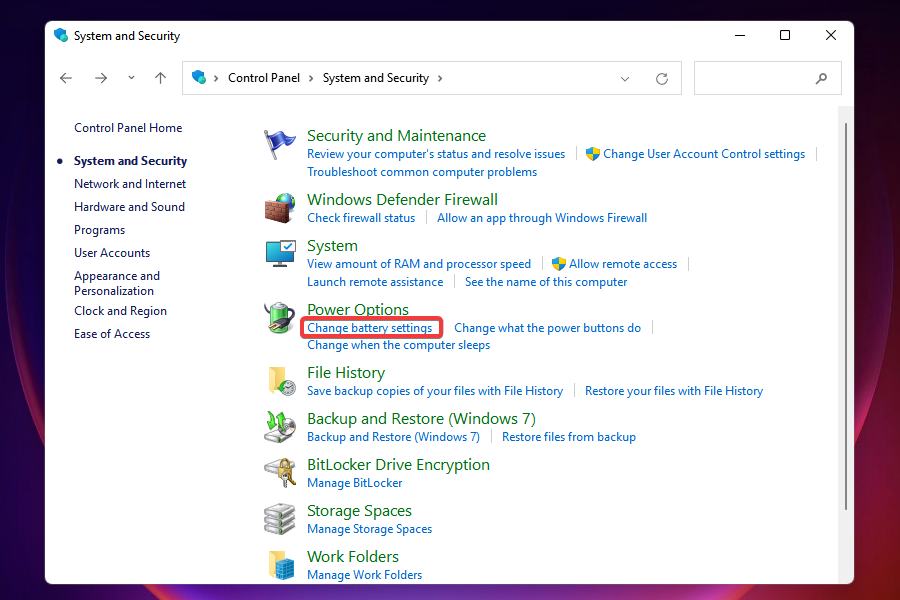

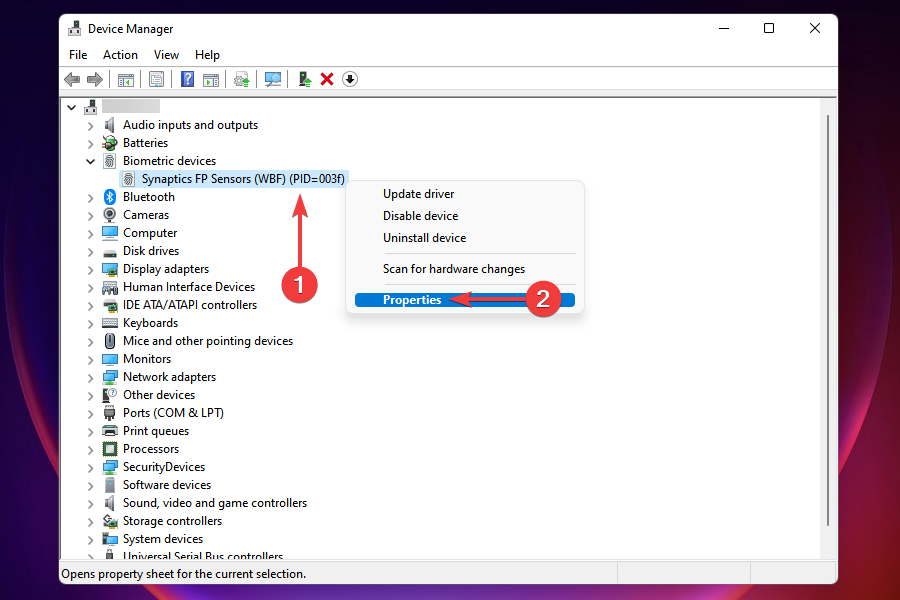
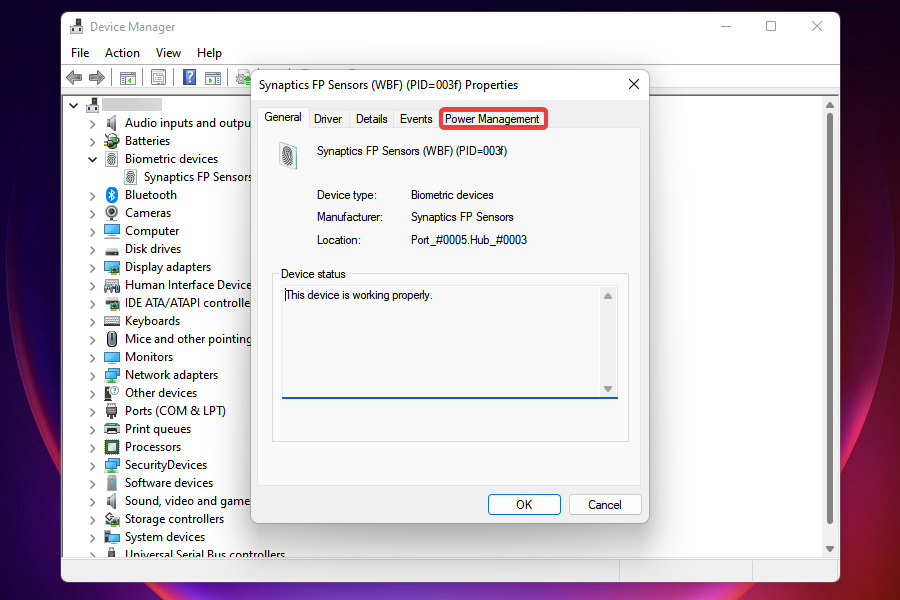
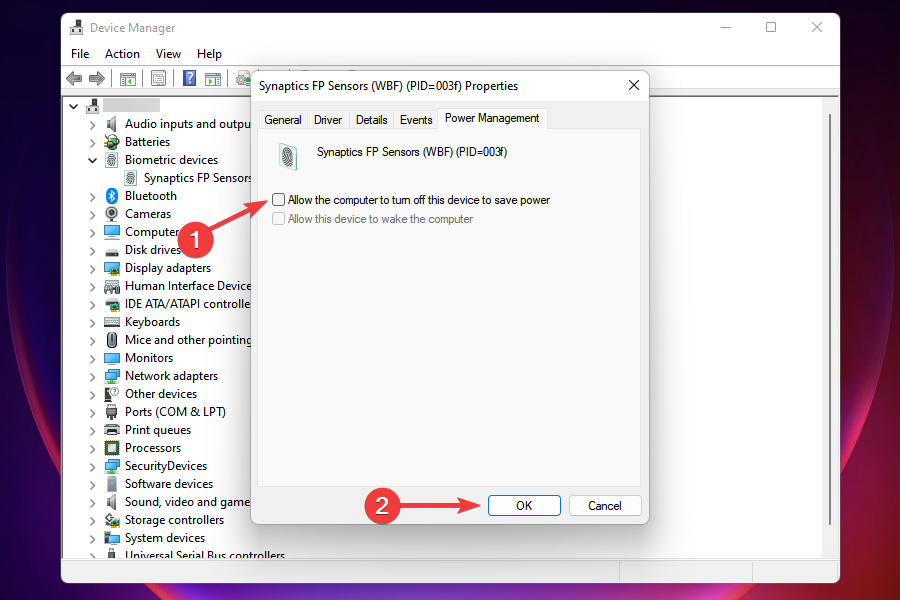
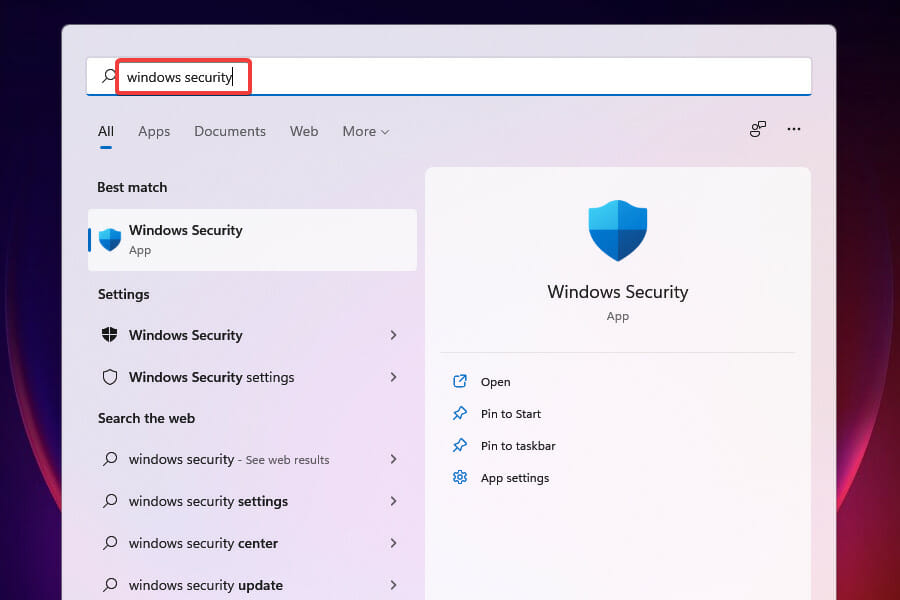
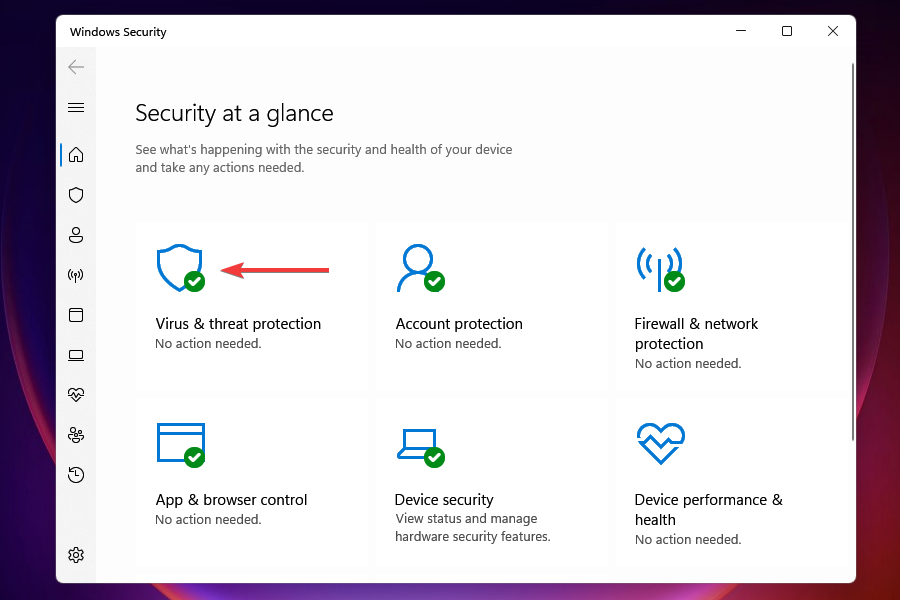
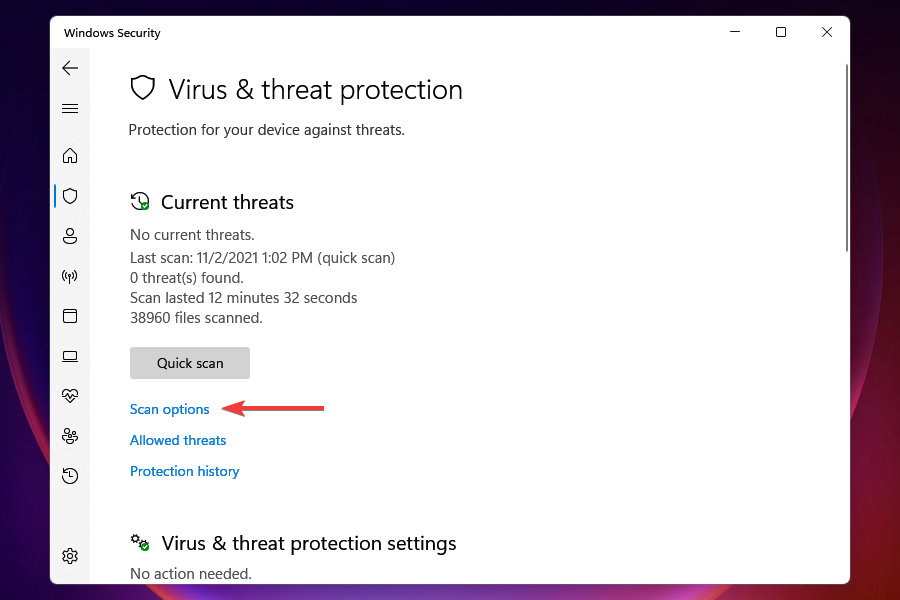
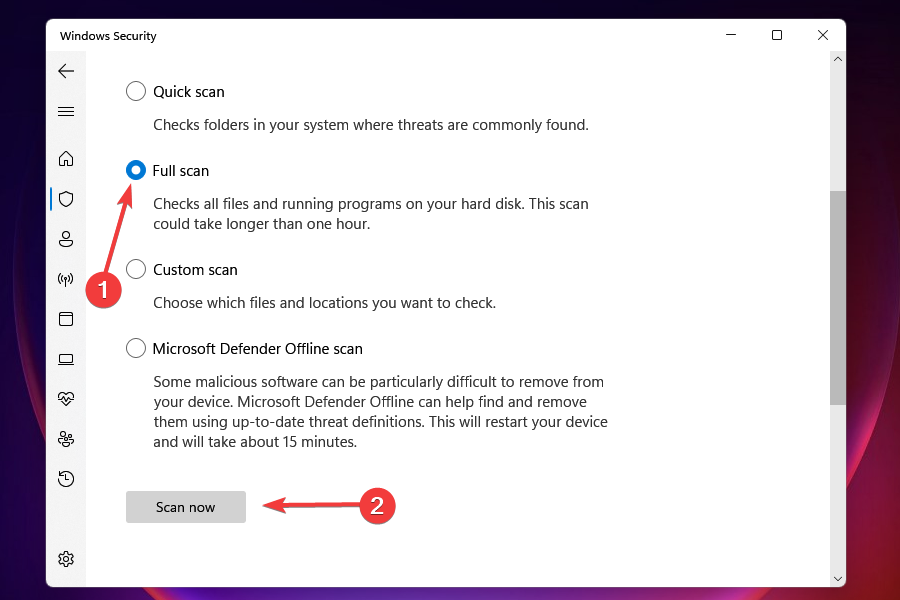





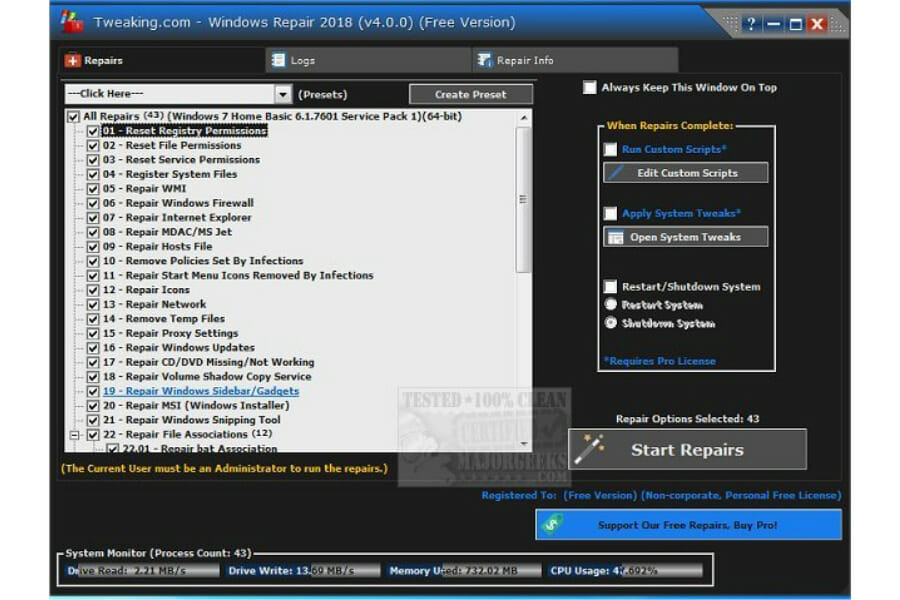




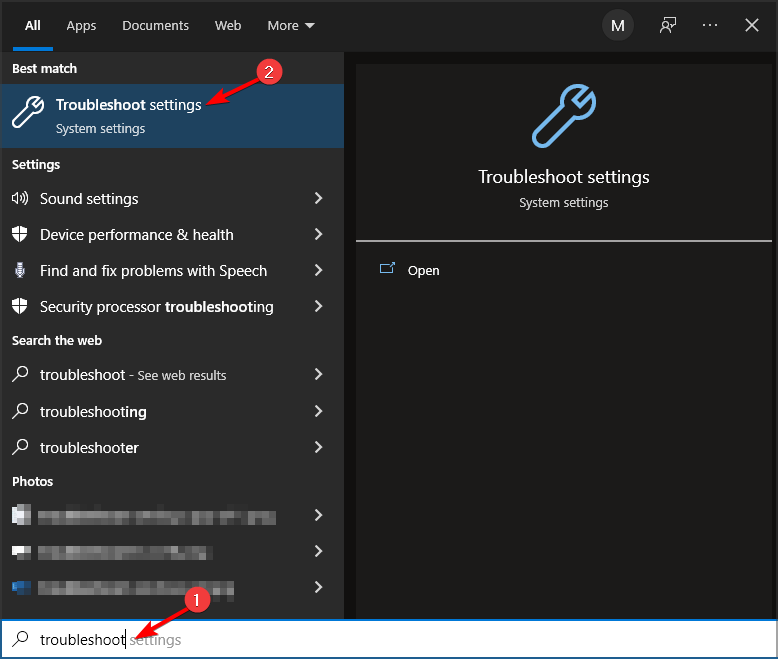





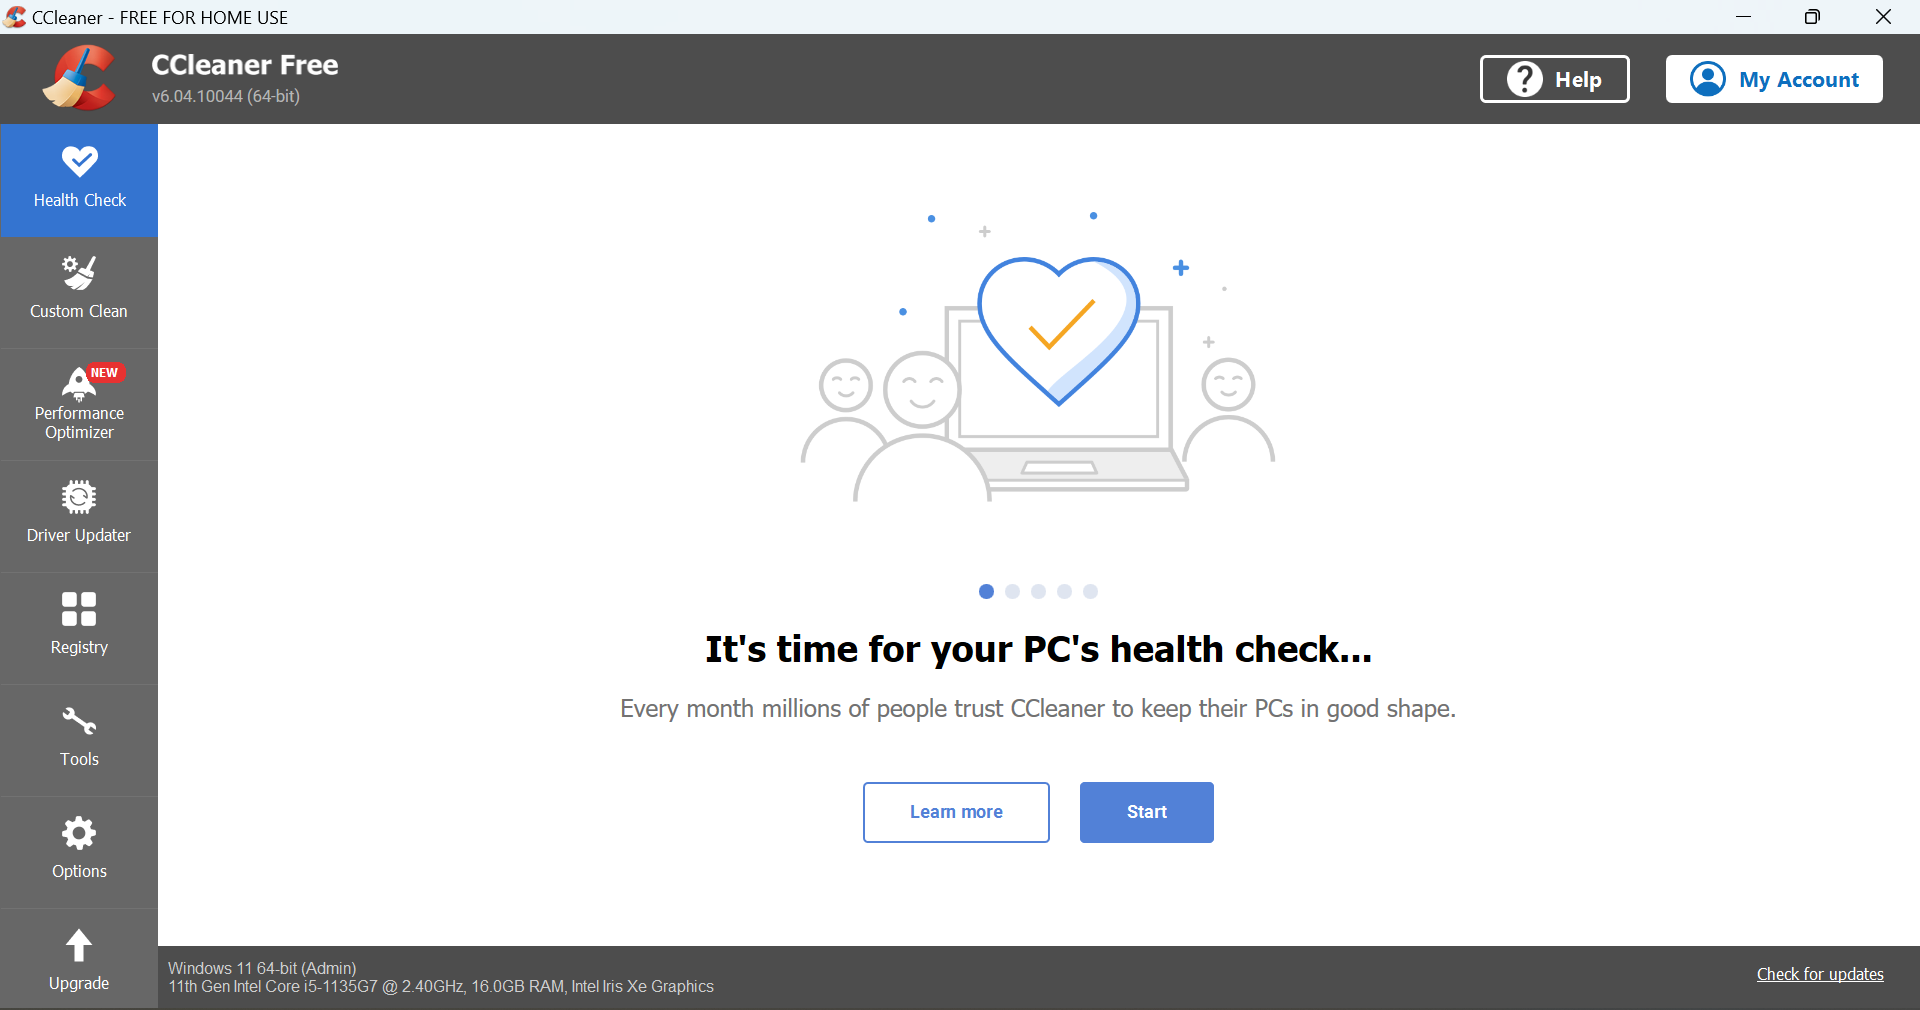









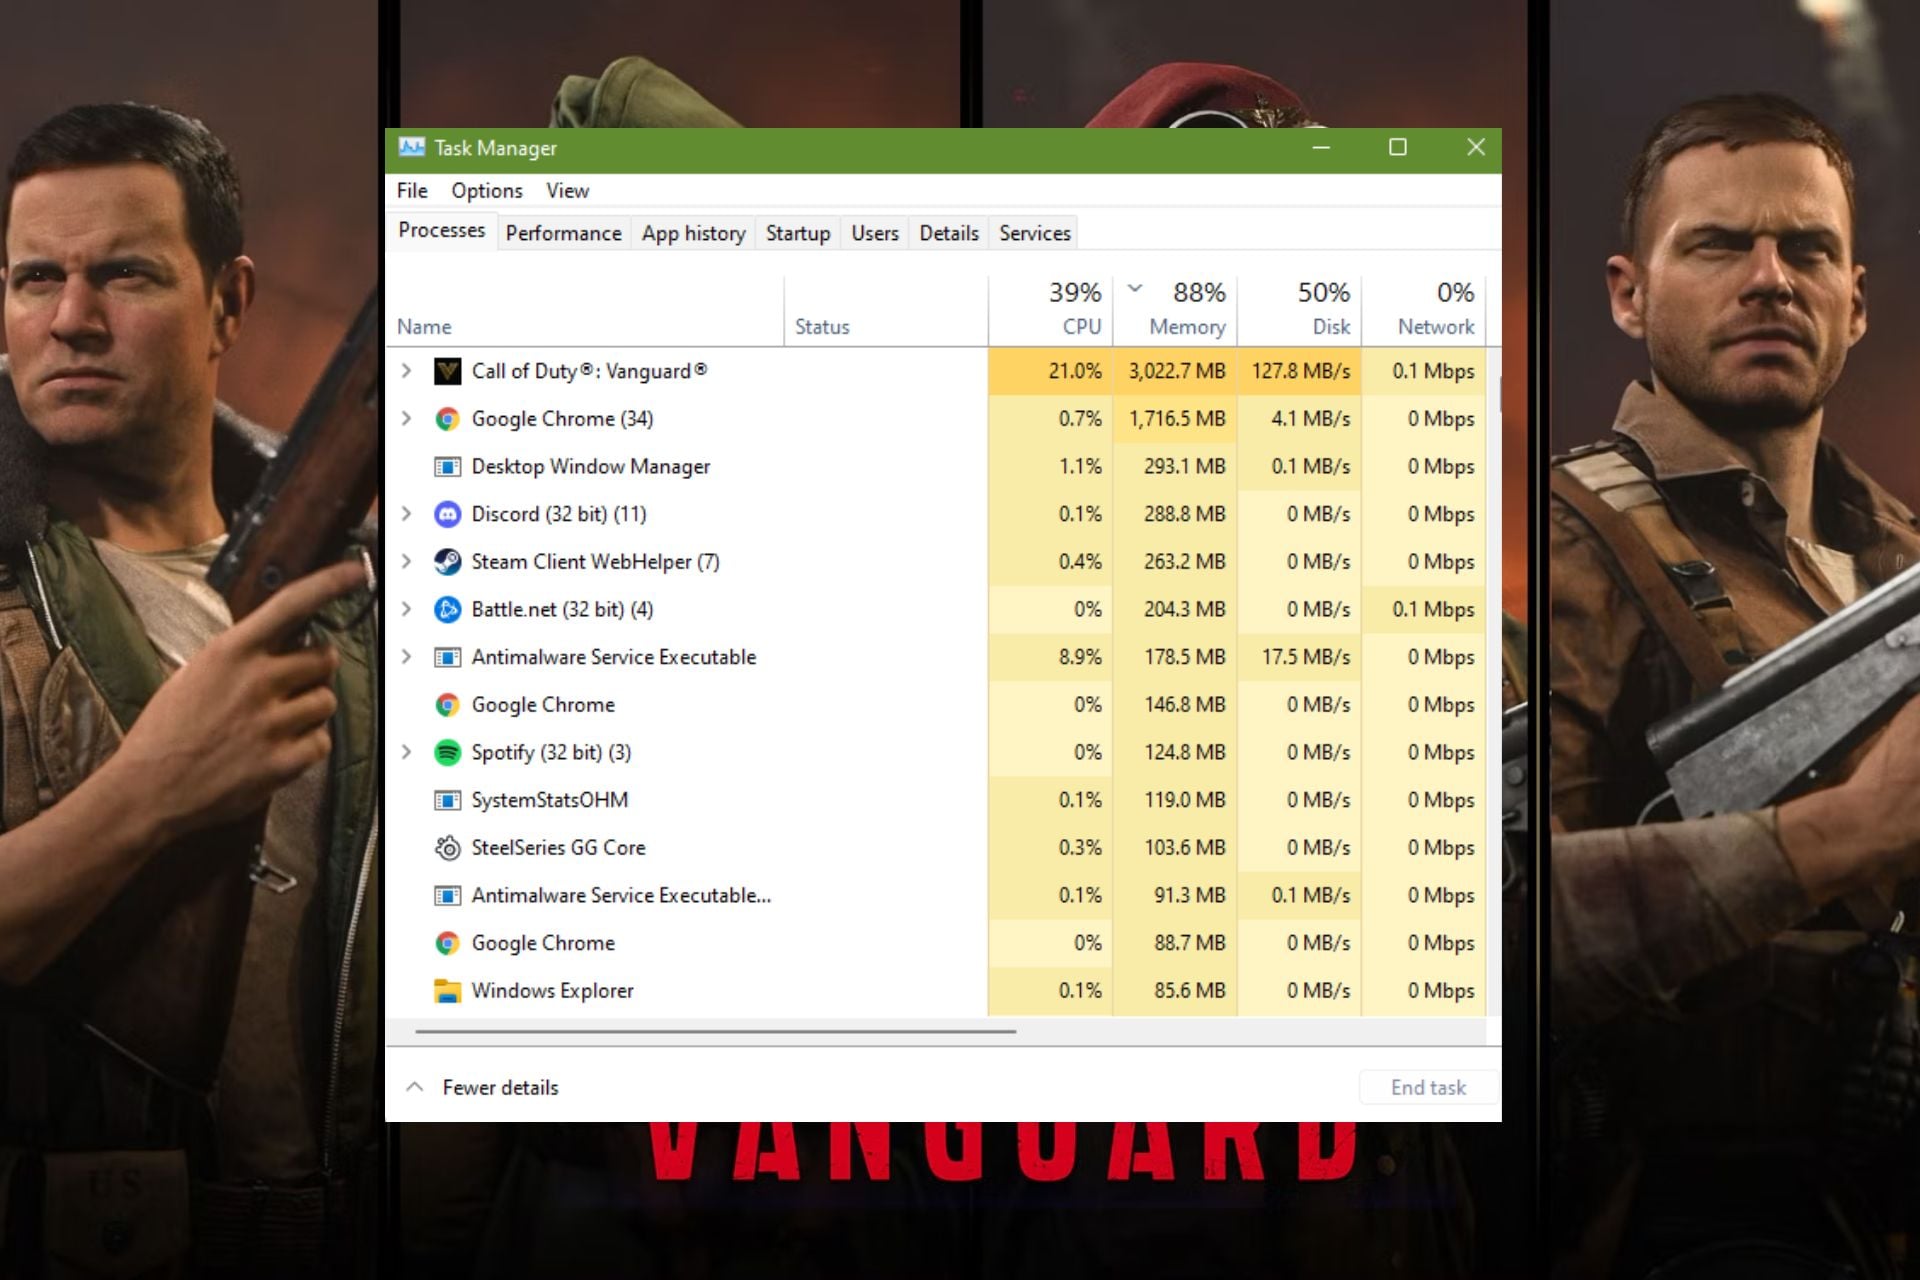





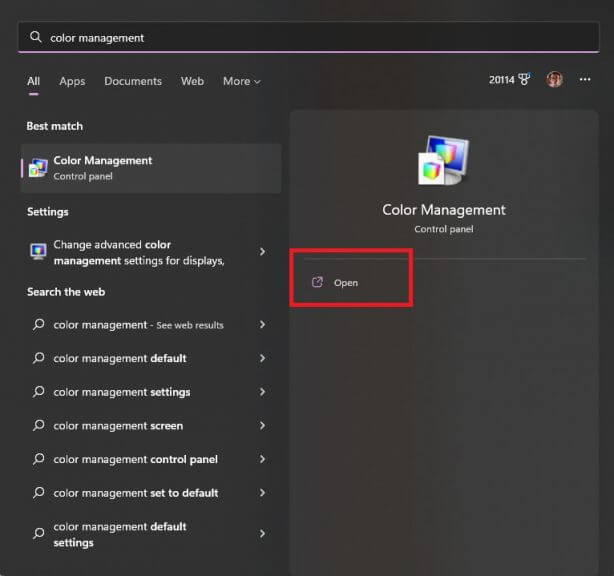

 4. Close Color Management by selecting Close (located underneath the Remove button) when you are finished.