Don’t install KB5022913 if you want to avoid startup issues

Windows 11 Moment 2 (KB5022913 update) is here, but some users have reported that it’s been plagued by problems upon starting up.

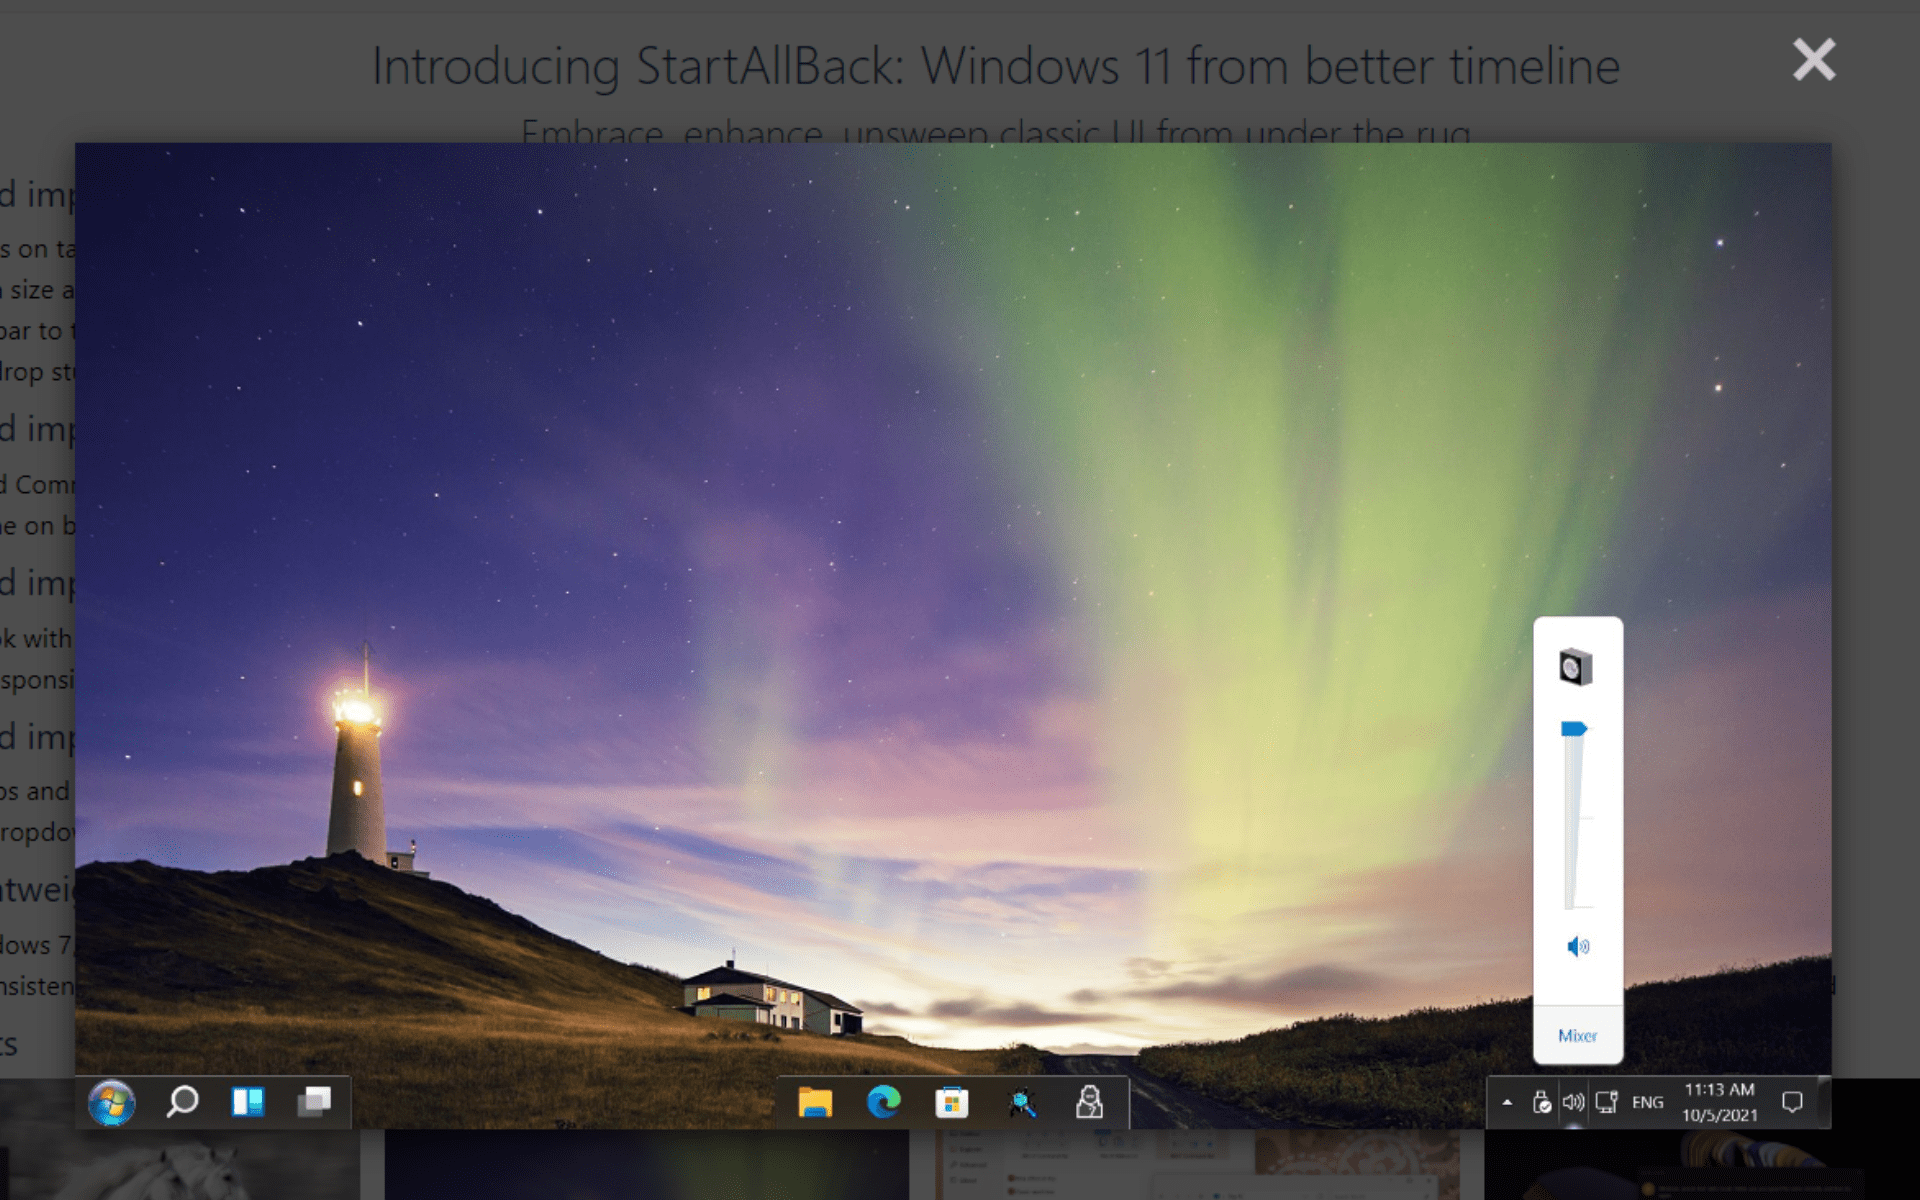
Long story short, the update blocks explorer.exe to run, resulting in some devices with third-party UI customizations, like ExplorerPatcher and StartAllBack, not booting up. Microsoft has acknowledged the problem and posted a dire warning on Windows 11 22H2 health issues page. 

“These types of apps often use unsupported methods to achieve their customization and as a result can have unintended results on your Windows device. We are presently investigating and will provide more information when it is available. If you are using any third-party UI customization app and encounter any issues, you will need to contact customer support for the developer of the app you are using.”

However, Redmond officials have just recently addressed on the Windows release health page that this issue has been externally addressed, as both ExplorerPatcher and StartAllBack have released a version that lists this issue as resolved. 

But, if you still encounter this issue after installing KB5023774, here are a few workarounds you may be able to try.

So, how do we fix it, if there’s anything to be done?

Can I fix startup issues in KB5022913?

Well, there are a few workarounds you can do.

Logically, since this affects devices with third-party UI customization apps, you can uninstall them before installing the KB5022913 update.

Or, better yet, if you’re a StartAllBack user, update to the latest version (v.3.5.6 or later).

If not, you can also opt not to install the KB5022913 update instead.

What other feature does KB5022913 bring?

[Highlights]

  • New! This update improves the search box experience on the taskbar. As you type in the search box, search results now appear in the search flyout box. You can also change the search experience you want for your taskbar by going to Settings > Personalization > Taskbar. For commercial customers, this update adds a new policy for IT administrators to manage how the search box on the taskbar appears in your organization. For more information, see Customizing search on the Windows 11 taskbar.
  • New! You can now access Windows Studio effects directly from quick settings on the taskbar for devices that have a supported neural processing unit (NPU). This makes it quick and easy to turn on and configure camera effects. These effects include Background blur, Eye contact, Automatic framing, and Audio effects (Voice focus). You can still access these effects in the Settings pages.
  • New! This update makes it easier to get help if you are having PC issues. You can now find Quick Assist in the Start menu’s All apps list.
  • New! This update introduces a touch-optimized taskbar for 2-in-1 devices that you can use as a tablet. There are two states of this taskbar: collapsed and expanded. To switch between the two states, swipe up and down on the bottom of your screen. When collapsed in tablet mode, the taskbar recedes to give you more screen space and keeps you from accidentally opening the taskbar. When expanded in tablet mode, the taskbar is optimized to be easier to use with touch. Your taskbar will automatically change to this optimized version when you disconnect or fold back the keyboard.This feature only works on devices that can be used as tablets and is on by default. To change that, go to Settings > Personalization > Taskbar > Taskbar behaviors. The setting is called “Optimize taskbar for touch interactions when this device is used as a tablet.” If your company manages Windows updates for your device, this feature will be off by default. Administrators can turn it on using the new commercial control for continuous innovation.
  • New! This update provides enhanced support for braille devices. They will continue working while you switch between Microsoft Narrator and third-party screen readers. Narrator will automatically change braille drivers. For more information, see Chapter 8: Using Narrator with braille.
  • New! This update also adds support for new braille displays and new braille input and output languages in Narrator. Some of the new braille displays include the APH Chameleon, the APH Mantis Q40, the NLS eReader, and many more. For more information, see Chapter 8: Using Narrator with braille.
  • New! Windows now provides energy recommendations. If you use them, they can help to improve the energy efficiency of your PC and reduce your carbon footprint. Go to Settings > System > Power & Battery > Energy Recommendations.
  • New! For devices that are joined to Azure Active Directory (AAD), Windows now provides AI-powered recommended content on your Start menu. On the Start menu, you will find content to help you to prepare for meetings, quickly access files you’re collaborating on, and more.
  • New! This update enhances the system tray. All icons will have a rounded focus and hover treatment in the lower right, including the “Show hidden icons” flyout menu. You can move icons to rearrange them in the “Show hidden icons” flyout menu or move icons to the taskbar.
  • New! This update makes voice access more flexible and supports interaction with more user interface (UI) controls. For example, voice now interacts with controls that contain:
    • Names that have numbers, such as “Click 5”
    • Names without whitespaces between them, such as “click PivotTable” or “click PivotChart”
    • Names that have special characters, such as Bluetooth & devices (“click Bluetooth and devices”) or Dial – up (“click dial hyphen up”)
  • New! Voice now supports spin controls, thumb controls, and split buttons. You interact with these controls by using the “click” command or number overlays. This update also addresses issues that affect snapping commands that snap a window left or right. Commands that move the cursor in a text box now run instantly.
  • New! This update also provides voice scrolling enhancements. You can use voice to scroll to the extreme left and right on a page. You can also use continuous scrolling to the left or right like what is already present for vertical scrolling. For more information about the new voice access commands, see Voice access command list.
  • New! This update makes enhancements to Task Manager. These include:
    • Filtering—You can now filter processes using the binary name, PID, or publisher name. The filter also applies when you switch between pages. The keyboard shortcut is ALT+F.
    • More theme options—You can now choose a theme for Task Manager that is different from the Windows theme. Also, all dialogs, except for Run new task and the Properties dialog, now support themes. The dialogs will use app-specific themes or the Windows theme.
    • Efficiency mode—You can now opt out of confirmation dialogs when you turn on Efficiency mode.
  • This update addresses an issue that affects the Color filters setting. When you select Inverted, the system sets it to Grayscale instead.
  • This update addresses an issue that affects IE mode. The text on the status bar is not always visible.
  • This update addresses an issue that displays a blue screen during video playback. This occurs after you set high dynamic range (HDR) on your display.
  • This update addresses an issue that might affect the touch keyboard and the PIN entry keyboard. You might not be able to use them to enter text when you sign in to your device.
  • This update addresses an issue that affects which folders appear in the Browse for Folder picker.
  • This update addresses an issue that affects File Explorer. When you use Shift+Tab or Shift+F6, the input focus does not move.
  • This update addresses an issue that affects the user interface (UI). The volume up and volume down commands from a Bluetooth keyboard do not display.
  • This update addresses an issue that affects Xbox subscribers. If you buy an Xbox subscription using the “Redeem code” option, the Xbox subscription card does not appear on the Settings Accounts page. This issue occurs when recurring billing is off.

[Improvements]

This non-security update includes quality improvements. When you install this KB:

  • New!  This update adds the new Tamil Anjal keyboard for the Tamil language. To add it, make sure Tamil (Singapore), Tamil (Malaysia), Tamil (Sri Lanka), or Tamil (India) appears in Settings > Time & Language > Language & Region. Select the ellipses (…) next to the language. Select Language Options. Add Tamil Anjal (QWERTY) to the list of keyboards.
  • This update improves the reliability of Windows after you install an update.
  • This update affects the United Mexican States. This update supports the government’s daylight saving time change order for 2023.
  • This update addresses a date information issue. It affects the format of dates sent between Windows and some versions of the Heimdal Kerberos library.
  • This update addresses compatibility issues that affect some printers. These printers use Windows Graphical Device Interface (GDI) printer drivers. These drivers do not completely adhere to GDI specifications.
  • This update addresses an issue that affects the software keyboard. It does not appear in the Out-of-Box Experience (OOBE) after a Push-button reset (factory reset). This type of reset requires an external keyboard to be attached to provide credentials.
  • This update addresses an issue that affects AppV. It stops file names from having the correct letter case (uppercase or lowercase).
  • This update addresses an issue that affects Microsoft Edge. The issue removes conflicting policies for Microsoft Edge. This occurs when you set the MDMWinsOverGPFlag in a Microsoft Intune tenant and Intune detects a policy conflict.
  • This update addresses an issue that affects provisioning packages. They fail to apply in certain circumstances when elevation is required.
  • This update addresses an issue that affects Azure Active Directory (Azure AD). Using a provisioning package for bulk provisioning fails.
  • This update addresses an issue that affects Universal Print’s Configuration Service Provider (CSP). A command prompt window appears when you install a printer.
  • This update addresses a reliability issue that occurs when you use Task View.
  • This update addresses an issue that might affect lsass.exe. It might stop responding. This occurs when it sends a Lightweight Directory Access Protocol (LDAP) query to a domain controller that has a very large LDAP filter.
  • This update addresses an issue that affects the Local Security Authority Subsystem Service (LSASS). LSASS might stop responding. This occurs after you run Sysprep on a domain-joined machine.
  • This update addresses an issue that affects copying from a network to a local drive. Copying is slower than expected for some users.
  • This update addresses an issue that affects parity virtual disks. Using Server Manager to create them fails.

If you installed earlier updates, only the new updates contained in this package will be downloaded and installed on your device.

Have you downloaded this update and experienced the same hassle? Let us know in the comment!

Windows 11 Problems: Common Bugs & How to Fix Them

Microsoft has done a great job in introducing some great new features in Windows 11 that weren’t available in previous versions of its operating system. However, this doesn’t exclude it from the usual bugs Windows PCs commonly face.

These problems are frustrating for users and can make their computers slow, unresponsive, or unstable. Some are easily fixable, and some need a little patience. Find out some of the biggest irks in Windows 11 below.

Are there any problems with Windows 11?

Windows 11 is no longer a new operating system. We’re close to hitting the two-year mark since its release, and so far, it has been a rollercoaster of good and bad. 

Even though Microsoft has made significant improvements to its OS over the years, there’s still no escaping that its products are complex and difficult to build. As a result, some bugs will inevitably slip through the cracks. 

Since it has been out for a while now, Microsoft has had ample time to iron out the kinks and bugs in the system. However, there are still some issues that users run into daily.

Being the latest iteration from Microsoft, it will obviously be ranked as one of the best OSes yet. Still, Windows 11 is not a perfect product. Like any new software release, it has its fair share of problems and bugs. 

This should, however, not be cause for alarm as its predecessors have faced similar issues with hardware, performance, and security, among others.

Luckily, most of the early bugs are usually ironed out as Windows 11 updates roll out on a regular basis. However, if these updates don’t address your issues and you’re still experiencing one or two issues, here are some common issues and how to fix them.

What are the biggest issues with Windows 11?

1. Restarting issues

Some users have reported that their PCs keep rebooting after installing Windows 11. This can happen if your PC doesn’t have enough RAM or doesn’t have the right drivers for your hardware. 

Some of these issues can be fixed by uninstalling or reinstalling a particular program or app. But if your problem isn’t solved by doing this, you may have to turn to Microsoft for help.

In other cases, the PC won’t restart at all. An easy fix would be to restart in Safe Mode and load only essential services and drivers. This will allow you to isolate the issue. If it doesn’t work, you may have to reset your PC.

2. Wi-Fi connectivity issues

Some users have complained about the Wi-Fi connection dropping randomly or failing to connect automatically. The problem occurs when you connect to a new Wi-Fi network, but there is no internet connectivity after that. 

fix no internet there is something wrong with the proxy error

This issue can be resolved by rebooting your PC with an Ethernet cable plugged in. You should also ensure that your router is working properly without issues like firmware updates or firewall settings causing this issue. 

3. Blue Screen of Death (BSOD)

The Blue Screen of Death is a common Windows 11 problem that can be caused by any number of issues. The BSOD is a very serious error. It means that your computer has stopped working properly and may need repair.

fix PINBALL_FILE_SYSTEM BSOD error

This occurs when a driver stops responding or an application crashes, causing Windows to stop working until you restart your computer. You can usually solve this problem by updating drivers or reinstalling software that may be causing the problem.

Other common BSoD errors include:

BSoD errorMeaning
0x0000004EThis error is normally caused by a corrupt Windows update
Wdfilter.sysThis is a BSoD error caused when there is a problem with the Windows Defender Mini-Filter Driver
0xc0000001This implies there’s a problem with your boot sector
0x00000154This is usually related to an outdated or corrupt driver

4. Apps not working correctly

One of the most common issues reported by early adopters of Windows 11 was that apps weren’t working correctly in the new OS. 

Some users have reported issues with apps like Microsoft Edge not working correctly. In other cases, Windows 11 apps were not opening or became unresponsive after a few seconds.

If an app isn’t working correctly after you update to Windows 11, it could be because of old software or hardware drivers. You can update the drivers or reinstall the app.

5. Slow boot time

You may notice that your computer takes longer than usual to boot up after installing Windows 11. This is because Microsoft has integrated more features into the operating system, and it needs more time to load them all.

In addition, Windows 11 has a faster boot time than previous versions of Windows, thanks to a feature called Fast Startup. However, if you’re using a traditional hard drive, it could take longer for your computer to boot up than on previous Windows versions.

This problem usually occurs when there is a lot of junk data in your computer’s hard drive or RAM. The solution is to turn off superfluous processes and features. 

6. Windows Update issues

Windows Update is one of the most useful features in Windows 11, as it keeps your computer updated with all the latest security patches and software updates. 

However, there are times when Windows Update fails to work properly, leaving you stuck with an outdated version of Windows that is now exposed to vulnerabilities. This could be because your hardware and software are incompatible.

Windows Update Error 0x80242017 5 Ways to Fix It

Some Windows update errors are minor annoyances that can be easily taken care of by running the Windows update troubleshooter, while others are show-stopping bugs that make your PC unusable.

It is a known fact that some users have upgraded to Windows 11 despite their devices not meeting the minimum system requirements. While this may work, you may miss some updates or errors because of compatibility issues.

If your computer is having trouble installing updates, we’ve probably covered the update error, so be sure to check that out.

A few common Windows update errors include:

ErrorMeaning
0x80242017The computer is missing some critical system files
0xc1900223Occurs because of corrupt Windows update components
0x80242ffThis can happen due to misconfiguration of software settings
0x800f0986Prevents you from installing the latest Windows updates
0x80080008The update fails and gets stuck because of incomplete update files

7. Bluetooth problems

Bluetooth is one of the most important features in any device today, and it’s an essential part of Windows 11. 

Windows 11 has some new Bluetooth capabilities, including the ability to send files from your PC to another device, but it also has some issues. 

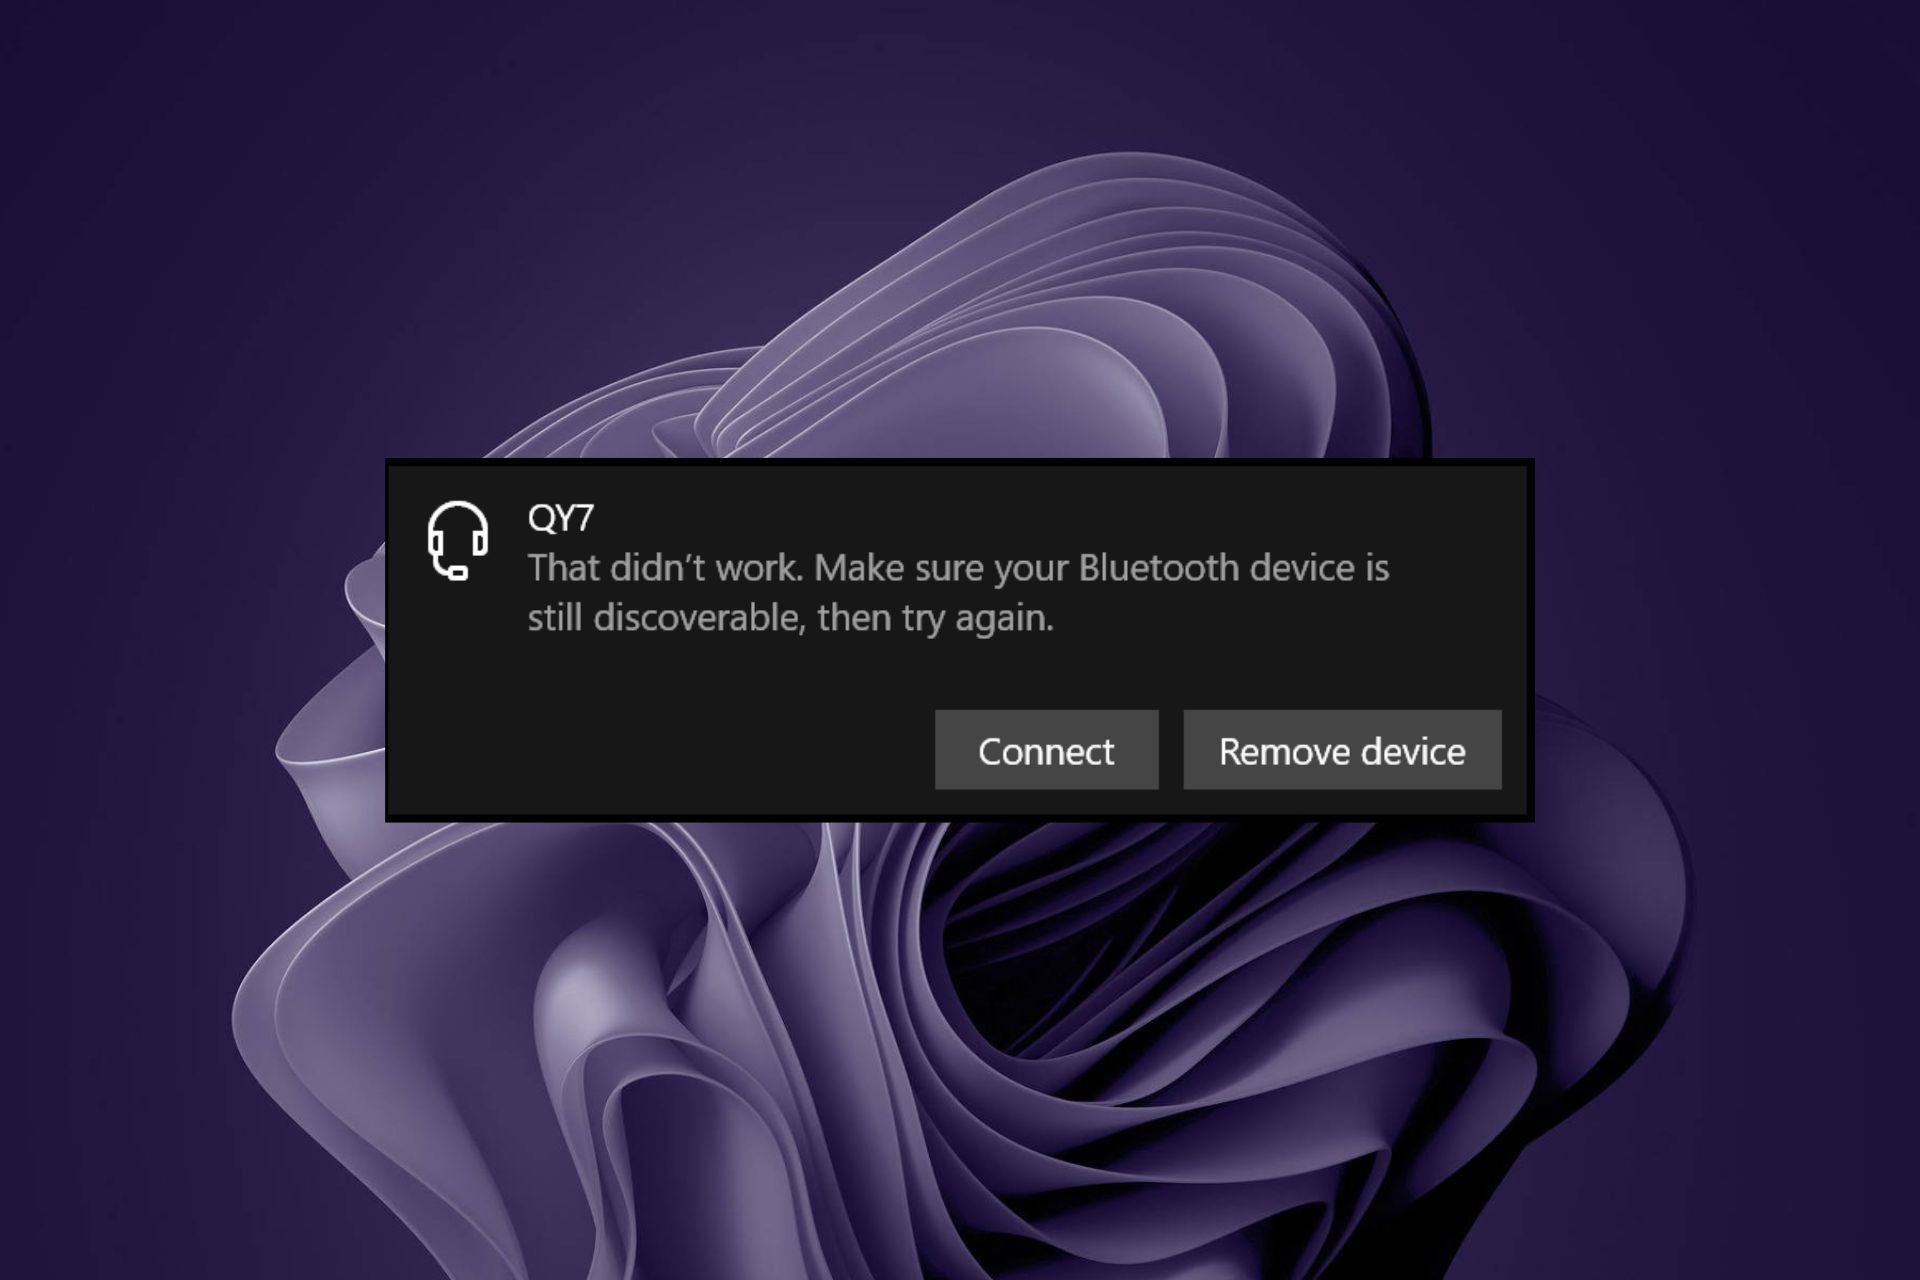
Some people have reported that their Bluetooth connection is not working, others say it is slow or lagging, while others say it won’t connect at all. 

Bluetooth problems can be caused by several things. For example, if you have a new computer with an old Bluetooth adapter, it might not work as well as it should. 

Most of these Bluetooth issues can be fixed by checking your Bluetooth adapter’s compatibility and updating your Bluetooth drivers.

Common Windows 11 Bluetooth issues include:

Bluetooth errorMeaning
Bluetooth not finding devices This is when your Bluetooth feature is on but cannot find available devices
Bluetooth speakers paired but not connectedThis occurs when your Bluetooth speaker is not recognized as an audio device
Bluetooth unknown deviceThis issue can occur when an unrecognized device shows up in the list of your Bluetooth devices
Can’t remove a Bluetooth deviceThis is when you try removing a Bluetooth device, but all attempts fail

8. Overheating

Many people have reported overheating issues with their computers after upgrading to Windows 11. 

This problem can affect any version of Windows, but it seems people are having more problems with this issue after upgrading to Windows 11 than before. 

If your computer appears to be overheating while running Windows 11, try updating it with the latest drivers for your motherboard and graphics card. Also, if your CPU fan is not spinning, ensure it works properly. 

A cooling pad or fan is the best way to tackle this problem. You can also check your computer’s temperature to see if it is too high and needs cooling.

9. Slow performance

If your computer feels sluggish or slow, it can be frustrating. Although any version of Windows can experience this issue, with Windows 11, it’s more of a slap in the face, given all the improvements.

The main reason behind the slow performance is usually an outdated operating system, hardware issues, or other factors such as malware or viruses slowing down your computer’s performance.

You can always use some tricks to boost your Windows 11 speed and performance, but if your hardware is failing, you’ll need more than a few tweaks to get out of this fix.

10. Freezing/Crashing issues 

Some users have reported that their computers are freezing or crashing when they try to use certain apps or websites.  If your device freezes or crashes regularly while using Windows 11, there may be an issue with your hardware or software configuration. 

This issue may occur when you try to open certain programs or apps on your device. Your device may freeze or crash during the process of opening these apps. 

If this happens, you should check the system requirements of the program you’re trying to open. It’s unlikely that it will work properly on your computer if there are any compatibility issues. 

You may also need to run a memory test and ensure that your RAM is compatible with Windows 11. In most cases, you may have to upgrade your RAM or extend space in your hard drive for your computer to handle Windows 11 without any problems.

11. Software compatibility issues 

One problem with Windows 11 is that some programs won’t work with it yet. You might get an error message that this app can’t run on your PC because it’s incompatible with the new operating system.

It could be because the developer hasn’t updated their software yet or because Windows 11 has changed something fundamental about how apps work with your computer. 

If you’re having trouble installing or running your favorite apps on Windows 11, try installing them from the Microsoft Store. 

Alternatively, try reinstalling them from scratch using the latest release version available from their official websites rather than automatic updates. 

12. Battery life issues

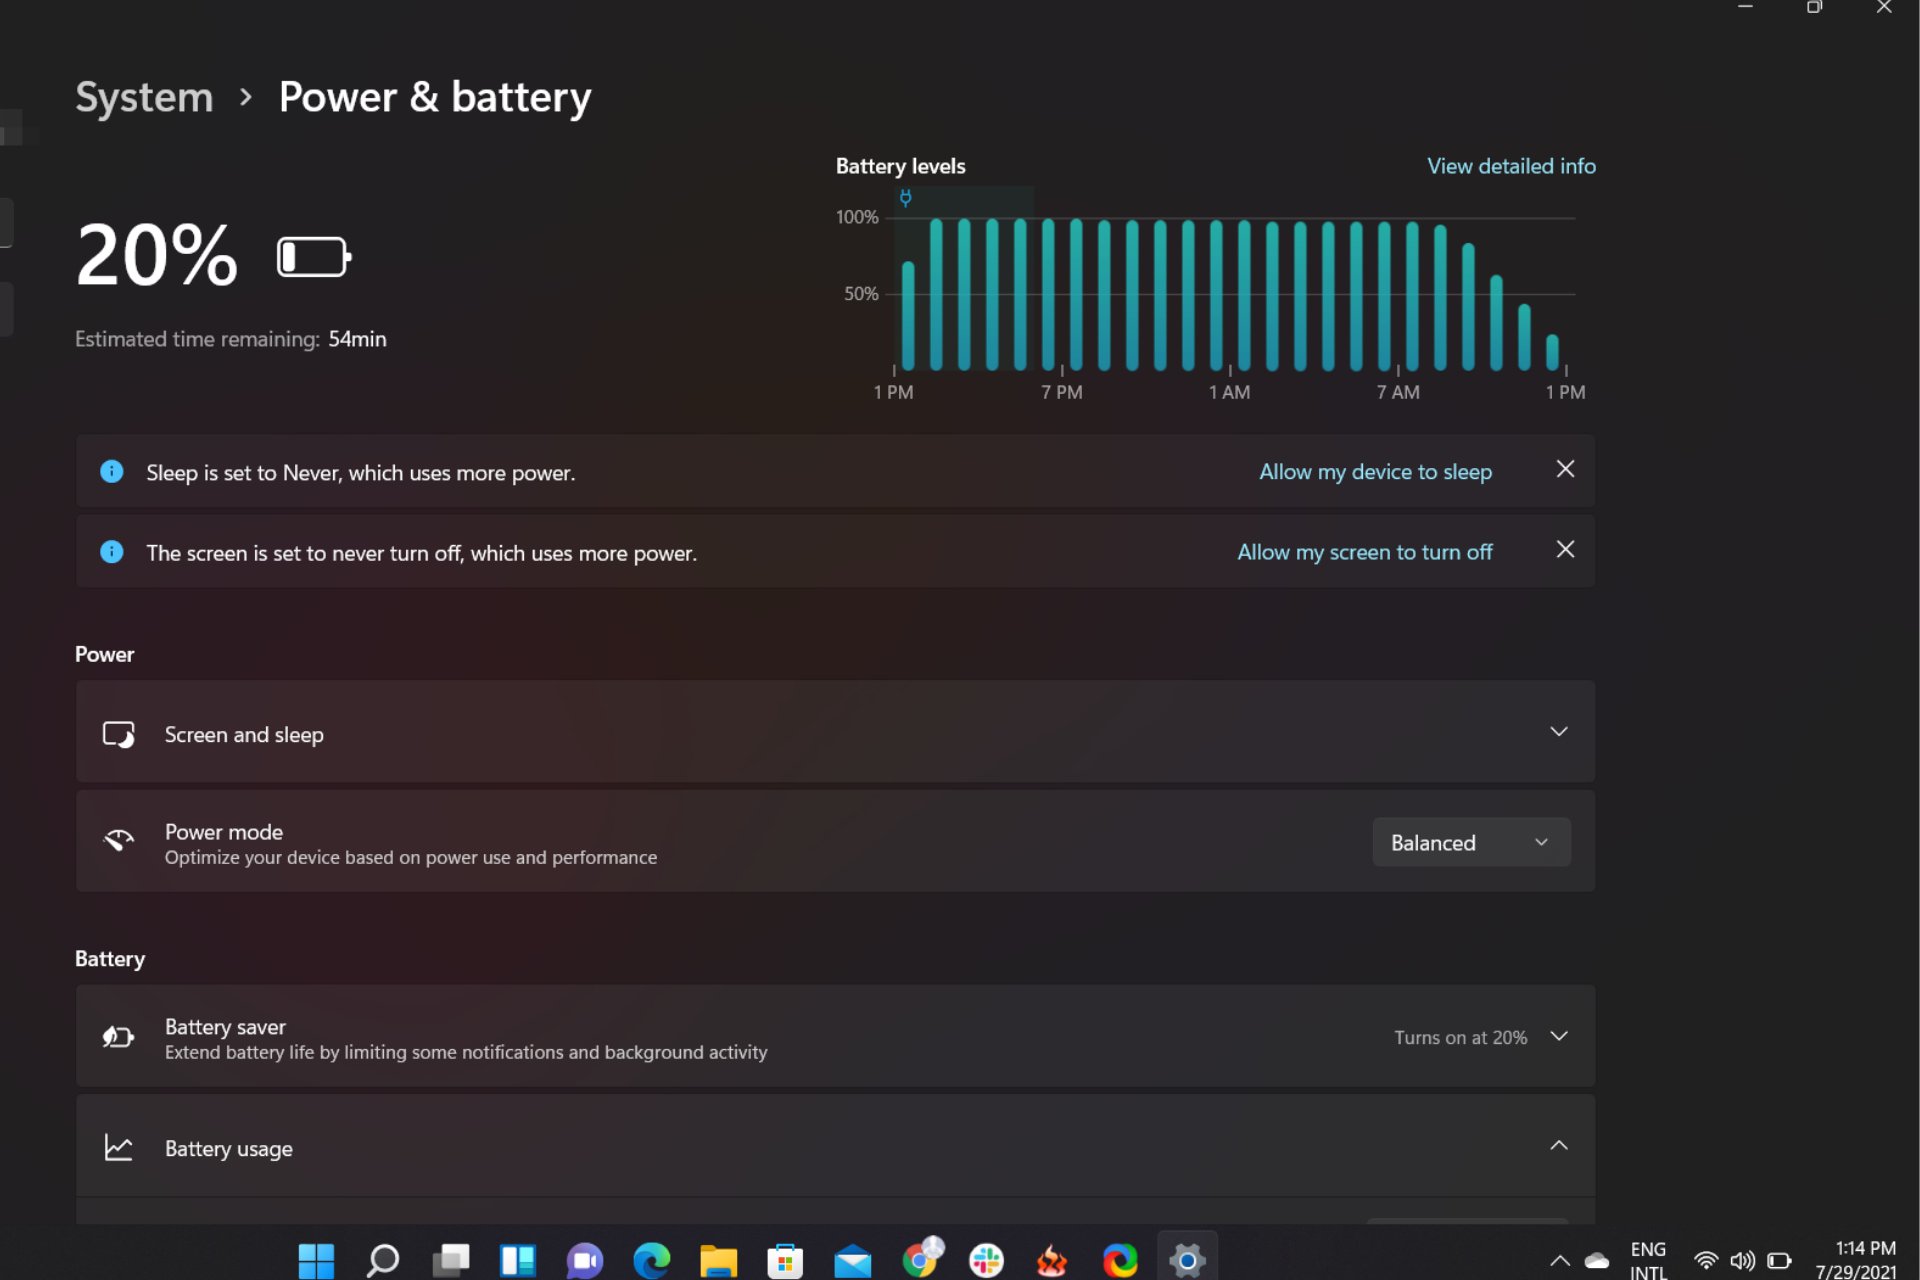
Battery life is one of the biggest complaints about Windows 11, with many users reporting that their devices are draining faster than normal.

windows 11 battery usage

Windows 11 is a very powerful OS with additional features. Of course, the battery consumption will not be similar to its predecessors. However, if your laptop is draining its battery faster than normal, it could be because of a problem with Windows 11.  

Also, if you have an older laptop or PC and aren’t using a new battery or adapter, you could see significantly shorter battery life. It may be worth it to check your battery health just to make sure everything is working optimally. 

13. High CPU usage

One of the most common problems with Windows 11 is high CPU usage. When this happens, it’s usually because an application or process is using too much of your computer’s CPU resources and causing other programs to slow down or freeze. 

This can happen when your PC starts running low on memory or trying to run multiple processes at once. 

If you notice high CPU usage on your PC, try closing out all open programs and see if that helps reduce the load on your machine’s processor.

If this doesn’t fix the issue, there may be another problem at hand, like malware or another software issue, that needs your attention before you can return to normal speeds.

14. Sound problems

A number of users have reported sound problems after upgrading to Windows 11. This includes no sound coming from their speakers or headphones. While this is usually an easy fix, you may need to do some troubleshooting to get your audio back up and running.

If you’re having trouble hearing anything from your computer, it could be due to a handful of different issues. First, check your sound settings to ensure they’re not muted or turned down too low.

You may also need to update your audio drivers, especially if you get a crackling sound. Elsewhere, you can also improve your sound quality in Windows 11 from our recommended tips.

15. Icons disappearing

If you’ve noticed that some of your icons are no longer showing up in the taskbar or on your desktop, it’s not because they’re gone for good. Icons disappearing can be caused by many reasons so it’s hard to pinpoint one reason for this issue. 

It could be an issue with your antivirus or third-party programs installed on your computer that is conflicting with Windows 11, or maybe you have disabled some settings in Windows 11 that were required to display icons properly.

You can easily restore missing Desktop icons by following our expert guide.

16. Windows 11 not shutting down 

What are the odds that shutting down your PC may also be a problem? This one seems like an easy fix at first glance, after all, it just takes some time for the computer to shut down properly. 

Most of the time, it is because there are still programs or processes running in the background preventing the computer from shutting down. First, ensure all applications are closed before attempting to shut down your computer.

If your PC takes five minutes or more to shut down when you press the power button in the Start menu or on your keyboard, it could be due to a problem with how Windows handles powering off Windows 11.

You need to adjust your power settings to get a balance of efficiency and performance. This will hopefully solve your PC not shutting down issue.

17. Log-in problems 

No one expects to be locked out of their devices when they try to log in to Windows. Of course, you can always do away with passwords, but it is not recommended when using a shared computer. 

If you’ve upgraded to Windows 11 and the login screen is not showing, it could be an issue with your user profile. A corrupt user profile can occur due to many reasons, so you should first check if you can sign in as another user.

It could also be due to corrupt or damaged registry keys or files. If you’re having trouble logging in with a local account instead of a Microsoft account, double-check that you’re entering the correct username and password information.

18. Invalid product key errors

Most users have reported an invalid product key error message while trying to download or activate Windows 11. 

product-key Error Code 0xc004e016 on Windows

If you try to activate your copy of Windows 11 using the built-in Activation Troubleshooter, it will tell you that your product key is not working or is invalid. This happens when you try to use an invalid license key from an older version of Windows to activate Windows 11.

Recent and significant hardware changes may also play a huge role, so check out our detailed list of activation errors and learn how to navigate such issues.

19. Windows 11 problems with games

Gaming on Windows 11 can be hit or miss. Some games will run fine, while others will crash or freeze up during play. If you want to make sure you don’t experience this issue, try the following:

  • Ensure that all your drivers are up-to-date – This will ensure that your graphics card and sound cards are working properly and there aren’t any issues with older software versions.
  • Check for updates for the game itself – Many games have their own update systems, so if there are any bugs in the software, this should fix it.
  • Disable antivirus software – Antivirus programs and firewalls can often interfere with how well your game runs. Make sure all antivirus programs are disabled before starting a game or application so they don’t conflict with each other.

Other gaming issues include:

Gaming issueMeaning
Stuttering in gamesThis is when you experience frequent delays  and lags during gameplay
Low FPSThis is whereby there are a lot of image interruptions and screen flickering
Gaming features are unavailableThis error occurs when your version of Windows is not updated to receive the features

What is the disadvantage of Windows 11?

With most software, advantages and disadvantages are a grey area, given that every user is different. What may seem like an advantage could be a disadvantage to the next person.

Below are just some of the irks that most users can agree could have been improved on:

  • Limited support for older devices – Windows 11 doesn’t support older hardware as much as its predecessor did. If you have an older PC and want to upgrade to Windows 11, then there are chances that certain apps won’t work on your device after the upgrade.
  • Stringent system requirements – The minimum requirements for Windows 11 are pretty high, which means that some older computers might not be able to run this version of Windows. You may have to get a new PC that meets these requirements.
  • Resource-intensive – Windows 11 is a resource-intensive operating system. With each update, the need for more memory and processing power to run Windows 11 is becoming more evident. 
  • Interface overhaul – While this may not be a disadvantage for some users, the Windows 11 interface can be confusing. This can take some getting used to for longtime users.

Can I go back to Windows 10 from Windows 11?

Yes, you can revert to your old version of Windows. If you’ve been using Windows 11 for a while, you might wonder why anyone would want to downgrade from such a great operating system. 

Windows 11 is the most popular operating system, and with good reason. It’s more secure than its predecessors, less annoying, and has the desired features.

But if you’re running Windows 11 on older hardware or don’t like the new look, you might consider switching back to Windows 10. 

There are some differences between these two versions of Windows, and we expound in our comprehensive side-by-side comparison of Windows 10 vs 11.

Other reasons to switch include:

  • Takes up too much storage space
  • It’s slow on older hardware
  • Compatibility problems

In conclusion, Microsoft has made great strides toward creating a reliable system. It performs better and doesn’t require as much maintenance as previous operating systems.

There are certainly bugs, and some are frustrating. But, when you look at it as a whole, the benefits far outweigh the negatives.

While we can’t assure your PC will run without a hitch, you can work through each of the most common problems above on your own to prevent more complicated issues.

Feel free to let us know of any other Windows 11 problem that seems to be making a regular occurrence but is not mentioned here. You can also learn how to resolve another common bug like ASSIGN_DRIVE_LETTERS_FAILED.

How Many CPU Cores Does Windows 11 Support? [How to Check]

The number of CPU cores that Windows 11 supports is critical for anyone who uses the OS daily. This is because the more CPU cores your PC has, the more tasks it can handle at once, and the faster those tasks will be completed.

Windows has traditionally used a single-threaded model for most tasks, which usually results in high CPU usage. But with newer OSes, Microsoft has been moving toward a multi-threaded model. So, how do you check the number of cores you have? Let’s see below.

Does Windows 11 support multi-CPU? 

The first thing to address is what’s a core. A core is the central processing unit (CPU) of a computer. It performs all the calculations and controls the operation of the entire computer. 

Think of a core as another brain. It performs another task simultaneously as your main CPU does another. If a PC has multi-cores, each core can run its own process, or multiple cores can work together to perform one task more quickly.  

Windows 11 supports multi-CPUs and hyper-threading. This means you can use multiple CPUs simultaneously to improve your performance. This brings us to the next question, how many cores does Windows 11 support?

  • Single core – Some computers have single-core processors designed for light computing tasks like email and web surfing. These processors can handle only one task at once.
  • Dual-core – Dual-core processors have two processing units that can run multiple programs together at the same time. This makes them great for everyday tasks like web browsing, word processing, and watching videos.
  • Quad-core – Quad-core processors have four processing units that can run multiple programs simultaneously without slowing down other processes in the background. This means you can stream music while you browse Facebook or check your email while you watch YouTube videos. Quad-core processors are typically used in powerful laptops and desktops that require lots of heavy lifting from their processors to get work done quickly.
  • Octa-core and others – These processors contain eight chips that can each run instructions at the same time. Deca-core processors contain 10 chips that can each run instructions at the same time.

How many cores do I need?

If you want to buy a new PC or upgrade your current one, it’s important to know what kind of tasks you will use it for. 

It all depends on what you want to do with your computer and how many tasks you’re running at once. If you’re running a single application, such as a web browser or a word processor, then one core will be enough to handle all of its tasks.

But if you run multiple applications simultaneously, such as listening to music while playing a game, then more cores are better because they keep everything running smoothly without slowing down your system.

Still, the different core types don’t necessarily mean faster performance. They mean your computer isn’t limited by how fast one core can go when there are multiple cores available to do work.

To understand this concept better, see our complete guide on what CPU cores are and how they work, including how they affect your computer’s multitasking and speed.

How do I check the number of cores in my Windows 11 PC?

Before you proceed to the more detailed steps on how to check your CPU cores, most manufacturer websites list the number of cores on their CPUs. All you have to do is check your PC’s model number, and the number of cores should be listed alongside it.

If not, proceed to the following solutions to determine how many cores are in your Windows PC.

1. Use Task Manager

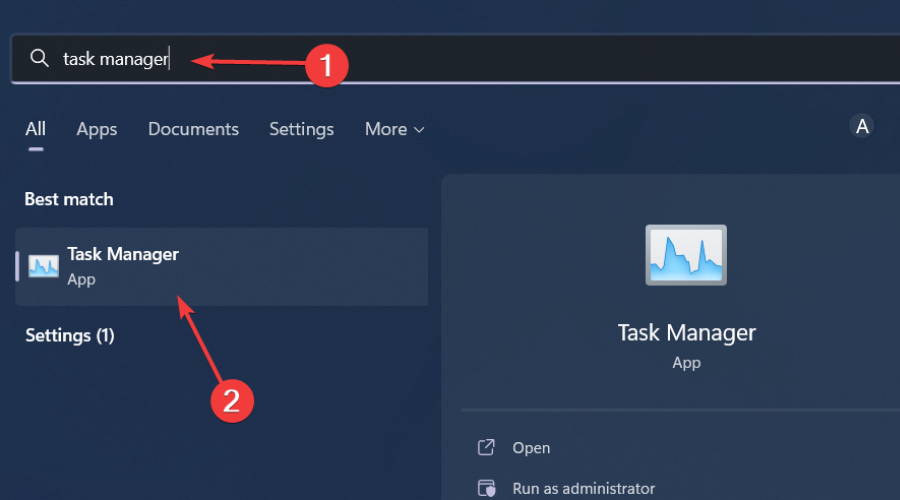
  1. Hit the Windows key, type Task Manager in the search bar, and click Open.task manager search
  2. Navigate to the Performance tab and click on CPU.
  3. You will see your PC’s information, including the number of cores listed.

In case Windows is not showing all cores in Task Manager, we have the answers on how to navigate around this issue.

2. Use System Information

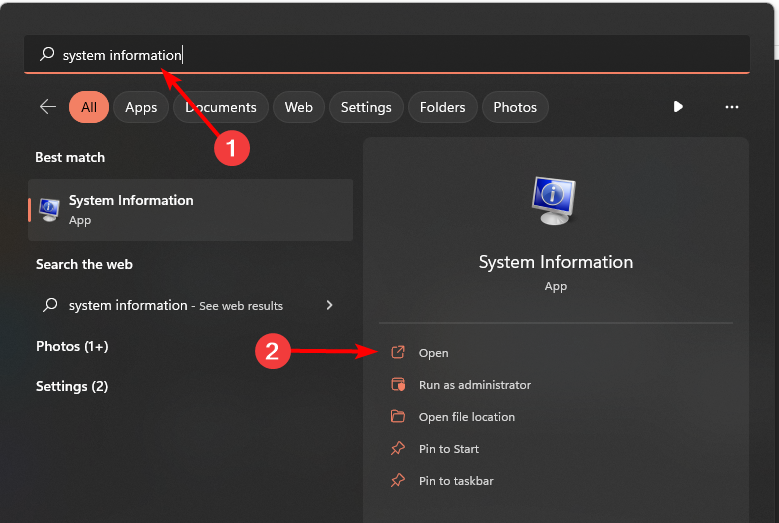
  1. Hit the Windows key, type System Information in the search bar, and click Open.
  2. Navigate to the System Summary, and your number of cores will be under Processor.

3. Use the Command Prompt

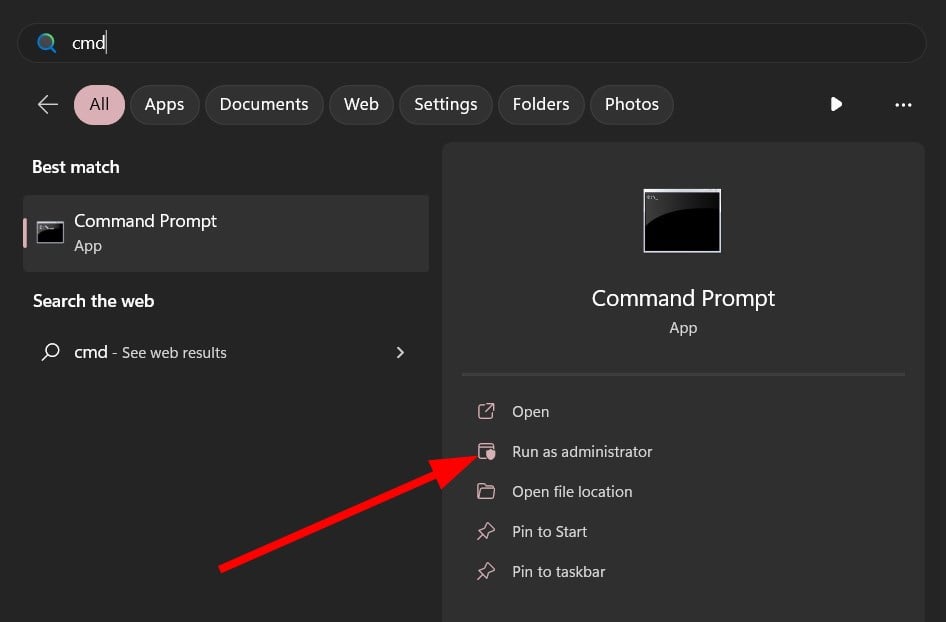
  1. Hit the Windows key, type cmd in the search bar, and click Run as administrator.cmd-run-admin-w11 unexpected kernel mode trap windows 11
  2. Click Yes if the UAC prompt appears.
  3. Type in the following command and press Enter: WMIC CPU Get NumberOfCores
  4. The number of cores will be listed once the command finishes.

4. Use Powershell

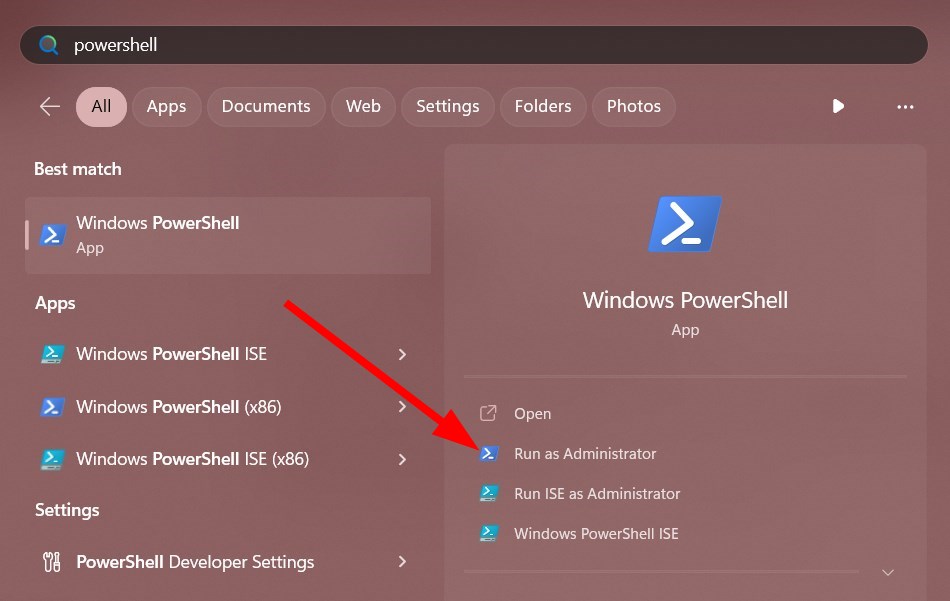
  1. Click on the Search icon on the taskbar, type Powershell in the search bar, and click Run as administrator.
  2. Click Yes if the UAC prompt appears.
  3. Type in the following command and press Enter: WMIC CPU Get NumberOfCores
  4. The number of cores will be listed once the command finishes.

5. Use third-party software

There are many ways to check how many cores you have installed on your computer.  If the above proves to be lengthy or complicated, you can opt for third-party software.

These apps display detailed information about your computer’s hardware and software, including the number of cores in your processor. Our top choice would have to be the PRTG Network Monitor.

Now that you know how to check the number of cores in your Windows 11, you’re probably considering upgrading to a CPU with more cores.

However, before you jump the gun, we’d like to point out that the number of cores in a CPU doesn’t directly affect performance. 

Instead, it increases the amount of work that can be done at once because each core can handle its own task independently. 

This prevents your processor from becoming overloaded and slowing down your whole system.

The speed and performance of your PC depend on other factors, so you may find a single-core processor is faster and more efficient than a quad-core in some cases.

With this in mind, it’s worth considering whether your current PC has enough power for what you want to do before buying anything new.

You can also allocate more CPU to a process, especially if it is resource-intensive, to increase efficiency.

It’s also possible to change the number of processors in MSConfig, but that can cause more issues down the road.

And with that, we conclude this article. Hopefully, this has provided much-needed insight into how cores work, how you can check the number of cores, and what to look for when purchasing a new PC.

In the comment section below, let us know how many cores you have on your PC and your general PC performance.

KB4074629 fixes PowerShell vulnerabilities in Windows 10&11

We’re always talking about exercising safety while online, and preaching caution when it comes to your own sensitive information.

On that note, know that Microsoft has completely re-labeled all the major threat actors and has made it easier to identify each and every one of them.

Also, a few days ago, the dreaded Windows 11 LSA bug was fixed with kernel-mode hardware stack protection.

And, since we’re talking about Windows 11, know that you now can diagnose network problems on Windows 11’s taskbar.

Now, another major issue has been apparently dealt with, since Microsoft posted an interesting article on its official page.

Microsoft comes with PowerShell scripts for multiple flaws

In case you didn’t know, last month Microsoft issued PowerShell scripts for automating WinRE updates to address BitLocker bypass security vulnerability.

The Redmond-based tech company has released new PowerShell scripts again, and we’re about to take a closer look at them.

This time, however, they are for multiple different speculative execution side-channel attack CPU vulnerabilities on Windows 11 and Windows 10.

To better understand, remember that one of these includes the memory mapped IO (MMIO) flaw which received newly updated patches recently on Windows 10 and Server.

The above-mentioned scripts are meant to help verify the status of mitigations of these vulnerabilities. Or, at least that’s what Microsoft claims.

According to Redmond, to help you verify the status of speculative execution side-channel mitigations, it published a PowerShell script (SpeculationControl) that can run on your devices.

Security advisories ADV180002, ADV180012, ADV180018, and ADV190013 cover the following nine vulnerabilities:

  • CVE-2017-5715 (branch target injection)
  • CVE-2017-5753 (bounds check bypass)
  • CVE-2017-5754 (rogue data cache load)
  • CVE-2018-3639 (speculative store bypass)
  • CVE-2018-3620 (L1 terminal fault – OS)
  • CVE-2018-11091 (Microarchitectural Data Sampling Uncacheable Memory (MDSUM))
  • CVE-2018-12126 (Microarchitectural Store Buffer Data Sampling (MSBDS))
  • CVE-2018-12127 (Microarchitectural Load Port Data Sampling (MLPDS))
  • CVE-2018-12130 (Microarchitectural Fill Buffer Data Sampling (MFBDS))
Note icon NOTE
Protection for CVE-2017-5753 (bounds check) does not require additional registry settings or firmware updates.

Advisory ADV220002 covers additional Memory-Mapped I/O (MMIO) related vulnerabilities:

  • CVE-2022-21123 – Shared Buffer Data Read (SBDR)
  • CVE-2022-21125 – Shared Buffer Data Sampling (SBDS)
  • CVE-2022-21127 – Special Register Buffer Data Sampling Update (SRBDS Update)
  • CVE-2022-21166 – Device Register Partial Write (DRPW)

You will find a lot more information and useful tricks by visiting Microsoft’s official website. There is a lot more Microsoft hasn’t shared yet, so we are still waiting on updates.

In the meantime, be sure to check out the April 2023 Patch Tuesday release. This month’s update pack consists of 97 patches that address various vulnerabilities.

You can find the direct download links for both Windows 11 and Windows 10. We’ve also prepared a list of the updates issued for Windows 7 and 8.1.

Leave a comment below and let us know if you found any other issues after installing KB4074629 on your Windows 11 PC.

Windows Security Icon Missing? How to Get It Back

Some of our readers have recently reported the Windows Security icon missing on their PC either on the System tray or task manager start-up.

In case you are experiencing similar issues and you don’t seem to know why it is happening or how to get your Windows Security icon back, don’t worry. This post is for you.

Why is the Windows security icon missing?

There are several reasons why the Windows Security icon may be missing from your computer’s taskbar or system tray. Below are five possible causes:

  • Windows Security is disabled – The major reason behind the Windows Security icon missing error is that the feature is disabled. To fix this issue, you can turn on Windows Security by using the Windows Settings app.
  • Outdated Windows version – If you’re running an outdated version of Windows, it is possible that the Windows Security icon is missing due to compatibility issues. To fix this, you can update your operating system to the latest version.
  • Conflicting third-party antivirus software – If you’re using third-party antivirus software, it is possible that it is conflicting with the Windows Security icon. You can try disabling the third-party antivirus temporarily and check if the problem is fixed.
  • Group Policy settings – If your computer is managed by a system administrator, it is possible that Group Policy settings have disabled the Windows Security icon.

Now that you know some of the potential reasons behind the Windows Security icon missing error, the next section will provide you with simplified steps on how to get it back on your Windows taskbar.

What can I do if the Windows Security icon is missing?

Before trying any of the advanced solutions provided in this article, you should consider performing the following preliminary checks;

  • Restart your PC and check if the Windows Security icon is back.
  • Run the Windows app troubleshooter to know the root cause of the problem.

Having confirmed the above checks, if the problem persists, you can explore the advanced solutions provided below to get the Windows Security icon back.

1. Show the Windows Security icon on Taskbar

  1. Press the Windows + I keys to open the Settings app.
  2. On the left pane, click on Personalization and click on Taskbar on the right pane.
  3. In the Taskbar settings, locate the Other system tray icons option and expand it.
  4. From the list of apps under the option, toggle On the button for the Windows Security notification icon to make it appear on Taskbar.
  5. Close the Settings app and restart your PC.

Now, check whether the issue of the Windows Security icon missing is fixed or not. If not, try the next fix.

2. Enable the Windows Security icon at Startup

  1. Press the Windows + I keys to open the Settings app.
  2. On the left pane, click on Apps and then click on Startup on the right pane.
  3. Now, turn On the Windows Security notification icon to make it appear on Startup.
  4. Restart your computer for the changes to take effect.

If you try enabling the Windows Security notification icon on your Taskbar but it’s not showing, you can set it to appear on Startup. If this doesn’t work, try the next fix.

3. Use the Windows Registry

  1. Press the Windows key to open the Start menu. Type Command Prompt in the Windows search bar and click on Run as administrator on the right pane.
  2. Type the following command in the dialog box and press Enter: reg add "HKLM\SOFTWARE\Microsoft\Windows\CurrentVersion\Run" /v SecurityHealth /d "%windir%\system32\SecurityHealthSystray.exe" /t REG_SZ /f
  3. Wait for the process to complete and restart your computer.

The Windows Security notification icon should launch automatically whenever you log in to your account.

4. Enable the Windows Security icon in Local Group Policy Editor

  1. Press the Windows + R keys to open the Run dialog box. Type gpedit.msc and press Enter.
  2. In the Local Group Policy Editor window, navigate to the following path: Computer Configuration\Administrative Templates\Windows Components\Windows Security\Systray
  3. On the right pane of Systray in the Local Group Policy Editor, double-click on the Hide Windows Security Systray policy to edit it.
  4. Select Enabled and click OK.
  5. Close the Local Group Policy Editor and restart your computer.

The Local Group Policy Editor is another option to use to fix the Windows Security icon missing issue. It is however important to create a system restore point before making any Windows Policy changes.

And that’s it on how to get the Windows Security icon missing back if it is missing. If you have further questions or suggestions on this guide, kindly drop them in the comments section.

How to Quickly Fix Mail & Calendar Error 0x8007054e

Some of our readers have recently reported that they encounter the Mail and Calendar error 0x8007054e when trying to set up their account on the app.

If you are experiencing similar issues and you do not know what fix to apply, don’t worry. We have compiled some potential fixes to troubleshoot the issue and get your Mail and Calendar app fixed.

What causes calendar error 0x8007054e?

While this is a common problem for Windows 10 users, there can be several reasons why the mail and calendar error 0x8007054e is coming up. Below are some of them:

  • Corrupted user profile – One of the major reasons behind the calendar error 0x8007054e is due to a corrupt user profile. Creating a new user profile and migrating your data to the new profile should resolve the problem.
  • Windows Update issues – Sometimes, Windows updates can come with bugs and cause issues with system apps. You can try updating the mail and calendar app, or roll back the Windows update to a previous version to fix the issue.
  • Conflicting antivirus software – Antivirus software can sometimes interfere with the mail and calendar app. Try disabling your antivirus software temporarily and see if the error goes away.
  • Outdated drivers – If your drivers are not up-to-date, it can cause issues with the mail and calendar app. Update your drivers to the latest version to get rid of the error.
  • Corrupted system files – Corrupted system files can cause severe errors to the PC. Run the System File Checker tool to scan for and repair any corrupted system files.
  • Faulty installation – A faulty installation of the mail and calendar app can also cause an error. Try uninstalling and reinstalling the app to fix the issue.

Now that you know some of the potential reasons behind the calendar error 0x8007054e, let’s proceed to how to fix the issue.

How can I fix the mail & calendar error 0x8007054e?

Before engaging in any advanced troubleshooting or settings tweaks for the mail and calendar error 0x8007054e, confirm the following preliminary checks:

  • Ensure that you are using the latest version of the mail and calendar app.
  • Run the Windows app troubleshooter to know the root cause of the problem.

Having confirmed the above checks, and none of them fixes the problem, you can proceed using the advanced solutions provided below.

1. Run the SFC Scan

  1. Press the Windows key to open the Start menu, type Command Prompt in the Windows search bar, and click on Run as administrator.
  2. Next, type the following and press Enter: sfc /scannow
  3. Once completed, restart your PC and this should fix any corruption found.

You can also use PowerShell if you are unable to run Command Prompt as an admin or if it is simply not available for whatever reason.

However, you can try an automatic repair tool to run a rigorous scan of your computer and detect all stability issues, including corrupt or missing system files.

2. Fix the Accounts Information Folder

  1. Close the Mail and Calendar apps on your computer.
  2. Open the Windows Explorer. Navigate to the View tab at the top, select Show, and click Hidden items.
  3. Now, navigate to this path: C:\Users\Your Username\AppData\Local 
  4. Then, rename or delete the Comms folder to delete the account information stored for the problematic apps.
  5. After deleting the Comms folder, reopen the Mail or Calendar app, add your account and start using the apps normally.

Renaming or deleting the account information folder should fix the mail and calendar app.

3. Reset the Mail and calendar app

  1. Press the Windows + I keys to open the Settings app.
  2. Click on the Apps option and Installed apps.
  3. Locate the Mail and Calendar app, click the options icon, and select Advanced options.
  4. Scroll down and click the Reset button under the Reset Mail and Calendar section.
  5. Click on the Reset button when you see the confirmation window.
  6. Restart your PC for the changes to take effect.

Once the process is complete, it will reset your mail and calendar app to default. Now check if the error code 0x8007054e still appears.

4. Perform a System Restore

  1. Press the Windows + S keys, type restore, and choose to Create a restore point from the menu.
  2. Select System Properties and click on the System Restore button.
  3. Click on Next.
  4. Now, select the desired restore point and click on the Next button.
  5. Follow the on-screen instructions to complete the restoration process.

Several users reported that System Restore fixed the problem for them, so be sure to try it out.

5. Reinstall the Mail and calendar app

  1. Press the Windows key, type PowerShell in the search box, and click on Run as Administrator from the menu.
  2. Type or paste the following command line in the text field and press Enter: Get-appxprovisionedpackage –online | where-object {$_.packagename –like “*windowscommunicationsapps*”} | remove-appxprovisionedpackage –online
  3. Wait for the process to complete and restart your PC.
  4. Now, launch the MS Store app, type Mail and Calendar in the Search bar and click on the app.
  5. Click the Install button to install the Mail app.

Once installed, run the app and add your account. The problem should be completely resolved by now.

That’s it on how to fix the Mail and Calendar error 0x8007054e code. Hopefully one of the fixes provided will help you to fix the issue.

For further assistance, you can explore our expert guide on Mail and Calendar app not working in Windows 10.

If you have any questions or suggestions, or possibly another solution for this error, do not hesitate to use the comments section below.

Fix: The Request Failed Due to a Fatal Device Hardware Error

Some of our readers have recently reported that they encounter The request failed due to a fatal device hardware error message while trying to open an external hard drive from their PC.

In case you are experiencing similar issues, don’t worry. You can work your way through any of the potential fixes provided in this article to resolve the issue.

Why did the request fail due to a fatal device hardware error?

There can be several reasons why you are getting the request failed due to a fatal device hardware error message. Below are some of the possible triggers;

  • The USB cable is faulty – If there is a loose connection or if the hard drive cable is faulty, the external drive may not show at all. In this case, the data transfer won’t be successful which would then trigger the error message.
  • There are bad sectors on your hard disk – If there are bad sectors on your hard drive, data can’t be written to it, and the ones stored cannot be read.
  • Driver issues – If your driver is corrupted, outdated, or incompatible with the hardware, it can cause the device to fail. Reinstalling or updating your drivers should fix the problem.

Now that you know some of the reasons behind the request failed due to a fatal device hardware error message, let’s proceed to how you can fix this problem.

What can I do if the request failed due to a fatal device hardware error?

Before engaging in any advanced troubleshooting or settings tweaks, users should ensure they perform the following preparatory checks;

  • Disconnect the device and restart your PC.
  • Try connecting the hard drive to the computer using a different USB cable.
  • Test the hard drive on another computer.
  • Ensure that the power supply is providing enough power to the hardware components.

Having confirmed the above checks, if the problem persists, you can try out any of the advanced solutions provided below one after the other.

1. Check your Hard drive’s SMART status

  1. Press the Windows + S keys, type cmd in the Search box, and select Run as administrator.
  2. Type the command below in the text field and press Enter: wmic diskdrive get status
  3. The command will then return any of the following statuses: OK, Bad, Unknown, and Caution.

Windows has an inbuilt feature known as SMART analysis which analyzes your hard drive/SSD to determine whether the hard drive is damaged and also know the extent of the problem.

2. Run the CHKDSK Scan

  1. Press the Windows + S keys, type cmd in the Search box, and select Run as administrator.
  2. Type the command below (replace C with the assigned drive letter) and press Enter: chkdsk c: /r
  3. Wait for the command to finish running, and then apply any recommendations.

If the SMART analysis does not fix the error, try the Check Disk Utility. CHKDSK is a built-in tool that identifies issues with computer storage devices and bad sectors and recommends ways to fix the errors.

3. Update Device Drivers

  1. Press the Windows + X keys to open the quick menu and select Device Manager.
  2. Expand the Disk drives option and right-click the problematic external driver. Select the Update driver option.
  3. Now, choose Search automatically for drivers and install any available update.
  4. Restart your PC.

Alternatively, you can choose to reinstall the affected driver by uninstalling it and then restarting your PC.

4. Initialize the Hard Disk

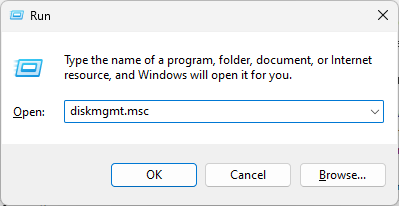
  1. Press the Windows + R keys to open the Run command. Type diskmgmt.msc in the run dialog box to launch Disk Management.
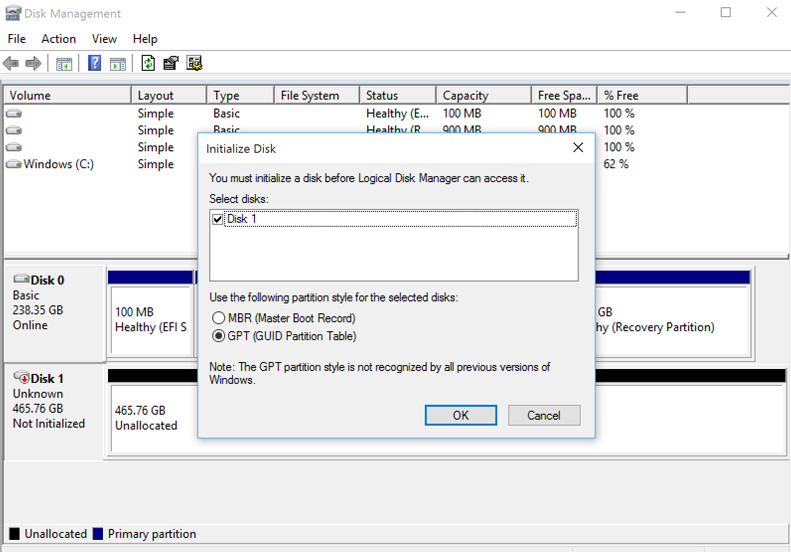
  2. Right-click your external hard drive and select the Initialize Disk option.
  3. Select either MBR (Master Boot Record) or GPT (GUID partition table) partition style to initialize the drive and click OK.

Your hard drive can be activated by initializing it. This should remove any obstacles that could be causing the error on your external hard disk.

5. Format the Hard drive

  1. Press the Windows + E keys to open File Explorer.
  2. Right-click the affected external drive, and select Format from the context menu.
  3. Choose the desired File System from the dropdown menu, tick the Quick Format checkbox, and click Start.
  4. Wait for the format to complete, then try moving files to SSD or Micro SD card, as the case may be.

If none of the above fixes works, you can consider formatting your external hard drive. This will clear all the data stored on the drive, but, it will certainly clear the request failed due to a fatal device hardware error message.

In case you need further assistance on how to fix external hard drive errors, you can explore our dedicated guide.

That’s it on how to fix the request failed due to a fatal device hardware error whenever you encounter it on your PC.

If you have any questions or suggestions regarding this issue, do not hesitate to use the comments section below.

Shellpage Not Letting Me Access Certain Pages [Fix]

Some of our readers have recently reported a problem they encounter with the Microsoft Edge internet browser. Claims have it that Edge directs users to a site named Shellpage instead of the intended URL.

If you’re experiencing similar issues such as Shellpage not letting me access certain pages, don’t worry. This article will provide you with the reason and how to fix the error.

Why is Shellpage not letting me access certain pages?

While this is yet an unusual error, there are a few things that may have caused the Shellpage not letting me access certain pages. Below are some of the possible reasons behind the error;

  • Server issues – One of the major reasons is that Edge’s servers may be experiencing technical difficulties, which can prevent you from accessing certain pages. This may be due to maintenance or upgrade work being carried out on the servers, or due to unexpected technical glitches.
  • Using Edge’s Bing Chat – Relative to the above, this behavior may occur when using some features available in the Edge’s sidebar, such as Bing Chat. Users have claimed they encounter this issue when the internet connection is poor or
  • Faulty Update – There’s a possibility that you have installed (or your system auto-updated) a faulty update. This happens when some update files are missing or have problems. You can simply roll back to the previous restore point to fix the issue.
  • Corrupt cache files – The presence of corrupt cache files can also cause the Edge browser or any other program to misbehave as it stores data for different websites you visit. Clearing your browser’s cache should help fix the issue.

Now that you know some of the possible reasons behind this error, let’s proceed to check how you can fix the issue.

What can I do if  Shellpage not letting me access certain pages?

Before proceeding to attempt any of the advanced solutions, you should consider performing the following preliminary checks;

  • Clear your browser’s cache.
  • Check your internet connection.
  • Use a different internet browser – You can check out some of the best internet browsers for Windows 10.
  • Open a new tab and delete the Shellpage tab.
  • Run the same query on another browser.
  • Update your computer.

Having confirmed the above checks, and none of them fixes the problem, you can explore the advanced solutions provided below.

1. Clear Edge’s browsing data

  1. Launch Edge, click on the three-dot menu and select the Settings option.
  2. Click on Privacy, search and services on the left pane. Navigate to the Clear browsing data section and click the Choose what to clear button.
  3. Select a Time range, and tick the checkboxes for Browsing history, Download history, Cookies and other site data, and Cached images and files. Then, click the Clear now button.
  4. Relaunch Edge, then try to visit the webpage that redirected to the Shellpage error in Edge to see if it still occurs.

Clearing the browsing data should help fix the Shellpage not letting me access certain pages errors. You can also use any of the best memory cleaner software for Windows too.

2. Remove browser extensions

  1. Launch your Edge browser.
  2. Copy and paste the link below in the address bar, then press Enter: edge://extensions/
  3. Toggle off the extension switch.
  4. Restart your PC and check if the problem is fixed.

There are only rare cases where Edge extensions prevent the browser from connecting to particular web pages. But, if you get this error after installing a specific extension, try removing it.

3. Reset Microsoft Edge to Default Settings

  1. Launch the Microsoft Edge browser on your device. Tap on the three horizontal dots in the top-right corner and click on Settings.
  2. Now, click on Reset Settings on the left pane. Next, click on Restore settings to their default values.
  3. In the pop-up window, click on Reset.
  4. Restart your Edge browser to see if you can now access the page.

For any program or device, restoring the settings to their default state usually resolves most issues and it helps such to run anew.

And that’s it on how to fix the Shellpage not letting me access certain pages issue.

If none of the fixes provided in this article works for you, you can explore our detailed guide on ways to permanently fix can’t reach this page error and try the steps one after the other to fix the issue.

If you have any questions or suggestions, do not hesitate to use the comments section below.

Windows Cannot Find wt.exe? Here’s What to do

Some of our readers have recently complained that they encounter the Windows cannot find wt.exe error message whenever they try to launch the Windows Terminal app on Windows 11 PC.

When they tried to open the Windows terminal app by running the wt.exe command or from the start menu, it rather displayed an error message claiming that the name is incorrect. In this article, we will discuss the causes and how to fix the issue easily.

Why can’t Windows find wt.exe?

There can be several reasons why Windows is not finding the wt.exe application. Below are some of these reasons;

  • Incorrect Path – One of the most common reasons why Windows can’t find wt.exe is that the path to the executable may not be correctly specified. If the path is incorrect, Windows won’t be able to locate the file.
  • Missing File – Another reason why Windows can’t find wt.exe is that the file may be missing. If the file is not present in the specified location or has been accidentally deleted, Windows won’t be able to locate it.
  • Corrupted System Files – Sometimes, the wt.exe file may become corrupted due to various reasons such as malware or hardware failure. In this case, you need to run a thorough malware scan to identify and remove any infections.

Now that you know some of the possible reasons why Windows can’t locate wt.exe, let’s proceed to how you can fix this problem.

What can I do if Windows cannot find wt.exe?

Before engaging in any advanced troubleshooting or settings tweaks, you should consider performing the following preliminary checks;

  • Restart your PC.
  • Ensure that the name of the path is correctly written.
  • Check your Windows Terminal settings.

Having confirmed the above checks if the problem persists, you can explore the advanced solutions provided below to know what works for you.

1. Run an SFC Scan

  1. Left-click the Start Menu, type Command Prompt, and click on Run as administrator.
  2. Next, type the following and press Enter:  sfc /scannow 
  3. Once completed, restart your PC and this should fix any corruption found.

By running the SFC scanner, Windows Resource Protection will help determine what the problem is and fix it. You can also check our detailed guide on what to do if you can’t run Command Prompt as an administrator.

In any case, we also suggest you use dedicated repair software that can entirely diagnose your PC and repair it right away.

2. Tweak the Windows Terminal settings

  1. Press the Windows, type App execution aliases, and launch it.
  2. Locate the Windows Terminal and toggle off the option. Now, toggle the option on again and exit the window.

Now check if you can see wt.exe there or not. If not, try the next fix.

3. Repair and Reset Windows Terminal

  1. Press the Windows + I keys to open the Settings app.
  2. On the left pane, click on Apps and choose Installed apps.
  3. Type Terminal in the search bar. Select the three-dot icon next to the Terminal and click Advanced options.
  4. Select the Repair option. If you’re still facing the same error, press the Reset button.
  5. Now relaunch the Windows Terminal from the Start menu.

Take note that, using the reset option will cause your data to be deleted. Therefore, ensure your data is backed up in a file before resetting the Windows Terminal.

4. Reinstall Windows Terminal

  1. Launch the Microsoft Store app on your system. Type Windows Terminal in the search box.
  2. Click on the official Windows Terminal app from the search results.
  3. Now, click on the Get button.
  4. Wait until the installation process is complete; once done, restart your PC.

Reinstalling the Windows Terminal is another viable solution for this error. In case you do not have the Microsoft Store readily installed on your PC, you can follow the steps in our detailed guide to know how to install Microsoft Store on Windows 11 PC.

Alternatively, users can explore our dedicated guide on how to install the Windows Terminal without the Store app.

If you have any questions or suggestions, do not hesitate to use the comments section below.

StreamEast Not Working on Xbox? Fix It in 4 Steps

StreamEast is a popular online live sports streaming platform that provides various NFL games for free. However, complaints have been received from some of our readers about StreamEast not working on Xbox application. In this article, we will discuss the causes and what to do if the error persists.

What can I do if StreamEast is not working on Xbox?

There are a few tricks to apply if StreamEast is not working on Xbox. However, you should consider performing the following preliminary checks;

  • Restart the Xbox.
  • Check your internet connection.
  • Contact StreamEast support.
  • Check popular chat platforms such as Reddit to be sure you’re not the only one facing the issue.
  • Update the Xbox browser from the Xbox Store.
  • Try some great Streameast alternatives

Having confirmed the above checks, if you still need a step-by-step guide on what to do to fix the issue, you can explore the solutions provided below.

1. Run a Network connection test on your Xbox

  1. Press the Xbox button to open the guide. Select Profile & system and go to Settings.
  2. Navigate to the General tab and click on Network settings.
  3. Then, select Test network connection.
  4. Wait for the network connection test to complete.

Once the connection test is complete, it will give you a report. If it is not successful, you can check some of the troubleshooting network connection errors to know what to do.

2. Clear the Cache on your Xbox

  1. Press the Xbox button on your console to open the guide and navigate to the Settings menu.
  2. Click on Device & connections on the left pane. Next, select Blu-ray.
  3. Select Persistent Storage. Then, choose to Clear persistent storage.

Clearing the cache on your Xbox console can sometimes help to resolve issues with apps. This will remove any temporary files and data that may be causing the issue.

3. Update your Xbox System

  1. Press the Xbox button on your controller. Go to Settings and from the menu.
  2. Select System and select Updates.
  3. Then, select the latest Console update available and select Update now and follow the on-screen instructions to begin the update process.
  4. Wait for the update to download and install.
  5. After the update is complete, your Xbox will restart automatically.

Reinstalling the StreamEast app means clearing all the data and starting the app afresh. However, if the problem persists, check the next fix.

4. Reinstall the StreamEast app

  1. Go to the Xbox Store. Navigate to the My games & apps section on your Xbox.
  2. Search for StreamEast. Press the Menu button on your controller.
  3. Select Uninstall all.
  4. Finally, reinstall the StreamEast application from the Xbox Store.

Reinstalling the StreamEast app means clearing all the data and starting the app afresh. However, if the problem persists, check the next fix.

Why is StreamEast not working on Xbox?

There can be several reasons why StreamEast is not working on your Xbox. Below are some of the common reasons for the StreamEast not working on Xbox issue;

  • Server issues – One of the major reasons why StreamEast may not be working on your Xbox is due to server issues or maintenance on the StreamEast website. If this is the case for StreamEast, you may need to wait until the issue is fixed.
  • Connection issues – Another possible reason for this error is due to connectivity issues, such as a weak or unstable internet connection. You may also need to use one of the fastest VPNs if StreamEast is not supported in your country.
  • App or System is Outdated – You may also encounter StreamEast not working on Xbox if your Xbox system or StreamEast app is outdated. Ensure that both your Xbox system and StreamEast app are updated to avoid compatibility issues.
  • Cache and Cookies – Browser cache and cookies can sometimes cause issues with websites. Clearing your browser’s cache and cookies should help fix the problem.
  • Account-Related issues – You may not be able to access StreamEast on your Xbox if you have issues with your StreamEast account, such as incorrect login credentials.

Since you now know some of the potential reasons behind StreamEast not working on Xbox, let’s proceed to how you can fix this problem.

And that’s it on how to fix the StreamEast not working on Xbox issue. For more fixes and detailed troubleshooting steps, see our full guide on how to fix Streameast not working.

Alternatively, you can explore our expert guide on what to do if you can’t stream games to Windows 10/11.

There are several other ad-supported streaming services that users can subscribe to as alternatives.

If you have any questions or suggestions, do not hesitate to use the comments section below.

StartUpCheckLibrary.dll Missing? Here’s How to Fix It

When you start your computer, Windows checks for several errors and issues that might have occurred in your system. If it encounters one, it displays an error message to let you know about it.

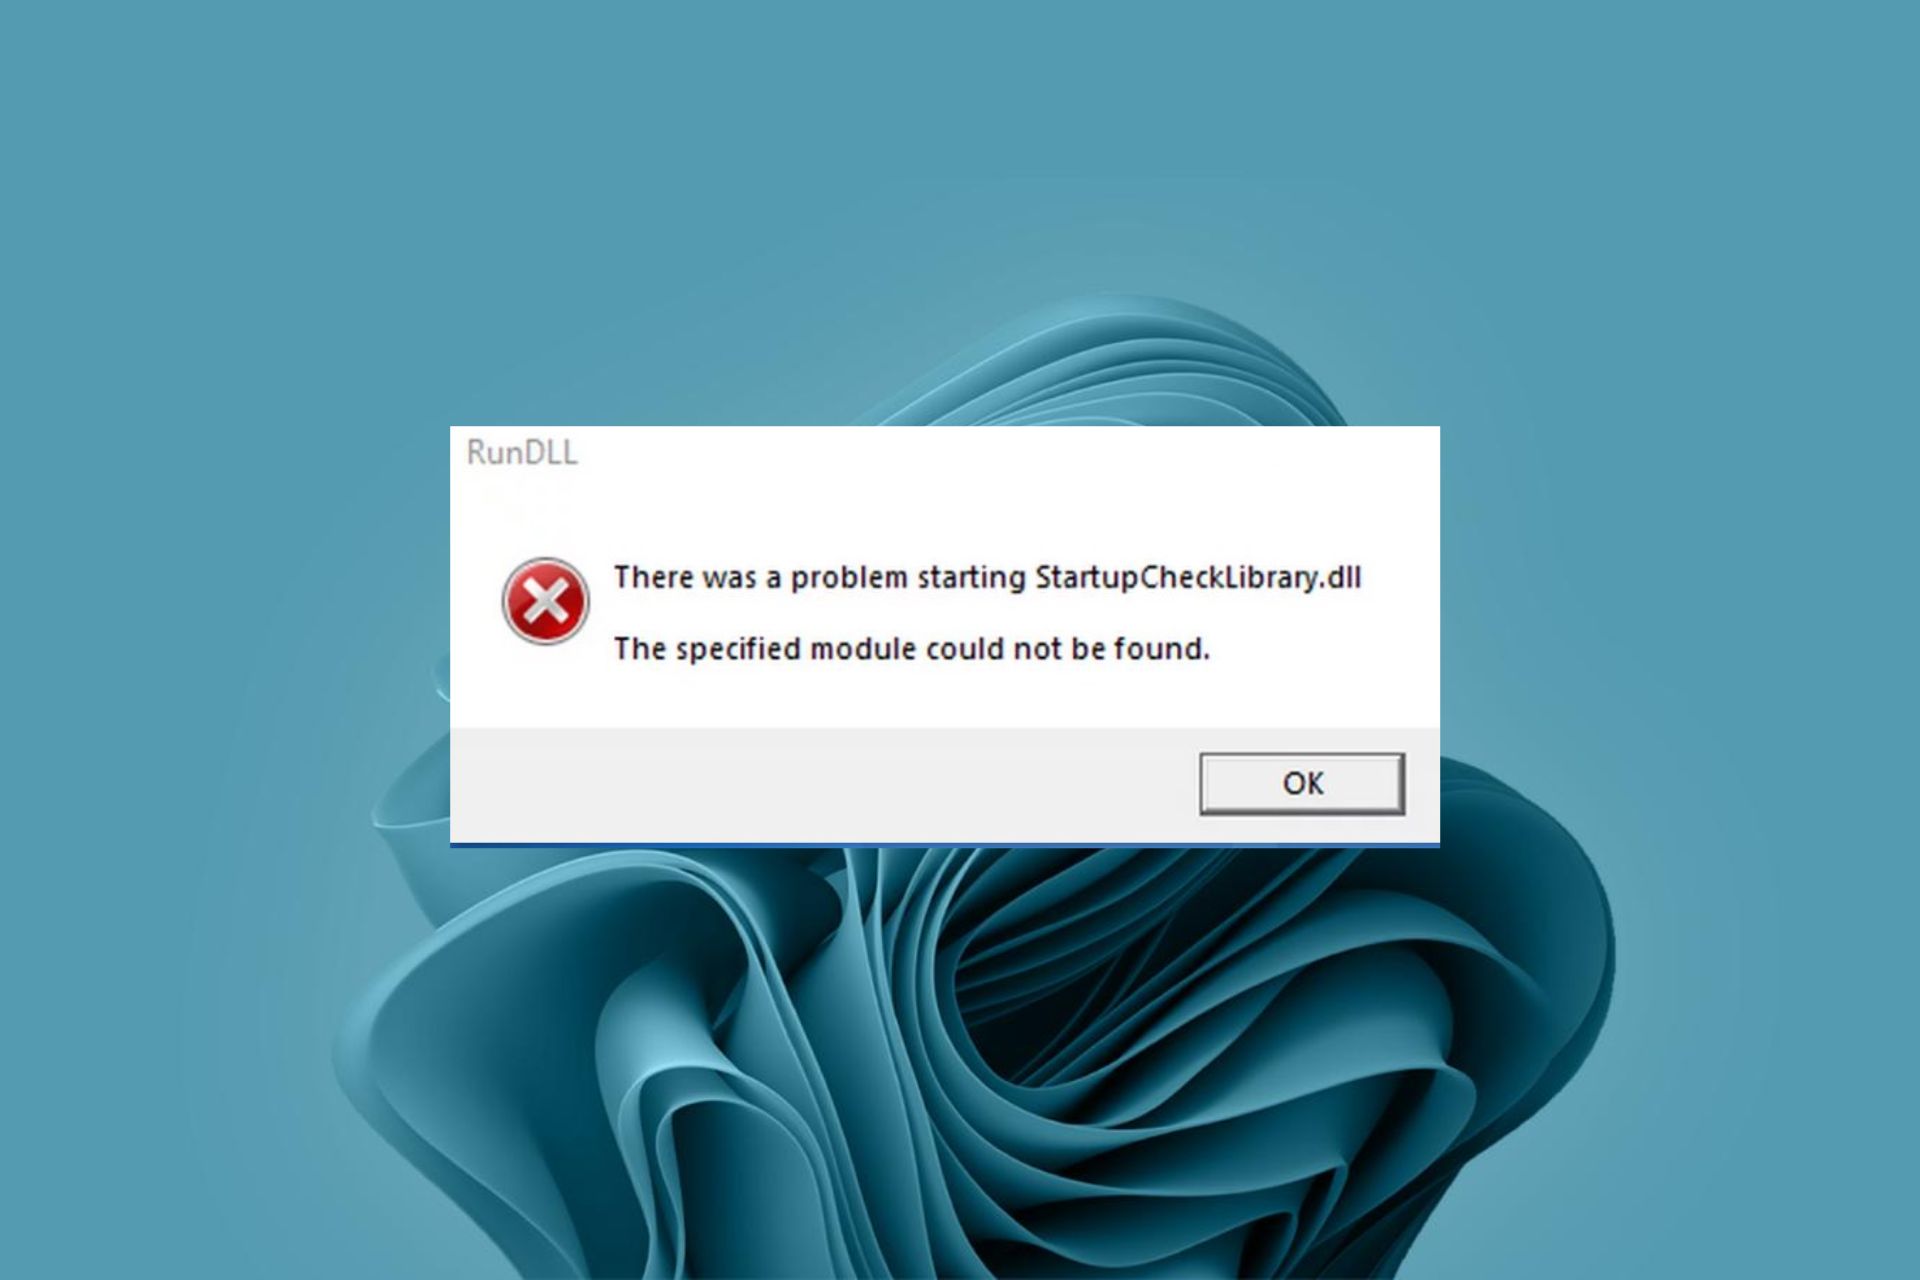
One of these errors is the StartUpCheckLibrary.dll error. This error message can occur if there are missing DLL files. Windows use this file to run some important tasks, so let’s now delve into possible solutions for this error.

What is Startupcheck dll?

StartUpCheckLibrary.dll is a library file used by the Microsoft Windows operating system. It can be found in either of the following folders, depending on your version. C:\Windows\SysWOW64 or C:\Windows\System32

It is a module used for checking startup programs. If this DLL file is missing from your computer, you may experience problems with the operation of certain applications or system behaviors.

From what we have gathered from users, the StartUpCheckLibrary.dll error appeared after a recent Windows update. This could indicate that the update was corrupt.

Other triggers include:

  • Corrupt Registry entries – If your computer has been infected with a virus or malware, there’s a good chance that your registry key has been corrupted as well. 
  • Malware infection – Malware infections are becoming more common these days, and they can affect your computer in many ways, including making certain files disappear completely.
  • Corrupt Windows update – Corrupt updates can cause several computer problems and render it unusable.

How do I recover the StartUpCheckLibrary DLL file?

A few quick workarounds that can save the day include:

1. Run a dedicated DLL-fixer

If you are getting a StartUpCheckLibrary DLL is missing error, and your PC is running slowly, a DLL repair tool should be on top of your list.

Such programs are very useful when you want to fix the StartUpCheckLibrary problem so you don’t know how to do it manually.

What’s more, the fix is usually 100% for Windows DLL files such as this one, so you don’t have to jump from solution to solution trying to figure out how to resolve DLL errors.

2. Run the DISM and SFC scans

  1. Hit the Start Menu icon, type cmd in the search bar, and click Run as administrator.cmd-run-admin-w11 unexpected kernel mode trap windows 11
  2. Type the following commands and press Enter after each one:DISM.exe /Online /Cleanup-Image /Restorehealth sfc /scannow

3. Run a virus scan

  1. Press the Windows key, search Windows Security, and click Open.
  2. Select Virus & threat protection.
  3. Next, press Quick scan under Current threats.
  4. If you don’t find any threats, proceed to perform a full scan by clicking on Scan options just below Quick scan.Scan options
  5. Click on Full scan, then Scan now to perform a deep scan of your PC.Full Scan Scan Now
  6. Wait for the process to finish and restart your system.

4. Remove the task from Task Scheduler

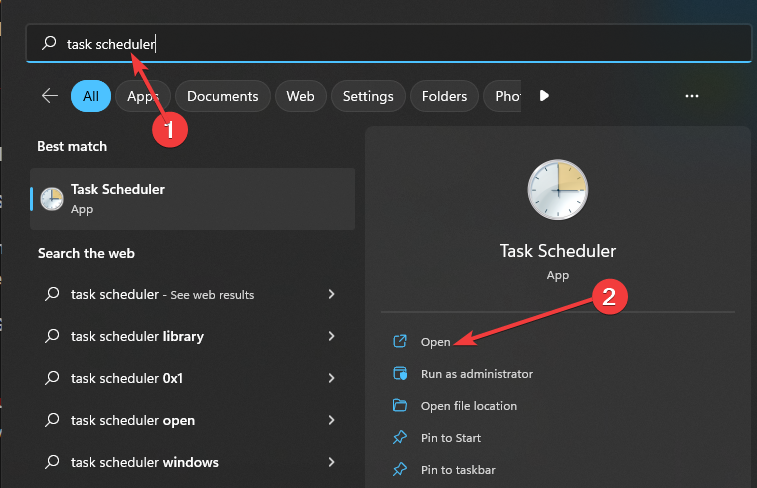
  1. Hit the Windows key, type Task Scheduler in the search bar, and click Open.
  2. Click on the Task Scheduler library menu to expand, then select Microsoft.
  3. Select Application Experience and right-click on StartupCheckLibrary, then click on Delete.

5. Uninstall recent Windows update

  1. Hit the Windows key and select Settings.settings windows 11
  2. Click on Windows Update and select Update history on the right pane.update-history restart to repair drive errors
  3. Scroll down, and under Related settings, click on Uninstall updates.uninstall-updates-w11 computer-recognize-logitech-unifying-receiver
  4. This will take you to the most recent installed updates.
  5. Select the topmost update and click on Uninstall.uninstall-update-latest computer-recognize-logitech-unifying-receiver
  6. Restart your PC and check if the problem persists.

If the Windows update was the problem, you can wait for the next update to be available in case Microsoft releases bug fixes.

For general DLL errors like missing DLL files after a Windows update, check out our comprehensive article on how to bypass these issues.

Let us know what solution worked for you if you encountered this error in the comment section below.

McUICnt.exe – Entry Point Not Found [Error fix]

The Entry point not found error occurs mostly when the software can’t access its DLL file, meaning that, the file is missing in the app. The McUICnt.exe – Entry Point Not Found is one of such errors reported by some of our readers.

We have previously provided solutions for Chrome, Origin, OneDrive and other software that encountered similar problems. In this article, we’ll discuss how to fix the McUICnt.exe problem too.

Why is the McUICnt.exe – Entry Point Not Found?

There can be several reasons why the McUICnt.exe – Entry Point Not Found error is coming up. Below are some of the potential causes;

  • Missing or corrupt system files – The most common factor behind the McUICnt.exe – Entry Point not found error message is that some of the system files required by the application are missing or corrupted.
  • The latest Visual C++ Redistributable package is missing – Another important factor behind the McUICnt.exe error is that the Visual C++ Redistributable package is missing. You need to make sure that the latest version is installed on your PC.
  • Registry configuration errors – If the registry is a database that contains important settings and configurations for the operating system and applications. If these settings are corrupted or incorrect, it can trigger the McUICnt.exe – Entry Point Not Found error message.
  • The DLL file is damaged – The DLL file mentioned in the error message might be corrupt or missing, which is why the application is showing the error.

Above are some of the factors responsible for the McUICnt.exe – Entry Point Not Found error message. Until the files are repaired or reinstalled as the case may be, the message will be persistent. Let’s check how to fix the issue.

What can I do if I get the McUICnt.exe – Entry Point Not Found?

There are a few known tricks to apply before seeking advanced troubleshooting tweaks. Below are some of them;

Having applied the above checks, if you require a detailed step-by-step guide on what to do to fix the error, you can explore the fixes provided below;

1. Run the SFC Scan

  1. Press the Windows key to open the Start menu. Type Command Prompt, and click on Run as administrator.
  2. Then, type the following and press Enter: sfc /scannow
  3. Once completed, restart your PC and this should fix any corruption found.

By running the SFC scanner, the Windows utility should help you to identify and repair corrupted system files. In case you are unable to run Command Prompt as an administrator, check our expert guide to fix it.

2. Perform a System Restore

  1. Press the Windows key to open the Start menu. Type System restore in the Search box and open it.
  2. Select System Restore under System Protection.
  3. Then, click on System Restore and click Next.
  4. Now, select the desired restore point and click on the Next button.
  5. Click Finish.

If you have created a restore point before the error, the System Restore will restore your system to a state when you weren’t facing the McUICnt.exe – Entry Point Not Found problem.

3. Perform an Anti-virus Scan

  1. Press the Windows key to open the Start menu. Type Windows Security in the search box and open it.
  2. Click on the Virus & threat protection option and click on Quick Scan.
  3. Then, follow the on-screen instructions to remove the virus or malware, if found.
  4. Click on Scan options and select Full Scan to perform a deep scan.

The Windows in-built antivirus software will help detect viruses or malware in your computer. However, the Windows Security tool is not always very effective in every situation. Here’s a list of some of the best antivirus tools that you can download on your PC.

4. Reinstall the McAfee Software

  1. Press the Windows, search for Installed apps, and launch it.
  2. Then, locate McAfee, click on the options icon and click Uninstall.
  3. Confirm the process by clicking on Uninstall again.
  4. Follow the on-screen instructions to complete the uninstallation process.
  5. Restart your PC and visit the official McAfee website to download the software.
  6. Install the program on your PC and check whether this fixed the issue.

Reinstalling the program should fix the error as it installs all the files from scratch. Make sure there aren’t any interruptions during the installation.

5. Install VC++ Redistributables

  1. Visit the official Microsoft Visual C++ download page.
  2. Click the relevant link for your Windows PC version. For instance, if your device runs 64-bit Windows, click the x64 link for the latest Visual Studio 2015, 2017, 2019, and 2022 packs.
  3. Then, install the McAfee redistributables and follow the on-screen instructions.
  4. Reboot your PC and try running the McAfee software again.

If none of the other fixes work, hopefully, reinstalling this package will resolve the issue as it fixes the missing DLL files problem.

And that’s it on how to fix the McUICnt.exe – Entry Point Not Found error message. For any additional assistance, you may contact McAfee Chat Support.

If you have any questions or suggestions, do not hesitate to use the comments section below.

MSN Page Will Not Refresh? How to Get It Updated

Some of our readers recently reported that their MSN page will not refresh as it has been showing the same stories for about two days and this is unusual.

It can be quite frustrating if you’re trying to use MSN Explorer but it remains unresponsive. If you’re experiencing similar issues, do not worry. We have compiled some tweaks to apply if the page will not refresh.

Why will the MSN page not refresh?

There are several reasons why the MSN page is not refreshing. Some of the common causes include:

  • Server issues – One of the major reasons why the MSN page is not refreshing is due to server issues or maintenance on the MSN Explorer. If this is the case for MSN, you may need to wait until the issue is fixed.
  • Connection issues – Another possible reason for this error is due to connectivity issues, such as a weak or unstable internet connection. Ensure that you are properly connected to the Internet to clear connection doubts.
  • Browser Settings – Sometimes, browser settings such as proxy servers, security settings, or cookie settings can affect web page behavior. Try to reset the browser settings to default and reload the page.
  • Cache and Cookies – Browser cache and cookies can sometimes cause issues with websites if the cache is not cleared regularly. Clearing your browser’s cache and cookies should help fix the problem.
  • Browser Extensions – If you have some browser extensions enabled, it can sometimes interfere with web pages, causing them not to refresh properly. If this is the case, try to disable all browser extensions and reload the page.

Now that you know some of the reasons why the MSN page will not refresh, let’s proceed to how you can fix this issue.

What can I do if the MSN page will not refresh?

Before engaging in any advanced troubleshooting or settings tweaks, you should consider performing the following preliminary checks;

  • Press F5 to refresh the page.
  • Restart your MSN browser.
  • Contact MSN support.
  • Ensure that you are properly connected to the Internet.
  • Update your MSN browser from the official website.

Having confirmed the above checks, and the MSN page does not refresh, work your way through the steps provided below to fix the issue.

1. Use an alternative Browser

If the MSN browser won’t refresh, you can explore our guide for the best browser alternatives that will serve the same purpose.

The Opera browser is an excellent substitute for MSN Explorer because it comes with mail, a sidebar player for audio and video, and a password manager.

Use Opera, which has all of your bookmarks and saved passwords, as a replacement for MSN Explorer when it becomes unresponsive.

Opera

Get a faster and safer browsing experience with Opera’s advanced set of features.

2. Reset browser settings to default

  1. Launch your browser. Click the three dots icon in the upper-right corner of the browser and select Settings.
  2. On the left pane, choose Reset settings. Then, click Reset settings to their default values.
  3. Finally, click the Reset button to confirm.

By resetting your browser settings to default, it should correct any changes you’ve made to the browser. If this does not work, try the next fix.

3. Clear the browser cache

  1. Launch your browser. Click the three dots icon in the upper-right corner of the browser and select Settings.
  2. Click Privacy and security on the left pane and click Clear browsing data.
  3. Now, check the Cached images and files box and click the Clear data button.
  4. Restart your MSN browser and check if the issue is resolved.

Clearing your MSN browser cache can sometimes help to resolve issues with the browser. This will remove any temporary files and data that may be causing the issue.

And that’s it on how to fix the MSN page will not refresh issue. Additionally, users can explore our expert guide on MSN Explorer not responding in Windows 10 for further information on how to fix MSN issues.  

If you have any questions or suggestions, do not hesitate to use the comments section below.

VCOMP100.DLL Missing or Not Found: 5 Ways to Fix It

VCOMP100.DLL is Dynamic Link Library (DLL) developed by Microsoft and required by several graphical-based applications such as Photoshop, along with several games like The Witcher 3.

If the operating system cannot locate this DLL upon launching the app, you get the DLL missing or not found error.

Why is VCOMP100.DLL missing from my computer?

Below are the probable reasons why you get the missing vcomp110.dll error:

  • App not installed correctly -The missing DLL errors commonly occur when a game or an app isn’t installed correctly due to a setup crash or blocked installation for security reasons.
  • Virus and malware Infection – The presence of viruses or malware messes up your system, damages the essential files, and even modifies or deletes the DLL contents.
  • Corrupt system files – If the vcomp110.dll file is not found on your computer, the corrupt file system can also be at blame.
  • Accidental deletion – The DLL file could also get accidentally deleted when you are trying to free up the disk space.
  • Graphic driver issues – A outdated or corrupt graphics driver often lead to a slew of DLL-related errors.

The methods listed in the following section will prove effective in resolving the missing VCOMP100.DLL error.

How do I fix the missing vcomp110.dll or not found errors?

Before you proceed to the solutions methods below:

  • Make sure that DirectX is installed on your computer.

1. Use a DLL repair tool

DLL errors like these must be handled with caution to avoid damaging your computer even further. If you are a novice and do not have experience troubleshooting system-level errors, it’s best to seek help from a dedicated DLL repair tool and powerful software recommended by professionals.

2. Repair the system files

  1. Press the Windows key to bring up the Start menu, type cmd in the search bar and choose the Run as administrator option from the right result section.vcomp110.dll
  2. Press the Yes button on the User Action Control popup that appears.
  3. Type or paste the following command and press the Enter key to initiate the SFC scan. sfc /scannowvcomp110.dll
  4. When you see the message verification is 100% completed, type or paste the following command and press the Enter key to execute the DISM it: DISM /Online /Cleanup-Image /RestoreHealthvcomp110.dll

Wait for the DISM tool to detect the corrupt component store files and restore them with the cached copy. Running the SFC and DISM scans will ensure that the system files are not corrupt and your computer can successfully locate the vcomp110.dll file when launching games and apps.

3. Scan for viruses and malware

  1. Use the Windows + I keyboard shortcut to bring up the Settings app.
  2. Choose Privacy & security from the left sidebar and then select Windows Security from the right section.vcomp110.dll
  3. Next, choose Virus & threat protection option.vcomp110.dll
  4. Click Scan options located under the Current threats section.
  5. Enable the Microsoft Defender Antivirus (offline scan) option and then hit the Scan now button located underneath.vcomp110.dll

The Windows Defender will now scan the system and will get rid of the viruses and malware if it detects any.

If you rely on effective thirty-party antivirus to keep your system protected, you can run a full scan to identify the problems.

4. Manually download VCOMP100.DLL

If the above methods could not help fix the error, it’s best to download the missing DLL file manually. While several websites offer DLL files for free. Unfortunately, not all of them are trustworthy. However, you can visit reliable websites like DLL_Files to download the missing file.

Before hitting the download button, ensure that the DLL version you intend to download is compatible with your operating system and system architecture.

When the download is successful, you can extract the content and paste the file into the given location: C:\Windows\System32

Alternatively, you can also paste the DLL file into the installation directory of the affected program or game. After performing the above action, execute the following command in the Command Prompt window to register the DLL: regsvr32 VCOMP100.DLL

We hope the solutions listed in this guide helped you fix the missing VCOMP100.DLL error and you could play your favorite games.

However, if several DLL files are missing, refer to this guide to find effective solutions to resolve them.

Also, if you have any other queries or suggestions for us, do let us know in the comments section below.

Steam_api64.dll missing: How to Fix It

Steam_api64.dll, a DLL (Dynamic Link Library) file developed by Valve Corporation, is an essential part of the Steam client app, a digital distribution platform for video games and similar content. Specially developed for the 64-bit operating system, steam_api64.dll manages several Steam API-related services.

Why is the steam_api64.dll file missing?

If the Steam client is unable to find the steam_api64.dll in the installation folder, it could be due to the following reasons:

  • Outdated display drivers – Obsolete or missing display drivers are the primary reason for the missing DLLs.
  • Incomplete installation – If you encounter the steam_api64.dll not found error when launching Steam for the first time, the app has not been installed correctly.
  • Malware attacks – Viruses and malware damage, modify, and even delete the DLL files stored on your system which can no longer be found.
  • Missing system files – If the system files are corrupt or damaged, DLL-related errors are inevitable.
  • Incompatibility – Recently installed system updates can render the Steam app incompatible, triggering errors of all sorts.

If you encounter the missing steam_api64.dll in Steam, try the methods provided in this guide to resolve the problem.

How can I fix the missing steam_api64.dll error?

Before you proceed to the complex methods listed below, you should perform the following actions:

  • Restart your computer to reset the temporary cache.
  • Install the latest Windows updates for your PC.
  • Uninstall the affected app and then reinstall it again.
  • Scan your PC with antivirus to get rid of the viruses and malicious software from your computer.

If the missing DLL is still not found, try the solutions listed below one at a time.

1. Use a dedicated DLL fixer

Instead of restoring the DLL file to troubleshoot the related errors, you can employ a potent DLL-fixing software capable of resolving the system-related issues effortlessly.

Such tools are effective against several third-party DLL problems as they can handle compatibility issues between the operating system and the Steam client.

They can easily restore the missing Steam_api64.dll at a button click regardless of whether it has been modified, deleted, or damaged because of an underlying cause.

2. Update the graphics driver

  1. Use the Windows + R shortcut to bring up the Run dialog box, type the following command in the text box and press the Enter key. devmgmt.mscsteam_api64.dll
  2. Expand the Display adapter category in the Device Manager window.
  3. Right-click the graphics driver and choose the Update driver option.steam_api64.dll
  4. Choose the Search automatically for drivers option from the window.steam_api64.dll

In addition to the solution, you can opt for other methods to update GPU drivers on your device if the steps below don’t help.

More exactly, it’s recommended to use effective driver update software that can certainly manage outdated drivers automatically without causing any errors.

3. Temporarily disable real-time protection

  1. Bring up the Settings app using the Windows + I keyboard shortcut.
  2. Switch to the Privacy & security settings from the left sidebar and then select the Windows security option from the right section.steam_api64.dll
  3. Next, choose the Virus and threat protection option.
  4. Click the Manage settings option located under the Virus and threat protection settings section.
  5. Toggle Off the switch under the Real-time protection section.Steam_api64.dll

The steam_api64.dll file goes missing as Windows Defender restricts the DLL file from running on your PC, considering it to be a virus or malware. To prevent it from happening, you should disable the real-time protection feature before you launch the Steam client to play games.

In case you rely on a third-party antivirus to stay protected against online threats, you can disable it for the time being.

3. Install DirectX

  1. Navigate to the official download page, choose your preferred language in the drop-down, and hit the Download button to download the DirectX Web Installer on your computer.steam_api64.dll
  2. After the download is complete, navigate to the installer location and double-click to run the Web Installer. steam_api64.dll
  3. Follow the step-by-step instructions to complete the package installation.

Reboot your PC to apply the changes and launch the Steam client. Hopefully, you will no longer encounter the missing Steam_api64.dll error when launching games like Dying Light and Fallout 4.

DirectX is a popular API by Microsoft that offers graphical support to numerous games and applications. These games also utilize DirectX packages to operate the in-game backend mechanics. If DirectX is not installed on your computer, DLL-related errors will likely occur.

4. Manually install steam_api64.dll

If the methods discussed above cannot resolve the problem, you can download the missing DLL files from some reliable source since there is no official website available to download them.

To avoid downloading viruses and malware masquerading as original files, you can visit dll_files.com to download the steam_api64.dll compatible with your system architecture. After this, extract the contents and then paste them into the installation directory of the Steam client.

After replacing the DLL, restart your PC and launch the game you intend to play.

So that’s pretty much everything you can do to restore the missing steam_api64.dll file to get rid of the issue.

If the DLL files go missing right after installing the Windows update, the solutions mentioned in this guide will prove effective.

Before you leave, don’t miss our latest guide to learn what to do if awesomium.dll is missing.

Which of the methods listed above helped fix the missing Steam_api64.dll error? Do let us know in the comments below.

Xbox exec says Hi-Fi Rush was “a breakout hit” despite rumors to the contrary

Last week speculation regarding Hi-Fi Rush‘ sales performance made the rounds on social media. Rumors that the game had undersold relative to Microsoft’s expectations began with a remark games journalist Jeff Grubb made on his podcast. Specifically, Grubb said that he’d heard the game had not earned as much sales revenue as expected.

The comment set off a discussion online about where Microsoft’s priorities lie regarding its first-party games. Hi-Fi Rush, a Bethesda IP, was shadow-launched on Xbox Game Pass back in January to a wave of excitement, though obviously with a total lack of marketing. And as many pointed out, the game’s release on Game Pass would naturally undercut individual game sales.

Grubb later tweeted some clarification on what he’d said on the podcast, saying “This was just a small, passing statement in a larger conversation. It wasn’t meant to make people worry about HFR.”

On Friday VP of Xbox Games Marketing Aaron Greenburg posted on Twitter to assure fans that Hi-Fi Rush was indeed a success “in all key measurements and expectations.”

So it looks like we shouldn’t count out an eventual sequel just yet. Check out our Hi-Fi Rush roundtable impressions post here for more on the game.

Hi-Fi RUSH
Hi-Fi RUSH
Developer:
Bethesda Softworks
Price:
Free

MSVCR71.dll was Not Found: 5 Ways to Fix It

MSVCR71.dll is a Dynamic link library file installed with the Visual C++ Redistributable package. It is used by different applications to help them run properly on your computer.

If you have encountered the MSVCR71.dll was not found error, this guide can help! We will discuss expert-recommended methods to restore the missing DLL file.

What causes the MSVCR71.dll was not found error?

There could be several reasons for the DLL missing error; some of the common ones are:

  • Corrupted Visual C++ Redistributable package – If the Visual C++ Redistributable package is damaged or corrupted, you might see this error. Reinstall it to fix the error.
  • File deleted by security patch – Windows security patch somehow deleted the DLL file while getting installed. You need to reinstall the Windows security patch to resolve the problem.
  • Virus infection – If your computer is infected with viruses, it may corrupt system files. You need to scan your PC using an antivirus tool to remove the malicious files.

Now that you know about the causes of the error message, let us talk about the solutions.

How can I fix the MSVCR71.dll was not found error?

Before moving to the advanced troubleshooting steps, go through these preliminary checks:

  • Try rebooting your computer; simple as it may sound, sometimes it can do the trick.
  • Check for pending Windows updates.
  • Try reinstalling the app that throws the error.

If these quick fixes didn’t help, move on to the detailed fixes.

1. Run a DLL fixer

DLL files are essential as they contain code and data shared by multiple programs on a computer. If these are corrupted, it could cause issues on your machine. To safely recover or restore DLL files, you need a reliable DLL fixer like the one below.

That is an application that scans and repairs DLL errors, including MSVCR71.dll was not found, thereby fixing issues like conflicts between third-party apps and OS, system crashes, slow performance, and improving the overall health of your PC.

2. Download the Visual C++ Redistributable package

  1. Press the Windows key, type control panel, and click Open.Control Panel start menu  msvcr71.dll
  2. Click View by, select Category from the options, then click Uninstall a program.Programs msvcr71.dll
  3. Locate & select Visual C++ Redistributable, then click Uninstall.Programs msvcr71.dll
  4. Click Yes on the UAC prompt and then click Repair.DLL file C++ repair
  5. If this doesn’t resolve the problem, follow the steps mentioned above and click Uninstall.Uninstall C++
  6. Remove other versions of the app if listed. Download the Visual C++ Redistributable package.
  7. Double-click on the installer file, accept the license terms, and click Install.Msvcr71
  8. Follow the on-screen instructions to complete the process.

3. Run SFC & DISM scans

  1. Press the Windows key, type cmd, and click Run as administrator.CMD elevated CMD elevated msvcr71.dll
  2. Type the following command to repair the system files and hit Enter: sfc/scannowSFCSCANNOW CMD
  3. Wait for the scan to complete, then copy & paste the following command to repair the Windows OS image and press Enter: Dism /Online /Cleanup-Image /RestoreHealthRestore health msvcr71.dll
  4. Restart your computer to confirm the changes.

4. Perform a System Restore

  1. Press the Windows key, type control panel, and click Open.Control Panel start menu d3dx9_42.dll d3dx9_42.dll
  2. Select View by as Large icons and click Recovery.Recovery Control Panel  msvcr71.dll
  3. Now click Open System Restore.Open system restore
  4. On the System Restore, select Choose a different restore point and click Next.Next Choose a different restore point msvcr71.dll
  5. Now select the desired restore point and click Next.Choose a point
  6. Click Finish, and your system will restart and restore the previous version.Finish msvcr71.dll

If System Restore is not working, we recommend you check out this guide.

5. Download the DLL file manually

Note icon NOTE
It is not recommended to install DLL files from a third-party website, but you can get them from a reliable source, such as the DLL-Files website, as it has been tested and verified by us.
  1. Visit the DLL Files website, locate the MSVCR71.dll file, and click Download.msvcr71.dll Download
  2. Open the downloaded folder, and copy the .dll file.
  3. Now go to this path and paste the file: C:\Windows\System32
  4. Reboot your PC to let the changes take effect.

Encountering DLL errors on Windows 10 can be frustrating and unfortunate; thankfully, easy fixes are available to resolve the error. Check out this guide to know more.

So, these are the fixes you need to apply to resolve the MSVCR71.dll was not found error. If you have any questions or suggestions, please let us know in the comments section below.

D3dx9_42.dll Not Found: How to Fix It in 5 Steps

D3dx9_42.dll is a Dynamic Link Library file developed by Microsoft and is an important system file for the Windows operating system.

If this DLL file is missing or corrupted, you might see an error while playing video games or using graphics software. In this guide, we will discuss some easy fixes to resolve the issue in no time.

What causes the d3dx9_42.dll missing error?

There could be several reasons for this DLL missing error; some of the common ones are mentioned here:

  • Faulty app – If the software or game using the DLL file is damaged or corrupted, you could encounter this error. Reinstalling the affected app could fix it.
  • Malware infection – Malware could infect system files causing various errors. Run a deep scan using a reliable antivirus to fix the issue.
  • Corrupted system files – If the system files are deleted or corrupted, it could lead to the DLL missing error. Run the SFC scan to get rid of the error.
  • Broken registry files – Broken registry entries could also be one of the reasons for this DLL error. You need to use a registry cleaner to resolve the problem.

Now that you know the causes, let us dive into the solutions to fix them.

How can I fix the d3dx9_42.dll missing error?

Before moving to the advanced troubleshooting steps, go through these: 

If these didn’t help you, let us check out the fixes mentioned below. 

1. Use a third-party DLL fixer

Microsoft recommends not tampering with the system files, especially the DLL files. Therefore, to fix the missing DLL error, you need DLL fixers.

A third-party DLL repair tool scans for missing or corrupted DLL files and replaces or repairs them. Also, by restoring files like d3dx9_42.dll, this app can fix other issues as well, thus improving your computer’s performance.

2. Run SFC & DISM commands

  1. Press the Windows key, type cmd, and click Run as administrator.CMD elevated d3dx9_42.dll
  2. Type the following command to repair system files and click Enter: sfc/scannowSFCSCANNOW CMD
  3. Wait for the process to complete, then copy and paste the following command to repair the Windows OS image and hit Enter: Dism /online /cleanup-image /restorehealthRestore health d3dx9_42.dll
  4. Restart your computer to confirm the changes.

3. Perform a system restore

  1. Press the Windows key, type control panel, and click Open.Control Panel start menu d3dx9_42.dll d3dx9_42.dll
  2. Select View by as Category and click Recovery.Recovery Control Panel  d3dx9_42.dll
  3. Click Open System Restore.Open system restore
  4. Select the Choose a different restore point option and click Next.Next Choose a different restore point d3dx9_42.dll
  5. Choose a restore point and Next.Choose a point
  6. Click Finish to start the restoration process.Finish d3dx9_42.dll

If System Restore didn’t complete successfully, we recommend you check out this guide to learn the solutions.

4. Download the file manually using a reliable website

Note icon NOTE
Installing DLL files from third-party websites is not advised; however, obtaining them from a trustworthy source is recommended since we have tested and verified it.
  1. Go to the DLL Files website, locate the d3dx9_42.dll file, and click Download.d3dx9_42.dll download
  2. Open the downloaded folder, and copy the .dll file from it.
  3. Now navigate to this path and paste the file: C:\Windows\System32
  4. Reboot your PC to let the changes take effect.

If you’re experiencing missing DLL files on Windows 10 computer, we recommend you check out our informative article on how to fix this common issue.

So, these are methods to follow to fix the d3dx9_42.dll missing issue. If you have any questions or suggestions, feel free to mention them in the comments section below.

Fix: Windows Security Protection History Missing

Several users have reported that the Windows Security protection history is missing or empty for them. Notably, the protection history shows nothing and it is blank. However, the users are getting notifications that the programs are being blocked.

This annoying issue prevents the users from unblocking the mistakenly blocked programs. If you are also experiencing the same issue, this guide is for you. Here we will share with you a bunch of solutions to resolve the Windows 11 protection history empty issue.

Why is the Windows 11 Security protection history empty or missing?

We did some digging and found a bunch of reasons which is why the Windows 11 Security protection history is empty, missing, or not working.

  • Updates aren’t installed: If your PC isn’t updated, then chances are an underlying bug is causing the Windows Security protection history to be empty or missing.
  • Corrupt system files: Chances are the important system files are corrupt or missing from your PC causing the programs to misbehave.
  • Windows Defender issue: Often, programs can run into trouble if a third-party app or something else has changed important files related to Windows Defender.
  • Corrupt Defender history files: Users have also pointed out that because of the presence of corrupt Defender history files, they weren’t able to see anything inside the protection history.

Let us now apply the solutions and fix the issue of the Windows Defender protection history empty.

How can I resolve the Windows Defender protection history empty problem?

1. Install the latest updates

  1. Press the Win + I keys to open the Settings menu.
  2. Click on Windows Update on the left.
  3. Hit the Check for updates button.
  4. Click on the Download and Install option to get the latest updates.
  5. Restart your PC.

You should ensure that your PC is running the latest update. Updates not only bring new features for you but also lets you fix the bugs that are associated with the programs. You can install the latest update and check if this resolves the Windows 11 protection history empty issue.

2. Delete Defender scans history

  1. Press the Win + R keys to open the Run dialogue.
  2. Type C:\ProgramData\Microsoft\Windows Defender\Scans\History and click on OK.
  3. Open the Service Folder.
  4. Press Ctrl + A to select all files.
  5. Hit the Delete button on your keyboard.
  6. Restart your PC.

This solution was suggested by one user on the official Microsoft forum. Apparently, this has helped several users fix the problem of Windows Defender protection history empty.

3. Re-register Windows Defender

  1. Open the Start menu by pressing the Win key.
  2. Open Windows PowerShell as an admin.
  3. Type the below command and press Enter. Get-AppxPackage Microsoft.SecHealthUI -AllUsers | Reset-AppxPackage
  4. After the process completes, reboot your PC
  5. Open the Start menu by pressing the Win key.
  6. Open Windows PowerShell as an admin.
  7. Type the below command and press Enter. Add-AppxPackage -Register -DisableDevelopmentMode "C:\Windows\SystemApps\Microsoft.Windows.SecHealthUI_cw5n1h2txyewy\AppXManifest.xml"
  8. Once the process finishes, close the PowerShell.
  9. Restart your PC.

This solution was also suggested by one user on the Microsoft Forums, and it has helped users overcome the Windows Security protection history missing problem. You can also follow the above steps and check if this helps you resolve the issue or not.

4. Run the system file checker

  1. Press the Win key to open the Start menu.
  2. Open Command Prompt as an admin.
  3. Type the below command and press Enter. sfc /scannowCMD sfcscannow
  4. Wait for the process to complete.
  5. Type the below commands and press Enter after each one. DISM /Online /Cleanup-Image /CheckHealth DISM /Online /Cleanup-Image /ScanHealth DISM /Online /Cleanup-Image /RestoreHealth
  6. Restart your PC.

You can fix the corrupt or missing system files using the built-in functions such as SFC Scan and DISM commands.

However, often these aren’t that effective in solving issues. For such situations, we advise you to use dedicated tools that will be able to fix Windows errors, fix BSoD errors, or even detect and remove malware from your PC.

5. Reset Windows Defender/Security

  1. Press the Win + I keys to open the Settings menu.
  2. Click on Apps.
  3. Select Installed apps.
  4. Locate Windows Security.
  5. Click on the 3-dot icon and select Advanced options.
  6. Scroll down and hit the Reset button.
  7. Click on Reset again.
  8. Restart your PC.

Resetting the Windows Defender or Security will re-install all the files from scratch. This would also negate any other issues with the program as well.

Where is the protection history in Windows Defender and how to clear it?

  1. Press the Win + I key to open the Settings menu.
  2. Select Update & Security.
  3. Click on Windows Security on the left.
  4. Select Virus & threat protection.
  5. Click on Threat history.
  6. Hit the Remove all button.

That is it from us in this guide. The above steps guide you on how to clear your protection history in Windows Security or Windows Defender. For users coming across Windows Defender scan issues, we have a guide that lists some effective solutions to fix the problem.

Recently users have started reporting getting the Microsoft Defender threat service has stopped the problem. This annoying error can be resolved by following the dedicated guide.

Several users have also pointed out the Windows Defender Engine unavailable issue. We have a guide that explains in detail what this error means and how you can fix it.

Let us know in the comments below which one of the above solutions resolved the Windows Security protection history missing problem

PDFs Opening in Chrome Instead of Adobe? How to Change It

Many of our readers complained about PDFs opening in Chrome instead of Adobe. The issue can occur for many reasons. However, you can fix it by following the steps outlined in this article.

Alternatively, you can check our detailed review of the best PDF reader software for Windows 11 if you need professional tools to work with PDF files.

But now, let’s focus on why this issue appears and how to properly fix it.

Why does my PDF open in Chrome instead of Adobe?

Some notable factors that may be responsible for PDFs opening in Chrome instead of Adobe are:

  • Chrome is the default PDF file reader – If your default settings regarding the software for opening your PDF is Chrome, it’ll work whenever you try to access a PDF file instead of Adobe.
  • Acrobat Chrome extension on the browser – If you have installed the Acrobat Chrome extension, you can experience difficulty opening PDF files with Adobe Acrobat DC. It can prompt your system to use the extension instead of the app.
  • Adobe Reader isn’t installed or accessible – The system can direct the PDF file you’re trying to open to an available app that can open the file type. So, if Adobe Reader isn’t installed on your PC, Chrome can open the PDF if it’s the only option.
  • Chrome PDF settings – The Chrome browser uses its integrated PDF viewer by default whenever you want to open downloaded files. So, it can override other app permissions if it’s not disabled.

These factors are liable to vary depending on the circumstances. Regardless, we’ll discuss how to resolve the problem.

What can I do if PDFs open in Chrome instead of Adobe?

Before proceeding with any steps for resolving the problem, go through these checks:

  • Check if you still have Adobe Reader installed on your PC.
  • Ensure Adobe Reader is set as the default to open PDFs.

Try these fixes below if the checks are intact.

1. Switch your settings to open PDFs in the reader

  1. Launch Adobe Acrobat Reader on your PC, click the Edit button on the menu bar, then select Preferences from the drop-down menu.
  2. Click Internet in the left panel of the Preferences menu and then select Internet Settings.
  3. Go to the Programs tab and click Manage Add-Ons, then choose Acrobat Reader in the list of add-ons.
  4. Click the Disable option to ensure PDFs won’t open in a browser.

The above steps will prompt PDF files to always open in Adobe Reader instead of the browser.

2. Change the PDF file’s property settings

  1. Go to the location of the PDF file you want to open on Adobe and right-click on the thumbnail. Go to the Opens with option and click the Choose another app button.
  2. Select Adobe Reader or Acrobat DC from the drop-down. Click Always to save and apply changes.

Changing the PDF file’s default viewer allows you to set which PDF viewer will open whenever you attempt to open the file.

3. Change the default PDF viewer

  1. Press Windows + I key to open the Windows Settings app.
  2. Select Apps and click on the Default apps option.
  3. Select the Choose default app by file type option.
  4. Click Chrome and select the Adobe Reader app to open PDF file format as the new default.
  5. Close the Settings window and try accessing the file.

Changing the default reader for PDF file format in Settings allows Adobe Reader to be responsible for opening any PDF files on the PC.

4. Set downloaded files not to open in Chrome

  1. Launch the Chrome browser on your PC, click the three dots in the top right corner of the screen to open Menu, then select Settings.
  2. Type PDF into the search bar, then click on Site Settings from the search results.
  3. Scroll down and click on PDF Documents.
  4. Toggle on the switch for the Download PDF files instead of automatically opening them in Chrome option.
  5. Exit the browser and check if the problem persists.

Tweaking Chrome PDF document settings configure it only to download the PDF files and not to open them with Chrome automatically.

If you want to continue using Chrome for PDF files, you might be interested in our Chrome PDF viewer not working guide.

5. Disable Adobe Reader extension in Chrome

  1. Open Google Chrome on your PC. Click the three-dot icon in the top right corner to open the Menu, select More Tools, and click on Extensions.
  2. Turn off the toggle switch for the Adobe Reader extension.
  3. Check if the problem is still there.

Disabling the Adobe extension will stop it from opening PDFs in Chrome.

In addition, our readers can go through how to create & edit PDF Documents with the PDF Pro Software on their PCs.

Likewise, you can read about fixing the invalid Plugin detected error in Adobe Acrobat.

Should you have further questions or suggestions, let us know in the comments section.

How to Deploy Fonts Using SCCM [3 Simple Steps]

Deploying font packages on multiple computers requires using System Center Configuration Manager (SCCM). However, not all users know how to go about it. This guide will discuss how to deploy fonts using SCCM in a few steps.

Also, we have a detailed article about what to do if you can’t install fonts on Windows PC.

Can I deploy a font to all users?

One of the benefits that come with deploying fonts with Microsoft System Center Configuration Manager (SCCM) is its ability to deploy the same font on multiple computers.

It uses dedicated scripts to deploy a script (SCCM Package) to install the font and extends it to all users.

How do I deploy fonts using SCCM?

1. Download the Install_fonts script

Note icon NOTE
For this step to work, you must show extensions for all files.
  1. Download the install_fonts script from a trusted source and save it in a folder.
  2. Right-click on the downloaded file, select Rename from the drop-down menu, then change the file extension from .txt to .vbs.
     
  3. You should get a warning. Click Yes. If the warning doesn’t appear, it means you didn’t change the file extension.
  4. Copy the script file and font to a shared folder.
  5. Right-click on the script file, select Open with from the drop-down, then click on Notepad or any editor.
  6. Set the font source path to the location where the font is saved, save, and close the file.

2. Create a package containing the source file

  1. Left-click the Start button, type Configuration Manager console, then press Enter to open the SCCM console.

  2. Go to the Software Library, then select Overview.
  3. Expand the Application Management entry, then select Packages.
  4. Right-click Packages and select Create Package from the drop-down menu.
  5. Specify the Name, Source folder and click the Next button.
  6. On the Choose the Program Type menu, select Standard Program, then click Next.
  7. Specify the Name for the standard program, and enter the Command line as: cscript.exe filename.vbs
  8. Under the Program can run tab, choose the Whether or not a user is logged on option, then click Next.
  9. On the Create Package and Program wizard completion page, click Close.
  10. Click on the created package, and at the bottom pane, click the Programs tab.
  11. Right-click the Program and click Properties from the drop-down.
  12. Select the General tab, go to the After running option, and set it to the Configuration Manager logs user off option.
  13. Click Apply, then OK.

3. Test the Font Deployment in SCCM

  1. Right-click on the package and Distribute the content to the Distribution Point (DP).
  2. After the content is available in the DP, right-click the package and click Deploy, then deploy the package to the desired collection.
  3. Go to Deployment purpose and select either Available or Required.
  4. In the Software Center, click Install Selected. After the software is installed, the status will show Pending Logoff.
  5. Click on the Logoff button to log off.
  6. After the user logs in, the font will be available in the Fonts repository in the Control Panel.

The above steps will allow you to deploy fonts to multiple computers with the Microsoft System Center Configuration Manager (SCCM).

In addition, our readers can check our guide about how to fix blurry fonts on Windows. Likewise, we have a comprehensive guide on ways to fix font bugs on your PC.

If you have further questions or suggestions, drop them in the comments section.

Cpuz149_x64.sys: What Is & How to Delete

Cpuz149_x64.sys is a Windows driver file, but its presence can sometimes cause issues on the PC if a virus disguises it as a file. It can be due to numerous problems affecting the file. However, this guide will discuss the causes and ways to delete the file.

Also, readers can read about Win32kfull.sys BSOD error on Windows 11 and everything you need to know about fixing it.

What is cpuz149_x64.sys?

The Cpuz149_x64.sys file is the driver responsible for the process known as cpuz149, and it belongs to the software CPUID service.

It is not an essential Windows OS file; its absence doesn’t affect the system’s performance. Due to the lack of information about the file, it can’t be said that it is safe.

However, cpuz149_x64.sys can be a threat to the system if it is used by malicious software. It can corrupt other system files and regenerate to damage the computer. Some factors that can cause the issue are:

  • Corrupt system files – System files are essential for the processes running on the PC. If the system files are corrupt or compromised, they can cause issues with other files, including cpuz149_x64.sys.
  • Virus and malware infection – The driver file error can occur due to malware and viruses infecting the system. They can corrupt well-running apps and system files, causing them to malfunction.
  • Outdated Windows OS – Many times, the system misbehaves and runs into problems with its files and processes when the operating system running on it is outdated.
  • Malicious applications – Files like cpuz149_x64.sys can find their way into the system when installed as part of an app package.

These factors can vary on different PCs depending on the circumstances. However, we’ll take you through some basic steps to resolve and delete the file.

How do I delete cpuz149_x64.sys?

Try these steps to see if the cpuz149_x64.sys is removed from your PC:

  • Perform a System Restore – Restoring your operating system to an earlier state can help with problems related to this file.

Try the steps below if the issue persists.

1. Uninstall and delete Corsair ICEU temp files

1.1 Uninstall Corsair ICEU

  1. Left-click the Start button, type Control Panel, then open it.
  2. Click on Programs, then select Programs and Features.
  3. Find the Corsair iCUE 4 Software, right-click it, then select Uninstall from the drop-down.
  4. Follow the onscreen instructions and restart your PC to see if the file persists.

Uninstalling the program will delete app files and remove its components, including the cpuz149_x64.sys file.

1.2 Delete the Cpuz149_×64.sys file

  1. Press Windows + R to open the Run window, type %appdata%, then click OK.
  2. Find any Corsair folder in the window, right-click, and select Delete.
  3. Press Windows + R to open the Run window, type %localappdata%, and click OK.
  4. Delete any Corsair folder in the window.
  5. Navigate your File Explorer to the following path and delete the Corsair files/ folder:
    • for ICUE 3 C:\Program Files (x86)\
    • for ICUE 4 C:\Program Files\
  6. Then, restart your PC to take effect.

Removing the cpuz149_×64.sys file will completely clear the file from your PC. You can read about how to fix File Explorer if it crashes on your computer.

Similarly, some users also claimed the HWmonitor software could prompt the Cpuz149_×64.sys. So, uninstall and clear the cache folders also.

2. Disable Intel Utility running out of Control Set in Autoruns

  1. Download the System Autoruns for Windows from Microsoft Build.
  2. Right-click on the file and click Show in folder.
  3. In the File Explorer, then right-click and select Extract all.
  4. Depending on your processor, right-click the following, and click Run as administrator:
    • Autorunsx64.exe if you are using a 64-bit processor.
    • Autoruns.exe if you are using the 32-bit processor.
  5. Search for Cpuz and uncheck the CPUZ program running out of control set services.
  6. Then, reboot your PC and check if the cpuz149_×64.sys has been removed.

As you can see, removing this file is pretty simple, and to do so, you need to uninstall any applications that might be using this file.

Also, we have a detailed guide about the Brusbsib.sys Incompatible Driver error and how to fix it.

Did we miss a solution that worked for you? Let us know in the comments below!

What is The 0x80070534 Error Code & How to Quickly Fix It

The error 0x80070534: no mapping between account names and security IDs was done, which can make accessing files from external drives hard.

It affects many Windows users and can occur for many reasons. Hence, we’ll guide you through some steps to fix it.

Also, you can read our article about the Desktop referring to a location that is unavailable on Windows PC.

What is the 0x80070534 error?

Users can encounter the error code 0x80070534 when trying to restore files from external storage devices on the device. It is accompanied by an error message indicating No mapping between account names and security IDs was done.

Furthermore, the error doesn’t necessarily indicate that the usernames are not matching. However, it can mean several possible problems with the file restore process.

What causes the 0x80070534 error code?

Some notable factors that can cause the error are:

  • Permission issues – There is a limit to the changes you can make to the system depending on the account you operate. Sometimes you need administrator permission to make certain changes.
  • Wrong Username or account – You can also run into the error code 0x80070534 if the username you entered is incorrect. Also, if you don’t have an account with administrator privileges logged in, you may be unable to restore files.
  • Issues with the external drive – If the external drive you’re trying to restore from is not working properly or has partition problems, it can cause issues with the activities running on it. Hence, it can result in the 0x80070534 error.

Nevertheless, you can resolve the error by following the steps below.

How can I fix the 0x80070534 error code?

Before trying any troubleshooting steps to fix the error, go through the following checks:

  • Free up memory space.
  • Restart your PC and try to restore the file.

If you can fix the problem, proceed with the steps below:

1. Take full control of the folder

  1. Right-click on the folder prompting the error and select Properties from the drop-down menu.
  2. Click on the Security tab and select the Username you want to grant access to. Then, click on the Edit button to change permission.
  3. Enable the Full Control option and click on OK.
  4. Repeat Step 2 above and click on Add.
  5. In the pop-up, select Advanced, select Find now, and click on Everyone.
  6. Close the Properties menu and restart your PC, then try to restore.

You need to identify the folder or file promoting this error and perform the listed process to fix it. It will give you full access to modify and export the file.

2. Run the CHKDSK Command

  1. Right-click on the Start button, type cmd and click on Run as administrator.
  2. Type in the following command prompt and press Enter: chkdsk c:/f/r/x 
  3. Replace the letter c in the command strings with the drive letter the user wants to repair.
  4. Close the Command Prompt and check if the error persists.

The Check Disk command will scan and find issues affecting the drivers on your system and resolve activities impeding their operation. Check our guide on how to fix Command Prompt not working on your PC.

3. Sign out of your Microsoft account via Credential Manager

  1. Left-click the Start button, type in Credential Manager, and click on it to open it.
  2. Select the Windows Credentials, navigate to the Generic Credentials section, and click on it.
  3. Select the Microsoft Account link. Click on Remove to delete the account from the device.
  4. Log in to your account and check if the 0x80070534 error appears when restoring files.

Signing out of your account allows you to sign in with the correct credentials and refresh your profile on the PC. You can read about how to fix Credential Manager not working on your PC.

4. Enable the Administrator account

  1. Right-click on the Start button, type cmd and click on Run as administrator.
  2. Type the following command and press Enter: net user administrator /active: yes
  3. Sign out from the current user account and log into the Administrator account shown on the log-on screen.
  4. Try restoring files from my external hard drive and check if the error message appears.

Enabling the Administrator account will grant you access to various locations, files, or programs that may require elevated administrator privileges.

Read our article about making your Administrator account on Windows PC.

In addition, you may be interested in our detailed guide on switching accounts from Standard users to an Administrator and vice versa. Also, you can check how to create a local account on Windows 11.

If you have any questions or suggestions about this guide, kindly drop them in the comments section.

Bootstrap.dll Not Found Error: 5 Ways to Fix It

Bootstrap.dll is a legit dynamic link library (DLL) file that is part of Tonido developed by CodeLathe LLC. Some applications or games may need this file to work properly.

Bootstrap.dll not found is a common issue that occurs when the DLL file can’t be located or accessed by the system.

What causes the bootstrap.dll not found error?

Several potential reasons could lead you to this error; some of the common ones are:

  • Corrupted file – If the DLL file is either deleted or has become corrupt due to malware infection or system error, you might see this error message. To fix it, run a malware scan.
  • Incomplete installation of bootstrap framework apps – If any of the apps related to the bootstrap.dll is installed incorrectly installed or uninstalled, it could cause the issue.
  • Software conflicts – Conflicts between different software on your computer, primarily related to web development, may result in the bootstrap.dll file being deleted or moved.
  • Incorrect file path – If the file path or configuration related to the file is incorrect in your application or system settings, it may result in the file being reported as missing.
  • Operating system issues – Issues with the operating system, including system file errors or compatibility issues, may also result in the error. To fix it, repair system files.

Now that you know the probable causes, let us move to the fixes.

How can I fix the bootstrap.dll not found error?

Before engaging in troubleshooting steps, you should consider performing the following checks:

If these didn’t work for you, proceed to the advanced fixes.

1. Run a DLL fixer

DLL file fixers are easy-to-use utility software that can help you fix common DLL-related errors, including missing, corrupted, and broken files that may occur when launching or running certain software applications or games.

These tools can scan and detect DLL-related errors or issues on the computer and attempt to fix or restore the affected DLL files to their original state.

One such reliable tool can find or replace DLL files like bootstrap.dll and restore the app’s functionality, resolving the conflict between your operating system and third-party app.

2. Run an SFC scan

  1. Press the Windows key, type cmd, and click Run as administrator.CMD elevated
  2. Copy and paste the following command and hit Enter: sfc/scannowSFCSCANNOW CMD
  3. The scan will take a few minutes to complete; once done, restart your computer.

3. Run a malware scan

  1. Press the Windows key, type windows security, and click Open.Windows Security open Windows key bootstrap.dll
  2. Go to Virus & threat protection and click Scan options.V& T Scan options
  3. Select Full scan, then click Scan now.Full scan
  4. The tool will scan your computer to find the malicious files. Once it shows the results, select the listed files and delete them to fix the issue.

4. Install the missing DLL manually

4.1 Replace the corrupted DLL file

  1. Go to the DLL files website and download the DLL file.
  2. Locate and right-click the file and select Extract All.Extractall
  3. Select the location and click Extract.Extract
  4. Locate, copy the file, and paste it into the program folder which is requesting the file in error. If the ShareX app is trying to use the DLL file, you need to navigate to this path and paste the file here: C:\Program Files\ShareX
  5. In case the older version of the file is available, choose it and click Rename button. Add .old to the existing file and then paste the new file.Rename old DLL file
  6. Restart your computer.

4.2 Register the DLL file

  1. Press the Windows key, type cmd, and click Run as administrator.CMD elevated
  2. Click Yes on the UAC prompt.
  3. Type the following command to register the DLL file and hit Enter: regsvr32 bootstrap.dllcmd 2 bootstrap.dll
  4. Reboot your PC to save the changes.

5. Perform a System Restore

  1. Press the Windows + R to open the Run dialog box.RSTRUI
  2. Type rstrui and press Enter to open the System Restore window.
  3. On the next window, select Choose a different restore point and click Next.Next Choose a different restore point
  4. Select the restore point and click Next.Choose a point bootstrap.dll
  5. Now click Finish to initiate the process. Your computer will restart, and the Windows settings will be reverted to the chosen point. Finish

If you’re tired of dealing with missing DLL files on Windows 11, check out our blog for expert tips and solutions!

So, these solutions could help you fix the bootstrap.dll not found error. If nothing worked for you, we advise you to reset your PC to fix the problem.

If you have any questions about this error, please mention them in the comments section below.

Beast32.dll: How to Download or Fix It if It’s Missing

Beast32.dll is a dynamic link library (DLL) file associated with Beast API File Interface developed by AutoDesk. If the beast32.dll file is missing, it could result in errors or issues related to the software.

This guide will explore some potential solutions to fix the missing DLL issue and restore the smooth functioning of the applications or games.

What causes the beast32.dll file missing issue?

This error occurs due to various reasons; some of the common ones are listed here:

  • DLL file is removed – If the app or game related to the DLL file is being uninstalled or removed, you might see this error. You need to reinstall the software.
  • Software or program corruption – If the DLL file becomes corrupted due to a software or program error, it could lead to this issue.
  • Malware infection – Virus infections could delete or corrupt, missing DLL files, leading to this error. You need to run a malware scan to fix it.
  • Incorrect file location – If the software that requires this dll file cannot locate the DLL file at the specified file path or location, it may result in an issue. It would help if you reinstalled the software.

Now that you know the possible causes, let us move to the solutions.

What can I do if the beast32.dll file missing?

Before we go to the advanced fixes, here are a few preliminary checks you should do:

  • Reinstall the affected software.
  • Make sure there are no pending Windows updates.

If these didn’t work for you, proceed to the troubleshooting methods.

1. Run a DLL fixer

DLL file fixers are software utilities designed to detect and fix issues associated with dynamic link library files in the Windows operating system.

It can scan for missing, corrupted, or broken DLL files on a computer and attempt to restore them.

The repairing tool can also fix the DLL error specified to an app and resolve the conflict between your operating system and software, such as in the case of the beast32.dll file missing issue.

2. Run SFC & DISM commands

  1. Press the Windows key, type cmd, and click Run as administrator.CMD elevated beast32.dll
  2. Type the following command to repair the system files and press Enter: sfc/scannowSFCSCANNOW CMD
  3. The scan will scan the system files & try to fix them.
  4. Copy and paste the following command to repair the Windows OS image and hit Enter: DISM.exe /Online /Cleanup-Image /RestorehealthRestore health beast32.dll
  5. Once done, restart your computer to complete the process.

3. Run a malware scan

  1. Press the Windows key, type windows security, and click Open.Windows Security open Windows key beast32.dll
  2. Navigate to Virus & threat protection and click Scan options.V& T Scan options
  3. Select the radio button next to Full scan and click Scan now button to initiate the deep scan.Full scan - beast32.dll
  4. The security will scan and show you the list of infected files if present. Delete them to fix the error.

4. Install the missing DLL manually

4.1 Download the DLL file

  1. Go to the DLL files website and click Download.
  2. Right-click the downloaded file and select Extract All from the context menu.Extractall
  3. On the next window, choose a preferred location and click Extract.Extract
  4. Open the folder, and copy the beast32.dll file.
  5. Navigate to the Programs folder: C:\Program Files
  6. Locate the app that gives you the error and paste the DLL file.
  7. In case the old version of the file is there, select it and click Rename button. Add .old to the existing file and then paste the downloaded file. Reboot your PC.Rename old DLL file

4.2 Register the DLL file

  1. Press the Windows key, type cmd, and click Run as administrator.CMD elevated
  2. Click Yes on the UAC prompt.
  3. Copy and paste the following command to register the DLL file and hit Enter: regsvr32 beast32.dllcmd_beast32.dll
  4. Restart your computer to let the changes take effect.

5. Perform a System Restore

  1. Press the Windows key, type control panel, and click Open.Control Panel start menu
  2. Select View by as Large icons and click Recovery.Recovery Control Panel beast32.dll
  3. Click Open System Restore.Open system restore
  4. Select Choose a different restore point and click Next.Next Choose a different restore point
  5. Select the desired restore point and click Next.Choose a point beast32.dll
  6. Now click Finish to initiate the process. Finish
  7. Your computer will restart and be reverted to the chosen point.

If you’re frustrated with encountering missing DLL files on Windows 10, our blog offers valuable expert tips and solutions you won’t want to miss!

So, these are methods you can follow to fix the beast32.dll missing error. Try them and let us know what worked in the comments section below.

Fix: 0xc000027b Microsoft Store Crash Exception Code

Several users have reported facing Microsoft Store crash exception error code 0xc000027b. Notably, the Microsoft Store apps crash without displaying any error window. This makes it more difficult to investigate the issue since the error doesn’t show any error message.

However, we have researched and found some reasons that could trigger the Microsoft Store crash exception error code 0xc000027b. This guide will also help you with solutions to fix the problem at your end. Let us get right into it.

What is 0xc000027b, and how does it trigger?

The simple meaning of the error 0xc000027b is that Microsoft Store abruptly closes during an operation or opening of an app. Some of the common 0xc000027b app errors that you will come across are 0xc000027b start menu, 0xc000027b explorer, 0xc000027b calculator, etc.

Although there isn’t any error message displayed, most of the time, when users come across the 0xc000027b, after reading several user reports we found many reasons that could trigger the problem.

  • Time and date are incorrect: Simple it may sound, but several users reported that because the time and date aren’t correct on their PCs, they are getting this issue.
  • Windows Store is problematic: There are chances that there are some underlying issues that are causing the Microsoft Store crash error 0xc000027b.
  • Microsoft Store cache is corrupt: Because of corrupt cache files for Microsoft Store, you will come across various issues including the one at hand.
  • Corrupt Store registry key: Chances are some important registry keys related to the Windows Store are corrupt and causing problems.
  • System files are missing or corrupt: Also, because of some missing or corrupt system files, you may get several issues associated with the Windows program.

Let us check out the different solutions that will hopefully help you resolve the Microsoft Store crash exception code 0xc000027b.

How can I easily get rid of this Microsoft Store error 0xc000027b?

1. Set the correct time and date

  1. Press the Win + I keys to open the Windows Settings.
  2. Click on Time & language on the left.
  3. Select the Date and time option.
  4. Toggle on the Set time automatically option.
  5. From the Time zone drop-down, select the correct time zone.
  6. Scroll down and under Additional settings, hit the Sync now button to sync the time.

Notably, this solution was suggested by one user and has helped several users to fix the Microsoft Store error 0xc000027b.

You can try fixing the time and date for your PC and hopefully resolve the 0xc000027b error and other associated errors such as 0xc000027b start menu, 0xc000027b explorer, and 0xc000027b calculator,

2. Run the Windows Store app troubleshooter

  1. Press the Win + I keys to open the Windows Settings.
  2. Click on Troubleshoot.
  3. Select Other troubleshooters.
  4. Hit the Run button next to the Windows Store.
  5. The troubleshooter will start detecting the issues.
  6. Apply the prompted fixes.
  7. Restart your PC.

If there is an underlying issue with the Windows Store, it can be easily resolved by running the Windows Store troubleshooter.

It will detect the issue and prompt you to apply the fixes to resolve errors, including the Microsoft Store error 0xc000027b.

3. Reset Microsoft Store

  1. Press the Win + I keys to open the Windows Settings.
  2. Click on Apps on the left.
  3. Select Installed Apps.
  4. Click the 3-dot icon for Microsoft Store and select Advanced options.
  5. Scroll down and click on Reset.
  6. Hit Reset again in the prompt to reset the Microsoft Store.

Resetting the Microsoft Store helps reset all the files that might be corrupt or causing the problem. When you launch the Store after resetting, all files will be loaded from scratch.

4. Delete Windows Store cache

  1. Press the Win + R keys to open the Run dialogue.
  2. Type regedit and hit Enter.REGEDIT RUN COMMAND
  3. Navigate to the below path and press Enter. Computer\HKEY_CURRENT_USER\Software\Microsoft\Windows\CurrentVersion\CloudStore\Store
  4. Delete the Cache folder for Store.
  5. Close Registry Editor.
  6. Restart your PC for the changes to take effect.

This issue of Microsoft Store error 0xc000027b could also be triggered if several registry files are missing or corrupt.

You can easily clear the Windows Store cache registry files by following the above steps and see if this helps in 0xc000027b start menu, 0xc000027b explorer, 0xc000027b calculator, or other 0xc000027b associated errors.

5. Run SFC and DISM commands

  1. Press the Win key to open the Start menu.
  2. Run Command Prompt as an admin.
  3. Type the below command and press Enter. sfc /scannowSFCSCANNOW CMD
  4. Wait for the SFC Scan process to complete.
  5. Type the below commands and press Enter after each one.Dism /Online /Cleanup-Image /CheckHealth Dism /Online /Cleanup-Image /ScanHealth Dism /Online /Cleanup-Image /RestoreHealth
  6. Restart your PC.

Several users have also asked in forums whether the shellexperiencehost.exe 0xc000027b and kernelbase dll exception code: 0xc000027b errors are similar to 0xc000027b.

In short, yes. If you are facing the shellexperiencehost.exe 0xc000027b and kernelbase dll exception code: 0xc000027b errors, you can apply the fixes mentioned above. Moreover, you will also face these 0xc000027b errors with an app downloaded from the Microsoft Store, such as a calculator.

So, basically, some underlying problems with the Store are causing apps to misbehave. You can also apply the same solutions mentioned above to resolve these issues.

That is it from us in this guide. We have prepared a guide that lists down all the most common Microsoft Store error codes along with the solutions that will help you resolve them.

Feel free to let us know in the comments below which one of the above solutions fixed the Microsoft Store error 0xc000027b on your PC.

0x80070246 Windows Update Error: 6 Ways to Fix It

According to several Windows 10 and Windows 11 users, they are coming across error 0x80070246 when trying to install the Windows update. This error prevents them from upgrading their PCs and enjoying the latest features.

Thankfully, in this guide, we have listed some of the best solutions to help you resolve the Windows update install error 0x80070246 on your Windows 11 PC. We will also discuss the reasons that could trigger the problem in the first place. Let us get right into it.

Why am I getting Windows update install error 0x80070246?

There can be various reasons why you are getting the Windows 11 install error 0x80070246 on your PC. After some research, we have listed the main reasons below.

  • Windows update feature is problematic: Chances are that the Windows update tool itself is at fault and causing the update to fail.
  • Corrupt system files: If the system files on your PC are corrupt or missing, then you will come across multiple issues one of which is the update error 0x80070246.
  • Windows update service isn’t running: Chances are some third-party app, or you might have disabled the Windows update service, which is causing the issue.
  • Windows update components are conflicting: Often, Windows update components have been found the culprit behind various Windows update errors.
  • Windows update cache is problematic: Windows update cache files might be corrupt or cause a problem with the latest update that you are trying to download.

Let us go through the solutions that will help you resolve the Windows update error 0x80070246.

How can I fix Windows 11 install error 0x80070246?

Note icon NOTE
Users have been facing this update error on Windows 10 and 11 PCs. So, you can apply the solutions mentioned below on both operating systems.

1. Run Windows update troubleshooter

  1. Press the Win + I keys to open the Settings menu.
  2. Click on Troubleshoot.
  3. Select Other troubleshooters.
  4. Hit the Run button for Windows Update.
  5. The troubleshooter will begin diagnosing the issue.
  6. Apply the prompted fixes.
  7. Restart your PC.

If you come across any issue related to Windows update, you can try to run the Windows update troubleshooter and resolve the problem.

2. Clear Windows Update components

  1. Press the Win key to open the Start menu.
  2. Open the Command Prompt as an admin.
  3. Type the below commands and press Enter after each one.net stop bits net stop wuauserv net stop appidsvc net stop cryptsvc Ren %systemroot%\SoftwareDistribution SoftwareDistribution.bak Ren %systemroot%\system32\catroot2 catroot2.bak net start bits net start wuauserv net start appidsvc net start cryptsvc
  4. Restart your PC.

As mentioned, often Windows update components can conflict with the Windows update services and cause several issues including the Windows 11 install error 0x80070246.

3. Make sure the Windows Update service is running

  1. Press the Win + R keys to open the Run dialogue.
  2. Type services.msc and hit the Enter key.Services Run Command
  3. Double-click on the Windows Update service.
  4. Press the Start button under Service status to run it.

To install the latest updates, you should ensure that the Windows Update service is running on your PC and it isn’t stopped.

You can follow the above steps to enable the service in case it is not running and check if this resolves the Windows update error 0x80070246.

4. Run SFC and DISM commands

  1. To open the Start menu press the Win key.
  2. Open Command Prompt as an admin.
  3. Type the below command and press Enter.sfc /scannowSFCSCANNOW CMD
  4. The SFC Scan process will initiate.
  5. Wait for the process to complete.
  6. Type the below commands and press Enter after each one.Dism /Online /Cleanup-Image /CheckHealth Dism /Online /Cleanup-Image /ScanHealth Dism /Online /Cleanup-Image /RestoreHealth
  7. Restart your PC.

Windows OS comes built-in with commands such as the SFC Scan and DISM that you can use to fix corrupt or missing system files. However, in many cases such as the error 0x80070246, it isn’t that useful.

For that scenario, you can use a system repair tool that can fix Windows errors, fix BSoD errors, or even detect malware or PUA threats from your PC.

5. Clear Windows Update cache

  1. Press the Win + R keys to open the Run dialogue.
  2. Type services.msc and hit the Enter key.Services Run Command
  3. Double-click on the Windows Update service.
  4. Right-click on the Windows Update service and select Stop.
  5. Open the Run dialogue by pressing the Win + R keys.
  6. Type C:\Windows\SoftwareDistribution\Download and press Enter.
  7. Select all files and delete each one of them.
  8. Go to the services.msc console.
  9. Start the Windows Update service.

Cleaning the Windows Update cache has helped several users resolve the Windows Update error 0x80070246 on their PCs.

Often cache files of old Windows updates can interfere with the new ones and won’t let them download on your PC. In such a case, we would suggest you follow the above steps to clear the Windows Update cache files.

6. Clean up disk space

  1. Open the Start menu by pressing the Win key.
  2. Open Disk Cleanup.
  3. Choose the disk drive where you have installed the OS from the drop-down.
  4. Select Clean up system files.
  5. Check the boxes for the files that you want to delete and press OK.
  6. Select Yes to remove all the files.

Chances are that there isn’t sufficient space left on your disk drive, because of which the update isn’t getting installed, and you are getting the Windows 11 install error 0x80070246.

That is it from us in this guide. If you are getting the Windows update error 0x80888002, check out our guide for a quick resolution.

We also have a detailed guide on Windows update error 0x8007000B that will help you resolve the issue at your end. For users getting the update error 0x8024402c, we suggest you refer to the solutions mentioned in our dedicated guide.

Let us know in the comments below which one of the above solutions fixed the Windows 11 install error 0x80070246 on your PC.

Error Code 22: How to Fix Your Graphics Device Driver

If your graphics devices on your PC are disabled by you or by a third-party application, then you will come across an error code 22. The graphics device driver error code 22 is another one of the Device Manager errors that users come across from time to time.

In this error code 22, the screen turns black, and there is no response from the affected program, which, in our case, is the graphics driver. This guide lists some effective solutions to help you resolve the graphics device driver error code 22. Let us get right into it.

What does graphics device error code 22 mean, and what causes it?

When you come across the error code 22, you will always see the error message This device is disabled. (Code 22).

You can view further details about this graphics device driver error code 22 by heading over to the Device Status area in the device’s properties.

We have also talked about the error code 43 in Windows 11. You can also check out our guide on how you can fix the graphics device error code 31 on your PC.

  • The device is actually disabled: There are chances that the device in question throwing you this error code 22 is actually disabled.
  • There is a driver issue: Incompatible or corrupt driver files can also cause multiple issues with the device program.
  • The driver isn’t up to date: You should ensure that you are running the latest version of the driver as latest updates bring bug fixes that might be causing this problem.
  • CMOS is creating an issue: Windows might have disabled the device due to a lack of system resources and clearing CMOS might help.
  • The slot is faulty: Chances are that the slot in which the graphics driver is attached is faulty and causing genuine issues.

Notably, the device is disabled. (code 22) USB driver and this device is disabled. (code 22) Wi-Fi is also a similar issue. You can apply the same solutions mentioned in this guide appropriate to the driver if you are experiencing error code 22.

Let us now check out the solutions that will help you fix the graphics device driver error code 22.

How do I fix the graphics device driver error code 22?

1. Enable the device

  1. Open the Start menu by pressing the Win key.
  2. Open Device Manager.
  3. Expand the Display adapter section.
  4. Double-click on your graphics driver.
  5. Switch to the Driver tab.
  6. Hit the Enable device button.
  7. Click OK to apply the changes.
  8. Restart your PC.

You can enable the graphics driver manually if you are coming across the error code 22. If the device is already enabled, then you can move on to the next solution.

2. Update your graphics driver

  1. Open the Start menu by pressing the Win key.
  2. Open Device Manager.
  3. Expand the Display adapter section.
  4. Double-click on your graphics driver.
  5. Click on the Driver tab.
  6. Select Update driver.
  7. Choose Search for drivers automatically option.
  8. Install the latest update.
  9. Restart your PC.

Make sure that you have installed the latest update for your graphics driver, as there could be an underlying bug or glitch that might be causing the problem.

In any case, you could better employ software to automatically update any drivers securely on your PC. That will help avoid this type of error code and optimize the performance as well.

Outbyte Driver Updater

Keep all your drivers up to date with this professional software.
Free Trial Download now

3. Reinstall the graphics driver

  1. To open the Start menu press the Win key.
  2. Open Device Manager.
  3. Expand the Display adapter section.
  4. Double-click on your graphics driver.
  5. Click on the Driver tab.
  6. Select Uninstall Device option.
  7. Click OK.
  8. Restart your PC.
  9. Visit the official website of your graphics driver and download the latest version.
  10. Install the graphics driver.

4. Clear CMOS

  1. Turn off your PC.
  2. Remove all the connected devices.
  3. Disconnect the power cable from the source.
  4. Remove the battery of your laptop.
  5. Wait for 2-3 minutes.
  6. Reconnect the battery back to your laptop.
  7. Connect all of your peripherals to your PC.
  8. Reboot your PC.

5. Perform a system restore

  1. Press the Win key to open the Start menu.
  2. Type create a restore point and open it.
  3. Hit the System Restore button.
  4. Click Next.
  5. Choose the restore point.
  6. Select Next.
  7. Click Finish.

The system will help you take your PC back to a state when everything is normal. However, we would like to inform you that the system restore works only when you have created a system restore point. We have a guide that explains how to create a system restore point.

6. Change the slot

Do note that for this method, if you are unsure what to do, take your laptop to an expert. You need to try changing the slot to which the GPU is connected on your PC or laptop.

Often, faulty slots can cause issues and affect the associated driver, causing the graphics device driver error code 22. Check if changing the slot for your GPU helps or not.

7. Replace the GPU

If nothing works, then as a last resort, we would advise you to get your GPU checked, and if it has some issues, then it is time for you to get a new one and replace the old GPU.

That is it from us in this guide. Note that you can also apply the abovementioned solutions to fix the graphics device driver error code 43. Before you leave, you should check out our guide that explains 5 ways that will help you check your graphics card on Windows 11.

Sometimes, problems with your GPU can lead to You are not currently using a display attached to an Nvidia GPU error, but we covered it in one of the previous guides.

Feel free to drop a comment below and let us know which solution fixed the graphics device driver error code 22 for you.

6 Quick Ways to Transfer Files from Windows to Mac

Have you moved on from a Windows PC to a Mac or used both and want to know the best ways to transfer files from Windows to Mac?

If so, then you are in the right place. Because in this guide, we will show you all the methods you can follow to transfer files from Windows 10 or Windows 11 PC to Mac.

Not only using Migration Assistant but there are several other ways, including using third-party apps to transfer your files from Windows to Mac or vice versa. If you are interested, you can learn how to transfer files from a PC to an iPhone as well. Let us get right through it.

How can I transfer files from Windows to Mac?

1. Use Windows Migration Assistant

  1. Download the appropriate version of Migration Assistant on your PC.
  2. Launch the Migration Assistant EXE file and hit the Next button.
  3. Accept the terms and agreements and click Install.
  4. Click Finish.
  5. You will be asked to quit all other background programs.
  6. You will be asked whether you would like to send app usage data to Apple. Choose from the below two options:
    • Automatically Send
    • Don’t Send
  7. Migration Assistant will begin searching for a Mac.
  8. Open Migration Assistant on your Mac.
  9. Follow the on-screen steps.
  10. Select the option From a Windows PC and click Continue.
  11. Click on your Windows PC icon and click Continue.
  12. On your Windows PC and Mac, check if the passcode appearing is the same and click Continue.
  13. Your Mac will begin scanning files on your Windows PC.
  14. Select the files that you wish to transfer to the Mac and click Continue.
  15. The transfer will begin.

The Windows Migration Assistant for Windows is a nice tool that will help you migrate all your Windows files to a Mac pretty quickly. The setup process may take a while, but using Migration Assistant to transfer files from Windows to Mac is smooth.

2. Via USB

A USB is a pretty effective tool if you wish are looking to transfer files from your PC to a Mac. It is portable, comes in various storage variants, and is simply plug-and-play.

All you need to do is copy all the files from your Windows PC that you wish to be moved over to a Mac inside the USB. Then plug the USB into your Mac and copy and paste the files that you moved from your Windows onto your USB to your Mac.

One important thing to note is that you should format your USB drive to exFAT file format since it is compatible with both operating systems to accomplish transferring files from PC to Mac via USB.

3. Use WiFi

  1. Open the Start menu by pressing the Win key.
  2. Open Control Panel.
  3. Click on Network and Sharing Center.
  4. Select the Change advanced sharing settings option from the left.
  5. Run command prompt as an admin.
  6. Type the below command and press Enter. ipconfigipconfig
  7. Note down the value next to IPV4 Address.
  8. On your Mac open Finder.
  9. Press Command + K keys.
  10. Type the below command followed by the IP address of your Windows PC (noted in step 7) and press Enter.
  11. Enter the credentials to log in to your Windows PC.
  12. You will be asked which folders would you like to copy to your Mac. Select those folders and press OK.

Following the above steps will help you transfer files from a Windows PC to Mac over Wi-Fi. You need to ensure that both your Mac and Windows PCs are connected to the same Wi-Fi network.

4. Use cloud storage

Another convenient way of transferring files from a Windows PC to a Mac is to make use of the different cloud storage services available.

Using cloud storage service is pretty easy. All you need to do is create an account in any cloud storage such as Dropbox, OneDrive, Google Drive, etc. You can check out the best free cloud storages that you can use in 2023 in our dedicated guide.

Upload all the files you wish to transfer to your Mac from your Windows PC. Now, log in to the cloud storage service on your Mac and download the files. Simple and easy.

More exactly, it’s possible to perform this action with a file-sharing tailored solution that can sync both devices simply and fast.

All you have to do is select the files you need to transfer, no attachment required, and press on the Share button to complete it.

Sync.com

Add your files to the cloud or transfer them quickly cross-platform with this method.
Check price Visit website

5. Use an external hard drive

If the USB drive storage isn’t sufficient for you, you can also opt for an external hard drive. There are so many options available for external hard drives to choose from, and you can pick the best one for you, upload your files and transfer them to your Mac.

6. Use a third-party tool

  1. Download and install Syncthing on both of your PCs.
  2. Launch Syncthing on your Windows PC.
  3. Syncthing will set up a Default Folder for you in your home directory.
  4. Your Windows PC will remain available on https://localhost:8384/.
  5. Click on Actions and then select Show ID to view your unique ID which you will use to connect with your Mac.
  6. Click on Add remote device at the bottom right.
  7. Enter the unique ID on your Mac.
  8. Select the folders that you want to share.
  9. Clicking on Save will make the remote device appear on the bottom right of the interface.

When you add files to this Default Folder, the files will get synced with the connected remote device, allowing you to transfer files from Windows to Mac.

That is it from us in this guide. We have listed some of the best tools that you can use to transfer files from PC to iPhone.

Feel free to let us know in the comments below which one of the above solutions you utilized to transfer files from Windows to Mac.

How to Increase SCCM Client Cache Size [Easiest Steps]

The SCCM client cache size determines the size of applications you can deploy during an OSD, and many are wondering how to increase SCCM client cache size.

Deploying a large file may fail if the SCCM Client Cache is too big to cache the app installation files, so it’s important to adjust it, and this is exactly what this article will do.

Also, our readers may be interested in knowing the causes and how to fix SCCM Application Error 0x87d00607 in a few steps.

What is SCCM Client Cache?

Microsoft System Center Configuration Manager client has a dedicated disk space for storing temporary files when it installs apps and programs.

These temp files store the client cache files. Whenever you deploy any app, the temp files are copied and transferred to the CCMcache folder located in C:\Windows\ccmcache

Furthermore, the SCCM client cache determines the size of applications to deploy during an OSD. If the app is larger than the client’s cache size, it will fail because the client is not big enough to cache the application installation files. However, you can configure the client cache settings.

Also, the default SCCM client cache maximum size is 5120 MB if you do not set the property while installing the SCCM Client. Likewise, the minimum value you can specify is 1 MB. You can set the maximum size in megabytes (MB), or the percentage of the disk.

How can I increase SCCM Client cache size?

1. Create new client settings

  1. Left-click the Start button, type Configuration Manager console, then press Enter to open the SCCM console.

  2. Click the Administration option from the left sidebar, then select Client Settings.
  3. Right-click and select Create Custom Client Device Settings from the drop-down menu.
  4. Check the box next to the Client Cache Settings option at the bottom of the list, then click OK.
  5. Click on Client Cache Settings from the left sidebar.
  6. Go to the Device Settings tab and set Configure client cache size to Yes, then input the desired cache size in MBs and click OK.
  7. Right-click on the new client settings, select Deploy from the drop-down, then select a target collection.

The client will use the new client settings on the next SCCM server logon.

2. Modify SCCM client cache size via PowerShell scripts

  1. Left-click the Start button, type PowerShell and click Run as administrator.

  2. Click Yes on the User Account Control prompt.
  3. Copy and paste the following lines of commands and press Enter: $Cache= Get-WmiObject -Namespace 'ROOT\CCM\SoftMgmtAgent'-Class CacheConfig$Cache.Size = '10240'$Cache.Put()Restart-Service -Name CcmExec
  4. Restart the client to allow the changes to take effect.

The above commands will modify the client cache size, allowing you to input whichever MB you want to increase it to.

After following these steps, you should be able to increase SCCM client cache size with ease.

3. Change the client cache size on a single machine

  1. Click the Start button, type control panel, then select Control Panel.
  2. Go to Configuration Manager Client Properties and click on Cache. Click on the Configure Settings option and change the value of the cache size to a maximum.
  3. Then, click OK.

Modifying the client cache size for a single machine will be deployed automatically compared to a custom client that undergoes a deployment process.

As you can see, it’s pretty simple to increase SCCM client cache size, and we hope you found this guide helpful.

Further, you can read through our guide about the reason behind the 0x87d00324 SCCM Application install error and how to fix it.

Also, you can check how to upgrade from Windows 7 to Windows 10 using SCCM on your PC.

Did we miss something? Let us know in the comments section below.

Fix: 0x87d00213 Application Deployment Error

Running the Microsoft System Center Configuration Manager (SCCM) allows you to manage and deploy applications across an enterprise. Sadly, our readers report the 0x87d00213 error during the deployment process. So, we’ll discuss the causes and ways to fix the error.

Also, we have a detailed guide on SCCM application error 0x87d00607, and how to fix it, so we suggest checking it out.

What causes 0x87d00213 Application Deployment error?

A few factors can cause the Application Deployment error; some common ones are listed here:

  • Incorrect application deployment command – If the SCCM client receives an incorrect or invalid application deployment command-line parameter, it may affect the deployment process, resulting in the 0x87d00213 error.
  • Software distribution failure – The error can occur when the SCCM client fails to distribute or deploy the software package to the target device due to incorrect package content or network connectivity issues.
  • User Account permission issues – If the user account operating the SCCM client does not have sufficient permissions to deploy the application package, it can cause the Application Deployment error 0X87D00213.
  • Timeout Configuration – When the deployed application is not given enough time to run, it can cause the Timeout Occurred error to appear with the error code 0X87D00213.
  • Damaged packaged content – You can also run into the error if the software package you’re trying to deploy contains corrupted files. It makes it impossible for the SCCM client l to install the app, resulting in an error.

Nonetheless, we’ll discuss the basic steps for fixing the error as we proceed with the article.

How can I fix 0x87d00213 Application Deployment error

Before engaging in any advanced troubleshooting steps, we recommend you go through the following:

  • Reboot the primary SCCM server.
  • Ensure the date & time are correct on both the client and server.
  • Verify if the app you are trying to deploy has dependencies included in the source file.

If the above checks can’t help resolve the error, then proceed with the solution below:

1. Perform a clean boot

  1. Press Windows + R key to open the Run dialog box, type msconfig, and click OK.
  2. Click the Services tab, check the box for the Hide all Microsoft services option, then click the Disable all button.
  3. Go to the Startup tab and click Task Manager.
  4. Select the startup programs and click the Disable button.
  5. Restart your PC and check if the application deployment error persists.

Performing a Clean boot will prevent services interfering with the deployment process from running when you boot the system.

You can check our guide on how to disable startup apps on Windows 11.

2. Redistribute package content to distribution point

  1. Left-click the Start button, type Configuration Manager console, then press Enter to open the SCCM console.
  2. Go to the Software Library tab.
  3. Select the content types for redistribution.
  4. In the taskbar at the top of the ribbon, select the Properties tab and click on Properties.
  5. Click on the Content Locations tab.
  6. Select the distribution point (or distribution point group) that you want to redistribute the content, then click on the Redistribute button.
  7. Click OK to begin the redistribution of the content.
  8. Restart your PC and check if the App Deployment 0x87d00213 error persists.

Repairing content distribution of the particular package you want to deploy will fix the deployment error. Also, it allows the device to overwrite the existing files.

3. Change the maximum run time

  1. Left-click the Start button, type Configuration Manager console, then press Enter to open the SCCM console.

  2. Go to Software Library\Overview\Application Management\Applications
  3. Select the application and then click Deployment Types.
  4. Right-click the application deployment type and click Properties.
  5. Select the User Experience tab, and modify the Maximum allowed run time in minutes to 60 minutes.
  6. Restart your PC and retry the application deployment.

Extending the Run Time gives the deployment process enough time to complete.

4. Uncheck Enables this distribution point for pre-staged content

  1. Right-click the Start button, and select Microsoft System Center under the All Programs list.
  2. Select Configuration Manager Console and go to Distribution Point’s properties.
  3. Go to the General tab, scroll down, and uncheck the Enable this distribution point for pre-staged content option, then click the OK button.
  4. Wait for a couple of minutes for the changes to take effect and check if the issue persists.

Disabling the distribution point for prestaged content allows the deployed app to run without being affected.

Alternatively, our readers can check our guide about 0x8007000f: SCCM Task Sequence error and ways to fix it.

What other solution did you use to fix this problem? Let us know in the comments section below.

How to Install GarageBand on a Windows 11 PC

GarageBand is only available on Mac and iOS platforms. However, this guide will discuss downloading, installing, and using GarageBand for Windows 11. So, there are means available for Windows users to run GarageBand on their PCs but with a different Operating System.

How can I download, install and use GarageBand for Windows 11?

1. Create a macOS virtual machine

1.1 Download Mac OS Monterey VM

  1. Download Mac OS Monterey Virtual Image and the VMware Player Patch Tool. Then, extract the files from the zip folders.
  2. In the Unlocker folder, right-click the win-install script and click Run as Administrator. This will auto-run the patch script in the Command Prompt.
  3. Open VMware after this process is complete.

1.2 Create Mac OS Monterey VM with VMware

  1. Select Create a New Virtual Machine and choose I will install the operating system later. Then click Next.
  2. Choose Apple macOS X, select macOS 12, and click Next.
  3. Input an easy name for the macOS Monterey VM. Then, copy the file path to your Desktop folder.
  4. Set the disk size to a minimum of 50GB in the next window, choose Store virtual disk as a single file, and click Next.

1.3 Edit the macOS Monterey VM settings

  1. Right-click macOS Monterey VM on the VMware screen and select Settings.
  2. Set the VM memory to 4GB minimum. Allocate at least 2 cores under Processors.
  3. Under New CD/DVD (SATA), select Use ISO image file. Then choose the macOS Monterey ISO file.
  4. Close the Hardware window and click Finish.

1.4 Edit the macOS Monterey VMX file for Intel/AMD hardware

  1. Launch the File Explorer and go to this default location:
  2. Find macOS Monterey.vmx, right-click it, choose Open with and select Notepad.
  3. Add the following lines to the bottom of the configuration file: C:\Users\YOURNAME\Documents\Virtual Machines\YOUR MAC OS X FOLDER
    For Intel: smbios.reflectHost = "TRUE" hw.model = "MacBookPro14,3" board-id = "Mac-551B86E5744E2388" smc.version = "0"
    For AMD: cpuid.0.eax = “0000:0000:0000:0000:0000:0000:0000:1011” cpuid.0.ebx = “0111:0101:0110:1110:0110:0101:0100:0111” cpuid.0.ecx = “0110:1100:0110:0101:0111:0100:0110:1110” cpuid.0.edx = “0100:1001:0110:0101:0110:1110:0110:1001” cpuid.1.eax = “0000:0000:0000:0001:0000:0110:0111:0001” cpuid.1.ebx = “0000:0010:0000:0001:0000:1000:0000:0000” cpuid.1.ecx = “1000:0010:1001:1000:0010:0010:0000:0011” cpuid.1.edx = “0000:0111:1000:1011:1111:1011:1111:1111”

1.5 Configure and install the macOS Monterey VM

  1. Choose Disk Utility and select VMware Virtual SATA hard drive Media from the Internal drive column.
  2. Select Erase option, give the drive a name, set Format to APFS, and Scheme to GUID Partition Map. Then click Erase.
  3. Return to the Monterey recovery screen and select Install macOS Monterey.
  4. Choose the drive created in Disk Utility and click Continue.

1.6 Install VMware tools to your macOS Monterey VM

  1. With the macOS VM running, select Player, go to Manage, and select Install VMware Tools.
  2. Choose Install VMware Tools from the installation disc window. Then follow the installer prompts o complete the process. Your PC will restart after the process.

2. Install GarageBand

  1. Go to GarageBand’s official download page and click Download. It will take you to the App Store.
  2. Click on Get or Download button and select Install app if it prompts it.
  3. Input your Apple ID and password and click Sign in.
  4. After downloading, you will see the app in the Launchpad or Applications or Finder.

The steps above help install and boot your system into macOS Sierra. Check our article on how to dual boot Windows 11 and macOS on the same PC.

Also, you may be interested in our detailed review of the best MIDI keyboard controller for GarageBand to buy.

Users who prefer to stay within the Windows environment instead of running a virtual machine can explore a GarageBand alternative for PC to create, mix and record music natively without switching operating systems.

If you have further questions or suggestions, kindly drop them in the comments section.

Modio.dll Not Found: 4 Ways to Fix It

You are probably reading this article because you just got the error message: modio.dll not found. This is not the hardest of bugs you can face, and we help you through the problem in this article.

However, before we get into this missing DLL issue, let us explore some common causes so that you may avoid a repeat case in the future.

What causes modio.dll files to go missing?

Here are the principal elements that trigger the missing error:

  • Malware infection – Viruses are notorious for deleting important files, and a virus may have deleted the library. This is why we recommend a solid antivirus.
  • Corrupted Windows registry – When the Registry is corrupt, some vital DLLs may stop functioning or be destroyed.
  • Upgrading or installing software – This may be the case, especially when an installation or upgrade is done with a faulty executable.
  • Third-party software conflicts – Users have also observed that the missing DLL error is often triggered when conflicting applications are on a device.
  • Driver issues – Drivers are an essential link between hardware and software. However, you may need to update drivers if they get corrupted.

What do I do if I get the modio.dll not found error?

Before going into the solutions, you may try the following:

  • Restart the computer – While this may not be a total fix, problematic processes cause some problems, and a reboot forces these processes to shut down.
  • Reinstall the problematic application – An app uninstallation will remove bad or corrupt program files, after which you should download a fresh copy from an official source.

If none of the prerequisite solutions work, you may proceed to the main fixes below.

1. Use DLL repair tools

Modio.dll, a third-party DLL, is associated with the Modio software and is essential for modifying game data. Using any of the best DLL repair tools may be the best call when it is missing.

2. Run an SFC scan

  1. Press Windows + R, type cmd, and hit Ctrl + Shift + Enter.
  2. Type the script below and hit Enter.
    sfc /scannow
  3. Wait while the scan executes; it may sometimes take several minutes.
  4. Restart your computer.

3. Download the DLL manually

You can head to the DLL Files website and get a fresh copy of the corrupt file. You should extract and place the newly downloaded file in the same directory as the problematic application.

Also, proper attention should be observed when downloading DLL files because they may come with malware and compromise your computer if gotten from the wrong source. However, some websites like DLL files verify their files, and they are safe.

4. Run a virus scan on your computer

  1. Type Windows Security in the Search bar, and click on the relevant search result.
    modio dll not found
  2. Click on Virus & threat protection.
    modio dll not found
  3. Select Scan options.
  4. Select Full scan and click the Scan now button at the bottom.

When modio.dll is not found, a virus scan may eliminate the problem if it is triggered by malware on your computer.

The fixes above should be adequate for the missing DLL issue. While we recommend using a repair tool, any solution may do the trick. We suggest trying what feels the most convenient.

We hope you have resolved the problem and want to know what worked for you. Please keep us informed using the comments section below.

Cardgames.dll: How to Download & Fix It When It’s Missing

Cardgames.dll is a legitimate dynamic link library file associated with various card games and other related software applications developed by Microsoft Corporation. This harmless file was initially available with Windows 7 games, including solitaire & hearts.

However, if you are playing the old games on your Windows 10/11 PC and encountered the cardgame.dll file missing error, this guide can help!

What causes the cardgames.dll missing error?

There are several potential reasons for this error, some of which are mentioned here:

  • Registry issues –Invalid or corrupt registry entries could cause various issues, including this one. To fix this, you need to repair system files.
  • File corrupted – If the DLL file is missing as it has been accidentally deleted or has become corrupted, you might see this error. To fix it, you need to download the DLL file again.
  • Software conflicts – Conflicts between different applications on your PC may result in the Cardgames.dll file being deleted or moved. You need to update or remove apps related to the file.
  • Malware infection – Infection on your computer can damage system files, including DLL files. Therefore, you need to run a malware scan to remove the infection.
  • Operating system issues – If your OS has issues like system file errors and misconfigurations, you may get this error. You must either restore the system to the previous version or repair the files.

Now that you know the reasons, let’s move to the fixes to resolve the problem.

What can I do if cardgames.dll is missing?

Before are some prerequisite checks you need to perform below applying the fix below:

  • Check for Windows pending updates.
  • Reinstall the affected program. This also helps when 3dmgame.dll is missing.

If these didn’t work for you, proceed to the advanced fixes.

1. Run a DLL fixer tool

If you don’t want to download the DLL manually or run commands on your computer to fix the problem, you can choose the easy way using a DLL file fixer.

2. Run an SFC scan

  1. Press the Windows key, type cmd, and click Run as administrator.CMD elevated
  2. Type the following command to repair system files and press Enter: sfc/scannowSFCSCANNOW CMD
  3. Wait for the process to complete. Once done, restart your computer to confirm the changes.

3. Run a malware scan

  1. Press the Windows key, type windows security, and click Open.Windows Security open Windows key cardgames.dll
  2. Go to Virus & threat protection and click Scan options.V& T Scan options
  3. Select Full scan and click Scan now.Full scan -
  4. The tool will scan your computer and list the malicious files. Remove the infected files to fix the issue.

4. Install the missing DLL manually

4.1 Download the DLL file

  1. Go to the DLL files website and Download the relevant DLL file
  2. Once downloaded, locate and right-click it and select Extract All.Extractall
  3. On the next window, select a location and click Extract.Extract CARDGAMES.DLL
  4. Once done, copy the file and paste it into the program folder using the file in error. If your DLL file is requested by ShareX, you need to navigate to the Programs folder and paste it there: C:\Program Files\ShareXrename old DLL file
  5. In case the older version of the file is there, select it and click the Rename button. Add .old to the existing file and then paste the newly-downloaded file.
  6. Restart your computer.

4.2 Register the DLL file

  1. Press the Windows key, type cmd, and click Run as administrator.CMD elevated
  2. Click Yes on the UAC prompt.
  3. Copy and paste the following command to register the DLL file and hit Enter: regsvr32 cardgames.dllcmd_1 cardgames.dll
  4. Reboot your PC to save the changes.

5. Perform a System Restore

  1. Press the Windows key, type control panel, and click Open.Control Panel start menu
  2. Select View by as Large icons and click Recovery.Recovery Control Panel cardgames.dll
  3. Click Open System Restore.Open system restore
  4. On the next window, select Choose a different restore point and click Next.Next Choose a different restore point
  5. Select the restore point and click Next.Choose a point cardgames.dll
  6. Now click Finish to initiate the process. Finish
  7. Your computer will restart, and the Windows settings will be reverted to the chosen point. This method may take a few minutes, so please be patient.

We recommend you check our guide on missing DLL files on Windows 11 to know more about the issue.

So, you can use these methods to fix the cardgames.dll missing error on Windows. Try them and let us know what worked in the comments section below.

Bdb.dll Is Missing? How to Fix The Error Or Download It Again

Bdb.dll is a dynamic link library (DLL) file developed by Ufasoft for Windows OS. This file contains data and code shared among multiple third-party programs & games, which enables them to perform specific functions.

However, if the bdb.dll file is missing or corrupted, it could lead to errors when running software that depends on it.

Why the bdb.dll is missing?

There are various reasons for this issue to occur; some of the common ones are listed here:

  • Virus infection – If your computer is infected with malware, system files, including the DLL files related to software, could get corrupted. To fix it, run a malware scan.
  • Deleted accidentally – If you have uninstalled a program that was using the DLL file, the file might have been deleted with it, leading to the error.
  • Corrupted software – The DLL file can become corrupted or missing if there are errors or issues with the software using the file. You need to reinstall the program to fix the problem.
  • Damaged Windows registry – If the registry entries on your PC are accidentally deleted or have become corrupt, then you might face this error.

Now that you know the reason, let’s proceed with the fixes.

What can I do if the bdb.dll file missing?

Before we go to the advanced fixes, here are a few preliminary checks you should do:

  • Check updates for Windows.
  • Reinstall the affected program.

1. Run a DLL fixer

Installing DLL files manually can be a daunting task, and if you are a novice, it is advised to use a DLL fixer software instead.

The repair tools can scan for any missing, corrupted, or broken files on Windows and try to restore or replace them.

The powerful tool below attempts to repair programs’ specific DLL files, thereby resolving the conflicts between third-party apps and your operating system. You can rely on this tool to fix issues like bdb.dll missing and avoid errors related to the problem.

2. Run an SFC scan

  1. Press the Windows key, type cmd, and click Run as administrator.CMD elevated bdb.dll
  2. Click Yes on the UAC prompt.
  3. Type the following command to repair system files and press Enter: sfc/scannowSFCSCANNOW CMD
  4. Please wait for the process to complete. Once done, reboot your PC to confirm the changes.

3. Run a malware scan

  1. Press the Windows key, type windows security, and click Open.Windows Security open Windows key bdb.dll
  2. Go to Virus & threat protection and click Scan options.V& T Scan options
  3. Select Full scan and click Scan now to start the deep scan.Full scan -
  4. The tool will scan the whole computer and show you the list of malicious files. Select and delete them to fix the issue.

4. Install the missing DLL manually

4.1 Download & install the DLL file

  1. Go to the DLL files website.
  2. Download the DLL file, right-click the downloaded file, and choose Extract All.Extractall
  3. On the next window, select the desired location and click Extract.Extract
  4. Locate the DLL file and copy it.
  5. Navigate to the Programs folder: C:\Program Files
  6. Locate the app that gives you the error and paste the DLL file.
  7. If the file’s older version is present, select it and click Rename button. Add .old to the existing file and then paste the new file.Rename old DLL file
  8. Restart your computer.

4.2 Register the DLL file

  1. Press the Windows key, type cmd, and click Run as administrator.CMD elevated
  2. Copy and paste the following command to register the DLL file and hit Enter: regsvr32 bdb.dllcmd_bdb.dll
  3. Restart your computer to let the changes take effect.

5. Perform a System Restore

  1. Press the Windows + R to open the Run console.RSTRUI
  2. Type rstrui and press Enter to open the System Restore window.
  3. Select Choose a different restore point in the next window and click Next.Next Choose a different restore point
  4. Select the restore point and click Next.Choose a point bdb.dll
  5. Now click Finish to initiate the process. Finish
  6. Your computer will restart, and the Windows settings will be reverted to the chosen point.

If you’re struggling with missing DLL file issues on Windows 10, check out our guide for expert tips and solutions that can help you!

So, these are methods you can follow to fix the bdb.dll is missing error. Try them and let us know what worked in the comments section below.

ChatGPT Stuck in Verification? Here’s How to Fix the Loop

ChatGPT is the new AI phenomenon that has taken the world by storm. You can ask it anything, and it will reply as if a human (with a great mind). However, several users have reported coming across a situation where ChatGPT is stuck in a verification loop.

If you are also among such users and are looking for a resolution, then you have landed in the right place. Because here, we will give you a bunch of solutions to resolve the ChatGPT stuck in verification loop. Let us get right through it!

Why is ChatGPT stuck in verification?

OpenAI, just like every other website, uses human verification to ensure that a human is using the website and not a robot. This helps them prevent any unusual activities on login from a user’s account.

Here are some reasons because of why the ChatGPT can get stuck in the verification loop:

  • Browser cache is corrupt: Often corrupt browser cache can interfere with the smooth functioning of a website.
  • A browser extension is conflicting: We use browser extensions to increase the feature set of our browsers. However, they can interfere with the browser’s performance and cause several issues.
  • Your account is at fault: Chances are that the account that you are using to access ChatGPT is blocked or facing issues.
  • ChatGPT server is problematic: The ChatGPT server might be under maintenance, because of which you are getting the error.

What can I do if ChatGPT is stuck in verification?

Before jumping ahead with the advanced solutions, we suggest you apply the fixes and check whether this resolves the issue.

1. Tweak the Disable site isolation flag in Chrome

  1. Launch Google Chrome, and head to the following address:chrome://flags
  2. Search for Disable site isolation flag.
  3. If you see it disabled, change it to default.
  4. Restart your browser for the changes to take effect.

One user pointed out that setting the Disable site isolation flag in Google Chrome to Default helped him overcome the ChatGPT stuck in human verification. This flag might get disabled because of third-party extensions you use in your browser.

2. Try using a different account

  1. Visit this OpenAI website.
  2. Click on the Sign up button.
  3. Enter your email address and click on Continue.
    (You can also make use of your Google or Microsoft account to login to ChatGPT. However, make sure it isn’t the one with which you are getting the verification error.)
  4. Create a password for your new ChatGPT account and click Continue.
  5. Verify your email address by clicking the link sent to your email ID.
  6. Login with this new account.

ChatGPT might have noticed some unusual activity from your account, which is why you are stuck in a ChatGPT Cloudflare loop.

You can try to use a different account by either creating a new one as mentioned above or using a different one, let’s say your friend’s account.

3. Clear browser cache

3.1. Google Chrome

  1. Open Google Chrome.
  2. Click on the 3-dot menu icon and select Settings.
  3. Click on Privacy and Security on the left pane.
  4. Choose Clear browsing data.
  5. Click on Cookies and other site data and Cached images and files options.
  6. Click the Clear data button.

3.2 Mozilla Firefox

  1. Click on the 3-line icon and select Settings.
  2. Click on the Privacy & Security tab on the left.
  3. Locate Cookies and Site data section and hit the Clear data button.
  4. Click on both Cookies and Site Data and Cached Web Content options.
  5. Click on the Clear button.

You can try clearing the browser cache by following the above steps and checking if this resolves the ChatGPT stuck in verification.

4. Disable browser extensions

  1. Launch Google Chrome.
  2. Click on the 3-dot icon.
  3. Choose More tools and select Extensions.extensions doordash internal server error
  4. Disable each extension by toggling them one by one.disable extension
  5. Restart your browser.
  6. Visit the ChatGPT website.
  7. Login with your account.

You should try disabling all the extensions on your browser and verify whether ChatGPT is still stuck on the verify human page.

5. Reset the browser

Note icon NOTE
The steps here are for Google Chrome, but other browsers follow a similar procedure. You could check the official website for the exact steps.
  1. Launch Google Chrome.
  2. Click on the 3-dot menu icon and select Settings.
  3. Choose Reset settings from the left pane.
  4. Click on Restore settings to their original defaults.
  5. Restart your browser.

That is it from us in this guide. Notably, another thing you can do is avoid using ChatGPT and wait until the issue is fixed.

Our guide explains how you can integrate ChatGPT with MS Word and enhance your abilities. You can also read our guide on integrating ChatGPT in WhatsApp. Also, find out all about ChatGPT Professional and why one should use it.

Many also encountered Error searching knowledge in ChatGPT, but we have a dedicated guide that addresses this issue.

Let us know in the comments below which one of the above solutions resolved the ChatGPT stuck in verification problem.