12 Best Anti-Data Mining Software to Keep Hackers at Bay

Data mining is a process that involves discerning patterns to acquire information concerning a data set. For instance, data mining involves the prediction of a computer user’s Internet activity to obtain behavioral characteristics.

In addition, some hackers, spammers, and even scammers utilize data mining tools for negative purposes. There are several reports relating to online identity theft, impersonation, and several online fraud cases.

Meanwhile, hackers use several data mining tools and techniques to steal users’ personal information, discover their identities, and exploit users’ data. Some of the tools and techniques are listed below:

  • Keyloggers – software that tracks the key sequence and strokes on your keyboard. Fortunately, you can install anti-keylogger software to block this type of tool.
  • Malware – short for malicious software which refers to various forms of hostile or intrusive software.
  • Phishing – the attempt to acquire sensitive data by disguising it as a valid entity on the web.
  • SMShing – this technique involves using mobile phone text messages, to lure users into downloading content online, or visiting a phishing website.
  • Virus – malicious codes that delete or corrupt files, and also interfere with normal computer operations
  • Session hijacking – the unauthorized usage of identification credentials within a web browser to hijack a valid web session. Also known as cookie theft.

The Windows Report team has compiled the best tools for you to protect your computer against data mining and its minions. These tools give you maximum protection in securing your personal information and identity.

What is the best tool to block data mining attempts?

TotalAV – Privacy tools built in
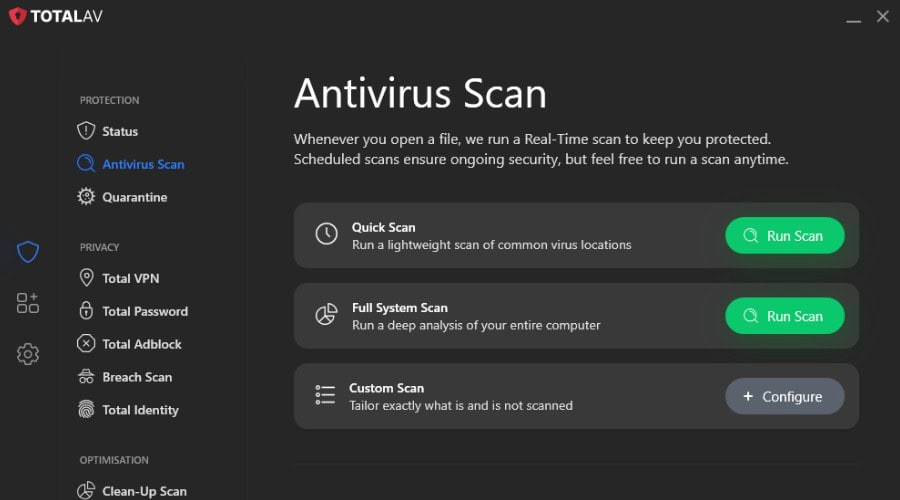
TotalAV antivirus scan

TotalAV goes beyond antivirus with tools aimed at data collection. The higher plans include a Safe Browsing VPN, an ad and tracker blocker, and data-breach monitoring that warns you when your details show up in a leak. The browser cleanup tool clears the cookies and cached data that trackers rely on.

On the security side, real-time protection and WebShield handle malware, spyware and phishing sites, and one subscription covers Windows, Mac, Android and iOS.

  • Safe Browsing VPN in the higher plans
  • Ad and tracker blocker
  • Data-breach monitoring
  • Browser cleanup for cookies and cached data
  • Real-time protection and WebShield
TotalAV

TotalAV

Protect your digital activity against data mining with the powerful TotalAV technology that has protected millions so far.
Check Price Visit Website

Bitdefender Total Security – Social network protection
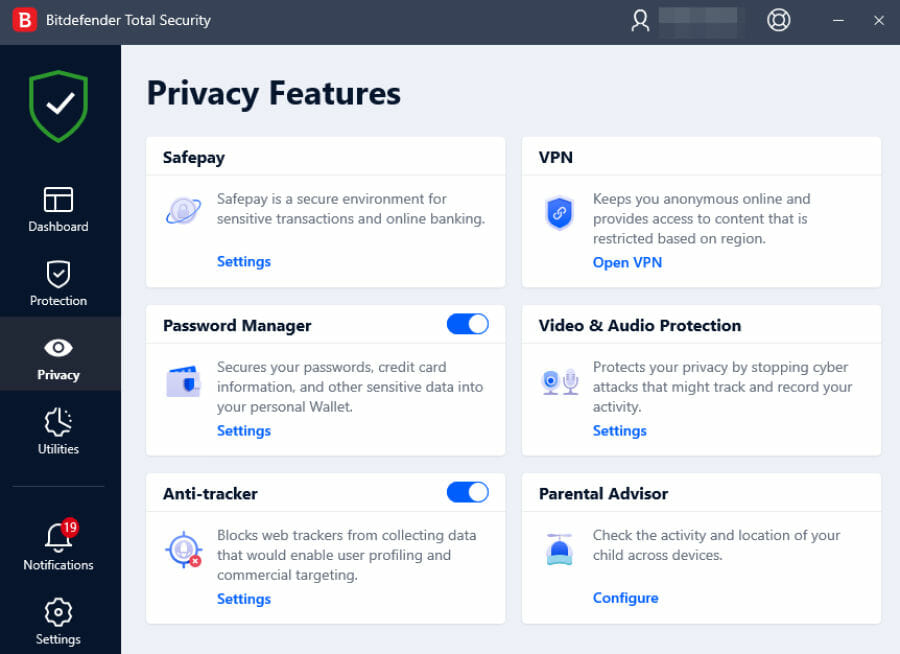
Bitdefender Total Security, as its name implies, defends every bit of information on your PC. If you want protection against any tools utilized by data hijackers, then you should consider this software which has one of the largest security infrastructures worldwide.

This anti-data mining software offers 3P i.e. protection, performance, and privacy. It also ranks highly in each AV Lab test performed independently.

Here’s what to expect from Bitdefender:

  • It comes with protection tools such as antiphishing, antivirus, anti-fraud, and anti-theft
  • It also has webcam protection to prevent snooping
  • Multiple-layer ransomware protection
  • It comes with Bitdefender VPN for anonymous online identity
  • Social network protection
  • Password manager

In addition, other tools include file shredder, game, movie, and work modes, secure browsing, battery mode, rescue mode, parental control, and many more.

It is compatible with all recent versions of Windows, starting with Windows 7 SP1, and offers top performance, especially on Microsoft Windows 10.

Bitdefender Total Security

Outstanding security app that offers complete protection against all e-threats.
Free Trial Visit Website

Avira Free Security – Multiple threat protection
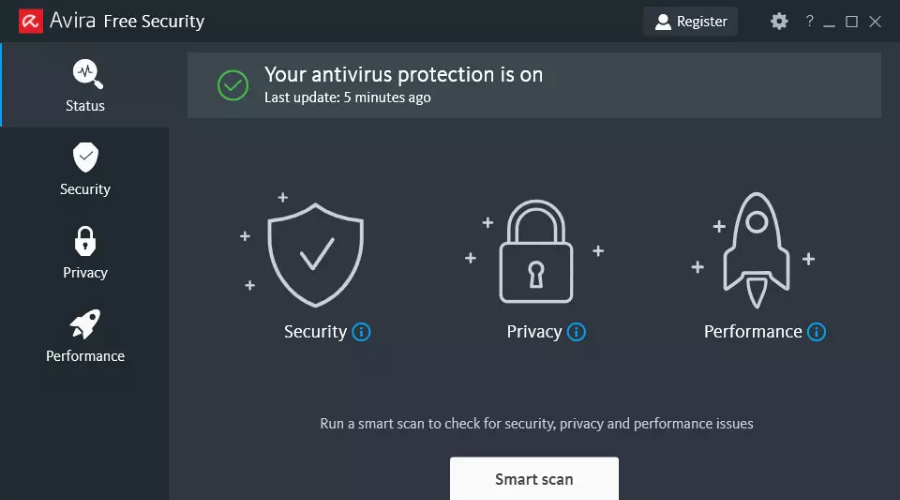
This software offers basic protection against the most common cyber-attacks: spyware, malware, ransomware, and phishing. The real-time protection feature is active at all times to ensure that your devices are secure.

Indeed, the tool is free, but, as you can imagine, it comes with just a few features. If you want to further increase protection for other areas such as getting strong passwords or tune-up tools, you can always upgrade to a more advanced solution.

For instance, with Avira Prime-only you get to optimize your PC or use the built-in VPN without restrictions.

Avira Free Security

Want only some basic protection for your device? Avira offers just that, packed with free, lightweight, efficient software.

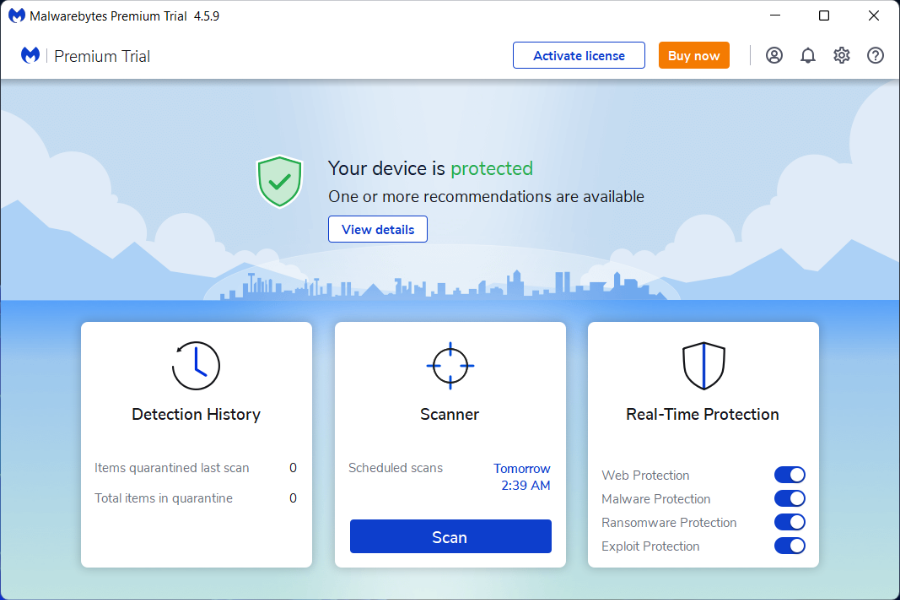
Malwarebytes Premium – Vulnerability prevention
antivirus tools for Amazon Fire device

Just as its name implies, Malwarebytes protects your computers from malware. Effective as anti-data mining software, your data is shielded with this multipurpose cybersecurity tool.

Here are some features of Malwarebytes:

  • Real-time protection against viruses, malware, adware, and spyware
  • Excellent antiphishing protection against malicious websites
  • Anti-exploit tool to prevent system vulnerability exploits attacks.
  • Anti-ransomware protection
  • Anti-rootkit tool for removing rootkits and repairing damaged files

Also, this anti-data mining software is compatible with Windows XP up to Windows 10. However, the anti-ransomware protection is only available on Windows 7, Windows 8.1, and Windows 10.

Malwarebytes Premium

Prevent digital threats from compromising your device with the Malwarebytes Premium software.
Check Price Visit Website

SpyShelter – Optimized performance

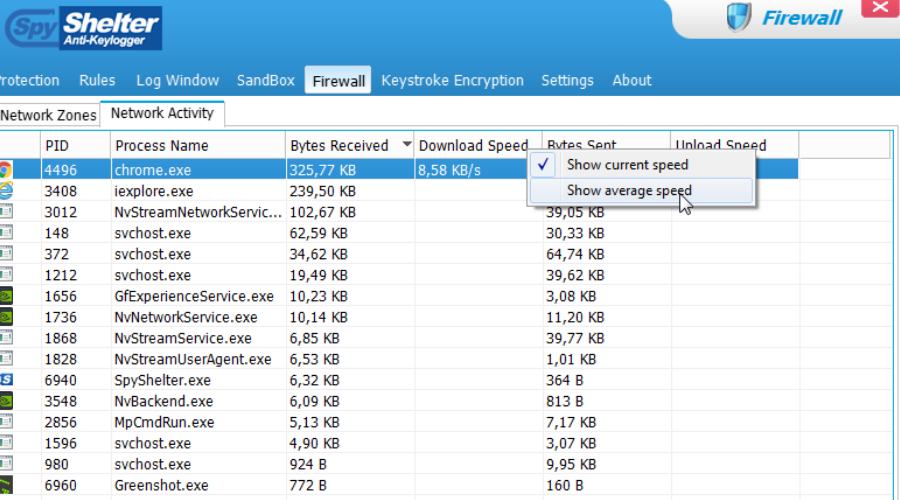
Ranked as the world’s number one anti-keylogger software, this software also functions effectively as anti-data mining software. With a nice GUI, even beginners can find it easy to use.

This tool consistently monitors all the vulnerable areas on your Windows PC; this ensures that your personal data is protected from wicked data mining software.

Also, this Windows OS-friendly software ensures you don’t lose your private data such as credit card data, chat messages, and passwords.

Here’s what you should expect from SpyShelter Free:

  • Strong behavior-based real-time protection against stealing your private data like passwords, chat messages, or credit card data.
  • Efficient detection and neutralization of advanced zero-day malware
  • Encryption of keys of all applications on kernel level.
  • Microphone and webcam protection
  • Low system resources used for increased performance

Also, this anti-data mining software has other features such as:

  • Alerts and Rules
  • Clipboard Protection
  • Screen capture Protection
  • Sound logger Protection
  • Restricted Applications
  • Two-way Firewall

So, you can combine this software with your antivirus program; this is because SpyShelter is compatible with most antivirus programs and other security programs on your system. Also, it is compatible with Windows OS (from Windows XP to Windows 10).

SpyShelter

Strong protection with high detection scores that block all types of malicious threats.
Free Trial Visit Website

Avast Free Antivirus – Latest e-threat detection
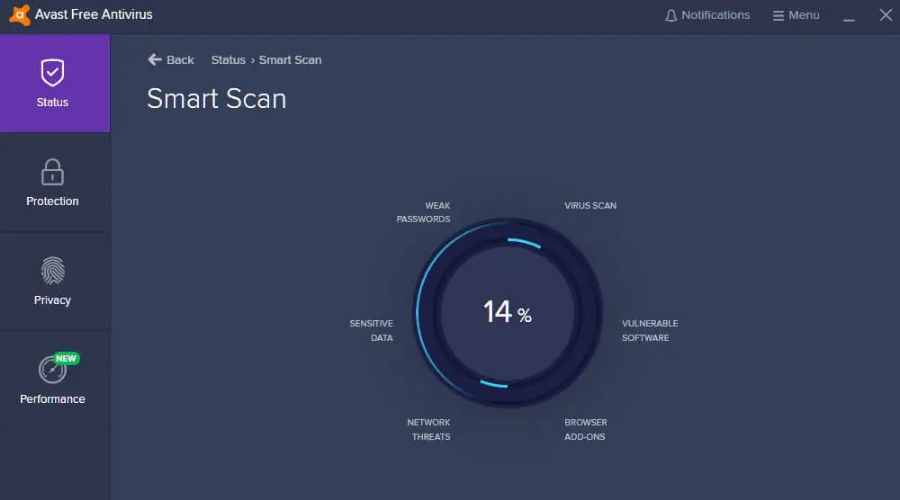
Don’t be put away by the fact that this product is free. It’s nevertheless efficient when it comes to detecting the latest cyber threats as it uses the same technology as paid products.

Additionally, it offers Wi-Fi network protection and document encryption functionalities, which regular free software doesn’t include.

Of course, you can have more options such as webcam security, or an extra layer of protection while doing online shopping, but with premium products.

Avast Free Antivirus

The most efficient free antivirus that offers great protection features for your device.

Dr.Web KATANA – Web link checker

anti data mining software

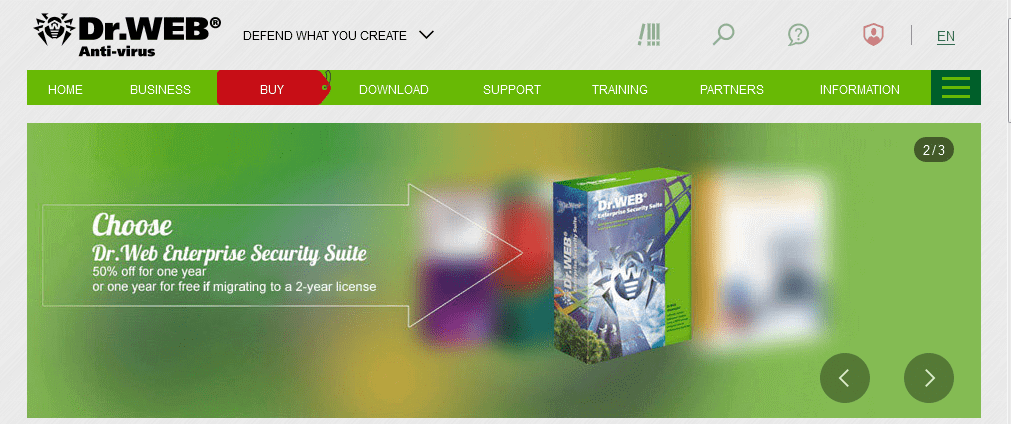
Another best anti-data mining tool on the market, Dr.Web KATANA shields vulnerabilities that expose your computer to data mining. Dr. Web was founded by Igor Daniloff in 1992, in Russia.

This software is efficient in neutralizing remote-controlled malware used for data mining. Also, Dr.Web is linked to a cloud facility that acquires information about data mining espionage and blocks it promptly.

Here’s what to expect from Dr.Web KATANA:

  • Real-time protection against viruses and malware
  • Efficient detection and neutralization of all types of threats including unauthorized network access
  • Comprehensive protection against data leaks
  • Web browser protection against cookie hijackings
  • Web CureIt for curing Windows PCs and servers
  • Web Live Disk for PC recovery
  • Web Link Checker for browser plugins

⇒ Get Dr. Web

Additional security tools against data mining:

We also made a quick list of supplementary security programs to defend your device against malicious software and malware.

Maintain your data and personal information secure by benefiting from all these advanced technology features that proactively block all e-threats.

Browser

A secure web browser is a category of web browsers that provides data confidentiality online. This means that all your browsing information is spoofed; hence, your browsing data cannot be accessed for data mining.

However, this is also possible on normal web browsers, where you just have to press the CTRL-Shift-Delete keys to clear your cache. But, a more secure web browser is advisable in case you forget the keys.

Safeness, rapidity, and security are certainly some of the many reasons people choose to use private browsers for their PCs.

⇒ Get Opera

⇒ Get UR Browser

VPN

access file via vpn

VPN stands for virtual private network which is a private network that extends across public networks most especially the internet. In addition, they enable secure access, anonymous identity, and virtual privacy on the internet; hence, your personal data and location are spoofed making it ideal to escape data mining agents.

Also, VPN protects your online privacy and gives you better internet connectivity, and access to limited resources.

1. PIA

Private Internet Access (PIA) keeps your personal data safe from ISPs, and the government. In addition, you get features like DNS and IP leak protection, a strict no-logs policy alongside 256-bit AES encryption for maximum security.

If you want access to thousands of servers worldwide, unlimited bandwidth, and traffic, at the highest possible speed; CyberGhost is the ideal tool for this purpose.

⇒ Get Private Internet Access

Password Manager

A password manager is a software application that stores and manages your passwords. This provides enhanced security for recollecting passwords for various online accounts instead of saving the passwords on your web browser.

⇒ Get NordPass

⇒ Get RoboForm

Check our top password managers for Windows 10.

? Tips for preventing data mining:

  • Create a guest account for “guests” to use your device to keep your sensitive data safe.
  • Avoid using public Internet connections such as Wi-Fi hotspots or public computers to enter your online account credentials.
  • Beware of clicking download links you are not sure of when checking your emails.
  • Keep your antivirus or security program constantly updated.
  • Use secure devices for internet banking.
  • Shun using the remember password option or auto-complete feature on your web browser.
  • Ensure your browser is completely closed after you are done surfing the web.
  • Update your Windows OS, web browsers, drivers, and other software applications regularly. You may consider using Outbyte Driver Updater as well.

Conclusively, we do hope that you find our list of best anti-data mining software useful in preventing data leaks and cyber espionage on your system.

Have you used any of the tools we mentioned above? Feel free to share your experience with us by commenting below.

How to Fix Windows Key Not Working In Windows 11 (9 Tested Fixes)

Windows key not working in Windows 11 can disrupt shortcuts and system navigation. This issue may stem from driver conflicts, Filter Keys, gaming settings, or Win Lock toggles.

Below, you’ll find step-by-step fixes to identify the cause and restore full functionality, including advanced tweaks using PowerShell and updates.

What Can I Do If My Windows Key Is Not Working in Windows 11?

1. Inspect and Clean the Keyboard

If you’re unsure how to identify if the Windows key is not working and why that is, start with a physical check:

  • Use compressed air to remove dust around the key.
  • For mechanical keyboards, remove the keycap and clean underneath.
  • Test another keyboard to rule out hardware failure.
  • Try using an external keyboard via USB if you’re on a laptop.

2. Check for a Win Lock Key

Some gaming keyboards include a Windows Lock key to disable shortcuts during gameplay:

  • Look for a key labeled Win Lock.
  • Check for a physical toggle switch on the side.
  • Consult the keyboard manual for model-specific features.

If you’re unsure, follow this detailed guide on how to unlock the Windows key on different types of keyboards.

3. Update Keyboard Drivers

Driver issues are a common reason for shortcut failures:

  1. Right-click the Start icon and open Device Manager.
Device Manager Windows 11
  1. Expand the Keyboards section and right-click your device to select Update driver.
Update keyboard driver Windows 11

To avoid manual updates, use one of the tools in our curated list of the best driver updater software for Windows.

4. Run the Keyboard Troubleshooter

Use the built-in troubleshooter to fix shortcut-related errors:

  1. Open Settings > System > Troubleshoot.
  2. Click Other troubleshooters > Keyboard > Run.
Keyboard troubleshooter Windows 11

This detects issues that prevent Windows input shortcuts from working properly.

5. Disable Filter Keys in Accessibility

  1. Go to Settings > Accessibility > Keyboard.
Keyboard accessibility settings
  1. Turn off the Filter Keys toggle.
Disable filter keys

If your Spacebar, Enter, or Backspace are also unresponsive, check this guide on fixing multiple key issues in Windows 11.

6. Turn Off Game Mode

  1. Open Settings > Gaming > Game Mode.
Game Mode settings
  1. Disable the Game Mode toggle.
Disable Game Mode Windows 11

Disabling Game Mode ensures it doesn’t interfere with background services required for keyboard input.

7. Restart Windows Explorer

Refreshing Windows Explorer can restore UI components responsible for shortcut handling:

  1. Press Ctrl + Shift + Esc to open Task Manager.
  2. Right-click Windows Explorer and select Restart.
Windows Explorer Restart -icons overlapping windows 11

8. Run PowerShell to Re-Register System Apps

Use this method if the problem lies within corrupted system packages:

  1. Open PowerShell as Administrator.
  2. Run the following command:

Get-AppXPackage -AllUsers | Foreach {Add-AppxPackage -DisableDevelopmentMode -Register “$($_.InstallLocation)\AppXManifest.xml”}

PowerShell allows you to restore Windows UI bindings when default app registration is broken.

9. Check for Windows Updates

  1. Open Settings > Windows Update.
  2. Click Check for updates and install available patches.
Windows Update Check for updates

Installing updates ensures that your keyboard drivers, services, and input handlers remain compatible with recent builds and features.

Conclusion

If your Windows key isn’t working on Windows 11, the issue may relate to Filter Keys, driver problems, Game Mode, or the Win Lock feature. These solutions help restore normal shortcut functionality without advanced tweaks or third-party software.

FAQs

Why is my Windows key not working in Windows 11?

It’s often caused by outdated drivers, the Win Lock feature, Game Mode, or Filter Keys.

How do I fix the Windows key after a system update?

Update your keyboard drivers, disable Filter Keys, and use the keyboard troubleshooter.

Does Game Mode interfere with the Windows key?

Yes. On gaming laptops or desktops, Game Mode can block shortcut inputs.

Can PowerShell restore the Windows key?

Yes. Re-registering system apps using PowerShell can fix shortcut-related issues.

What to Do When Laptop Is Charging But not Turning On

A laptop charging but not turning on is a power error that prevents you from using your PC. A faulty CMOS battery or problems with the power cord.

Nonetheless, we still have a few possible solutions that, if the problem is still persistent, at least give you a better insight into what’s happening.

What to do when computer charges the battery but won’t turn on

1. Inspect the power cord, adapter, and battery

Inspect the power cord, jack, and adapter for physical damage. If the battery is old or faulty, consider replacing it.

Also, make sure you’re using the correct power adapter and cord for your device. Check the adapter’s specifications on the laptop’s back to match voltage and current requirements.

2. Unplug peripherals and remove the battery

Another thing you can do is remove the battery and try to boot with the DC adapter solely. Sometimes, despite the LED light informing you that the battery is full, the battery might be faulty.

It’s one thing to hold a charge and another to transfer to a machine. Also, make sure that all peripheral devices are unplugged.

A small short circuit within a faulty USB port can also prevent the computer from starting. If this enables you to start your PC, check the USB ports one by one to identify the one causing the problem.

3. Drain residual power

  1. Unplug the DC power cord from the laptop.
  2. Remove the battery.
  3. Press and hold the Power button for a while.
  4. Connect the DC power cord, but don’t insert the battery.
  5. Power on your PC and look for changes.
  6. If you’ve succeeded, turn off the computer again, unplug the power cord, and reinsert the battery.

A residual power is an electrical charge stored in almost every electric device. Once you turn off your device, even without the power source, it’ll store some electric charge.

Occasionally, some parasitic capacitance in the transistors might ‘trick’ the device and block the battery charge.

4. Replace the CMOS battery

Tip icon Tip
Hardware changes are for advanced users only and are done at your own risk. Keep in mind that some hardware changes may lead to voiding your warranty. If you do not understand the steps or don’t feel uncomfortable disassembling your PC, please refer to a professional.
  1. Open the computer case and find the battery (usually located on the motherboard).
  2. Write down all the information located on the battery.
  3. Remove the cell. Some computers don’t have a removable battery. In this case, please contact the computer manufacturer.
  4. Insert a new battery.
  5. Turn on the PC, reset the CMOS values to defaults and save before exiting.

That should do it. We hope that this was enough to get you going.

If you are facing other issues, like the laptop won’t turn on without the charger plugged in, check our detailed guide to fix it.

We’re always there for questions, suggestions, or possible alternative solutions. Make sure to post those in the comments section below.

Best PDF Reader for Windows 11: Top 10 Software in 2026

If you’re looking for the best PDF reader for Windows 11, you’re in the right place. We’ll show you all the options that are worth using and more.

For all these reasons, PDF is and will be the most dominant electronic file format for people online.

So, what is the best way to read PDFs on a PC? You will need to install a PDF reader app for Windows. If you are looking for the very best PDF reader or a PDF viewer for Windows 11, here’s a quick preview of our favorite picks:

So, without further ado, let’s dive in.

Which PDF reader is best for Windows 11?

Soda PDF Reader – Best PDF tool overall

Soda best PDF reader for Windows 11

The Soda PDF Reader is a nicely packaged PDF reader that lets you use several features for free. You can view PDFs and EPUBs using 3D page-flipping technology.

It lets you create PDFs from scratch or convert any file format into this one. The tool also offers the option to merge multiple files. Additionally, you can combine different files in different formats together to form a portable document file.

The tool also comes with a PDF splitter option. It can help you split PDFs into single or multiple pages.

If you opt for the standard and upper plans of Soda PDF Reader, you can edit, compress, rotate, reorder, remove pages, or convert PDFs from office files, images, and more.

Soda PDF comes with the option to edit texts in the PDF using OCR, and also electronically sign documents.

Here are the key features of the Soda PDF reader:

  • Lets you split, compress, resize, and edit PDF
  • Texts can be edited using OCR, and PDFs can be electronically signed
  • Compatibility with Google Drive and other cloud storage services
  • Convert your PDF documents into Microsoft Office format and more

Soda PDF Reader

Quickly and comfortably access and edit PDF files with this versatile and easy-to-use software option.
Check price Visit Website

Adobe Acrobat Reader – File comparison tool

Adobe Acrobat Reader

Adobe Acrobat DC PDF reader deserves a place in the list of the best PDF readers for Windows 11. It is arguably the most popular PDF tool used across the globe.

You can do almost all of the things required to manage a file, including view, edit, print, sign, comment, share, convert, etc., and all of these are absolutely free of charge.

With the Pro version, Adobe Acrobat DC offers advanced options such as creating a new PDF, protecting it, exporting, converting, organizing, combining, and sending files for signatures.

This PDF reader lets you annotate files from anywhere, add bookmarks, highlight, underline important points, and even draw using the hand tool.

Let us take a quick look at the highlights of Adobe Acrobat Reader:

  • Gives the option to view, annotate, edit, sign, and more
  • Available across platforms
  • Seamless integration with popular cloud storage platforms
  • Offers a file comparison tool

Adobe Acrobat DC

Enjoy the plethora of features contained in Acrobat DC to create professional results.
Check price Visit Website

pdfFiller – Two-factor authentication

pdfFiller is another reliable PDF reader, editor, and creator that we truly recommend to our users because of its amazing set of features.

All you have to do is to drag and drop your preferred document and begin your PDF reader experience for free.

pdfFiller offers strong encryption and security to keep your documents safe and private thanks to its two-factor authentication feature.

Furthermore, you can create, edit, sign, fill automatically, add watermarks, images, and videos, and many more with this software’s advanced technology.

Other best features of pdfFiller include:

  • Print, download, and send
  • Erase, redact, draw
  • Add fillable fields
  • PDFs collaboration
  • Notarization

pdfFiller

Start your PDF reader experience alongside advanced editing, signing, and more with pdfFiller.
Free Trial Visit Website

PDFelement – OCR support

PDFelement

From the house of Wondershare, the name behind the popular video editing tool, Wondershare Filmora, also has an efficient PDF reader called PDFelement.

PDFelement lets you edit, create, sign, annotate, and share files on the go, with no issues. Even better is that you can collaborate with your colleagues on a document with cloud support.

This tool also offers an OCR tool, which you can use to extract and edit text from a PDF document. There is a powerful conversion feature that lets you convert scanned PDFs or image-based PDFs to most of the popular formats.

It supports over 20 languages, including English, Portuguese, Japanese, Spanish, German, Italian, etc.

Other options include the ability to resize or rotate any graphics on a PDF, extract data from PDFs in CSV format, sign documents digitally, and more.

Let us see some highlights of PDFelement:

  • Lets you digitally sign your files
  • It supports over 20 languages
  • Offers an OCR tool to edit and extract texts
  • Capability to perform batch conversions, data extraction, and other tasks

PDFelement

Get quick access to all the tools you need to view and edit PDFs on your PC successfully.
Check price Visit Website

Nitro PDF Reader – Best PDF annotation

Nitro best PDF reader for Windows 11

Nitro PDF Reader is also worthy of your attention. Over the years, the Nitro PDF Reader has gained popularity, because of its powerful features and its MS Office-similar interface.

The official website boasts that it is used by 68% of Fortune 500 companies. While we cannot confirm that, it is surely a nicely balanced and packaged PDF reader you can use on your Windows 11 PC.

Talking about features, it lets you create PDF files from over 300 file formats. You can create, edit, view, review, annotate, and read PDF files. It also lets you change the color, orientation, size, and quality.

You may easily sign a document by uploading a picture or scanning it. Nitro PDF Reader lets you convert PDF into popular document formats straight from the software.

Nitro PDF Reader is available for free, but you need to buy the Pro version to unlock all its capabilities.

Here are some of the key features of Nitro PDF Reader:

  • Easy-to-use interface
  • Lets you create PDFs from over 300 file formats
  • Allows you to change the color, orientation, etc., of the files
  • Offers features such as OCR, editing pages, combining multiple files, and more

Nitro PDF Reader

Use this versatile software with nifty features to easily open and edit your PDF files.
Check price Visit website

PDF Annotate & Fill – Best filling form feature

PDF Annotate & Fill

One of the straightforward PDF tools, that you can use either to edit a document or simply view it is called PDF Annotate & Fill.

It is available on the Microsoft Store for free, but there are in-app purchases, which you can opt for to unlock some features that are locked behind a paywall.

You can draw directly on the PDF, be it a straight line, rectangle, or oval. It offers the option to highlight, underline, and strike out text.

If you are collaborating with your colleague on a PDF, you can use features like comments, arrows, circles, lines, and more to point out the important lines in the document.

PDF Annotate & Fill also lets you sign PDFs digitally, fill up PDF forms, or print the document from the app itself.

Here are some of the best features of PDF Annotate & Fill:

  • Lets you draw or write on the files directly
  • Gives you the option digitally sign documents
  • Option to add comments and shapes
  • You can edit the elements by changing their color, size, transparency, and location

Xodo PDF Reader – Lightweight app

Xodo best pdf reader for Windows 11

The Xodo PDF tool is not only available for Windows 11 but also for Android and iOS. This is one of the best cross-platform PDF management apps that act as a PDF reader, editor, and converter.

You can use Xodo PDF Reader to collaborate with your colleagues and view, edit, highlight, comment, and annotate documents. It provides a chat feature option that could be very handy in virtual work-space scenarios.

This PDF reader for Windows 11 lets you convert almost any file format to PDF documents. You can draw or type text directly into the PDF using the Xodo PDF Reader.

The tool offers all these features, plus more, for free. In order to unlock all features, you can opt for the Xodo Pro PDF app.

Here are some of the highlights of the Xodo PDF Reader:

  • There is a night mode for ease of use at night
  • Can be used to convert popular file formats into PDFs
  • Chat feature lets you easily collab with other members of your work-space
  • Lets you sign your files using hand or scanned image
  • Merge multiple documents

Perfect PDF Reader – EPUB and MOB support

Perfect PDF Reader

Another PDF reader option that you can download straight from the Microsoft Store for your Windows 11 PC is the Perfect PDF Reader.

You can use the Perfect PDF Reader to simply view a PDF document or edit it with the various editing tools provided by this app.

It supports PDF, XPS, OXPS, text files, EPUB, MOBI, and FB2 eBooks. One of the best features of the Perfect PDF Reader is that it lets you open multiple files in individual windows within the app.

There are other facilities, such as the option to change layouts, fit modes, zoom levels, tune into full-screen reading mode, multiple pages, and more.

Some of the best features of the Perfect PDF Reader are:

  • Option to fill out PDF forms or sign them digitally
  • Lets you open multiple files in individual windows
  • The app saves the reading position of a file
  • Offers a bookshelf, that categorizes your documents based on categories

Foxit PDF Reader – Cross-platform PDF reader

Foxit PDF Reader

Foxit PDF Reader is another alternative you can choose if you are looking for a robust and full-of-features PDF reader and editor.

It offers several features without any fees, making it one of the most complete free PDF readers available on the internet for Windows 11.

You can use Foxit PDF Reader to fill in PDF or XFA file formats without any issues, and it is available for almost all platforms, including macOS, iOS, Android, the web, and Linux.

There are other tools that will make your PDF management easy, such as a text markup tool, a typewriter option, form handling, digital signatures, and more.

Check out some of the best features of the Foxit PDF Reader:

  • Offers enterprise CMS for collaboration and sharing
  • It provides the option to sign documents digitally
  • The tool is cheap compared to its competitors
  • Gives an extra layer of protection to your PDF using advanced security features

UPDF – Support for all platforms

UPDF is a professional PDF editing tool that comes with a stunning design. It allows you to protect the content of your file by making it a single-layered document.

It is the only PDF editor in the market that works across all platforms with 1 license. UPDF provides an enjoyable reading experience with dark mode and supports changing PDF backgrounds.

UPDF comes with an image editor tool that enables you to perform various operations, such as replacing, copying, cropping, and deleting the image.

This PDF reader tool has extensive annotation tools which enable you to personalize your documents by adding highlights, shapes, and other elements.

Some impressive features of UPDF:

  • UPDF allows you to use it across Windows, macOS, iOS, and Android with 1 license
  • Add customized backgrounds to personalize your document
  • The form-field highlighting makes filling PDF forms easy
  • Combines and maintains files with different image formatting into one
  • Add a single PDF into multiple documents with the Insert feature
  • Reduces the size of the file without comprising quality

Some of our readers also asked what are some of the best online PDF readers available?

While there are dedicated PDF reader software options available for a Windows 11 PC, several options are also available that let you view PDFs without needing to install the software.

These are web-based or online PDF readers. Such programs could come in handy, as you can use them to view documents on the go.

But what are some of the best online PDF readers available? Though it may take a few extra steps to view PDFs online, these options are sufficient to have a view of your documents at least.

You can make use of Google Drive for viewing PDFs. All you have to do is open Google Drive, upload the PDF file to your drive, and then open it. You can use Google Docs to edit the PDF as well. So, this gives you more flexibility than expected.

We also recommend checking our list of the best free and paid PDF editors for Windows 10 & 11.

Does Windows 11 have a free PDF reader?

Web browsers have become so capable that they also come with a built-in PDF reader. Now, Windows 11 comes with Microsoft Edge preinstalled as the default browser.

You can use the new PDF Reader in Microsoft Edge to open local or online files and more. So, if you’re wondering What program opens PDF files on Windows 11, know that MS Edge can neatly do the job.

However, they are not viable options for sharing, editing, annotating, or even signing those files. So, here’s the biggest question of all. Does Windows 11 come with a PDF editor? Unfortunately, it does not.

Let us know your thoughts below on our list of some of the best PDF readers for Windows 11. If you have a favorite PDF reader, you can also mention that in the comments section.

Fix: Laptop Won’t Turn on Without Charger Plugged in

The laptop won’t turn on without the charger plugged in issue is usually related to driver or peripheral problems. Thankfully, you can easily fix it, as shown below.

How to fix a laptop that doesn’t turn on without a charger

1. Remove all peripherals

Remove all the external devices connected to the computer and unplug/remove the batteries from the laptop. After that, keep the laptop idle for 5-10 minutes and re-insert all the components. If this doesn’t work,  run the hardware troubleshooter :

  1. Press the Windows + W, type troubleshooting, and press Enter.
  2. Click on Hardware and Sound and select Hardware and Devices.
  3. Now, click on Next to run the troubleshooter.

2. Uninstall Microsoft ACPI battery 

  1. Press the Windows key + R, type devmgmt.msc, and hit Enter.
  2. Expand the Batteries category.Batteries Device Manager
  3. Under the Batteries category and right-click the Microsoft ACPI Compliant Control Method Battery listing.
  4. Now, select Uninstall device. Be careful, do not remove the Microsoft AC Adapter driver or any other ACPI-compliant driver.
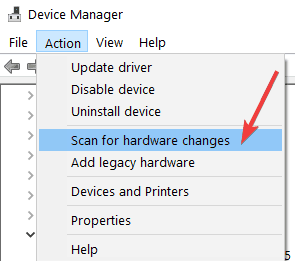
  5. On the Device Manager, click on Action, followed by Scan for hardware changes.
device manager scan for hardware changes

3. Run the Power troubleshooter and disable Fast Startup

  1. Open Control Panel and type power in the search bar.
  2. Select Choose what the power buttons do.Choose what the power buttons do
  3. Click the Change the settings that are currently unavailable option.change the settings that are currently unavailable
  4. Now, uncheck the option Turn on Fast Startup to disable the feature
turn off fast startup

After disabling the fast startup feature, check if the issue is fixed.

4. Check power settings

  1. Go to Control Panel > Power Options.power options control panel
  2. Click Change plan settings next to your active power plan.Change plan settings
  3. Click Change advanced power settings.changed advanced power settings
  4. Expand Battery settings and ensure they are set to optimal levels.power options battery saver
    • Critical battery action: Ensure it’s set to “Hibernate” or “Shut down” for low battery scenarios.
    • Low battery level: Set to a reasonable percentage (e.g., 10-20%).Critical battery level: Ensure it’s set lower than the low battery level (e.g., 5%).
    • Low battery notification: Ensure this is enabled so you receive alerts when the battery is low.
    • On battery settings: Verify that the laptop isn’t set to shut down at a low battery level.
  5. Save changes and test on battery.

5. Replace your battery

If nothing fixed the problem, this indicates that your laptop‘s battery is faulty and you need to replace it as soon as possible. Just ensure you get an original battery that works well with your PC.

To prevent issues like this from happening in the future and preserve the health of your battery, consider using a battery monitoring software.

Similarly, if your computer charges but won’t turn on, check our detailed guide to fix it quickly.

Feel free to let us know the solution that helped you fix this issue in the comments below.

Dead Or Failing Motherboard: What Are The Symptoms?

The motherboard, a main circuit board, connects all the hardware components to your processor. It defines which storage device, memory module, and graphics cards can be connected to your PC.

If anything happens to the motherboard, your computer will fail to start. This guide will cover all the causes and symptoms to look for to be sure that your motherboard is dead.

What are the reasons for motherboard malfunction?

There could be various causes of motherboard failing; some of the popular ones are mentioned here: 

  • Overheating – Overheating can result from a computer not being ventilated or the cooling system not working.
  • Component failure – Manufacturing defects, temperature exposure, and wear & tear could cause motherboard failure.
  • Power surges – Power outages and voltage spikes could also result in a power surge and could become the reason for the issue.

How can I tell if the motherboard is dead?

1. No Power

The first thing to look for is the computer not turning on or showing no signs of power. Next, check for all loose connections and ensure the power cables are correctly connected. 

 Check if the power supply is supplying power to the motherboard. Use a PSU tester and multimeter or a different power supply cable. 

You can use Newegg and Coolermaster to check the total power supply supplied to the motherboard. 

2. Check for physical damage 

printed circuit board - dead motherboard symptoms

Check your motherboard for damaged pins, printed circuit boards, or water damage. Also, check for burned transistors, chipped circuits, or bulged capacitors. Then, open the cabinet and look for the following to determine the cause. 

3. Remove GPU or RAM to check

If the GPU is not seated correctly, then it could interfere with the motherboard’s ability to turn on. If you see the lights or LED turning on, pull out GPU and RAM to check if the motherboard powers without them. If it restarts, try to seat GPU and different slots for RAM to check if it works with the motherboard.  

4. Disconnect everything

Check the internal components to analyze if they are using an unusual amount of power, failing the motherboard. 

Try removing the SSD, USB, or other memory disks to check if the motherboard powers on. 

5. Check the motherboard standoffs 

Standoffs are metal risers that can keep your motherboard elevated from your motherboard tray. If the standoffs are touching the motherboard back can cause a short circuit. 

Check the standoff positions to see if they are lined up with motherboard holes. Please remove them and reinstall your motherboard. 

6. Check the CMOS battery

CMOS battery - dead motherboard symptoms

As the CMOS battery powers up your PC’s BIOS and maintains the system settings saved, it is an essential element. A CMOS battery without power can also mistakenly make you think that the motherboard might be dead, as this battery is used to power it.

Before doing anything else, take out and check the CMOS battery. If at fault, replace it with the new one.

7. Check beep codes or LED indicators 

If your motherboard has status LEDs or beepers, they can indicate the problem with beep codes and error codes. With the motherboard speaker installed, you can get beep codes for troubleshooting. These are some examples:

  • One beep – memory issues
  • Two beeps – motherboard issues 
  • Five beeps – CPU issues 
  • Nine beeps – BIOS or ROM problems

If the motherboard has LED indicators, they may flash to indicate the issue with the CPU or motherboard. You need to check the manufacturer’s design to understand what your LED is indicating. 

8. Freezes and glitches in the computer 

BSOD - dead motherboard symptoms

If your computer is showing BSOD errors or is running slow, then this could also be a sign of a motherboard issue. But, again, some errors in the description might point you toward the problem. 

Also, if the computer is running hot or the fan is at full speed, it could be due to a bad cooling system. Check if the fans are working and remove the dust from the fan and PCB.

So, these are the symptoms that could confirm if the motherboard is dead or failing. If you have questions or concerns, feel free to mention them in the comments below. 

Windows Error Code 0xc0000185: 5 Solutions to Fix this Issue

Are you one of the Windows 10 users who ran into error code 0xc0000185 while using your device? Usually, this error message appears after a reboot and it can cause your PC to run into a problem and restart.

In this article we provide you with the best solutions to solve this error code, so keep reading.

How can I fix the Windows 10 error code 0xc0000185?

Before we start fixing this issue, there are a few checks that you can perform that will help you isolate the issue:

  • Disconnect all USB devices – It’s possible that the last USB device malfunctioned and it’s causing this issue. Therefore it’s important to disconnect all USB devices, except the keyboard and mouse.
  • Check your hard drive – Failing hard drive can cause this issue, so be sure to use HDD health check software and check if your drive is failing.

1. Repair your computer using the Windows 10 Installation Media

  1. Insert the Windows 10 Installation Media into the CD or DVD ROM and reboot the device.
  2. Now you should get to a black screen that says: Press any key to boot from CD or DVD in which case you will need to press just any button on the keyboard to boot from your Installation Media.
  3. Now select the Repair your computer button located on the lower left side of the screen.
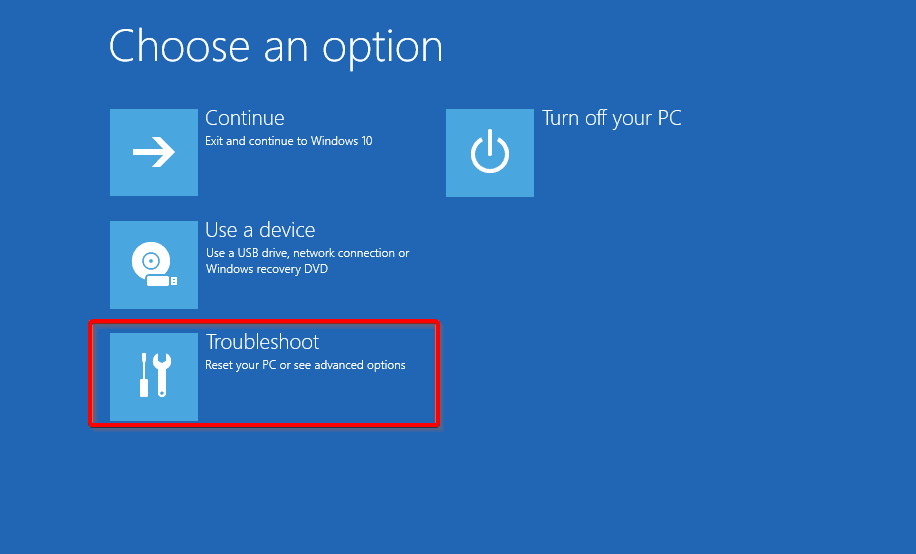
  4. Next, select the Troubleshoot option.
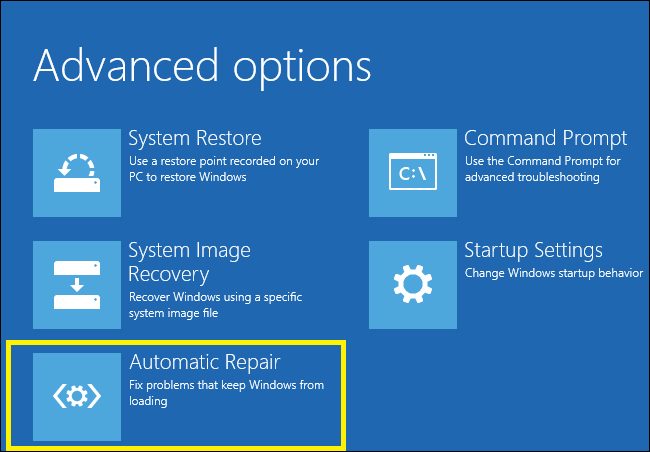
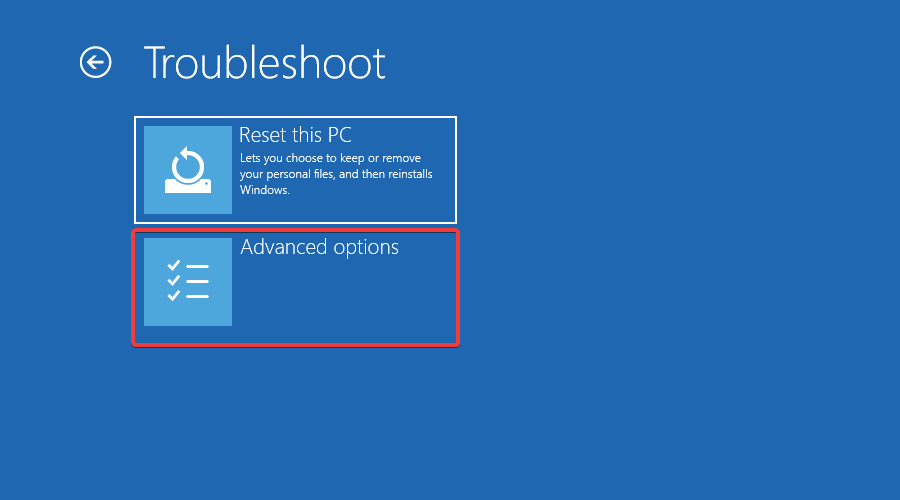
  5. From the Troubleshoot menu, select Advanced Options.
  6. Lastly, select the Automatic Repair feature.Yellow Screen of Death in Windows 10
  7. In this next window, select the operating system you are using.
  8. Wait for the process to finish.

Sometimes, you may get stuck on the Automatic Repair loop. If that’s the case, we’ve prepared a complete guide to help you get past the loop.

If you’re after a quick and convenient repair method, at any given time, using specialized software may help you fix the error code 0xc0000185.

More exactly, this ideal software will entirely scan your Windows PC and detect system malfunctions or corrupted files that generate this kind of BSoD error.

2. Rebuild Boot configuration data

  1. Boot from the installation media same as in the previous solution.
  2. Select the Repair your computer button situated on the lower side of the screen.
  3. In the Choose an option window, select the Troubleshoot option.
  4. Now, from the Troubleshoot menu, select the Advanced options.
  5. Select Command Prompt to launch the tool.
  6. Type the following commands and hit Enter after each one: BOOTREC /FIXMBR
    BOOTREC /FIXBOOT
    BOOTREC /REBUILDBCD
  7. Reboot your PC and check again if you still get the same error message.

3. Run System Restore

  1. Boot from installation media once again.
  2. Go to Repair your Computer, and select Troubleshoot.
  3. In the Troubleshoot window, select Advanced options.
  4. Click on the System Restore button.
  5. After you successfully completed the System Restore process, reboot your operating system normally and check if you still get the Windows error code 0xc0000185.

4. Run Disk Cleanup

  1. Go to Start, type disk cleanup, and launch the tool.
  2. Select the disk that you want to clean, and the tool will tell you how much space you can free up.
     
  3. Select what components you want to clear. Hit OK and wait until the process completes.

Your PC regularly stores temporary files and folders as you browse the Internet. These unnecessary files may trigger various issues, including error 0xc0000185.

You can quickly clean these junk files by using Disk Cleanup. If you can’t delete the temporary files on Windows 10, read our complete guide to get rid of them once and for all.

5. Remove recently installed software

  1. Press Windows key + X and choose Apps and features.
  2. Now locate any recently installed software and click Uninstall to remove it.
  3. Repeat this for a couple of applications.
  4. Once the software is removed, restart your PC and check if the issue persists.

And this is how you can fix your error code 0xc0000185 on Windows 10. This isn’t the only issue users reported, and we covered a similar issue in our error code 0x80070015 guide.

If you have additional questions related to this subject, feel free to drop us a line in the comments below.

Fix: Laptop Touchpad & Mouse Click Buttons not Working

Have you been using your mousepad, and the laptop click button suddenly stopped working? If this is your experience, we’ve got solutions you can use to work around the issue.

Some potential causes of the laptop click button not working include conflicts with other mouse or pointer software and driver issues.

Check out the solutions below to fix the laptop click button problem.

Why won’t my touchpad buttons work?

The touchpad buttons not working issue can be down to various factors. Below are some of the prevalent causes:

  • Faulty touchpad drivers: The touchpad drivers are important in connecting the touchpad’s hardware and software components. The solution to this is to reinstall these drivers.
  • Corrupt system files: Sometimes, this issue can be down to missing or faulty system files on your PC. The solution to this is to repair and restore these files.
  • Issues with a third-party app: Some third-party apps can mess with your PC processes. To be sure that an app is the cause of this issue, you need to perform a clean boot. If you are lucky to find the faulty app, you need to remove it using a specialized uninstaller tool.

How to fix laptop click button issues

1. Run Hardware and Devices troubleshooter

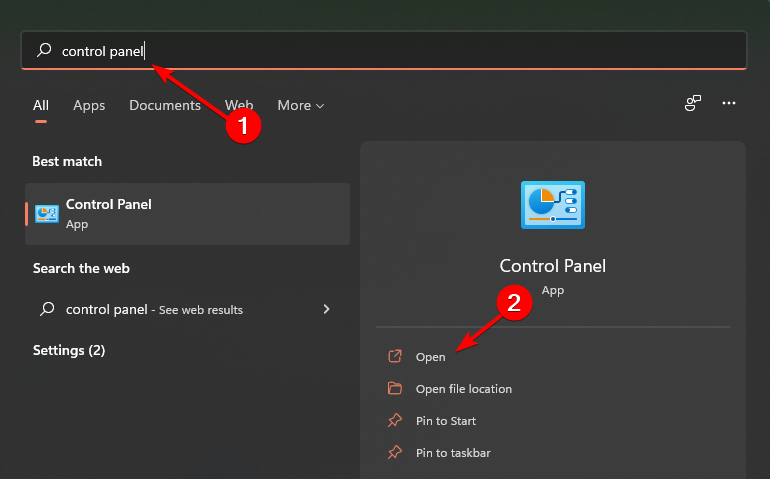
  1. Right-click Start.
  2. Select Control Panel.
  3. Go to the View by option in the top right corner.
  4. Click the drop-down arrow and select Large icons.
  5. Click Troubleshootinglaptop battery drain sleep mode troubleshooting
  6. Now, Click the View all option on the left pane
  7. Click Hardware and Devices
  8. Lastly, Click Next to run the troubleshooter

If you’re experiencing problems with your laptop’s touchpad, run the Hardware and Devices troubleshooter to resolve the issue.

This checks for commonly occurring issues and ensures any new device or hardware is correctly installed on your computer.

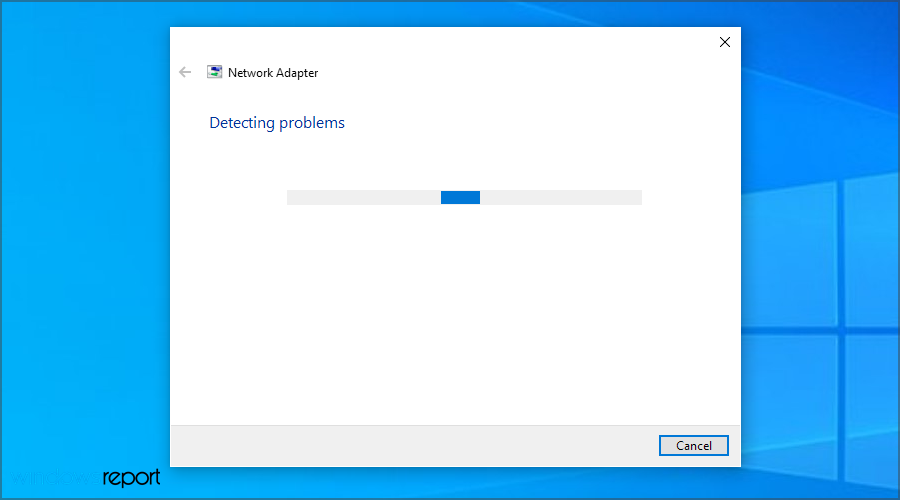
Follow the instructions to run the Hardware and Devices troubleshooter.  The troubleshooter will begin detecting any issues that may be causing your laptop click button not to work as it should.

2. Boot in Safe Mode

Safe mode starts your computer with limited files and drivers, but Windows will still run. To know whether you’re on Safe mode, you’ll see the words at the corners of your screen.

If the laptop click button issue persists, check whether it occurs while your computer is in Safe mode.

How to get your computer into Safe mode

There are two versions:

  • Safe mode
  • Safe mode with Networking

The two are similar, though the latter includes network drivers and other services necessary to access the web and other computers in the same network.

Follow these steps to start your computer in Safe Mode:

  1. Click on the Start button.
  2. Select Settings.
  3. Click Update & Security.laptop click button
  4. Select Recovery from the left pane.laptop click button
  5. Go to Advanced startup.laptop click button
  6. Click Restart now.
  7. Select Troubleshoot from the choose an option screen, then click Advanced options.
  8. Go to Startup Settings and click Restart.
  9. Once your computer restarts, a list of options will come up.
  10. Choose 4 or F4 to start your computer in Safe Mode.

A quicker way to get into Safe Mode is to restart your computer and then do the following:

  1. From the Choose an option screen, select Troubleshoot>Advanced options>Startup Settings>Restart
  2. Once your computer restarts, a list of options will come up.
  3. Choose 4 or F4 to start your computer in Safe Mode

If the laptop click button problem isn’t there while in Safe mode, then your default settings and basic drivers are not contributing to the issue.

Do the following to exit Safe Mode:

  1. Right-click the Start button.
  2. Select Run.
  3. Type msconfig.
  4. A pop-up will open.
  5. Go to the Boot tab.
  6. Deselect or uncheck the Safe Boot option box.
  7. Restart your computer.

3. Run a System File Checker scan

  1. Click Start.
  2. Go to the search field box and type CMD.
  3. Now, select Command Prompt.
  4. Right-click and select Run as Administrator
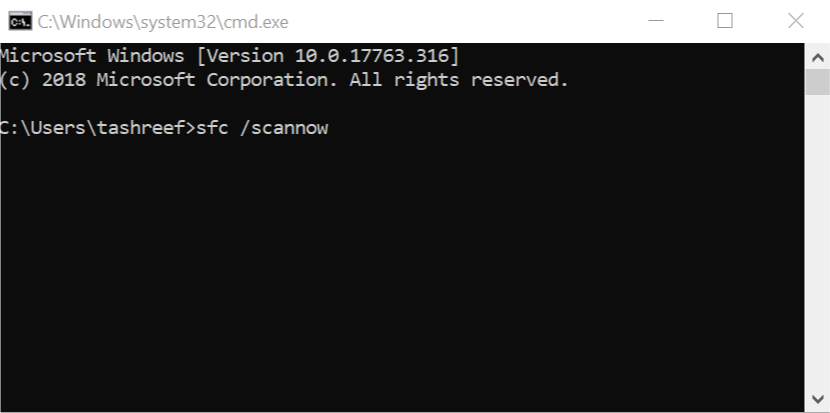
  5. Next, type the command below and hit Enter: sfc/scannowSfc scannow
  6. Finally, restart your computer.

A System File Checker scan checks or scans all protected system files and then replaces the incorrect versions with the genuine, correct Microsoft versions.

If the laptop click button issue persists, try the next solution.

4. Turn off the Touchpad and reboot

  1. Right-click Start.
  2. Select Control Panel.
  3. Click Devices and Printers.
    Default printer keeps reverting back
  4. Click Mouse.
  5. Now, click the Device Settings tab on Mouse Properties.
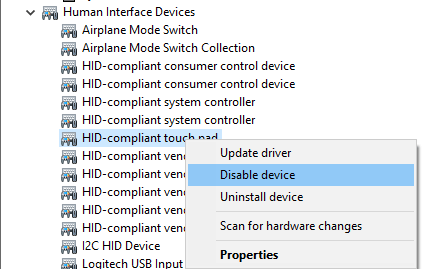
  6. Click Disable button to turn off the Touchpad.
  7. Restart the system.
  8. Finally, enable the button.

Does this restore your laptop click button to working condition? If not, try the next solution.

5. Uninstall and reinstall touchpad drivers

  1. Click Start.
  2. Select Control Panel.
  3. Double click System.
  4. Click the Hardware tab.
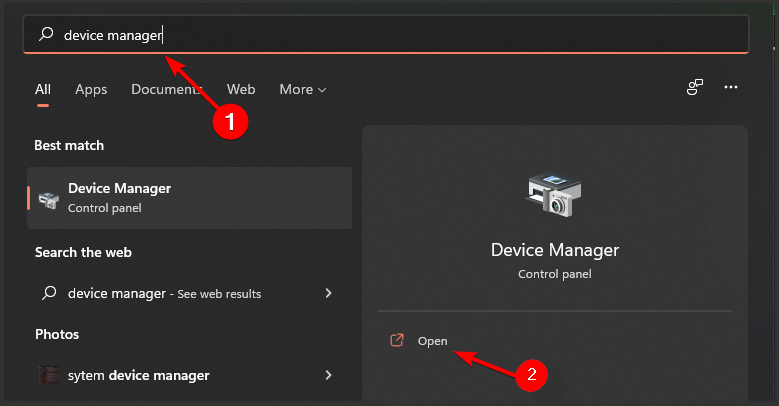
  5. Select Device Manager.skype error cant access your sound card
  6. Expand Mice and other pointing devices to open the list.
  7. Double-click on the TouchPad driver tab.
  8. Click Update driver.
  9. Right-click on Touchpad.
  10. Click Uninstall.
  11. Go to USB Controllers.
  12. Uninstall everything except the category itself.
  13. Restart your computer. Windows automatically detects the change in your hardware and will refresh the TouchPad driver and USB stack.

You can also contact your device’s manufacturer for the latest touchpad drivers, then check if this helps fix the laptop click button problem.

6. Perform a Clean Boot

  1. Go to the search box.
  2. Type msconfig.
  3. Select System Configuration.System configuration - Disable - Enable services
  4. Find the Services tab.
  5. Select Hide all Microsoft services box.
  6. Click Disable all.
  7. Go to the Startup tab.
  8. Click Open Task Manager.task manager startup
  9. Close Task manager, then click OK.
  10. Reboot your computer

If you laptop click button still won’t work, eliminate any software conflicts that may be causing the issue.

Performing a clean boot for your computer reduces conflicts related to software that can bring up the root causes of the laptop click button failure.

These conflicts can be caused by applications and services that start up and run in the background whenever you start Windows normally.

You will have a clean boot environment after all these steps are carefully followed, after which you can try and check if the problem is gone.

7. Run the DISM tool

  1. Click Start.
  2. In the search field box, type CMD.
  3. Now, click Run as administrator under Command Prompt in the search results list.
  4. Type the following commands and hit Enter after each: Dism /Online /Cleanup-Image /ScanHealth Dism /Online /Cleanup-Image /RestoreHealthThe language or edition of the version of Windows dism scan

If you still can’t get your laptop click the button to work, and run the DISM or Deployment Image Servicing and Management tool.

Once the repair is complete, reboot your computer and check if your laptop click button is working again.

8 Install drivers in compatibility mode

  1. Download the latest driver from the manufacturer’s website.
  2. Save it on your local disk.
  3. Right-click on the setup file of the downloaded driver.
  4. Click Properties.
  5. Click the Compatibility tab.
  6. Check the box next to Run this program in Compatibility mode.
  7. Select the Operating System from the drop-down list.
  8. The driver will install, then check its functionality.

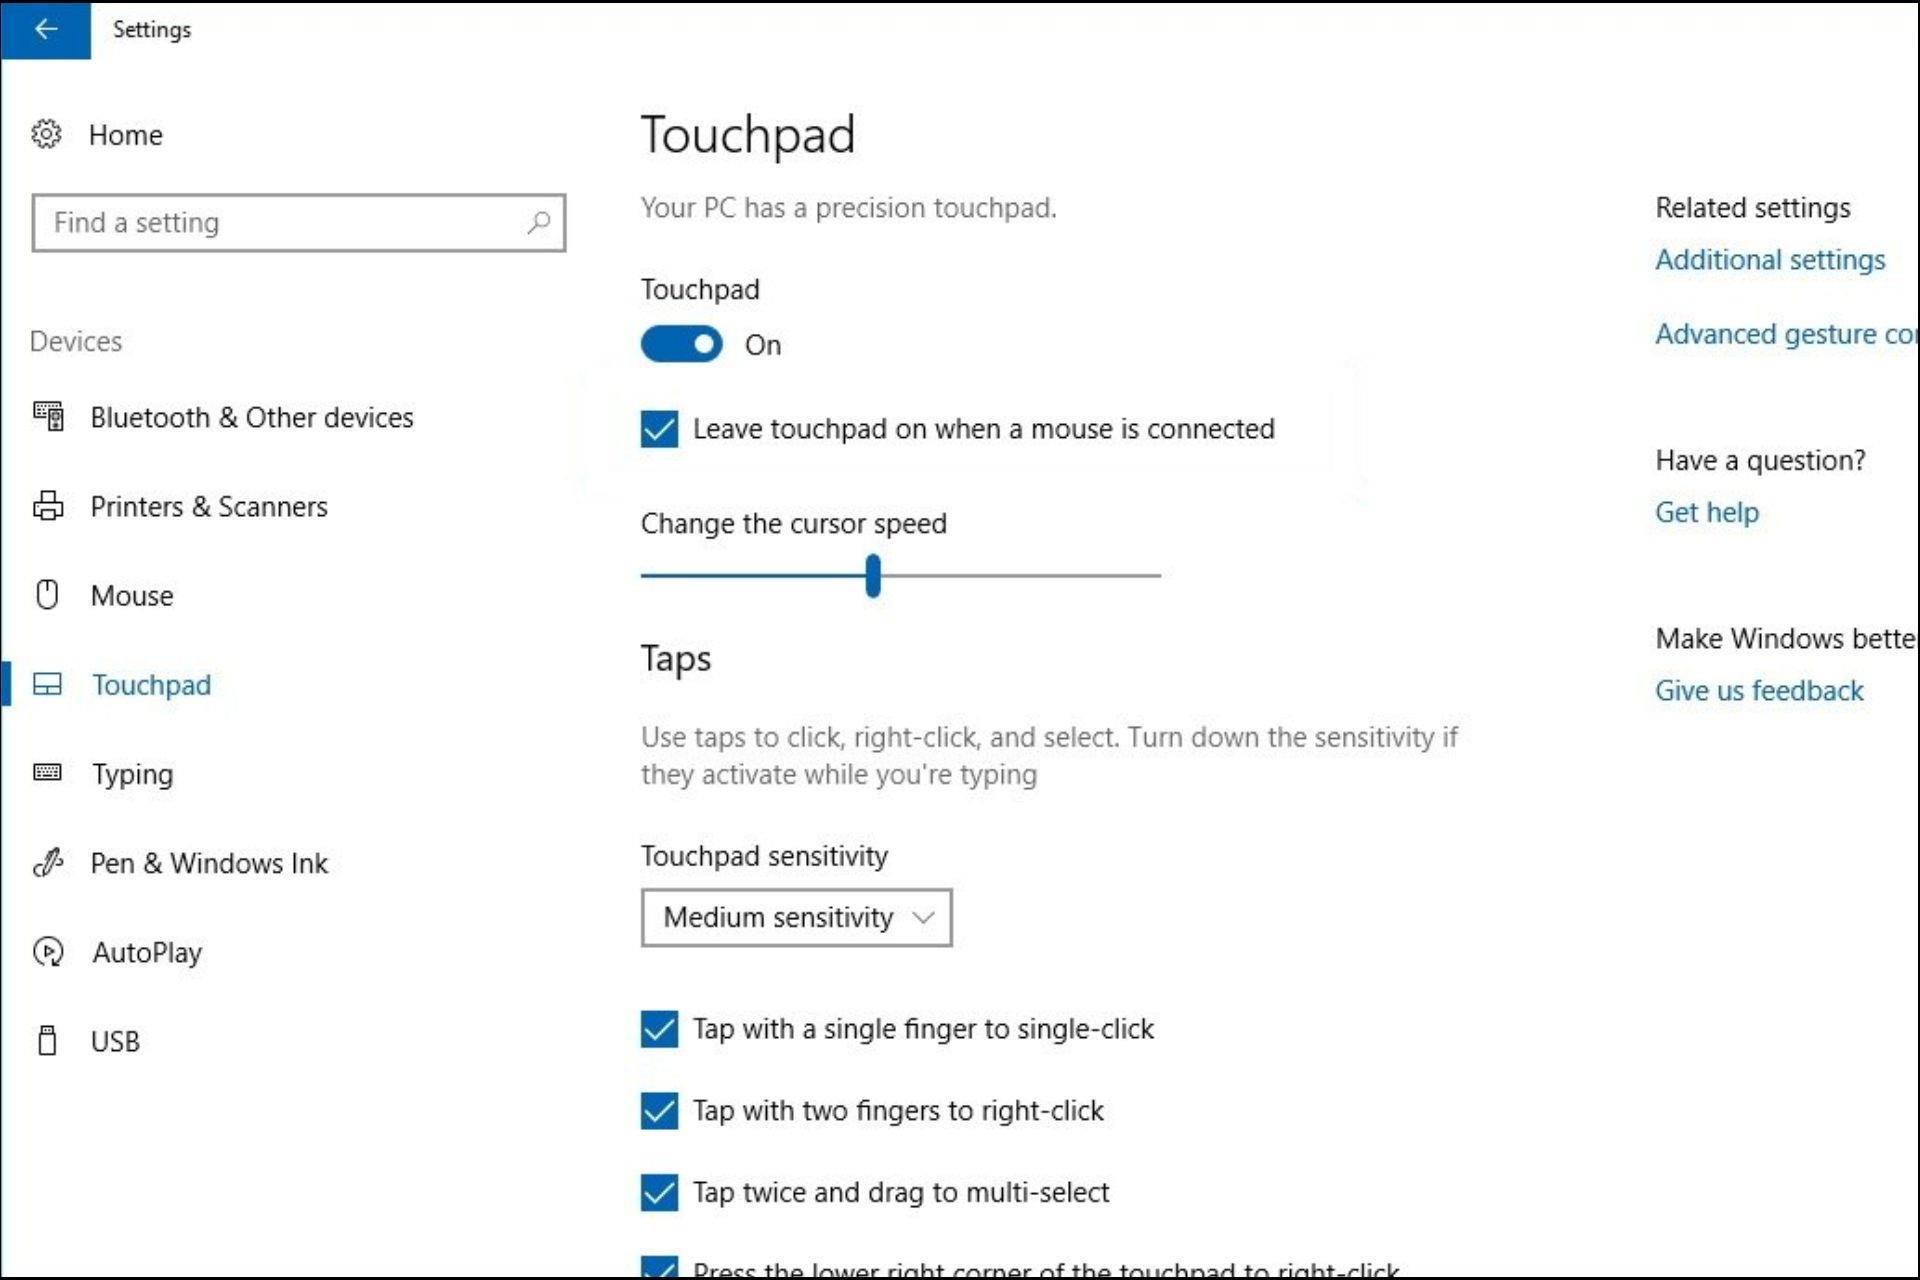
9. Check if your TouchPad is enabled or disabled

  1. Click Start.
  2. Type Touchpad in the search field box.
  3. Click Mouse and Touchpad settings.
  4. Look for Touchpad toggle settings On/Off.
  5. Click to toggle it On (if it is off).
  6. If you don’t have a toggle function, click Additional Mouse options at the bottom of your screen, then click Touchpad tab for your laptop.
  7. Click the picture of the touchpad.
  8. Click the toggle to On.
  9. Click Save.

10 Perform a System Restore

  1. Click Start.
  2. Go to the search field box and type System Restore.
  3. Click System Restore in the list of search results.
  4. Enter your administrator account password or grant permissions if prompted to.
  5. In the System Restore dialog box, click Choose a different restore point.
  6. Click Next.
  7. Click a restore point created before you experience the problem.
  8. Click Next.
  9. Click Finish.

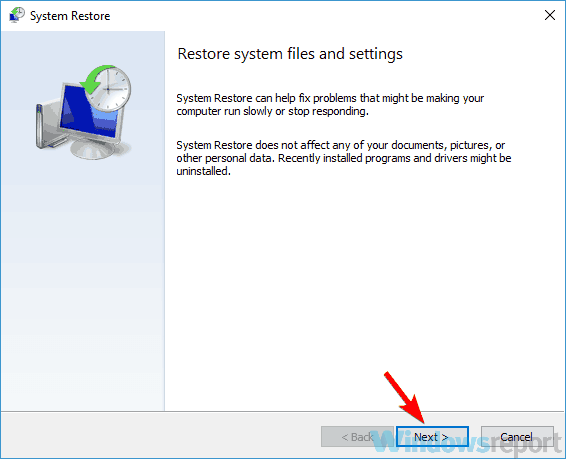
Use System Restore to create restore points when you install new apps, drivers, or Windows updates or when you create restore points manually.

If the laptop click button is not working, try and restore the system and see if it helps.

Restoring doesn’t affect your files. It, however, removes apps, drivers, and updates installed after the restore point was created.

To go back to a restore point, do the following:

  1. Right-click Start.
  2. Select Control Panel.
  3. In the control panel search box, type Recovery.
  4. Select Recovery.
  5. Click Open System Restore.
    main window system restore wlanext.exe
  6. Click Next.
  7. Choose the restore point related to the problematic program/app, driver, or update.
  8. Click Next.
  9. Click Finish.

That should do it for this guide on how to fix the touchpad buttons not working issue. We believe you now have all the information needed to fix this issue.

In the same vein, if your mouse is clicking on its own, check our detailed guide to fix it quickly.

Let us know in the comments section whether any of these solutions worked to resolve the laptop click button issue.

4 Best Photo Album & Organizer Software in 2026

Today, we’ll walk you through the best digital album software that allow you to sort photos hitch-free on your PC. With these tools, you can quickly organize and find pictures based on criteria like date, location, and tags.

You can get as specific as you want, or use built-in automated sorting options that, while not as precise, save a lot of time.

Let’s check them out.

What is the best photo album maker?

Note icon NOTE
Some products are primarily photo editors but have top-notch photo management features, so we couldn’t overlook them. But if you only need photo sorting and management, we also selected apps focused solely on those tasks.

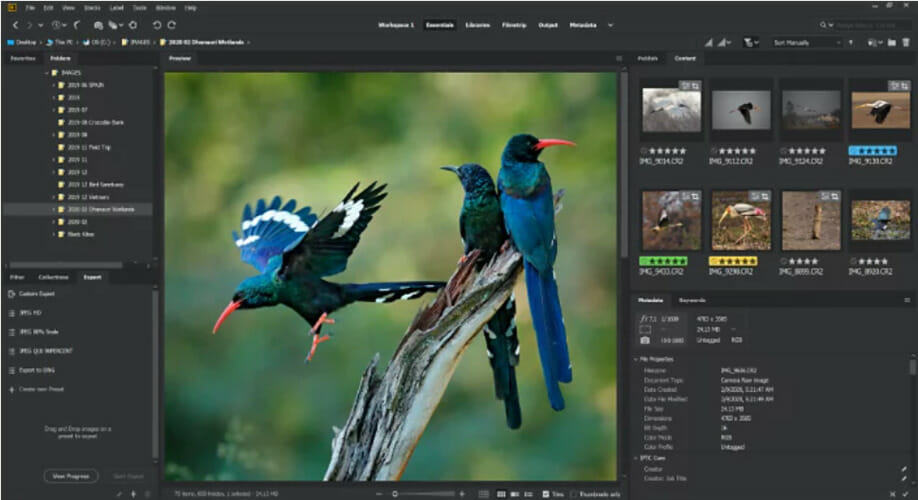
Adobe Bridge – Retina & HDR support

The full version of Adobe Bridge free, so if you’re looking for an advanced photo album app that cost zero cents, you’ve found your best bet.

Thanks to this tool you can do Automated cache management. It also allows you to quickly organize and stack panoramic and HDR images.

This software also comes with On-demand thumbnail and metadata generation. You also have the option to import photos and videos from your mobile device or digital camera.

It is easy to manage your photos thanks to the flexible batch processing functions and when it comes to editing you also have drag-and-drop file flexibility.

Adobe Bridge

Organize, edit, and share your photos with a complex and versatile tool that makes the job easy.
Free trial Visit Website

Magix PhotoStory Deluxe – Slideshow-focused

Magix PhotoStory Deluxe allows you to import photos directly from your camera, apply minor changes, create slideshows, and share them with friends and family.

The tool has custom albums and flexible view/management modes to let you find photos and videos quickly.

It lets you sort your photos according to thematic categories, such as night scenes or beach photos. You can also rate your images to sort them according to their importance and quality.

Additionally, you can back up your photos to CD, or DVD. You can also import and optimize uncompressed image data from more than 590 camera models.

Magix PhotoStory Deluxe

Choose from over 1.500 effects to create exciting and engaging visuals with this excellent software.
Free trial Visit Website

Microsoft Photos – OneDrive sync

The Microsoft Photos app is designed for organizing, editing, and sharing your photos. It stores photos and videos from all your devices, enhances them, and organizes them into albums.

You can gather photos from all your devices in one place using OneDrive and browse your collection by date, album, or folder.

You can create your own albums, view and share them, and automatically created albums can be edited to add a personal touch (PC only).

⇒ Get Microsoft Photos

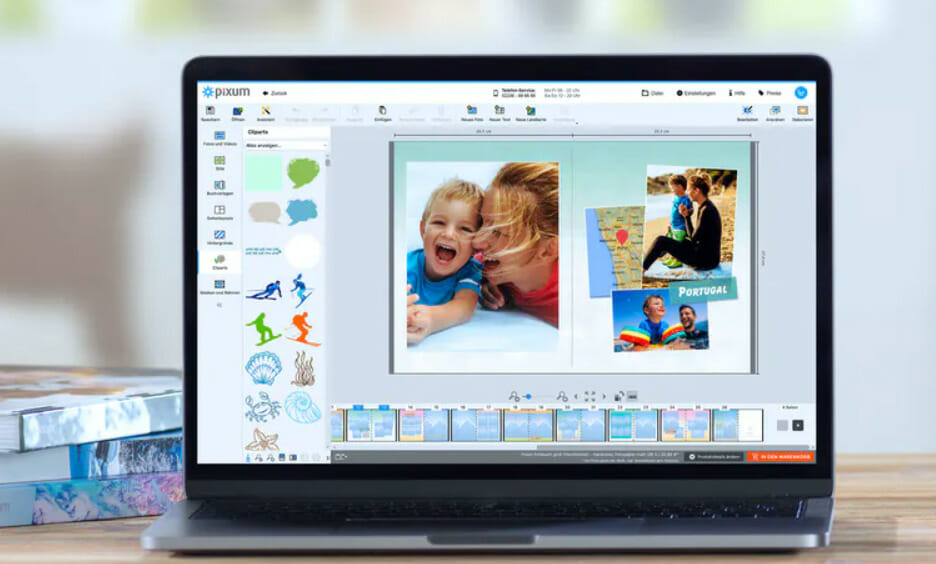
Pixum – Free digital photo album software ➕ QR code scanning

Pixum helps you manage, categorize, and edit your photo albums with ease. It’s free and offers simple installation and an intuitive editor.

You can design unique photo albums using a variety of pre-designed templates and layouts.

The editor suggests photo locations based on GPS info, helping you organize your photos more effectively. Enhance your albums by adding routes, pins, clipart, and stickers.

Use the Add Further Elements function to download additional options, which are perfect for albums aimed at children. The Shiny Highlights feature lets you create glossy-text greeting cards.

⇒ Get Pixum

Summary

As you can see when it comes to digital photo albums and management software there are various excellent tools that challenge not only your management skills but also your creativity.

Tell us more about your experience with these programs so drop us a comment in the section below.

Laptop Battery Drains When Off: 5 Ways to Fix it

If your laptop battery keeps draining when it’s off, you’re not alone. Many laptops don’t actually shut down completely because of settings like fast startup or USB power, which sneakily drain battery life.

Let’s break down how to stop this and save your battery.

How do I stop my laptop battery from draining when I close it?

Before we start, disable Fast Boot in BIOS, and hold the Power button on the laptop for 5 seconds after shutdown. If you have the Dell Power Manager app, use it to configure a power plan.

1. Modify device properties

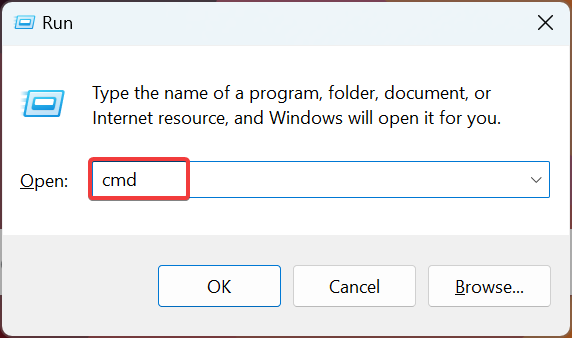
  1. Press Windows + R to open Run, type cmd in the text field, and then hit Ctrl + Shift + Enter.cmd in Run window
  2. Click Yes in the UAC prompt.
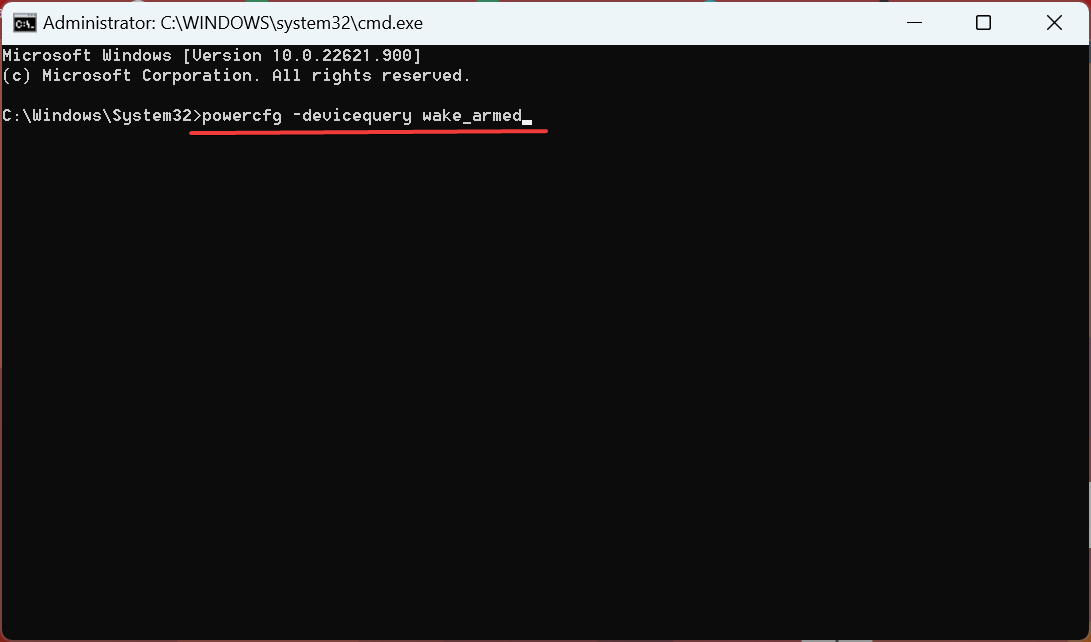
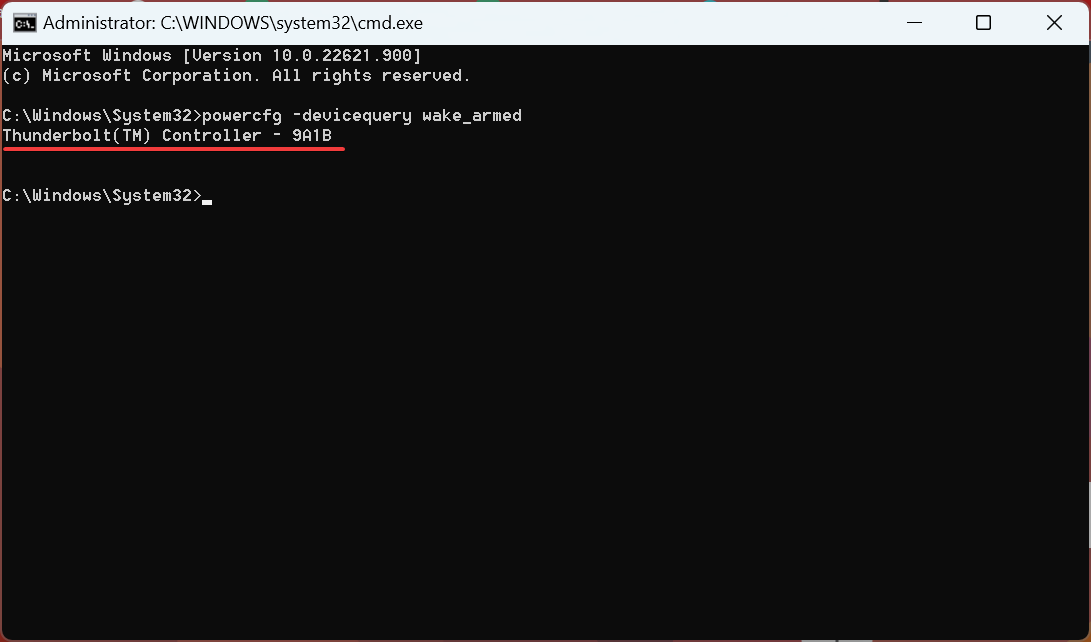
  3. Now, paste the following command and hit Enter:powercfg -devicequery wake_armedpowercfg -devicequery wake_armed command in Command Prompt
  4. A few devices that draw power from the computer will be listed here. Make a list of them, and our approach will be to disable them from doing so.list of devices that can wake the PC in command prompt
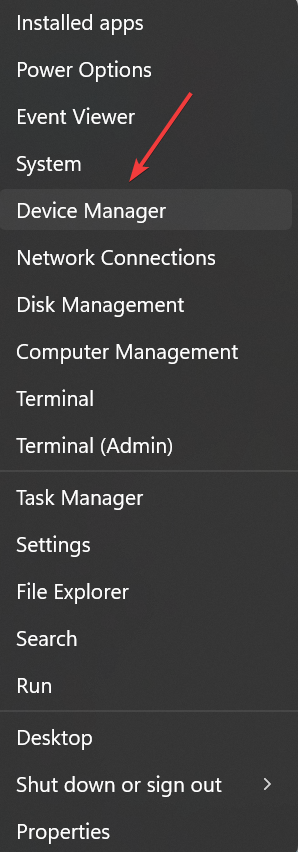
  5. Press Windows + X to open the Power User menu, and choose Device Manager from the list.win+x menu device manager
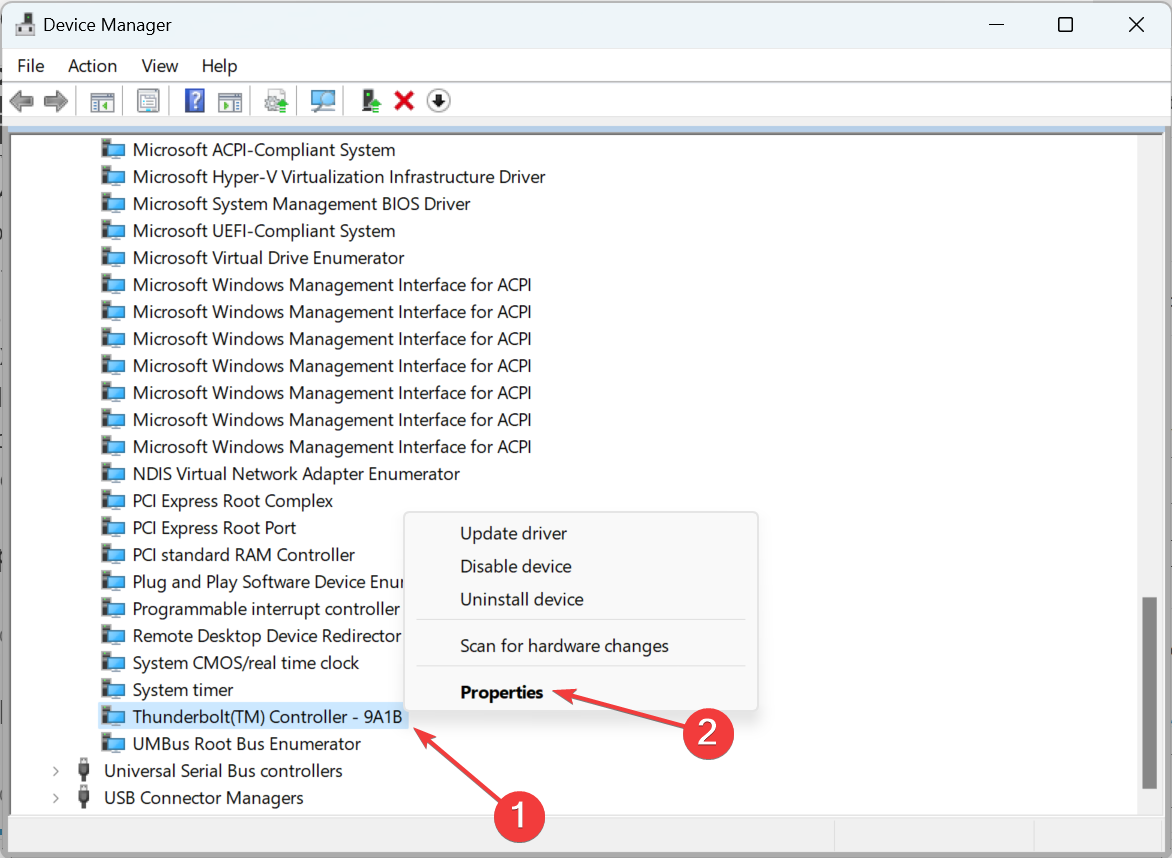
  6. Now, locate the device(s) you found earlier after running the command, right-click on each individually, and choose Properties.device propererties menu device manager
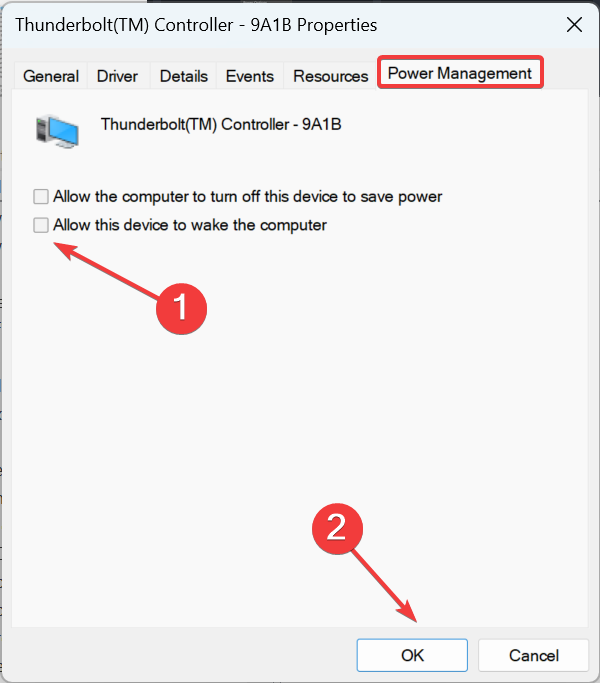
  7. Navigate to the Power Management tab if there’s one, uncheck the Allow this device to wake the computer option, and click OK to save the changes.
    allow this device to wake the computer unchecked
  8. Similarly, modify the power settings for other devices that were listed after running the command, and then restart the computer.

Make sure you change the power settings for the Intel Management Engine Interface as it was proven to be causing battery drain.

A few users suggested reinstalling the Intel Management Engine Interface or using a different version, so be sure to try that.

2. Disable hibernate feature

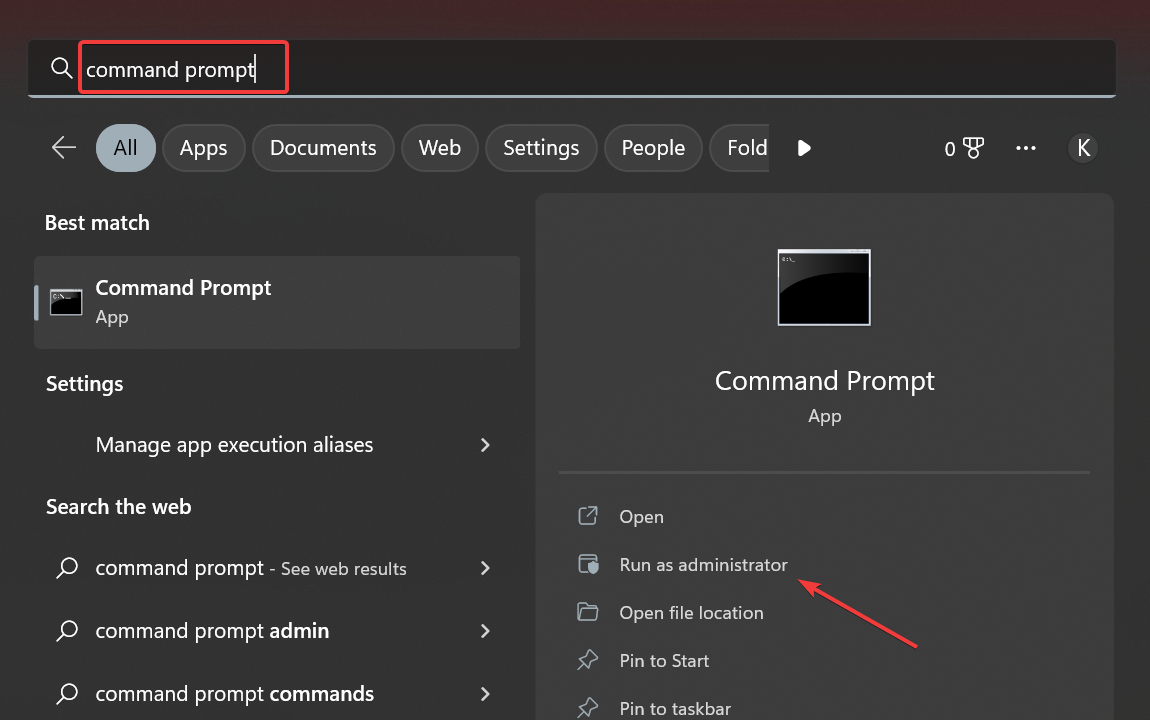
  1. Press Windows + S to open Search, type Command Prompt, and then click on Run as administrator.command prompt run as administrator search
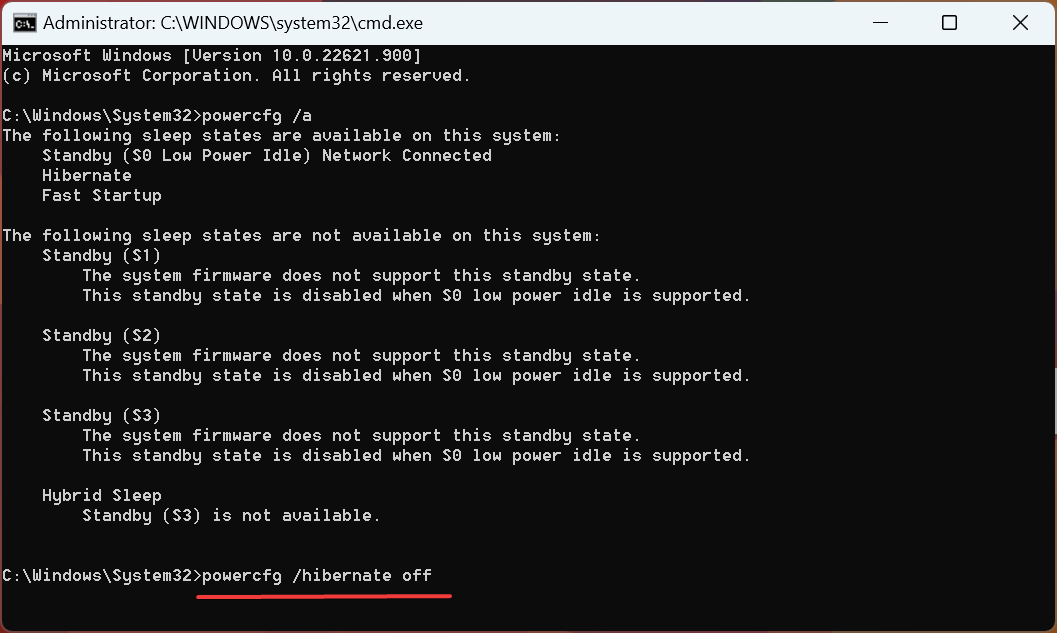
  2. Next, execute the following command to disable Fast Startup and Hibernate:powercfg /hibernate off
    powercfg /hibernate off command prompt
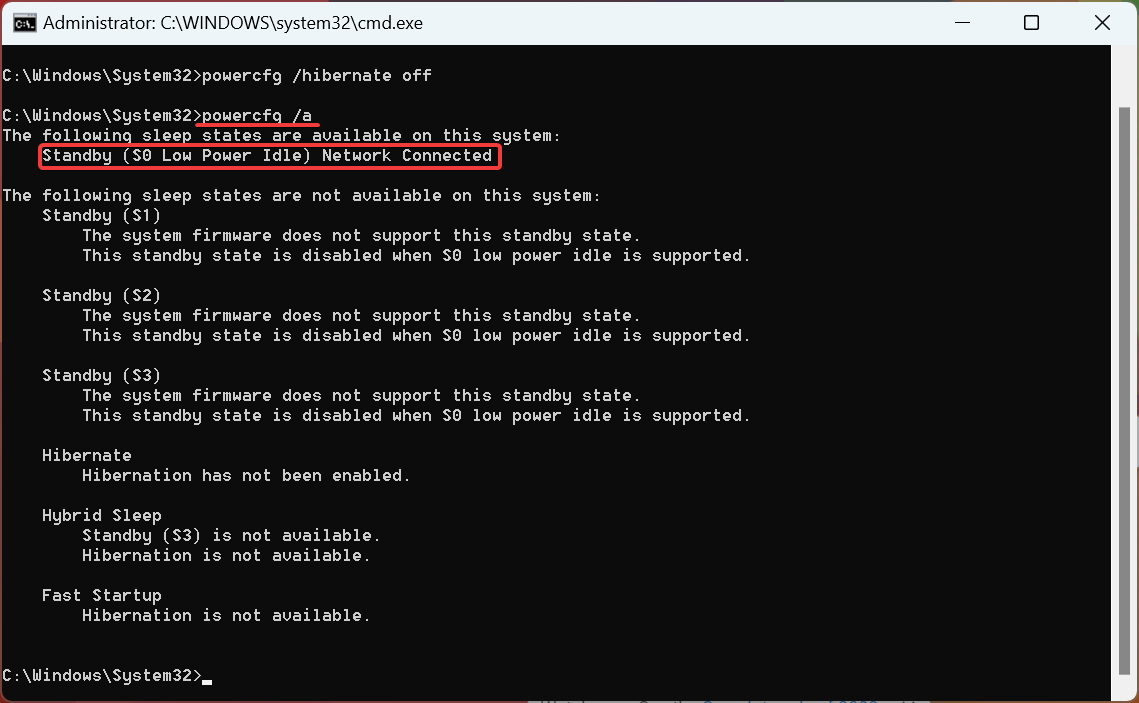
  3. Again, run this command to check the current sleep states:powercfg /apowercfg /a command in command prompt

3. Use the Command Prompt to modify the registry

  1. Open Command Prompt as administrator.
    CMD elevated search run as administrator
  2. Run the following command: reg add HKLM\System\CurrentControlSet\Control\Power /v PlatformAoAcOverride /t REG_DWORD /d
    PlatformAoAcOverride /t REG_DWORD /d  command in command prompt
  3. Once the command is executed, close Command Prompt.

4. Modify the registry

  1. Press the Windows key + R and enter regedit.
    regedit command in run
  2. Navigate to the following path: Computer\HKEY_LOCAL_MACHINE\SYSTEM\CurrentControlSet\Control\Power\PowerSettings\f15576e8-98b7-4186-b944-eafa664402d9
  3. In the right pane, double-click on Attributes.
    attributes dword registry editor
  4. Change the Value data to 2 and save changes.
    attributes value data 2
  5. After that, open Power Options in the Control Panel.
  6. Open Advanced Power Settings.
  7. In the Balanced tab, look for Networking Connectivity in Standby and disable it.

There’s an alternative method that has worked for some:

  1. Start Registry Editor.
  2. Next, navigate to the following path:  Computer\HKEY_LOCAL_MACHINE\SOFTWARE\Policies\Microsoft\Power\PowerSettings\f15576e8-98b7-4186-b944-eafa664402d9
  3. Look for ACSettingIndex and DCSettingIndex DWORDs.
  4. Double-click each of them and set their Value data to 0.
    acsettingindex 0 value data

If you don’t have these DWORDs available, your machine doesn’t support Modern Standby.

5. Turn off Wake on LAN

  1. Open Device Manager.
  2. Locate the Network adapters and click on the downward arrow to display the full list of adapters.network adapter drivers
  3. Pick the one you’re currently using, right-click on it, and select Properties. network adapter properties
  4. Go to the Power Management tab and uncheck the box next to Allow this device to wake the computer.allow this device to wake the computer

Is it normal for laptop battery to drain while shutdown?

Yes, a negligible battery drain will occur when the device is off. However, a noticeable battery drain might indicate a problem with your settings or battery.

Also, check some of the most effective tips to extend battery life in a Windows laptop. We also have a guide on what to do if battery drains on Windows 11, so don’t miss it.

Many reported that laptop battery drains in Sleep Mode, but we addressed this issue in a separate guide. We also have a guide that analyzes how Windows 11 affects battery life, so don’t miss it.

Experiencing a low battery alert while the charger is connected? Read the full fix in Laptop Low Battery Warning When Plugged In.

If you have any queries or know of a solution not listed here, drop a comment below.

Taskbar Flickering in Windows 10: How to Fix It

Taskbar flashing and flickering is a not-so-frequent issue on Windows 10. Nevertheless, it’s been a frustrating problem for most users, and some even reported that Taskbar isn’t working.

While there are several causes for this issue, this guide contains surefire fixes to solve it quickly. Read on!

Why does my taskbar keep blinking?

Consider a few things if your Taskbar keeps flickering on Windows 10. Below are some of the chief causes of the issue:

  • Outdated graphics driver: Sometimes, when a driver is obsolete, it becomes corrupt and might not have the power to carry out the necessary tasks.
  • Corrupt or faulty driver: If you started noticing the flickering Taskbar issue on Windows 10 after updating your PC or driver, the problem might be due to the newly installed driver. Rolling back the driver should restore normalcy here.
  • Glitchy user account: Some users have complained that this issue only occurs on some accounts and not others. A simple workaround for this is to create a new local account.
  • Incompatible apps: When you have too many apps, especially those that have to do with the looks and display on your PC, one of them might be causing this problem. To solve this problem, you must remove the app from settings or use one of the best uninstaller software.
  • Hardware issues: Issues with SMART technology on your hard disk can cause these types of problems.

Now, let’s delve into fixing this issue in detail.

How do I fix the flickering bar in Windows 10?

Before exploring the fixes in this guide to solve the Taskbar flickering on Windows 10 issue, you might want to try the following:

  • Update Windows – The latest Windows updates can fix software problems.
  • Restart the PC – Sometimes, a quick restart can fix problems, so be sure to try it.

Ensure that you are not having a hardware problem. Some users have found this issue may be triggered by a problem with SMART technology, which anticipates issues with the hard disk.

1. Update your display driver

    If your Taskbar icons and other pages on Windows 10 are flickering after startup, it might be because of an outdated display driver. So, the manufacturer’s website is the best way to get the dedicated driver manually.

  1. 1. Press the Windows key + R and select Device Manager.

    device manager windows 10 taskbar flickering
  2. 2. Click the arrow next to the Display adapters option to expand it and double-click the driver under it.

    stop-taskbar-icons-flashing-windows-10/
  3. 3. Select the Driver tab at the top and note the Driver version.

    stop-taskbar-icons-flashing-windows-10
  4. 4. Now, search for your driver name + Driver update + Windows 10 on Google, as shown in the image below.

    google windows 10 taskbar flickering
  5. 5. Choose the driver manufacturer’s website from the result and check if there is an upgrade on your current driver version.

  6. 6. If an update is available, download it and click the downloaded file to complete the installation.

However, with the apparent risk of downloading and installing the wrong drivers, which can lead to more significant issues, it is recommended to use a dedicated driver update tool to scan and install the drivers efficiently.

This user-tailored software is offering a comprehensive scan summary with each outdated driver and installs the latest update automatically with minimal support from you.

➡️ Get Outbyte Driver Updater

2. Roll back the graphics driver

  1. Open Device Manager and expand the Display adapters option.
  2. Right-click the driver there and select Properties.
    properties
  3. Choose the Driver tab at the top and click the Roll Back Driver button.
    driver tab
  4. Click the Yes button when prompted to confirm the action.

If you started noticing the Windows 10 Taskbar flickering issue after an OS or driver update, the problem might be with the newly installed driver. Removing it should restore regular service in this case.

3. Create a new local user account

  1. Press the Windows key + I to open the Settings app and choose Accounts.
    accounts
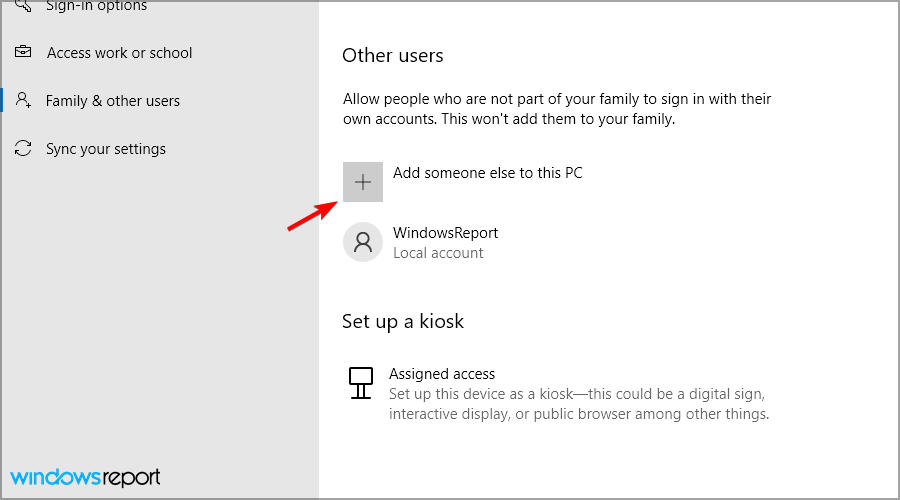
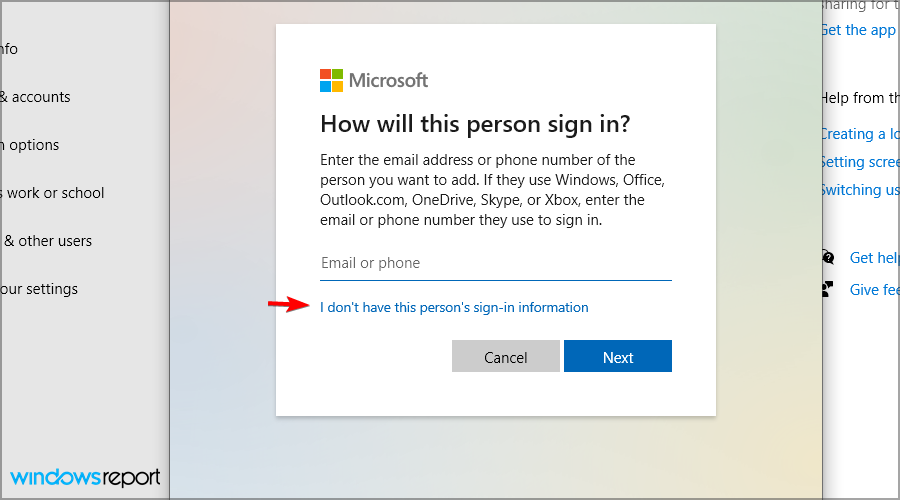
  2. Select Family & other users in the left pane and click on Add someone else to this PC.
    family and others windows 10 taskbar flickering
  3. Click on the I don’t have this person’s sign-in information.
    i dont have information
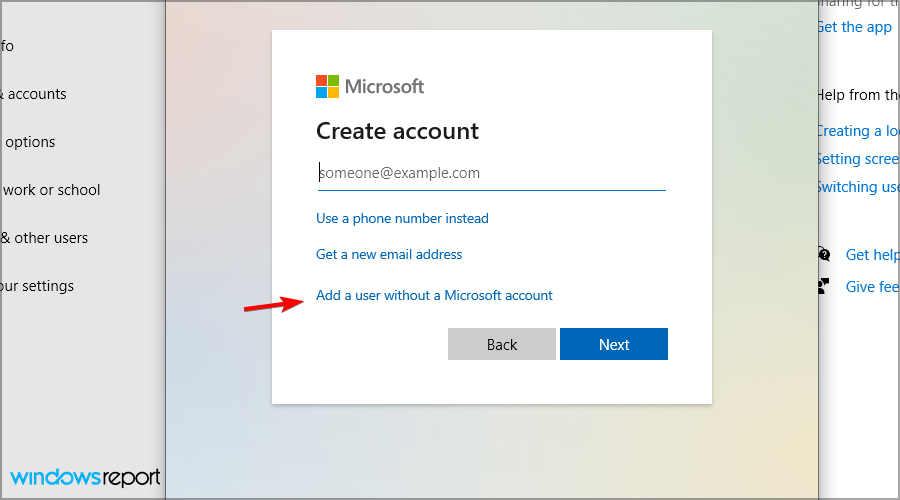
  4. Now, select Add a user without a Microsoft account.
    add a user
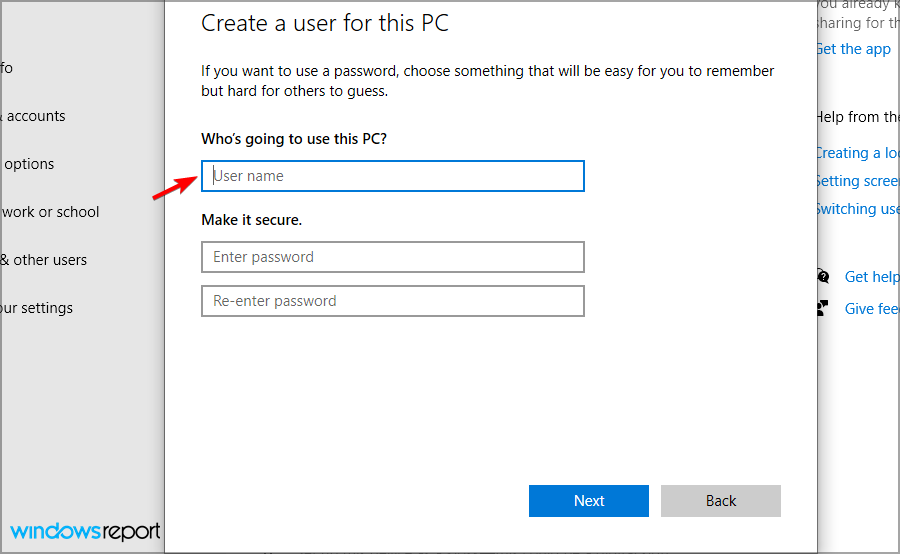
  5. Finally, type the name and password for the new user and click Next.
    next

This excellent workaround has proved effective for the Taskbar flickering and flashing after login on Windows 10. If the issue does not occur on the new account, it is a user-related glitch.

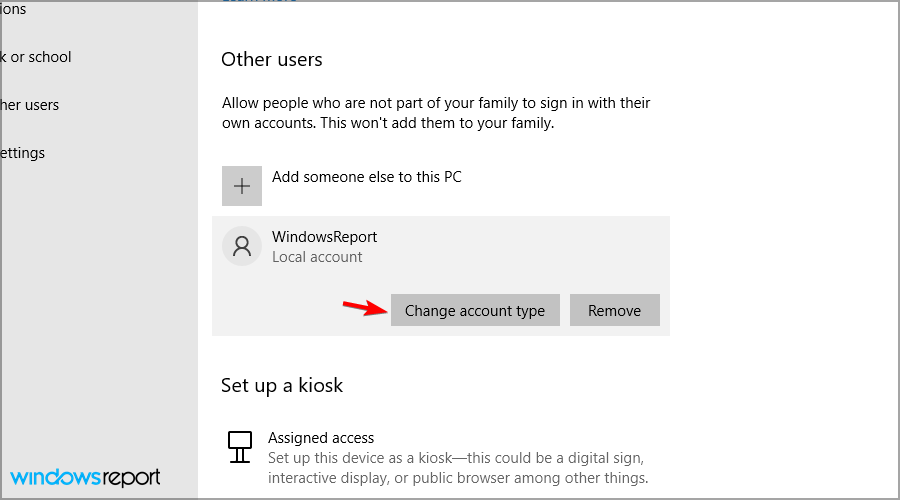
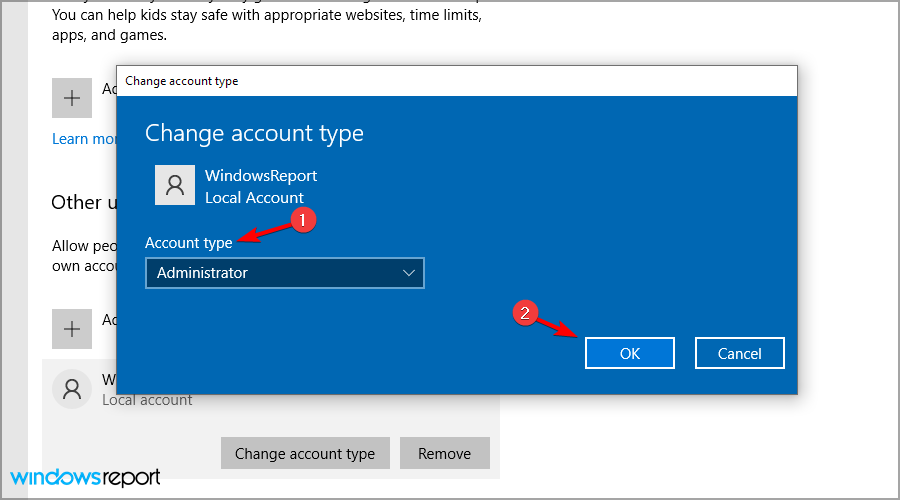
You can check this guide on changing an account to an administrator on Windows 10 to give the account administrative privileges.

4. Restart the PC in Safe Mode

  1. Press and hold the Shift key while clicking on Restart at the login screen (Bottom right corner).
  2. After your PC restarts, select Troubleshoot and then Advanced Options. After that, go to Startup Settings.
  3. Now, click on the Restart button.
    restart windows 10 taskbar flickering
  4. After restarting, choose Enable Safe Mode with Networking.
    enable with network

Sometimes, your hardware, apps, and other processes might cause the Windows 10 Taskbar to flash orange. If the problem does not show up in Safe Mode, it is probably not system related.

5. Perform a clean boot

  1. Press the Windows key + R, type msconfig, and hit Enter.
    msconfig
  2. Select the Services tab at the top, check the box for Hide all Microsoft services and click Disable all.
    services windows 10 taskbar flickering
  3. Click the Startup tab at the top and select Open Task Manager.
    open task manager windows 10 taskbar flickering
  4. Right-click each of the apps there and select Disable.
    disable
  5. Now, go back to the System Configuration window and click Apply, followed by OK.
    apply and ok
  6. Finally, restart your PC.

Sometimes, you only notice the Windows 10 Taskbar flickering on Startup. For example, this might be caused by a problematic app.

Performing a clean boot allows your system to restart with all these apps disabled. If the issue does not occur after the clean boot, you might need to enable the processes and services in batches to know the one causing the problem.

6. Remove the problematic app

  1. Press the Windows key + I and select the Apps option.
    apps
  2. Locate the app to uninstall and click on it.
  3. Click the Uninstall button and follow the simple onscreen instruction to complete the removal.
    uninstall windows 10 taskbar flickering

If you managed to identify the problematic app after performing the clean boot, then you need to remove or update it if that will solve the issue. For example, some users have found the TransluscentTB to cause the problem.

So, if you have the app, you should consider uninstalling it.

7. Uninstall the feature update

  1. Open the Start menu. Click the Power button, hold Shift and click Restart.
    power restart
  2. When your PC restarts, select Troubleshoot.
    troubleshoot Driver Power State Failure
  3. Now pick Advanced options.
  4. Select Uninstall updates.
     
  5. Choose Remove the latest feature update.
  6. Click on Uninstall feature update.
  7. Follow the instructions on the screen to complete the process.

The Desktop and Taskbar flickering issue can be pretty frustrating, as it causes a lot of trouble. Thankfully, it is not the most challenging issue to fix, as shown in this guide.

Are you facing other issues like Windows 10 laptop screen flickering? Then, check our detailed guide to fix it effortlessly. And find out if you can hide the battery icon in Windows 11.

Let us know if the solutions listed above helped you fix the problem. Share your thoughts in the comment section below.

How to Password Protect Compressed Folders in Windows 10

Encrypting a folder with a password has been an essential feature since the beginning of the Windows OS era.

It’s still the case with Windows 10. Now, even though many alternative measures have been added, most users will use simple password protection to prevent people from interfering with their data on a shared PC.

Many will compress folders to save space with a third-party compression tool. And the combination of the two is what we will talk about today. Or how to password protect a compressed folder in Windows 10.

How to password protect a compressed folder in Windows 10

1. Use a third-party compression tool

The second method requires any third-party compression tool, like the famous WinZip, WinRar, 7Zip, or others. These tools are favored over system compression and password encryption for various reasons, as you have many more options.

Namely, archive format, compression level, compression method, and encryption method, among others.

⇒ Install WinZIP

Compatible with all major file formats, this tool provides a complete file management suite to handle your files effortlessly, share them, back them up and protect them according to your wishes.

Here’s a quick guide to help you start password-protecting files with WinZIP in no time:

  1. Download WinZip (free).
  2. Click Create/Share on the top options. encrypt password protect winzip
  3. Activate the Encrypt option in the right ACTIONS menu.
  4. Place your file into the NewZip.zip center space.
  5. The set your password window will appear.set zip password winzip
  6. After setting your password, you also will need to activate the encryption setting.

Now, let’s quickly look at its key features:

  • Extract multiple files
  • Repair ZIP files
  • Powerful compression tools
  • Compatible with all major formats, including Zip, Zipx, RAR, 7Z, GZ, ISO, TAR, IMG, and more
  • Encryption and password-protect ZIP files
  • Archiving tools
  • Integrated File Manager and File Splitter
  • Data backup and sharing options

”WinZip”

”WinZip”

”The
”Free
&aff_sub2=Native” current_url=”true” button_text=”Get it now” image=”https://windowsreport.com/wp-content/uploads/2016/08/winzip-windows-10-compression-tool-210×160.jpg”]

2. Use system resources

The first method to password protect a folder in Windows 10 is via the Folder properties. Windows OS has you covered if you’re not familiar with using a third-party compression tool for this job. The procedure is rather simple.

Just make sure you have all the files inside before encrypting the folder. You can apply only one or the other (compress or encrypt it) with system resources.

Here’s how to password-protect a folder on Windows 10:

  1. Navigate to the folder and ensure all files you want to encrypt are inside.
  2. Right-click on the folder and open Properties.
  3. Under the General tab, click Advanced.
  4. Check the Encrypt contents to secure data box.Encrypt contents to secure data
  5. Choose Apply changes to this folder only and click OK.Apply changes to this folder only
  6. Back up your encryption key when prompted.

Bonus: Here’s how to archive a folder and encrypt it with a password on 7Zip (the procedure is similar on WinRar):

  1. Decompress the folder (if it’s already compressed).
  2. Right-click on the folder and, from the contextual menu, choose 7Zip > Add to archive…
  3. Choose the archive format, compression level (Ultra is highest while Store doesn’t apply compression at all), and other details.
  4. Under the Encryption section, enter and re-enter the password and confirm by clicking OK.7Zip > Add to archive
  5. Delete the unarchived, uncompressed folder, and you’re done.

Now no one except you can access that folder. Keep in mind that these are not exactly military-grade encryption. Someone with enough knowledge might find a way in.

On the other hand, they’ll do fine in protecting your private files from the prying eyes of a nosy family member or snooping colleague.

That’s it. Tell us in the comments section below if you have anything else to add or take. We highly appreciate your feedback.

7 Best Video Joiner Software Tools & Solutions [Free & Paid]

Video editing is the process of manipulating video shots, and it’s usually done with video editing software. But if you need to perform a quick edit, then video joiner software might be a better choice.

In this article, we will explore the best options for video editing software that allows you to join different clips easily.

What is the best video joiner software?

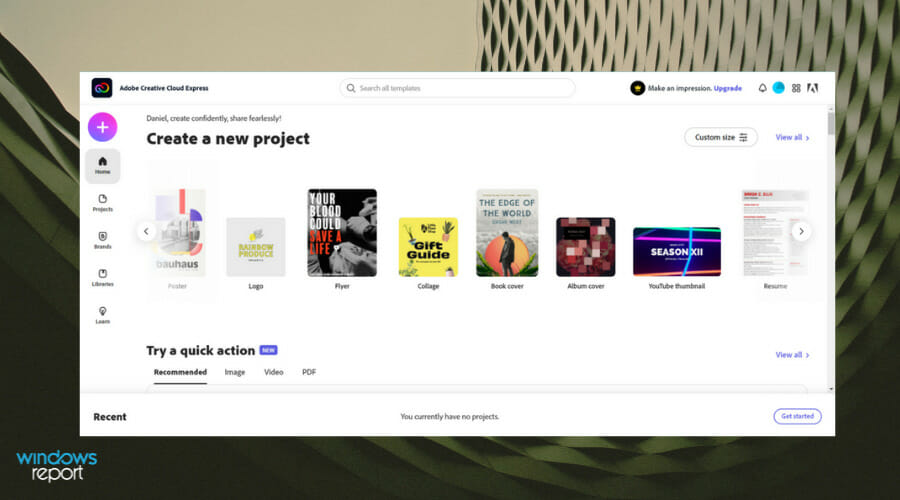
Adobe Creative Cloud Express – Best overall

Adobe Creative Cloud Express has a large usage for anything social media-related, be it logos, banners, flyers, invitations, or collages.

Videos are no exception, you can join videos with just a couple of clicks. This tool is one of the most intuitive and easy-to-use video joiner software.

It comes with a drag-and-drop interface that lets you stitch together videos you have just uploaded. You can either create a clip from scratch based on your creativity and vision or you can use tons of already available templates.

You can customize your video with transitions, custom fonts, icons, text, and much more. Adobe Creative Cloud Express is perfect for YouTube videos as it lets you create thumbnails, presentations, tutorials and, explainer videos.

The app can be accessed either via Web Browser or your mobile phone which gives you the freedom to work on the graphic or video content from anywhere.

Key features included:

  • Select or delete multiple portions from a video file.
  • Copy, paste and fine-tune the selections.
  • Join multiple files together
  • Split movies into smaller files
  • Save and play the selected scene without editing the movie files
  • Create presentations from scratch
  • Turn static graphics into moving objects

Adobe Creative Cloud Express

Improve your video projects with this editing software, and it’s perfect if you want to add effects, trim or join videos with ease.

Adobe Premiere Pro – For professional users

Adobe Premiere Pro is one of the best video editing software on the market and which makes it the best video joiner software on the market.

The video editor from Adobe has an interactive interface, is fast, and offers very good editing quality.

As a video joiner software, Adobe Premiere Pro provides an easy and complete way to join and combine files of multiple videos into one. It offers you the possibility of rearranging scenes and editing them using motions, transitions with drag and drop effects in order to be simple and fast for everyone.

As many people use the video joiner program for editing videos for social media, Adobe provides you with a lot of templates for this type of output to ease the process of sharing your experience in a few clicks.

You can go further with Adobe Premiere Pro features as you can benefit from editing with chroma key and creating a demo reel.

This user-friendly program supports MP4, MPEG, MPE, MPG, M2V, MTS (avchd), MOV, FLV, AVI, etc.

Some other features included in this program that is suitable as well for beginners as for advanced digital specialists provide:

  • Allows you to intercept video files
  • Ability to easily use voice-over
  • Adding subtitles to your video
  • Rotation video feature
  • Adding graphics, transition, and allows trimming

The fact that Premiere is included in Creative Cloud, you have the possibility to create VR and 360 videos, as well.

Adobe Premiere Pro

Adobe Premier Pro is a professional video editing software that can easily join or trim your videos.
Free trial Visit website

Xilisoft Joiner 2 – Easy to use

Xilisoft Joiner 2 is an excellent video joiner software because it’s compatible with multiple formats.

This program also allows you to edit videos easily – like set video size, adjust frame rate, bit rate, and resolution in order for you to get the best results.

Preview mode is also supported to provide you with a more direct way to watch your target videos before actually joining/cutting them.

Even though it is a small program, it is very powerful and can easily join videos in multiple formats, including AVI, MPEG, MP4, WMV, 3GP, H.264, MOV, ASF, SWF, and DAT, to one new single video.

It can also join video into formats of AVI, MPEG, MP4, WMV, 3GP, H.264, MOV, ASF, SWF, and DAT to AVI, MPEG, or H.264 videos easily.

To get the most out of this powerful program, we recommend you download and install K-Lite Codec Pack.

Other great features:

  • Supports popular video formats
  • Can join and merge different file types
  • High-speed and performance
  • Support for various effects

Xilisoft Joiner 2

Xilisoft Joiner 2 is optimized for multiple file types, so it’s a perfect video joiner software for first-time users.
Free trial Visit website

WinX HD Video Converter Deluxe – Great for beginners

Another software that might come in handy is WinX HD Video Converter Deluxe. This application allows you to download videos from various video-streaming websites.

The software also supports file conversion allowing you to convert or compress files easily. As for supported formats, the software works with HD/4K/8K, MP4, AVI, WMV, MOV, FLV, 3GP, and other formats.

WinX HD Video Converter Deluxe also has some video editing features, and it can work as a video joiner software, so be sure to try it out.

Other great features:

  • Can download videos from video-sharing websites
  • Can convert and compress a wide array of file types
  • Can trim, cut, flip, and join videos
  • Screen recording
  • Supports level-3 hardware acceleration

WinX HD Video Converter Deluxe

WinX HD Video Converter Deluxe is a great option to download, convert, join or edit your videos.
Free trial Visit website

Simple Video Trim & Merge – Has only essential features

As the name suggests, this app is a very easy-to-use video editing tool that helps you split and merge your videos.

It supports multiple formats, including AVI, MPEG, WMV, MP4; MP3, etc. Although it’s not the best video joiner software, it’s should be enough for basic tasks.

Other great features:

  • Supports most popular video formats
  • Incredibly simple user interface
  • Perfect for less demanding users

⇒ Get Simple Video Trim & Merge from the Microsoft Store

Format Factory – Powerful convertor with extra features

Format Factory is another free option that allows you to easily join videos. It can also transform all audio and video formats into MP4/3GP/MPG/AVI/WMV/FLV/SWF.

All you need to do after installing Format Factory on your computer is to open the program, select Advanced Mode -> Video Joiner.

Once the Video Joiner dialogue opens, select your preferred output video format, click add file/add folder and then click ok. Then you can click Start on the toolbar to start joining your videos.

Other great features:

  • All format video joining
  • MP4 files support for iPod, iPhone, PSP, Blackberry
  • Supports RMVB, Watermarks, AV Mux

⇒ Get Format Factory

Weenysoft Video Joiner – Great free option

This video joiner from Weenysoft is the best free video joiner that allows you to join multiple video files into one large video file easily.

Weenysoft Video Joiner can join video files from 3GP, AVI, FLV, MP4, MPG, RMVB, VOB, WMW, and more.

It also has good customization functions like sourcing video files in order, renaming the output files, and adjusting output settings – video codec, video size, video bitrate, video framerate, audio quality, audio volume.

Other great features:

  • Completely free
  • Supports various video formats
  • Ability to adjust output settings
  • Allows you to easily cut and join videos

⇒ Get Weenysoft Video Joiner

In this article, we listed a wide array of tools that can you can use to easily merge your videos. The tools in this list cover all video formats for both input and output.

If you need something with more power, we suggest using one of these lightweight video editing tools.

Let us know what your choice of software was in the comment section below.

YouTube Something Went Wrong Error: Why & How to Fix

YouTube allows users to watch videos without logging into the website. However, to post comments and like the videos, one must log in. Several users have reported the Oops! Something went wrong YouTube error while trying to sign in.

This error occurs while accessing the YouTube account via the web browser. The error can occur due to multiple reasons, including an outdated web browser or Google account issues.

If you are also troubled by this issue, here are a couple of troubleshooting tips to help you fix it.

What to do when YouTube says something went wrong?

1. Update your browser

1.1. For Chrome and Microsoft Edge

  1. Launch your browser and click the menu icon (three horizontal dots).
  2. Select the Settings option.
    settings menu youtube something went wrong
  3. Now, choose About Chrome (About Microsoft Edge for Edge) in the left pane.
    about chrome
  4. Finally, wait for the scan to complete; you will be shown if updates are available.

1.2. Update Firefox

  1. Launch Mozilla Firefox and click the menu ( three horizontal bars ).
  2. Click on Help.
    help
  3. Now, select About Firefox.
    about firefox youtube something went wrong
  4. Wait for Firefox to check for updates and install any available ones.

2. Remove devices from Google Account

2.1. Check the added devices

  1. Open your Google Account. Sign in with your Google account credentials if asked to confirm the details.
  2. From the home screen, open the Security tab.
    security
  3. Now, scroll down to Your Devices section and click Manage all devices.
    manage all devices something went wrong

  4. If you find any of the devices that do not belong to you, remove them. You may also remove any recognized device and add it again.

2.2. Remove the device

  1. To remove a device, click the arrow before it.
    arrow youtube something went wrong
  2. Select Sign Out.
    sign out  youtube something went wrong

  3. In the pop-up dialogue, click on Sign Out to confirm the action.

3. Change your Google account password

  1. Go to Google Account. Sign in with your Google account username and password if asked to confirm.
  2. Open the Security tab.
  3. Under Signing in to Google click on Password.
    password
  4. Enter your current Google account password and sign in.
    enter password
  5. Now, enter your new password. Confirm the password again.
  6. Click on the Change Password button.
  7. Open YouTube and sign in with your password and check for any improvements.

4. Reinstall the web browser

  1. Press the Windows key + R, type appwiz.cpl, and click OK.
    appwiz youtube something went wrong
  2. Right-click the Google Chrome option and select the Uninstall option.
    uninstall
  3. Finally, follow the onscreen instructions to complete the process.

The Oops! Something went wrong YouTube error can occur due to issues with the browser or your Google account. Follow all the steps in this article, one by one, to resolve the error.

If you are facing other issues, like an error occurred please try again later on YouTube, check our detailed guide to fix it quickly.

YouTube service errors may also cause the FreeTube API error to appear. If that happens, you can follow the proven solutions in this step-by-step FreeTube fix article to restore smooth playback.

If you have any other questions or suggestions, leave them in the comments section below, and we’ll check them out.

WiFi Shows No Internet But Internet Works: 11 Easy Solutions

There are some rare cases when your WiFi icon shows that it is not connected to the Internet, but if you open your browser, everything works without problems.

This is an unusual occurrence, and it usually doesn’t cause too many problems, but some users reported that it interferes with certain Windows features.

Join us while we take a closer look at this issue and show you the best ways to fix the Wi-Fi shows no internet, but the internet works issue once and for all on Windows 10 and 11 PCs.

Why does my WiFi say no internet, but it works?

This is generally a software-based problem limited to your device because the router does its job just fine. Generally, it’s a minor OS bug; restarting the computer makes Windows reflect the connection status correctly.

Also, suppose your computer is extremely slow. In that case, Windows will likely take a little longer to reflect that the device is connected to WiFi while the Internet starts working immediately.

In addition to these two, third-party apps with access to the network settings may also create conflicts and lead to the WiFi not being connected even though the Internet works.

What does the Network Status not connected on Windows 10 mean?

The Network Status not connected on Windows 10 means that you are not connected to any active network at the time. However, some users experience this issue and can still access the internet on their browsers but not other apps requiring a network.

This happens mostly after installing Windows updates.

What can I do if WiFi shows no internet but internet works?

Before proceeding to complicated fixes:

  • Make sure your WiFi or network source is truly turned on, and your PC is not in Airplane mode.

1. Run the Network troubleshooter

  1. Right-click the network icon in the bottom right corner and choose Troubleshoot problems.
  2. The troubleshooter will now start and scan your PC for problems. Follow the instructions on the screen to complete the process.
  3. Once the process is finished, check if the problem is still there.

Troubleshooters help automatically identifiy and eliminate problems with the computer and connected devices. And it would help when WiFi shows Not connected, but the Internet works in Windows.

This is a simple solution, but it’s also a good idea to update your drivers in addition to running the troubleshooter. To do that automatically, we suggest using Outbyte Driver Updater software.

Outbyte is a driver update program that monitors your hardware and searches the web for the latest driver update. We recommend this software because it is a straightforward program that scans and offers you detailed reports of your PC’s health.

After that, it will improve your PC performance by replacing or repairing any detail and keeping your drivers up to date.

⇒ Get Outbyte Driver Updater

2. Run wsreset.exe

  1. Press Windows + R, type wsreset.exe in the text field, and hit Enter.
  2. Wait for a few moments while the reset takes place.

Once done, verify if you still have no internet access in Windows 10, but the Internet works if that’s indeed the case, head to the following method.

3. Try using the administrator account

  1. Press Windows + X and enter add user. Next, select Add, edit, or remove other users.
  2. Select Add someone else to this PC.
  3. Pick I don’t have this person’s sign-in information.
  4. Now, choose Add a user without a Microsoft account.
  5. Enter the desired username.
  6. Select the account you just created and click on Change account type.
  7. Set the Account type to Administrator and click OK.
  8. Now log out of your current account, switch to the new one, and check if the problem is still there.

If this method eliminates the No internet access but connected issue, it means something is wrong with your old user account. To fix the problem with the previous version, check what to do with a corrupt user profile.

4. Disable your antivirus

  1. Press Windows + S and enter defender. Select Windows Security from the list of results.
  2. Now go to the Virus & threat protection and click on Manage settings.
  3. Set Real-time protection to off. You can also turn off other features as well.

Using third-party antivirus software, you’ll have to use different methods depending on your application.

In some cases, it’s necessary to uninstall your antivirus software. For example, the uninstall process for Norton is pretty simple. The same goes for uninstalling McAfee.

If your current antivirus is giving you problems, this might be a perfect time to switch to new and effective antivirus software.

5. Reset your IP configuration

  1. Press Windows + X and choose Windows PowerShell (Admin).
  2. Now, paste the following commands individually and hit Enter after each:netsh winsock reset netsh int ip reset ipconfig/ release ipconfig/ renew

This would reset the network settings and fix things if WiFi shows not connected, but Internet works on Windows.

6. Remove your wireless network and reconnect to it

  1. Press Windows + S and enter WiFi. Select Wi-Fi settings from the list of results.
  2. Select Manage known networks.
  3. Choose your network and click Forget.
  4. Restart your PC and connect to the same wireless network.

This method would also work if you can’t connect to the Internet but are connected to WiFi.

There’s a slight chance that you’ll have some issues after using this solution, and if that happens, find out what to do if Windows can’t find a WiFi network.

7. Change your power settings

  1. Press Windows + S and enter power plan. Next, select Choose a power plan from the list of results.
  2. Locate the power plan you’re using and click on Change plan settings next to it.
  3. Now click on Change advanced power settings.
  4. Select Wireless Adapter Settings and change Power Saving Mode to Maximum Performance.

8. Check your DNS settings

  1. Press Windows + S and enter view network. Select View network connections.
  2. Right-click your wireless connection and choose Properties from the menu.
  3. Select Internet Protocol Version 4 (TCP/IPv4) and click the Properties button.
  4. Select Obtain DNS server address automatically and click on OK to save changes.

Manually choosing a problematic DNS server could also be an underlying cause when WiFi shows not connected, but Internet works. And letting Windows do it automatically should resolve things.

If you have issues accessing this feature, find out what to do if IPv4 properties are not working to see how to fix this issue properly.

9. Restart your router

  1. Press the Power button on your router to turn it off.
  2. Wait for 30 seconds and press the Power button again.
  3. Then, wait for your router to reboot. This process can take about a minute.

Once your router restarts, check if the problem still appears. This is a simple solution; several users reported it worked for them, so feel free to try it out.

10. Enable Core Networking Diagnostics

  1. Press Windows + R, type control, and hit Enter.
  2. Click on System and Security and select Windows Defender Firewall.
  3. Click Allow an app or feature through Windows Defender Firewall on the left pane.
  4. Scroll down to Core Networking Diagnostics and ensure all its checkboxes are ticked.

11. Change your network adapter settings

  1. Press Windows + X and choose Device Manager from the list.
  2. Locate your network adapter from the list of devices, and double-click it to open its properties.
  3. When the Properties window opens, navigate to the Advanced tab. From the options listed under Property, select 801.11 bandwidth, change its value to Auto, and click on OK to save the changes.

That’s it! If your WiFi shows not connected but the Internet works, the problem wouldn’t appear after you restart the computer.

Why is WiFi working on one device but not on another?

If the WiFi works on one device but not another, it’s likely a problem with the network settings or the installed drivers.

Also, please verify that you are trying to connect all the devices from the same distance to the router, or at least have them all in range. Moving the device closer to the router may fix things.

Besides, it could be a temporary bug in the OS, and simply re-enabling WiFi or restarting the computer should help resolve the problem.

What causes the Not connected message to appear?

Usually, the Not-connected issue with your wireless network is caused by a recently installed third-party application or antivirus software.

Sometimes, the problem can be caused by network settings or system glitches.

Which is better to use, wireless or wired connection?

The wired connection is always better if you’re on a desktop PC. It’s more reliable, faster, and can withstand all sorts of interference.

However, if you’re using a laptop or can’t connect your PC via Ethernet, the wireless connection is a better choice due to its convenience.

What are other WiFi-related issues that users reported?

  • Laptop connected to WiFi but no internet access (Windows 10) – This is a variation of this problem, and to solve it, you need to check your wireless adapter settings.
  • My computer won’t connect to the Internet, but others will – If you’re having this problem, note that your network configuration might cause it. To fix this issue, make sure you use the default DNS.
  • Can’t connect to Internet (Windows 10) – This can be a big problem since you won’t be able to access the Internet at all. To solve it, be sure to try some of our solutions.
  • Wireless connected, but no Internet access – Several users reported that they are connected to a wireless network but unable to connect to the Internet. This is a big problem. However, you should be able to fix it using one of our solutions.
  • Wireless network not connected red cross – This is a variation of this problem, and if you encounter it, be sure to check your network settings.
  • Windows 10 has no internet access, but the Internet works – As you can see, this issue is self-explanatory. You have an Internet connection, but your PC shows otherwise.
  • You are currently not connected to any networks – Which means you may not be connected to the Internet or getting a No internet, secured error message. So check your Ethernet cables first of all.
  • WiFi doesn’t work, but Ethernet does – Check whether you have the associated wireless adapter driver installed.

Although this can be a problem, we hope that the solutions from this guide helped you solve your WiFi if it shows Not connected message.

Also, find out how to fix issues with a Windows PC’s wireless adapter or access points.

Lastly, if you need additional help regarding this subject, write us below in the comments section of the page, and we will get back to you.

How to Fix Printer Needs User Intervention→ HP, Epson, Canon

Are you getting a printer needs user intervention error message when printing documents?

The error might appear on the printer’s top panel display as well as within a dialog window. This is a fairly common error on various brands of laser printers.

That might mean there’s a corrupted print job, the spooler isn’t running, or could have something to do with the printer‘s driver. Let’s take a closer look at some scenarios reported by other users.

What does printer needs user intervention mean?

  • HP tops the inventory (User intervention printers HP: OfficeJet 3830, DeskJet 3700, and HP Envy are commonly impacted)
  • But most major brands are impacted (printer needs user intervention Epson, Brother, Xerox, Canon, Ricoh, Toshiba, Lexmark, Samsung, Kyocera and more)
  • Printer action/attention required (Another variation of this error states that the printer requires your attention. Don’t worry, we have covered all the scenarios below).
  • Several Windows versions (Printer needs user intervention in Windows 10, 7, 11)

These are a few potential fixes for this error. So, let’s see exactly how to fix the printer needs user intervention. Read on to see how to deal with it promptly and carry on with your tasks unhindered.

How do you fix printer needs user intervention?

  1. Restart the Print service
  2. Update the Printer Driver 
  3. Run the Printer Troubleshooter
  4. Run the Hardware Troubleshooter 
  5. Reinstall the Printer’s Driver
  6. Install Windows updates
  7. Uninstall the latest updates

1. Restart the Print service

  1. Press Windows Key + R and enter services.msc. Now press Enter or click OK.
  2. When the Services window opens, locate the Print Spooler service.restart Printer Spooler service
  3. Now choose Restart from the menu.

It’s possible that the local print spooler service is not running. This can easily trigger the printer needs user intervention message.

If this is the case, the first thing we’re going to try is restarting the Print Spooler service to bring it back to its original state. Follow the steps from above to do that easily.

2. Update the Printer Driver

2.1. Update drivers manually

  1. Right-click the Start and select Device Manager.
  2. Navigate to Printers queues and expand this section.
  3. Right-click your graphics device and open Properties.
  4. Select the Details tab.
  5. From the drop-down menu, open HardwareIds.
  6. Copy the first row and paste it into your browser’s address bar.
  7. The search results should show you the exact drivers you’ll need to install.

If reinstalling the printer driver didn’t help, you can check for additional driver updates for your printer. And you can update the printer drivers as shown above or go for a simpler and quicker solution. Check it out!

2.2. Update drivers automatically

If you don’t want the hassle of searching for drivers on your own, you can use a tool that will do this for you automatically.

A professional driver updater tool will help you keep all your drivers up to date so that it won’t be time-consuming to update them on your own.

3. Run the Printer Troubleshooter

If resetting the Printer service didn’t get the job done, we’ll try with Windows 10’s universal troubleshooting tool.

To run Windows 10’s troubleshooter for resolving printer problems, follow these instructions:

  1. Open the Settings app and go to Update & Security section.
  2. Select Troubleshoot from the menu on the left. Select Printer from the right pane and click Run the troubleshooter.run printer troubleshooter
  3. Follow the instructions on the screen to complete the troubleshooter.

4. Run the Hardware Troubleshooter

We can also do the same thing with the hardware troubleshooter:

  1. Open the Settings app and go to Update & Security section.
  2. Select BSOD from the menu on the left.
  3. Select Hardware & devices from the right pane and click Run the troubleshooter.
  4. Follow the instructions on the screen to complete the troubleshooter.

5. Reinstall the Printer’s Driver

Maybe there’s something wrong with the printer driver. To see if that’s indeed the case, we’re going to reinstall it. Here’s how:

  1. First, uninstall the driver via Device Manager. Open Cortana and enter Device Manager in the search box.
  2. Select Device Manager to open its window.
  3. Click Printers and then right-click your printer. Select Uninstall on the context menu, and click the OK button to confirm.
  4. Now when you restart your desktop or laptop, Windows will usually automatically reinstall an updated driver for the printer.

Alternatively, you can manually install the latest driver by downloading it from the manufacturer’s website.

For that, you’ll need to note down your printer model number details to find the correct driver, download it from a website and then run through its setup wizard.

6. Install Windows updates to fix printer needs user intervention

Microsoft usually delivers printer drivers for Windows 10 through Windows Update. So, it’s possible that the very next driver update will resolve the issue.

That’s why you should go and check for new updates.

To do that, go to Settings > Updates & Security, and check for updates.

7. Uninstall the latest updates

Contrary to the previous solution, it’s also possible that one of the recent updates you’ve installed actually causes the problem.

If you suspect that might be the case, go on and uninstall the troublesome update. Here’s how to do that:

  1. Press Windows Key + I to open the Settings app.
  2. Once the Settings app opens, navigate to the Update & security section.
  3. Go to the Windows Update tab and click on Update history.
  4. Click on Uninstall updates.uninstall updates
  5. A list of installed updates will now appear. Select the problematic update that you want to remove and click the Uninstall button.
  6. After removing the update, restart your PC.

Those are some of the best fixes for the printer needs user intervention issue.

You might also be able to fix the error with printer manufacturers troubleshooting software, such as HP Print and Scan Doctor if the manufacturer provides any utilities.

How to Install Software Without Admin Rights on Windows 10

You might often face the situation where you need to install software on a Windows 10 PC, but you don’t have admin rights. And without being an administrator, you cannot usually install software on the respective device. This is intentional since it’s an extra security measure.

Therefore, this workaround will let you install software even if you are not the admin on the Windows 10 device.

How do I install software without admin rights?

  1. 1. Download the software that you wish to install on a Windows 10 PC. In our example, we will install Steam.

    It is recommended that you set the download location to the desktop for convenience. Else, if it gets downloaded in the Download folder, as is the usual case, drag it to your desktop.

    This is just for convenience and has no bearing on the actual process.

  2. 2. Create a new folder on your desktop and drag the software installer into the folder.

  3. 3. Open the folder and Right-click, then New, and Text Document.

  4. 4. Launch the text file you just created and write the following codes: set _COMPAT_LAYER=RunAsInvoker

    Start SteamSetup

    install software without admin rights codes
  5. 5. Here,  SteamSetup needs to be replaced with the name of the particular installer that you wish to install.

  6. 6. Save the text file with the .bat extension in the same folder location.

  7. 7. For that, click on File, then Save As.

    save file as
  8. 8. In the Save As dialog box, replace the .txt file extension with .bat.

  9. 9. Click on Save.

  10. 10. Close the Steam.bat file.

  11. 11. Now, you can double-click the setup and follow the guidelines.

  12. Alternatively, you may create the BAT file in the default download folder of the application, then run it from there. That should still work.

    In Windows 10, it is possible to bypass restrictions and install software without admin rights. You just need to make a few tweaks on your PC, and then you can install the program you desire without worrying about restrictions.

Contrary to what you might think, the process is straightforward. And it’s quick too.

If you can’t create a new folder in Windows 10, look at our step-by-step guide to creating new folders to help you fix the issue.

Your next step will be double-click on the bat file to launch the installation process. Then, follow the on-screen instructions for the installation to complete normally. It’s that simple and easy.

To install unsigned drivers on Windows 10, read our article dedicated to installing unsigned drivers to get all the necessary info.

Lastly, we like to hear your questions or suggestions, don’t hesitate to leave them in the comments section below, and we will certainly check them out.

Sony continues to claim Microsoft is unwilling to offer “parity” with COD to Brussels regulators

With a stable revenue source such as Call of Duty potentially on a future chopping block as Microsoft seeks to acquire Activision Blizzard, Sony has been running to every regulatory body to preemptively block the deal, and its latest target is the authorities in Brussels.

According to tweet thread posted by Microsoft’s chief communications officer Frank Shaw, he’s of the belief that Sony has been “briefing people in Brussels claiming Microsoft is unwilling to offer them parity for Call of Duty if we acquire Activision.”

For anyone who has been paying attention to the approval process or had firsthand knowledge of Microsoft’s proposal would agree with Shaw’s defense of the claim that simply states, “nothing could be further from the truth.”

Early in the approval process for the $68.2 billion Activision buyout, Microsoft attempted to assuage cursory concerns of anticompetitive potential by offering Sony an extension on its current Call of Duty licensing deal with the mega publisher that’s already in place.

With Call of Duty being a fairly lucrative property on both PlayStation and Xbox platforms, Microsoft has repeatedly and in writing, offered to go beyond the current deal in place between Activision and Sony for COD, which would end in the next four years, and offered to extend a licensing deal for ten years, as well as bringing native development of the franchise to additional platforms it was not previously on that include Nintendo and Steam.

However, according to Shaw, Sony seems to be dismissing the COD offer, and instead is attempting to tilt the scales towards disapproval with continued hypothetical allegations in this instance.

While Shaw’s tweet thread, in favor of the merger, explains that “Our goal is to bring Call of Duty and other games – as we did with Minecraft – to more people around the world so they can play them where and how they want,” Microsoft’s recent history does lend some credence to Sony’s objections.

After purchasing Bethesda gaming studios, Microsoft almost immediately made the next two titles coming from the company exclusives. Bethesda’s Redfall and Starfield are slated to release this year as Xbox exclusives, which buttresses against Shaw and Microsoft’s seemingly altruistic position in the Activision Blizzard situation.

To be fair, Microsoft did not claim during its regulatory approval process of the Bethesda deal that it would not hoard some of the studio’s titles for its own business purposes. In a similar vein, Microsoft has not publicly stated that future titles from Activision Blizzard won’t be subject to exclusive clauses, but that well established multiplatform properties such as Call of Duty will remain open to current and additional platforms.

With Brussels being part of the European Commission (EU), which is expected to hand Microsoft its initial charge sheet, a list of concessions and demands that could help the companies close on deal in that region of the world, it’ll be interesting to see what, if any, influence Sony has on that part of the process.

Unable to Rename a Folder in Windows 10: 9 Confirmed Fixes

It is no secret that there is no perfect machine, and you will encounter problems on your Windows PC once in a while. While some can be ignorable, others, like your device ran into a problem and need to restart, can be frustrating.

One such frustrating problem that users are complaining about is the bug in Windows 10 that prevents them from renaming folders.

Why can’t I rename a file folder in Windows 10?

Here are a few reasons you might not be able to change a folder name on your PC.

  • Lack of permissions: Users need certain permissions to make changes to files, and for some, even administrator access.
  • Third-party app conflicts: Many third-party security applications and antiviruses have been found to conflict with the process and, in turn, lead to an error.
  • File open in another app: Another common reason for the problem is that the concerned file is open in another app.

Below are some of the variations of the error, as reported by users, and the possible causes:

  • Can’t rename folder Windows in use: This usually happens when some background processes are using the folder you are trying to rename.
  • Rename folder can’t find the specified file in Windows 10: This problem can occur due to your antivirus or its settings. Check your antivirus settings or consider switching to a different antivirus solution to fix it.
  • Can’t rename folder because it’s open in another program (Windows 10): This is another common problem with folders that can occur on Windows 10. However, you should be able to fix this issue with one of our solutions.
  • Can’t change folder name (OneDrive): Many users reported being unable to change the folder name in OneDrive, and the solutions here should work in this case as well.
  • Can’t change folder name sync pending: Encountered with OneDrive files, and modifying sync settings or moving the folder to somewhere else and then again transferring it to the same location might work.
  • Can’t change folder name in Outlook: Many reported being unable to change the name of the folder they created on Outlook. Though in most cases, the names were changed, the same was not reflected.
  • Can’t change folder name because file is open: This usually happens when you try to rename a file while it’s open in another software. Try closing it or go with the solutions in the next section.

What can I do if I can’t rename folders in Windows 10?

Before heading to the slightly complex solutions, try these quick tips:

  • If you recently shared the folder or a file in it using Outlook, first terminate the Outlook process and then try renaming the relevant folder/file.
  • Restarting the computer also worked for some users.

If these don’t work, head to the solutions listed next.

1. Change the Windows Defender settings

  1. Press Windows + I to open Settings and go to the Update & Security section.
  2. Select Windows Security from the left panel and in the right panel, click on Open Windows Security.
  3. Select the Virus & threat protection, and click on the Virus & threat protection settings.
  4. Scroll down and select Manage Controlled folder access.
  5. Set the Controlled folder access to Off.

Windows Defender is built-in antivirus software in Windows 10/11. However, sometimes, certain features of this tool can interfere with your system and cause problems like can’t change the folder name. Therefore, you might have to disable them to fix this problem.

Keep in mind that disabling this feature might make your system more vulnerable. If you don’t want to disable this feature, you might consider switching to one of the best third-party antivirus software in TotalAV.

Because viruses continually evolve, you need modern antivirus software with cutting-edge technology to protect you online and offline. And that is what you get with TotalAV.

It provides this total protection without messing with your PC.

TotalAV

Enjoy complete protection with no prior errors or incompatibilities.
Check Price Visit Website

2. Make sure you have ownership of the folder

  1. Right-click the folder you want to gain access to and choose Properties.
  2. Navigate to the Security tab and click on the Advanced button.
    advanced can't change folder name
  3. Check the Owner section at the top and click Change.
    option can't change folder name
  4. Enter the desired username or group into the Enter the object name to select field.
  5. Click Check Names and OK.
    enter name can't change folder name
  6. Check Replace owner on subcontainers and objects and click OK to save the changes.
    Can't rename folder Windows 10 in use

To do anything (rename, delete, move, etc.) with a folder in Windows, you need to have ownership of it. Else, you will always encounter the can’t change folder name error.

If you have just one User Account, ownership of most folders is automatically granted to you.

However, if there are more User Accounts on a single PC, users without administrator privileges may have problems managing folders.

Once you’ve got full ownership of the folder you want to rename, try to change its name once again. If it fails, move on to the solution below.

3. Disable Preview Pane in File Explorer

  1. Press Windows + E to open File Explorer.
  2. Now, head to the View tab, and click on Preview pane to disable it in case the feature is currently turned on.preview pane

A user pointed out that if a file is being viewed under the Preview pane, Windows might have trouble renaming it. So might want to disable the feature, just to be sure.

4. Use a registry tweak

  1. Press Windows + R, type regedit, and hit Enter.regedit
  2. Click on (don’t double-click) HKEY_LOCAL_MACHINE.
  3. Go to Fileand select Load Hive.
    Can't rename folder Windows 8.1
  4. Find your SOFTWARE hive, name it differently, and load it.
  5. When the hive is loaded, open: HKEY_LOCAL_MACHINE\your hive name\Microsoft\Windows\CurrentVersion\Explorer\FolderTypes
  6. Highlight Folder Types, right-click it, and choose Export.
  7. Choose a name and save.
    Can't rename folder Windows 10 in use
  8. Go back to your hive name, and close it.
  9. Open the File Menu, click on Unload Hive, and select Yes.
  10. Close the Registry Editor.
  11. Find the registry file you’ve just exported and double-click it to import it back into the registry.
  12. Restart your PC.

After you’ve performed this, check whether you still can’t change the folder name. If you’re unsure about what you’re doing, it’s best to ask someone more experienced for help.

5. Remove certain values from the registry

  1. Press Windows + R, enter regedit, and click OK to open the Registry Editor.
    regedit cant change folder name
  2. Navigate to the path below: HKLM\Software\Microsoft\CurrentVersion\Explorer\Folder\Descriptions
  3. Now, you need to delete the following keys: {2112AB0A-C86A-4ffe-A368-0DE96E47012E} {491E922F-5643-4af4-A7EB-4E7A138D8174} {7b0db17d-9cd2-4a93-9733-46cc89022e7c} {A302545D-DEFF-464b-ABE8-61C8648D939B} {A990AE9F-A03B-4e80-94BC-9912D7504104}

After removing these entries, the issue should be resolved, and you’ll be able to change the folder’s name without any problems. If you can’t find the keys mentioned in this solution, this solution can’t be applied to your PC.

6. Change your view settings

  1. Press the Windows key + E to open File Explorer and go to the directory containing the folder you’re trying to rename.
  2. Select the View tab.
    view cant change folder name
  3. Pick any view except for Small icons.

As you know, Windows allows you to change how you view your files. You can view your files as thumbnails, icons, or in a list. However, a glitch prevents you from renaming folders while using Small icons.

After changing your view, you should be able to rename the folders without too many issues. Remember that this is a workaround, so you’ll need to repeat it for every directory you want to remove.

7. Delete autorun.inf files

  1. Press the Windows + E key combination to open File Explorer and locate the directory you want to rename.
  2. Click the View tab. and check Hidden items.
    hidde cant change folder name
  3. Look for autorun.inf and remove it.

According to users, you can’t change a folder name because of the autorun.inf files. These files can interfere with your system and cause issues such as this one to appear.

Once you find and remove that file, the issue should be resolved, and you’ll be able to rename directories without any problems.

8. Make sure that your system is up to date

  1. Press the Windows key + I to open the Settings app and select Update & Security.
    update cant change folder name
  2. Click on the Check for updates button.
    check cant change folder name
  3. If any updates are available, they will be automatically downloaded and installed once you restart your PC.

After installing the latest updates, check if you still can’t rename the folder. As we already mentioned, not being able to rename folders can be a Windows 10 glitch and to fix it, it’s required that you update your system.

Windows 10 usually installs the latest updates automatically, but you might miss an update or two due to specific issues. If you are having trouble updating your Windows, you can look at our guide, which will help you solve them in no time.

9. Set your background to a static picture

  1. Right-click your desktop and choose Personalize from the menu.
    personalize cant change folder name
  2. Change your background from Slideshow to Picture.
    background

Many users use the slideshow as their background, which can lead to issues like this.

If you can’t rename folders on your PC, try disabling the slideshow backgrounds. After doing that, the issue should be resolved.

How do I force a folder to rename?

If you can’t change the name of a folder because the file is in use by another program, you need to close the program and try to rename it again.

This is because Windows does not allow you to change the name of such a folder. However, if a bug causes the problem, you should be able to solve it with one of our solutions.

If you can’t change the name of a folder on Windows 10, it might be caused by a bug or some wrong settings on your PC. With the fixes in this guide, you should be able to fix the issue easily.

Alternatively, if you want a software tool that will get the job done for you, look at our list of the best file renaming software available.

If you have any comments, questions, or suggestions, don’t hesitate to let us know in the comments below.

7 ways to use LinkedIn to expand your business and work opportunities

Although LinkedIn has over 830 million users across 200 countries, many users do not use the platform properly. People randomly connect with you because you vaguely know one of their distant connections – or they try to connect with you to harvest your carefully curated LinkedIn connections.

But used wisely, LinkedIn is a very powerful tool – especially for small businesses who want to use LinkedIn’s features – many of them free – to secure more work. And with the upheaval across the technology and crypto industries, there are far more people out there looking for work. So how do you make your own profile stand out to potential employers and attract new business?

LinkedIn profile tips

There are several tweaks you can make to your personal profile on LinkedIn to make it stand out online and get you discovered. Let’s start here.

1: Get your name right

Name Pronunciation Linkedin eileen brown onmsft

LinkedIn has a name pronunciation feature that helps people to correctly say your name. On the desktop click on the icon for your name and click ‘Edit’. You will see the option for you to record your name. Click on Name Pronunciation, say your name and save it on your profile.

On mobile, click your profile image and the edit icon on the right-hand side of the screen. Add or edit your pronunciation

2: Get your image right

Linkedin profile image and background banner eileen brown onmsft

Your photo shows potential hirers what you look like and gives them an impression of you before they get in touch with you. Some types of images are not acceptable, however.

  • Images that were taken from too far away
  • Images that are so close that they do not show your whole head
  • Images with bare shoulders
  • Images were taken with pets, partners, cars, or other distractions

Also, make sure that your photo looks into the camera and not to the right. Readers will follow the eyes of the person in the image and if you are looking to the right of the camera, then viewers of your profile will also look right – which is away from the main content in your profile

3: Find a banner image

Linkedin banner image

Banner images can showcase your brand if you are a small business, or give clients and recruiters an idea of what drives you. Banner images must be smaller in size than 8Mb and have a resolution of 1584 pixels wide by 396 high. you can save them in either JPG, GIF, and PNG formats. To add or edit a banner image, click the edit icon on the right of your profile and add your image.

4: Get a powerful headline

Linkedin headline eileen brown onmsft

You have loads of work experience and a heck of a lot of skills. Cram them all succinctly into your headline so that people can get a memorable overview of just how much you can do. Don’t bother to use the word ‘Professional’ however. We’re all professionals and expect to be paid for our skills. adding the word to our profiles does not add value, rather, it detracts from the main purpose of what we do. Click on the edit icon to the right of your name, scroll down to the headline section, and tell the world what you can do.

5: Tell the world what you can do

You may not have noticed it, but you can add a video clip to your profile with up to 30 seconds of your cover story. It is simple to do, but you need to record the video using your LinkedIn app on your mobile device. If you’d like to know more about cover stories, check out this post I did recently which goes into detail about how you can record your own cover story

6: Customise your profile URL

This is a really simple way to modify the default URL allocated by LinkedIn and create your own personalised URL – yet so many people do not do this. Work through these steps to create your own meaningful LinkedIn URL for your marketing materials

Once you have personalised your profile URL, you can take it further by learning how to upload a resume on LinkedIn so recruiters and potential employers can quickly access your CV.

7: Use your bilingual skills to your advantage

other languages profile eileen brown onmsft

If you can speak more than one language, then add a LinkedIn profile for each language your speak. LinkedIn viewers will see your profile in their native language if you have configured the profile for their language. To do this, look to the right-hand side of your LinkedIn page and chose the ‘Add profile in another language link.

There are many other ways you can enhance your LinkedIn profile which I’ll be covering over the next few months. LinkedIn is a really powerful tool for business networking, finding connections, and securing clients. Make sure you use it to your advantage.

Can’t Disable Touchpad on Windows 11: How to Force It

When touchpads are not working, they can be frustrating, especially for novices. They are often the first tool that people get stuck with, and then they find out that it’s not as simple as it seems, especially if you can’t disable it on Windows 11. 

This can be frustrating and may cause you to hit an unwanted key or button accidentally. The problem with touchpads is that they don’t work like mice and keyboards. In this article, we share various ways to force the touchpad to be disabled if it’s more of a problem than convenience.

Why is my touchpad not disabling?

There are many reasons that can hinder the functioning of your touchpad and cause it not to be disabled when you turn off your computer. Some of them are mentioned below:

  • Incompatible devices – If you have a device that is not compatible with Windows 11 and you plug it into your computer, it will try to install drivers for the device. However, if there are compatibility issues, it can cause your touchpad not to work properly.
  • Missing/corrupt drivers – The drivers might be missing or corrupted, so they cannot detect the touchpad. In this case, you will have to re-install them and ensure they work properly.
  • Outdated drivers – The drivers might be outdated, in which case they do not work properly on your operating system or device. You need to update your drivers regularly.
  • Firewall restrictions – If you have installed an antivirus or firewall application on your machine, then it might be blocking a program or port interfering with the drivers of your touchpad and making it inaccessible.
  • Outdated OS – Your may find that you can’t disable your touchpad unless you have updated your operating system. New updates usually include support for multitouch gestures.

How do I force my touchpad to turn off?

Before you try any of the slightly technical methods, ensure you check the following:

  • Clean off the surface of your touchpad. It’s possible that debris has accumulated under your finger pad and is interfering with how it works.
  • Close any background programs and processes that may be using the touchpad.
  • Find the latest driver for your laptop on the manufacturer’s website and try installing it.
  • Ensure you’re running the latest version of your operating system.
  • Restart your PC, and here’s what to do if your PC is stuck on restarting.

1. Use Settings 

  1. Hit the Windows key and click on Settings.settings windows 11
  2. Select Bluetooth & devices on the left pane then click on Touchpad on the right pane.
  3. Toggle the Touchpad button to turn it off.

2. Use the Control Panel 

  1. Hit the Windows key, type Control Panel and click Open.launch control panel
  2. Type Mouse in the search bar and click to open.
  3. In the Mouse Properties dialog box that opens, navigate to the tab after Hardware (it will be named depending on your touchpad), click on the device, and select Disable.
  4. Confirm the disable by clicking Yes in the prompt that appears.

3. Use Device Manager 

  1. Hit the Windows key, type Device Manager in the search bar, and click Open.
  2. Navigate to Mice and other pointing devices and click to expand.Mice and other pointing devices
  3. Locate your Touchpad driver and select Disable device.turn off touch pad windows

If, for some reason, your Touchpad doesn’t show up in the Device manager, check out our article on how to fix this issue.

4. Use Windows Registry 

  1. Hit the Windows + R keys to open the Run command.
  2. Type Regedit in the dialog box and press Enter.
  3. Navigate to the following location: Computer\HKEY_CURRENT_USER\SOFTWARE\Microsoft\Windows\CurrentVersion\TouchPad\Status
  4. Double-click on Enabled and change the Value data to 0 to disable Touchpad.
  5. Close the Registry and check if the problem persists.

Remember that editing the Registry is a risky affair so if you’re not sure of what you’re doing, contact a qualified expert to help you with this step.

5. Use third-party software

If you have a laptop with a touchpad, you can disable it. There are several apps that you can download to your computer that will allow you to turn off your touchpad or move it around. 

You will need to find one that works with the operating system you use and the type of computer you have.

It’s also possible that your touchpad has reached its end of life, and you need to do away with it or get a new one. If this is the case, we have an awesome recommendation of the best touchpads that guarantee an immersive experience but first, compare Synaptics touchpad and Windows precision to know the differences.

Should you encounter any other related issues, such as the touchpad click not working, we have an expert article that addresses this problem.

Elsewhere, users also complained of the touchpad scrolling not working, so don’t hesitate to check out our guide for recommended fixes.

Hopefully, you’ve been able to disable the touchpad successfully. Let us know of any other related issues you may face in the comments section below.

Your Device Is Missing Important Security And Quality Fixes

Windows gets updated pretty often, and most of these are security-related. Usually, updating your PC is seamless and is performed automatically. But in some cases, users receive errors, such as Your device is missing important security and quality fixes.

The full error message reads: Your device is missing important security and quality fixes. Some update files are missing or have problems. We’ll try to download the update again later. But Windows update errors are usually easy to fix.

How can I fix the Your device is missing important security and quality fixes issue?

1. Use the Windows Update troubleshooter

  1. Click the Start button and select Settings.
  2. Choose Update & Security.
  3. Select Troubleshoot from the left pane and choose Additional troubleshooters from the right.
  4. Expand the Windows Update troubleshooter and click Run the troubleshooter.

If the troubleshooter identifies any problems, it will attempt to fix them. If not, you will get the message that the Troubleshooter couldn’t identify the problem.

However, this should disable the Your device is missing important security and quality fixes prompt, and your PC will be able to install them.

2. Download the most recent Servicing Stack Update (SSU)

  1. Click on Start, then choose Settings.
  2. Now go to System.
  3. In the left side panel, scroll all the way down and click on About.
  4. Under Device specifications, you’ll see System type.
  5. Now go to the official Microsoft Update Catalog webpage and download the latest SSU that matches your version.
  6. After that, restart your computer and check if Windows Update works.

3. Repair corrupted Windows files

  1. In the Windows search bar, type cmd, and then click on Run as administrator on the right.
  2. When the Command Prompt window appears, type the following, then hit Enter: DISM.exe /Online /Cleanup-image /Restorehealth
  3. Wait for the process to finish, then type the following command and hit Enter: sfc /scannow

The process can be executed automatically. If you haven’t yet repaired your PC, we recommend a professional repair utility that will help you solve your corrupted directory situation with ease.

4. Manually reset Windows Update Service

  1. In the Windows search box, type cmd, and click on Run as administrator.
  2. When the Command Prompt window appears, paste these commands one by one and hit Enter after each: net stop wuauserv net stop cryptSvc net stop bits net stop msiserver Ren C:\Windows\SoftwareDistribution SoftwareDistribution.old Ren C:\Windows\System32\catroot2 Catroot2.old net start wuauserv net start cryptSvc net start bits net start msiserver
  3. Now check to see if Windows Update is working properly.

5. Reinstall Windows updates

  1. Press the Windows key and select Settings.
  2. Choose Update & Security.
  3. In the right section, click on View update history.
  4. In the new window, choose Uninstall updates.
  5. From the list that appears, click on the last Update for Microsoft Windows (KBxxxxxxx) and uninstall it.
  6. After the process has finished, go to Windows Update and check for updates.
  7. Also, you can install the faulty update manually. In the update history, locate the one that’s of interest to you and go to the official Microsoft Update Catalog webpage and search for it.
  8. Now, download and install it manually.

Some readers reported that cumulative update KB4562830 is causing the Your device is missing important security and quality fixes error message, so you should look for that one and remove it.

6. Check the services

  1. Press Windows key + R to start Run, type services.msc, and press Enter or click OK.
  2. Look for a service called Stopupdates 10 guard.
  3. If you find it, double-click to open and select Disabled from the Startup type dropdown menu.
  4. Then, click on Apply and OK to save the changes.

For some users, this Stopupdates 10 guard service blocked the updates, so simply disable it.

7. Reset your PC

  1. Click on the Start button and open Settings.
  2. Go to Update & Security.
  3. In the left pane, select Recovery then, under Reset this PC, click Get Started.
  4. Select Keep my files.
  5. Choose Cloud download to get a fresh copy of Windows.
  6. Continue the process and reinstall the OS.

This process should reinstall the latest Windows version without affecting your apps and programs.

Other errors connected to the missing security and quality fixes

As you already know, security updates are very important for Windows, and that’s why you need to keep an eye on the Patch Tuesday event that happens every 2nd Tuesday of the month.

That’s when Microsoft launches the important security updates that cover some of the possible vulnerabilities of the system.

Now, this particular error can appear with more than one error code and other variations, so here are some of the codes you may encounter:

How can I get security updates on Windows 11?

As the new OS inherited many of the problems from Windows 10, Your device is missing important security and quality fixes message that also appears on Windows 11.

Fortunately, all the solutions we provided above for the older system also work on Windows 11, although the design of the menus is a bit different.

The only slight difference is in step 6 because the Reset this PC feature in Windows 11 is a bit different, and you will find it in the Recovery menu of the System settings.

Additionally, you can read about what you can do when Windows update cannot currently check for updates because it might also help you.

If you have more questions or maybe another workaround for the error that wasn’t covered here, feel free to post them in the comments section below.

Microsoft Excel is Waiting for Another Application to Complete OLE Action

Getting a Microsoft Excel is waiting for another application to complete OLE action error?

When it shows up, Excel becomes unusable, and you are forced to terminate the program. It presents a major issue, but there are some quick fixes and workarounds. Let’s take a look at them.

How do I fix Microsoft Excel is waiting for another application to complete an OLE action?

Before trying a complex solution, try restarting your computer with Excel running and cancel when prompted to close it. Moving files from cloud into the computer and disabling VPN could also help.

If you’re still getting the error, try the following fixes:

1. Enable the DDE feature

    Enabling the Dynamic Data Exchange (DDE) feature is likely to solve the error. You can easily turn on this feature through Excel’s built-in settings.

  1. 1. Launch Microsoft Excel and open a new sheet.

  2. 2. Click on the File menu near the top-left.

    file menu
  3. 3. Click on More and then choose Options.

    options
  4. 4. Head to the Advanced tab, tick the Ignore other applications that use Dynamic Data Exchange (DDE) option, and then click on OK to save the changes.

    enable feature to fix Microsoft Excel is waiting for another application to complete an OLE action
  5. 5. Once done, restart Excel.

2. Disable all add-ins

  1. Open Excel, and click on the File menu.file
  2. Click on More, and then select Options from the flyout menu.options to fix Microsoft Excel is waiting for another application to complete an OLE action
  3. Go to the Add-ins tab, and with Excel Add-ins selected in the Manage dropdown menu, click on Go.Excel add-ins
  4. Now, uncheck all the add-ins listed here, and click on OK to save the changes.disable add-ins to fix Microsoft Excel is waiting for another application to complete an OLE action
  5. Again, go to the Add-ins tab, choose COM Add-ins from the dropdown menu, and click Go.COM add-ins
  6. Similarly, remove these add-ins as well.disable COM add-ins to fix Microsoft Excel is waiting for another application to complete an OLE action

Once done, restart Excel for the changes to come into effect, and you shouldn’t encounter the Microsoft Excel is waiting for another application to complete an OLE action message anymore.

Users primarily reported the Cisco Webex and Adobe Acrobat PDFMaker add-ins, amongst others, to be conflicting. So, make sure to check and remove the two.

3. Repair Microsoft Office

Note icon NOTE
Before proceeding, make sure you have a stable Internet connection since several files will be downloaded during the repair process.
  1. Press Windows + R to open Run, type appwiz.cpl in the text field, and hit Enter.appwiz.cpl
  2. Locate the Microsoft Office entry, select it, and click on Change.change
  3. Click Yes in case a UAC prompt appears.
  4. Now, choose the Online repair option and then click on Repair.online repair to fix Microsoft Excel is waiting for another application to complete an OLE action
  5. Again, click Repair in the confirmation box to start the process.repair

Microsoft Office provides a built-in repair option to eliminate a range of issues with it, including Microsoft Excel is waiting for another application to complete an OLE action. So, run it and verify whether the error is resolved.

Tip icon Tip
If you are using the 32-bit version of Microsoft Office, the error appears quite frequently, but users who switched to the 64-bit version reported that it almost ceased appearing. So, download the 64-bit version of Microsoft Office from the official website.

4. Run Excel in Safe Mode

  1. Press Windows key + R to open the Run dialog box.
  2. Type the following command and press enter:
    • excel /safe
      running excel in safe mode
  3. Try editing the same spreadsheet you first got the error on and see if persists.excel spreadsheet

What is an OLE action in Excel?

Object Linking and Embedding (OLE) action is a technology allowing Office apps to interact with other programs.

It allows an editing app to send part of a document to other apps and then import the data, i.e., take it back with more content. The process, though usually quick, can take some time depending on the other application and the other vital parameters.

Why does the OLE error appear?

Here are a few reasons you might be getting the Microsoft Excel is waiting for another application to complete an OLE action error:

  • The concerned file is stored on cloud: If the Excel file that’s throwing the message is stored on a cloud service like OneDrive or Google Drive, the data transmission takes longer and, as a result, you get the error.
  • Misconfigured Excel settings: Certain Excel settings, when disabled, have been found to trigger the Microsoft Excel is waiting for another application to complete an OLE action message.
  • Conflicting add-ins and applications: A few users found that it was an Add-in in Excel or a third-party application responsible for the issue. And simply removing the add-in or uninstalling the application fixed things.

In case you are still facing the same problem, switch to a reliable Microsoft Office alternative. There are several of these, each offering a plethora of features and being just as effortless as the former.

If you have any queries or want to share another solution we missed, drop them in the comments section below.

How to access Ubuntu through your Windows PC remotely

We all know how easy it is to access Windows remotely from another PC. Of course, we’ve covered that before ourselves. But did you know that you can now access your Ubuntu right from Windows this way?

In this article, we’ll explain the best ways to access your Ubuntu from Windows PC remotely. So let’s jump right in.

How to remotely access Ubuntu on Windows

Accessing your Ubuntu from Windows is straightforward. All you need is a Remote Desktop Protocol (RDP), and some critical information beforehand, such as the IP address of your computer, enable the port forwarding, and install SSH.

We’ll discuss all the steps individually, so everything is clear. So let’s get started with finding the IP address.

1. Finding the IP address

To set up remote access to your Ubuntu on Windows, you first need to get your Ubuntu computer’s IP address. You’ll need it later when you make use of RDP.

Head to your Ubuntu machine, press the Ctrl + Alt + T shortcut and open the Terminal, type in the following command, and hit Enter:

ifconfig

From here, look for “net addr” against your current connection. If you’re using Ethernet, for instance, look up eth0. Similarly, if you’re on WiFi, look up wlan0.

If this method doesn’t work, you can find the network connection icon, right-click on it, and select Connection Information.

2. Turn on Port Forwarding

To enable a computer on another network, you also need to enable port forwarding on the router. Start by typing in the following command in your Terminal and hit Enter:

ip r | grep default

Note down the IP address from here, and open it in your browser to display the router’s admin. When you’re done with that, here’s what you should do:

  • Look for the Port Forwarding settings.
  • Create a New Rule labeled Remote Desktop.
  • Set the Internal Port number to 3389.
  • Enter the External Port number to be 3390.
  • Enter the IP address of your Ubuntu.
  • Click Save.

3. Set up access using SSH

To enable remote access to the Ubuntu command line, it’s also essential that you install SSH on your Ubuntu. Launch your terminal on Ubuntu, type in the following command, and hit Enter:

sudo apt install openssh-server

That’s it. SSH will be installed. We can move to set up the RDP on your PC.


Remotely access your Ubuntu on Windows by Remote Desktop Protocol

RDP, or Remote Desktop Protocol in full, is a unique Windows protocol designed by Microsoft to help you connect with other computers remotely. On top of this, it also provides a simple GUI, which makes the whole experience much easier than it would’ve been otherwise.

To start with RDP, head to your Ubuntu and install the xrdp tool on Ubuntu. Open the terminal by pressing Ctrl + Alt + T and hit Enter:

sudo apt install xrdp

From there, type in the following code and hit Enter again:

sudo systemctl enable xrdp

The tool will be installed in a few minutes. As soon as the installation is finished, launch the application. Now, head to the Start menu search bar, type in ‘rdp,’ and click on Remote Desktop Connection.

After the app is launched, follow the steps below:

  1. Head to the Computer field and type in your IP address.
  2. Click on Show Options and add the Username for Ubuntu PC.
  3. Finally, click on Save.
  4. Select Connect to establish your connection.

As soon you click on Connect, you’ll most probably get asked for a password; enter it, and you’ll be inside in no time.

Access Ubuntu through your Windows remotely

With the RDP on your PC, you can connect and access your Ubuntu straight from your Windows. And the method of accessing it isn’t incomplete in any way. Be it playing, copying, or deleting your files, you can manage to do anything you’d otherwise want to do on your Ubuntu physically.

Time.windows.com Not Working: 4 Ways to Fix

Windows has been using automatic clock syncing for years, but time.windows.com not working is a common issue. You’ll often get a message that reads An error occurred while Windows was synchronizing with time.windows.com.

Here’s how to make it go away:

How to fix time.windows.com not syncing

1. Reconfigure the Windows Time service (Worked best for users)

  1. Press Windows + R to open Run, type services.msc, and hit Enter.services
  2. Locate Windows Time service, right-click on it, and select Properties.properties
  3. Choose Automatic from the Startup type dropdown menu.automatic
  4. Click on Start under Service status.start services to error occurred windows synchronizing time
  5. Head to the Log On tab, select the Local System account option, tick the checkbox for Allow this service to interact with desktop, and then click on OK to save the changes.allow to interact with desktop to fix error occurred windows synchronizing time

2. Use a different server

  1. Press Windows + R to open Run, type control in the text field, and click OK.control panel
  2. Click on Clock and Region.clock and region
  3. Now, click on Date and Time.date and time
  4. Navigate to the Internet Time tab, and click on Change settings.change settings to fix error occurred windows synchronizing time
  5. Choose a different server from the dropdown menu, click on Update now, and then on OK.change server to fix error occurred windows synchronizing time
  6. Again, click OK in the Date and Time box.
  7. Now, check if you can synchronize time without any trouble.

Users reported fixing Windows time not syncing simply by using a different server If the ones available by default don’t work, try these:

  • pool.ntp.org
  • time-a.nist.gov
  • time-b.nist.gov
  • time-a.timefreq.bldrdoc.gov
  • time-b.timefreq.bldrdoc.gov

3. Run a few commands

  1. Type Command Prompt in the Search bar, and click Run as administrator.Command Prompt
  2. Click Yes in the UAC prompt.
  3. Now, paste the following commands individually and hit Enter after each:net stop w32time w32tm /unregister w32tm /register net start w32time w32tm /resync

If everything goes well, you should see, The windows Time Service is starting. The windows time service was started successfully.

4. Reset the BIOS

Note icon NOTE
This is an intricate process and differs for every manufacturer. So, we recommend you head to the support section on the manufacturer’s website and find the exact steps. In case you are unsure, consult a professional.
  1. Turn off the computer, then turn it on, and repeatedly hit the F1, F10, or Del key (as the case may be on your PC) as soon as the display lights up to enter the BIOS.
  2. Now, look through the various tabs for the Load Default Options, Load Optimized Defaults, or Load Setup Defaults option and select it.reset bios
  3. Finally, confirm the change and restart the computer.confirm
  4. After resetting the BIOS, power off the computer and remove the CMOS battery for around 5-10 minutes, plug it back in, and then turn it on.

The last option in case an error occurs when you synchronize Windows time is resetting the BIOS. Often, the problem lies in the BIOS settings; resetting it is the only way to go.

How to enable automatic sync from settings

  1. Press Windows + I to open Settings, select Time & language from the navigation pane, and click Date & time on the right.date and time
  2. Click on the Sync now button under Additional settings.sync now
  3. Now, wait for the sync process to complete.

Some of the main reasons why Windows time won’t sync include the fact that the service isn’t running, corrupt system files, interfering apps, or network problems.

With the steps above, the time.windows.com not working should be a thing of the past. If you want to learn more, check out the time.windows.com vs time.nist.gov comparison to see which server will give you the most accurate time.

Unable to Connect to Nvidia Try Again Later: 3 Error Fixes

When you install new hardware, such as a graphics card, many times the driver software that comes with the hardware can be incompatible with your OS. If you have tried to install the Nvidia graphics card driver you might get the unable to connect to Nvidia try again later message.

The most common reason for this incompatibility is that your operating system has not been updated to support the latest version of the graphics card’s driver. In this article, we look into why you’re unable to connect to Nvidia and how to restore the connection.

Why won’t my Nvidia graphics driver install? 

Nvidia graphics drivers are a crucial part of your computer’s performance. Downloading the latest Nvidia drivers is a good idea because it will improve the overall performance of your computer. When you can’t install an Nvidia graphics driver, there may be several reasons:

  • Firewall interference – If you have an older Nvidia graphics card, you may need to disable any anti-virus or firewall software that is interfering with the installation of the driver.
  • Outdated OS – The Nvidia driver may not be compatible with your operating system and won’t install properly.
  • Hardware failure -The latest Nvidia graphics driver may not be compatible with your system’s hardware. 
  • Missing components – It is possible that you haven’t installed all of the required components correctly. The latest Nvidia graphics driver requires a few other programs to run properly.
  • PC doesn’t recognize the graphics card– Your PC may have a problem detecting the Nvidia graphics card hence not recognized by Windows.
  • Old drivers – You probably already installed an older version of the Nvidia graphics driver on your PC and want to upgrade it to a newer one without removing the old one first.

How can I fix the unable to connect to Nvidia try again later error?

Before jumping onto the slightly technical steps listed below, ensure to check the following:

  • Make sure the latest Nvidia graphics driver supports your motherboard.
  • Remove all other devices connected to your computer, including keyboards and mice, printers, scanners, and speakers.
  • Ensure you’re running the latest version of the GeForce Experience app.

1. Update the Nvidia drivers

  1. Press the Windows key, type Device Manager in the search bar, and click Open.
  2. Navigate to Display adapters and click to expand.
  3. Select the Nvidia driver from the drop-down menu, right-click on it and click the Update driver option.choose update driver for NVIDIA graphics card device manager
  4. Next, click on select Search automatically for updated driver software.
  5. Restart your PC.

Since most of the users who encountered the unable to connect to Nvidia try again later message had problems updating drivers from the GeForce Experience app, it is recommended that you try other ways of updating the driver. 

The above steps are for manual driver updates, but if you want a more straightforward way, you can opt for a driver updater utility. 

Outbyte Driver Updater is a tool that automates the process of downloading and installing new drivers for your PC. It will automatically detect the system and finds the best compatible driver for you, and install it.

Outbyte Driver Updater

An excellent automatic program that gets you the latest updates for your drivers.
Free Trial Download now

2. Disable Nvidia services

  1. Hit the Windows + E keys to open File Explorer.
  2. Navigate to the following location and delete the NSManagedTask.xml file. If the folder is missing, follow the steps to show hidden files, then proceed: C:\ProgramData\NVIDIA Corporation\NetService\
  3. Next, right-click on the Start Menu and select Task Manager.task manager onedrive high cpu usage
  4. Navigate to the Details tab, find NVNetworkService.exe, right-click on it and select End task.
  5. Now, hit the Windows + R keys to open the Run command.
  6. Type services.msc in the dialog box and hit Enter.
  7. Locate the NVIDIA Network Service, right-click on it and select Start.
  8. Restart your PC and check if the issue persists.

3. Reinstall the GeForce Experience app

  1. Hit the Windows key and select Settings.settings windows 11
  2. Select Apps on the left pane then click on Apps & features on the right pane.
  3. Locate the GeForce Experience app, click on the three ellipses and select Uninstall.
  4. Confirm uninstallation in the next dialog box.
  5. Restart your PC and proceed to download the GeForce Experience app.
  6. Follow the on-screen instructions to install, then try downloading the drivers again and see if you’re still getting the error message.

And that’s how to solve the unable to connect to Nvidia try again later issue. If none of the above solutions work, it is possible that the issue is a GeForce server error. You can check the GeForce status page to see if there is scheduled maintenance. 

You may also encounter an annoying error where your Nvidia drivers keep crashing on your PC. If this is the case, refer to our helpful guide on the steps to follow.

Let us know which of the above methods worked out for you in the comment section below.

How to Fix White Screen & Blank Pages on Google Chrome

If you’re facing the Chrome white screen problem, you’re not alone. Many users report the Google Chrome white screen error when opening the browser, causing it to display nothing but a blank page. This issue, sometimes called the Chrome white screen of death, can happen on startup, when visiting certain sites, or even mid-session. Here’s how to fix it.

Why does Chrome show a white screen?

The Google Chrome completely white screen error usually appears due to GPU hardware acceleration conflicts, corrupted browser data, problematic extensions, or outdated settings. In some cases, Chrome’s internal rendering process fails to load web content, leaving you with a Google Chrome blank white screen instead of the expected page.

How can I fix Google Chrome’s white screen problems?

1. Uninstall and reinstall Google Chrome

  1. Press Windows + I to open Settings, select Apps from the navigation pane, and then click on Installed apps.installed apps
  2. Locate Google Chrome, click on the ellipsis next to it, and select Uninstall from the flyout menu.uninstall chrome to fix chrome white screen
  3. Again, click on Uninstall in the confirmation prompt.uninstall
  4. Once done, navigate the following path, where the Username is the current account name, and then delete the Chrome folder here: C:\Users\Username\AppData\Local\Googledelete Chrome folder to fix white screen
  5. Finally, download Chrome and install it all over again.

We know that reinstalling Chrome may feel drastic, but it only takes 2-3 minutes and after logging back into your account, all the settings and bookmarks will be back as if nothing happen.

Completely uninstalling and reinstalling Google Chrome will fix this problem. Right after reinstalling it, make sure you also install its latest update.

2. Turn off hardware acceleration and background apps in Safe mode

  1. Close Chrome completely, then right-click on the Chrome shortcut icon and select Properties.
  2. In the Properties window, add the flag –safe-mode to the end of the Target field.
  3. Click Apply and then OK.
  4. When you start Chrome again, it should open in Safe Mode.
  5. Now, enter chrome://settings/system in the address bar and hit Enter.
  6. Look for Use hardware acceleration when available and Continue running background apps when Google Chrome is closed and turn these features to OFF.
  7. Now, close Chrome and start it normally, without the –safe-mode flag.

3. Clear cache to fix Chrome opens to a white screen

  1. Press Chrome’s Ctrl + Shift + Delete hotkey to open its Clearing browsing data window.
  2. Select All time from the Time range drop-down menu.All time to fix chrome white screen
  3. Tick the checkboxes for Browsing history, Cookies and other site data, and Cached images and files, and then click on the Clear data button.Clear data to fix chrome white screen

If clearing the cache doesn’t work in normal mode, use the first steps in the previous solution to start Chrome in Safe mode first.

4. Rename the User Data folder

  1. Close Google Chrome.
  2. Press Windows + E to open File Explorer, and navigate the following path, where the Username is the currently active account on the PC: C:\Users\Username\AppData\Local\Google\Chromeuser data
  3. Now, rename the User Data folder to User Data Old.rename folder
  4. Then, relaunch Chrome, and it will create the User Data folder again.

5. Disable all extensions

  1. Launch Chrome, paste the following path in the address bar, and hit Enter:chrome://extensions/
  2. Turn off the toggle for the extension that you want to disable.Disable extension to fix chrome white screen
  3. Then, repeat that for all the installed extensions.
  4. Finally, check if the problem is resolved.

If the white screen in Chrome doesn’t appear anymore, enable the extensions one by one until you recreate the problem and identify the one responsible for it.

Now, you can remove that extension and safely allow the rest.

5. Reset the browser

  1. Launch Chrome, paste the following path, and hit Enter to open the Reset and clean up settings:chrome://settings/reset
  2. Next, click the Restore settings to their original defaults option.Restore settings
  3. Then select the Reset settings option.Reset settings to fix chrome white screen

6. Edit the shortcut target to fix page loads and then goes blank on Chrome

  1. First, make sure that Google Chrome is fully closed.
  2. Right-click Chrome’s shortcut icon and select Properties.Properties
  3. Enter –disable-gpu at the end of the Target text box.disable GPU to fix chrome white screen
  4. Click on Apply and then OK to save changes.click Apply

7. Update Your Graphics Drivers

The Chrome white screen on startup can be caused by outdated or faulty GPU drivers. Updating them often resolves rendering errors.

  1. Press Windows + R, type devmgmt.msc, and press Enter.
  2. Expand Display adapters.display adapters
  3. Right-click your graphics device and choose Update driver.
  4. Select Search automatically for drivers.

To avoid installing the wrong driver, you can use a dedicated driver updater tool like Fortect Driver Updater, which scans your system and installs the correct GPU drivers automatically.

These are all the ways you can quickly resolve Google Chrome’s white screen in Windows. Sometimes this issue affects just a single website, and we wrote about that in our Twitch white screen in Chrome guide.

Also, find out what to do if Chrome is not responding or working or if you encounter a Chrome untitled error on your PC.

Did you manage to fix this problem with a different solution? Let us know in the comments section below.

Steam Update Stuck: How to Fix & Download Faster

It’s important to update your games, but what if a Steam update is stuck? Speaking of issues Steam downloads can drop to 0 sometimes or completely hang.

These are all major problems, and in today’s guide, we’ll show you how to fix them.

Why is my Steam update stuck?

There are multiple reasons for this problems, but here are the most common ones:

What are other Steam update issues?

Related issues such as the ones below can also be fixed with at least one of the solutions from this article:

  • Steam update stuck at 100 – This can happen from time to time, but you shouldn’t worry. Restarting or clearing the download cache usually does the trick.
  • Steam update stuck on preallocating – Preallocating means that Steam tries to make sure there’s enough space to download and install. Increase the available free space if necessary.
  • Steam stuck on updating steam information – A common moment when the process gets stuck that can be fixed by applying the solutions from this article.
  • Steam stuck in update loop – Break the loop by removing Steam and performing a clean install with the latest version.
  • Steam download stuck – Check your Internet connection. Then turn off the firewall.
  • Updating steam extracting package – Once the update is downloaded, the next step in the process is to extract the files from the package and apply them. If it’s stuck, try loading with administrator rights.
  • Steam update problem – This is one of the common Steam errors that users face.

How do I fix Steam stuck on checking for available updates?

1. Open Steam as an Administrator

  1. Press the Windows key + E hotkey.
  2. Open the Steam installation folder.
  3. Right-click Steam.exe within the software’s folder and select Properties.
  4. Click the Compatibility shown directly below.
  5. Select the Run as an administrator setting. Click Apply and OK to save changes.

First, make sure that Steam has admin privileges. Without admin rights, Steam might get stuck updating at some point.

Users can configure to run that game client software as an administrator using the steps from above.

2. Clear the download cache

  1. Press on the Windows key, type Steam, then open the app.
  2. From the top-left corner of the window, click on Steam.
  3. Navigate to Settings.
  4. On the left of the window, click on Downloads.
  5. Press the Clear Download Cache button.
  6. Click OK on the Clear Download Cache dialog box that opens.
  7. Thereafter, log back into Steam.

Clearing the download cache can resolve some Steam update issues. Clearing that cache will clear out cached data. Follow the guidelines above to clear the download cache.

3. Edit the host File

  1. Press the Windows key + S hotkey.
  2. Enter notepad in the search box. Right-click Notepad and select the Run as administrator option.
  3. Then click File and select Open.
  4. Go to the following path: C:\Windows\System32\drivers\etc
  5. Select All files and then double-click hosts file.
  6. Next, enter the following three lines at the bottom of the hosts’ file: 68.142.122.70 cdn.steampowered.com 208.111.128.6 cdn.store.steampowered.com 208.111.128.7 media.steampowered.com
  7. Click File and then Save to save the changes.
  8. Thereafter, open the Run window by right-clicking the Start button and selecting Run.
  9. Type ipconfig /flushdns and click OK.

Changing Steam’s content server might fix stuck Steam updates for some users. Users can do that by editing the hosts file just like we’ve shown.

4. Delete the package folder

  1. First, make sure that Steam isn’t running.
  2. Next, press the Windows key + E to open File Explorer.
  3. Open the Steam directory in File Explorer.
  4. First, back up the Package folder by selecting it and pressing the Copy to button.
  5. Select another folder to copy the subfolder to.
  6. Then right-click the Package subfolder in the Steam folder and select Delete.
  7. Launch Steam after erasing the Package folder.
    • Steam will then download a few files and open them.

The steam update might hang when the update package files get corrupted.

Erasing the Package folder will enable Steam to download again and might resolve the issue. Users can delete Steam’s Package folder as instructed above.

5. Turn off Windows Defender Firewall

  1. Open Cortana’s search box.
  2. Input firewall in the search box and select Windows Defender Firewall to open the window in the snapshot directly below.
  3. Click Turn Windows Defender Firewall on or off on the left of the WDF Control Panel applet.
  4. Select both the Turn off Windows Defender Firewall radio buttons, and press OK.
  5. If turning WDF off fixes the issue, users will need to add Steam to Windows Defender Firewall’s allowed applications. To do that, click Allow an app or feature through Windows Defender Firewall on the left of WDF’s Control Panel applet.
  6. Click the Change settings button.
  7. Then press the Allow another app button.
  8. Click Browse and open the Bin subfolder in the Steam folder within the Browse window that opens.
  9. Then select SteamService, and click the OK button.
  10. Thereafter, select Steam Client Service on the Add a Program window.
  11. Press the Add button.
  12. Select both the checkboxes for the Steam Client Service, and click the OK button.

It might be the case that Windows Defender Firewall is blocking Steam updating. In this case, turning WDF off might fix stuck updates.

6. Clean boot the Windows

  1. To clean boot Windows, open the System Configuration window by entering msconfig in Run.
  2. Navigate to the Services tab and check Hide all Microsoft services option first. After that, click on Disable all.
  3. Select the Apply option. Click OK to close the System Configuration window.
  4. Thereafter, a dialog box window opens from which users can select to restart.
  5. Select the Restart option on that window.

Some third-party antivirus software, firewalls, recording software, and other system utilities can also conflict with Steam and generate update errors.

If the issue is gone after disabling these services, start them one by one until you find the culprit.

7. Remove additional Steam library folders

Note icon NOTE
This method only works if you have two or more download folders set for Steam downloads.
  1. Open Steam Settings. Next, go to Downloads and choose Steam Library Folders.
     
  2. Select the drive that you want to make the default for downloads. Click the Gear icon and choose Make default.
  3. Select the drive you want to remove. Next, click the Gear icon and choose Browse Folder.
  4. A new window will now appear. Before proceeding, close Steam.
  5. Go one folder up, and you’ll see SteamMain directory. Rename it to SteamMainBackup.
  6. Open Steam again, and go to Steam Library Folders section.
  7. Select the drive you want to remove, click the Gear icon, and choose Remove drive.

Some of the above resolutions might fix Steam updates. Then users can launch Steam and enjoy the very best Windows games once again.

Users also reported that the Steam download goes on and off, but we covered that in a separate guide, so be sure to check it if you have more problems.

The Steam manifest unavailable error can cause issues with download, so it’s advised to fix it as soon as possible. For more information on Steam errors, don’t miss our error code 20 on Steam article.

Did you find a different solution? Share it with us in the comments below.

How to Keep Skype Always Active in Skype for Business

Skype for Business includes status indicators for its users. The app displays Available, Busy, Away, and Do not disturb status indicators, among others, for each contact shown within the app’s window.

However, the Skype for Business status indicator changes to Inactive after just five minutes of inactivity by default. That status changes to Away five minutes later.

Thus, the Skype for Business status indicator might change a little too quickly for some users. For example, a quick tea break will probably be enough to ensure the user status changes.

How can I appear Always Available on Skype?

  1. First, open the Skype for Business app window.
  2. Click the gear button on the right, select Tools, and click Options.
  3. Click the Status tab on the left of the Options window.skype how to always appear available
  4. First, click on the Show me as Inactive when my computer has been idle for this many minutes box. Enter 360 in that box, which is the maximum value.
  5. Then click on the Change my status from Inactive to Away after this many minutes box. Increase the value for that setting to 360.
  6. Press the OK button to exit the window.

Adjusting the value for the aforementioned status settings to 360 will ensure that the user status doesn’t change for 360 minutes.

Thus, the user status will not change to Inactive unless the desktop or laptop is idle for six hours. That should be enough time to ensure that the user status doesn’t change to Away while utilizing Skype for Business.

Note, however, that company system administrators can also adjust Skype for Business status settings changed by other users.

4 Best Bengali Typing Software for Windows 10 [Free Download]

The usual keyboard of a computer is in English. However, there are thousands of languages people speak around the world. Not everyone prefers writing in English or may choose to write in any other language for professional reasons.

That’s why Windows offers 202 keyboard layouts allowing you to write in over 7000 languages.

Recently, people also need to write in different languages due to the rise of the transcription industry. Bengali is one of those languages that people use in the transcription industry.

With over 230 million Bengali speakers in the Bengal region belonging to South Asia, this language is highly in demand. All they need to do is to download and add your preferred language to your system.

However, you would need separate software for added functionalities like special symbols and key mappings. Those who want to write in the Bangla language would need to download the PC software for Bangla typing.

We have listed some of the best free Bangla typing software for Windows that can help transcribe in Bengali effortlessly.

Type in Bangla seamlessly with these free typing tools

  1. LipiKaar – Highly reponsive
  2. Avro Keyboard – Built-in English-to-Bangla keyboard
  3. BanglaWord – Full word processing software
  4. Easy Learn Bangla – Easy to use

LipiKaar

LipiKaar bangla typing software for windows

LipiKaar is one of the leading PC software for Bangla typing that’s a typing system. This responsive and easy-to-use software helps users type in Bengali using the usual English keyboard.

It’s a simple application that enables users to create presentations, emails, word documents, or spreadsheets in Bengali.

The best part is that even if you are not proficient in English, you can use it easily since it helps you think in Bengali.

It works on a straightforward concept that helps users memorize words meticulously. In fact, it helps users to type even the most intricate words easily. This is why it is regarded as one of the best Bangla typing software.

It’s very different from transcription, as it allows the users to have complete typing commands. Developed for professional use, this program requires no keyboard stickers.

Price: the free version is available, and the pro version starts from Rs. 299

⇒ Get LipiKaar

Avro Keyboard

Avro Keyboard bangla typing software for windows

Avro Keyboard is the ultimate Bangla software package that’s completely Unicode based. This resourceful and customizable software implements all the popular Bangla typing techniques from India and Bangladesh in one interface.

The integrated Bengali spell checker makes it easier for the users to generate a flawless copy.

It also supports English to Bangla phonetic typing for home users. While beginners can use the Mouse-Based Bangla typing function, experts can use the traditional keyboard map for Bangla typing.

The best part is that the program features its effortless transcription scheme, which all the English inspires Bengali transcription software.

It’s especially beneficial for learning and is known for its user-friendly typing speed.

The floating preview Window, on the other hand, allows users to see how their English text is converted to Bangla on the spot.

What’s more? It even features an English-to-Bangla dictionary that contains around 150000 Bangla words and an auto-correct function for added support.

Best of all, the auto-correct dictionary can be edited by the users where they can add new words, modify them, or rectify any mistakes identified automatically.

Price: Freeware

⇒ Get Avro Keyboard

BanglaWord

BanglaWord bangla typing software for windows

BanglaWord is a clever word processing or typing software specially designed for those who want to write Bengali documents. The program lets you key in the Bangla text using only vowels and consonants.

The program automatically inserts the conjunct characters wherever possible or per the user’s requirement.

The Bengali alphabet is phonetically diagrammed on the usual keyboard in QWERTY format and is distinct from the Bangla font.

This lessens any learning curve required in the beginning and eliminates the need for material template design.

Moreover, the BanglaWord software enables users to send emails straight from the program with attached BanglaWord documents and RTF format text.

Additionally, it supports 200 plus Bengali fonts, offers a full word processing package, implements SmartBangla Typing Technology, and more.

Price: the free version is available on request, and the pro version available for $52.90

⇒ Get BanglaWord

Easy Learn Bangla

Easy Learn Bangla bangla typing software for windows

As the name suggests, Easy Learn Bangla intends to help users learn to read, speak, and write in Bengali proficiently.

It’s easy-to-learn software that’s perfect for tourists, school kids, and vacation planners as it helps them learn Bengali quickly. It’s also useful for business travelers and Bengali-speaking children from different countries.

From the introduction to the language or learning to read, write, and create the alphabet to making complete sentences in Bengali, it helps users learn Bangla pretty efficiently.

The program also offers guidance with basic conversations such as Time, Days, Months, Greeting, Farewell, etc., and also for advanced conversations like doctors, dentists, hotel booking, shopping, and more.

As a bonus, users can also take advantage of the talking dictionary.

Price: 1day free trial available, a pro version priced at $15

⇒ Get Easy Learn Bangla

These are some well-known, highly used, and reliable Bangla typing software for Windows that both beginners and advanced users can use.

So, make your choice and start writing proficiently with these easy-to-use programs.

Projector Not Turning On: Why & How to Fix [Epson, Dr.J]

If your Projector won’t turn on when you press the Power button or it shuts off abruptly, the issue can be with the projector’s power cable or other hardware failures.

This is not a new issue, as several other users are complaining about it. Fortunately, it is a problem that can be easily fixed, as shown in this guide.

How to fix the projector won’t turn on

1. Check your Projector Power

My projector own't turn on
  1. It is an obvious step, but check the power cord if you haven’t tried it. Check if it is correctly plugged in and if the main power switch to the projector is turned on.
  2. Check if the projector fan is spinning. This should give you a brief idea of whether the projector is receiving power.

2. Check Your Batteries

If you are using the Projector remote control to turn on the projector, you may want to check if the batteries have completely depleted.

Remove the batteries and rub them against your jeans for a few seconds until you see the surface is mildly hot. Insert the batteries and try to turn on the projector. If it works, you may need to replace the batteries.

3. Check your Projector Temperature

  1. All modern projectors come with a built-in safety feature that prevents the projector from being turned on if it has overheated or if the projector lamp is too hot.
  2. In the meantime, ensure that the filters are clean to make it possible for optimum air circulation. Without proper air circulation, the projector will overheat and refuse to turn on.
  3. Also, check the projector’s LED indicators that will flash if the projector is overheating. Check the projector manual to identify the correct indicator for overheating.

4. Check your Projector Lamp

  1. The projector still uses Lamps to project the image, and the lamp’s life can vary depending on the projector’s quality.
  2. Check your projector manual to check for the project bulb life. If the lamp has exceeded its life expectancy, you may need to replace the bulb to make the projector work again.
  3. Your projector may also have an LED indicator to detect lamp failure.

Most of the time, the projector won’t turn on the issue is due to a loose connection or faulty power cord. However, it can also occur if the projector board or bulb is defective.

Irrespective of the cause of the issue, you should be able to fix it with the solutions in this guide. In any case, check your projector manual for service to identify the problem.

If your projector fan won’t turn on for some reason, check our detailed guide to fix it quickly.

Feel free to let us know the solution that helped you fix this issue in the comments below.

LogonUI.exe System Application Error: How to Fix & Main Cause

Many users reported LogonUI.exe System Error on their PCs, and the problem is usually caused by issues with your graphics card. To know this for sure, you need to disable the graphics card in Safe Mode. This may also cause Exception_Illegal_Instruction.

How do I fix the LogonUI.exe application error?

1. Disable your graphics card in Safe Mode

  1. Press the Windows key and click the Power icon.
  2. Now, press and hold the Shift key and choose the Restart option from the menu.
  3. When your PC restarts, select Troubleshoot > Advanced options.
    advanced options logonui exe system error
  4. Choose the Startup Settings option.
    startup settings
  5. Next, click the Restart button.
    restart
  6. When your PC restarts, press the corresponding key to Enable Safe Mode or Safe Mode with Networking.
    enable safe logonui exe system error
  7. Now, press the Windows key + X and choose Device Manager once your PC boots up.
    device manager
  8. Double-click the Display adapters option to expand it, and right-click your graphics card.
  9. Select the Disable device option.
    disable device
  10. Finally, click the Yes button to confirm the action.
    yes logonui exe system error

The LogonUI.exe system Error can appear due to your graphics card. Your drivers can be the problem and cause this error message to appear.

If you cannot boot your PC normally, you should enable Safe Mode, as shown above.

2. Disable the fingerprint scanner

Several users have reported that the fingerprint scanner can cause LogonUI.exe System Error to appear. You need to enter Safe Mode and disable your fingerprint reader to fix this problem.

After doing that, the problem should disappear, and you can access Windows without any issues.

We have to mention that you can also fix this problem simply by updating your fingerprint software and driver. To do that, visit your fingerprint manufacturer’s website and download the latest fingerprint software or driver.

3. Disable Micro Focus Password Self-Service

Users reported that LogonUI.exe System Error could appear due to the Micro Focus Password Self Service login extension. If you have this extension installed, remove it and check if that solves the problem.

It’s rather likely that Micro Focus has a new version of their software available, so if you want to continue using it, update it and check if that solves the problem.

4. Disable PIN login

  1. Press the Windows key + I to open the Settings app and select the Accounts option.
  2. Now, click the Sign-in options in the menu on the left, and scroll down to the PIN section.
  3. Click on the Remove button.
  4. Windows will ask you to confirm that you want to remove your PIN. Click on Remove.
  5. Now you have to enter your password and click on OK to remove your PIN.

PIN login is a simple way to protect your PC from unauthorized access, but sometimes problems can occur. Users reported that LogonUI.exe System Error is related to PIN login, and if you want to fix it, you need to disable it.

5. Perform SFC and DISM scan

  1. Press the Windows key + S, type cmd, and choose Run as administrator under Command Prompt.
    cmd admin
  2. Type the command below and hit Enter: sfc /scannowsfc logonui exe system error
  3. Now, wait for the process to complete. If the SFC scan fails, type the command below and press Enter to run it: Dism /Online /Cleanup-Image /Restorehealthdism restore

LogonUI.exe System Error can sometimes appear due to corrupted system files. However, you can easily fix this problem simply by performing an SFC scan.

If the SFC scan can’t run or if it can’t fix the problem, you need to use the DISM scan instead. After the DISM run successfully, you can now repeat the SFC scan.

6. Remove the Sensible Vision FastAccess application

  1. Press the Windows key + I and select the Apps option.
    apps
  2. Click the Sensible Vision FastAccess app and select the Uninstall button.
    uninstall
  3. Finally, follow the onscreen instructions to complete the process.

According to users, the issue was caused by the Sensible Vision FastAccess application. You need to find and remove this application from your PC to fix the problem.

If you cannot boot into your PC normally, you should enable Safe Mode, as shown in Solution 1.

7. Use Ctrl + Alt + Del shortcut

If you can’t log in to Windows due to LogonUI.exe System Error, you might be able to solve it simply by using a single keyboard shortcut.

A few users reported that they fixed the problem simply by pressing Ctrl + Alt + Del shortcut for 10 seconds. We have to mention that this might not be a permanent solution, so you’ll have to repeat it every time this error appears.

8. Use integrated graphics

According to users, LogonUI.exe System Error can appear due to your dedicated graphics card. One way to fix this problem is to disconnect your laptop from the power source. By doing that, you’ll force it to use integrated graphics.

If you want a more reliable solution, change your settings and set your integrated graphics as the default display adapter. Keep in mind that by using integrated graphics, you might experience lower performance in video games.

9. Perform a clean boot

  1. Press the Windows key + R, type msconfig, and click OK.
    LogonUI.exe Application Error msconfig
  2. Click the Services tab at the top, check the Hide all Microsoft services box, and click Disable all.
  3. Navigate to the Startup tab and click on Open Task Manager.
  4. Now, select each of the apps there and click the Disable button.
    LogonUI.exe Application Error task manager
  5. Finally, go back to the System Configuration window, click the Apply button, followed by OK, and restart your PC.
  6. A dialog will appear asking you to restart your PC. Choose the option to restart your PC now.

As we previously mentioned, LogonUI.exe System Error can be caused by third-party applications. To fix the issue, you need to disable all startup applications until you find the problematic one.

Once your PC restarts, start Windows normally and check if the problem still appears. If not, it means that one of the disabled applications or services is causing this problem.

To find out which application is the problem, you need to enable the apps in batches till you fix the faulty one.

10. Reinstall your graphics card driver

  1. If your Windows can’t start normally, start it in Safe Mode, as shown in Solution 1.
  2. Now, right-click the Start icon and select Device Manager.
    device manager
  3. Expand the Display adapters options and right-click your graphics card.
  4. Next, choose Uninstall device.
    uninstall device logonui exe system error
  5. Check Delete the driver software for this device and click on Uninstall button.
    uninstall button
  6. Finally, restart your PC.

Sometimes, the LogonUI.exe System Error can be related to your graphics card driver. This is especially true for AMD beta drivers. To fix this, you need to uninstall and reinstall the driver. You can also find the latest driver versions with a dedicated app like Fortect Driver Updater, saving both time and effort.

If you want to remove your graphics card driver completely, you can do that with Display Driver Uninstaller. This is a freeware tool that will remove your driver and all files and registry entries associated with it.

After you remove the driver, you have to install it again. To do that, visit your graphics card manufacturer’s website and download the latest driver for your graphics card.

11. Perform a System Restore

  1. Press the Windows key + S, type system restore, and choose the Create a restore point option.
    LogonUI.exe Application Error system restore search
  2. Click the System Restore button.
    LogonUI.exe Application Error system restore button
  3. Now, click the Next button.
  4. Now you should see the list of all available restore points. If available, check the Show more restore points option.
  5. Select the desired restore point and click on Next to proceed.
    LogonUI.exe Application Error system restore points
  6. Finally, click the Finish button and follow the onscreen instructions to complete the restoration process.

You might be able to fix LogonUI.exe System Error simply by performing a System Restore. This useful feature can restore your system and remove any recent problems.

If you can’t start Windows normally due to this error, you might have to perform System Restore from Safe Mode. Alternatively, you can access Advanced Startup Options and perform System Restore. To do that, follow these steps:

  1. Press the Power button to shut down your PC forcibly and power it on again. Force your PC to shut down again when the manufacturer logo shows. Repeat this thrice to start the Advanced recovery menu.
  2. Now, choose Troubleshoot > Advanced options.
    advanced options logonui exe system error
  3. Select System Restore.
    system restore
  4. Now, select your username and enter your password.
  5. Next, choose a restore point and click the Next button.
    restore point
  6. Finally, follow the onscreen instructions to complete the process.

After restoring your system, the problem should be resolved entirely.

12. Disable Anti-Aliasing for your graphics card

  1. Open Nvidia Control Panel.
  2. Choose Manage 3D settings from the menu on the left.
    LogonUI.exe Application Error manage 3d settings
  3. In the right pane, go to Global Settings, locate Antialiasing – Mode, and set it to Off.
  4. Some users also suggest turning off Multi-Frame Sampled AA (MFAA), so you might also want to do that.
  5. Now click on Apply to save changes.

Many users use Anti-Aliasing while playing their favorite video games, but sometimes this feature can cause certain problems.

Several users reported that this feature caused LogonUI.exe System Error to appear. To fix the problem, you need to disable Anti-Aliasing, the FXAA feature.

After doing that, the problem should be resolved completely. We showed you how to disable Anti-Aliasing for Nvidia graphics cards, but if you have AMD graphics, you should be able to disable it from Catalyst Control Center.

13. Uninstall CSR Wireless Stack software

Another third-party application that can cause the LogonUI.exe System Error is CSR Wireless Stack. If you have this application on your PC, remove it or update it to the latest version and check if that solves your issue.

14. Disable or uninstall your security software

According to users, your antivirus software can also cause LogonUI.exe System Error to appear. You might have to temporarily disable your antivirus to fix the issue and check if that solves the problem.

If the issue persists, you might try temporarily removing your antivirus software.

It’s worth mentioning that antivirus tools tend to leave certain files and registry entries behind, even after you uninstall them. You’ll have to use a dedicated removal tool to remove an antivirus tool from your PC completely.

15. Replace the problematic files

Sometimes LogonUI.exe System Error will tell you which file is causing this problem. Copy that file from a working Windows PC to your C:\Windows\System32 directory to fix the issue.

Sometimes you might not be able to access your Windows, and if that’s the case, you’ll need to boot to Command Prompt and copy the problematic file to the System32 directory using the command line.

This is an advanced solution, and if you’re not careful, you can cause even more problems with your operating system, so be extra cautious.

16. Reset Windows 10

  1. Restart your computer a few times during the boot sequence.
  2. Choose Troubleshoot.
    troubleshoot
  3. Now, select Reset this PC.
    reset logonui exe system error
  4. Finally, choose the Remove files option and follow the onscreen instructions to complete the process.

If other solutions can’t fix this problem, you might consider Windows 10 reset. This solution will remove all files from your system drive, so back them up beforehand.

In addition, you might also need a Windows 10 installation media, so be sure to create it using the Media Creation Tool.

LogonUI.exe System Error can cause many problems since it can prevent you from accessing Windows. However, you should be able to fix this problem simply by using one of our solutions.

There are other login errors you can encounter, and we wrote about resolving the Logon Balancing Error 88 in SAP GUI with our expert solutions.

If you are facing other issues, like the exception breakpoint has been reached, check our detailed guide to fix it quickly.

Feel free to let us know the solution that helped you fix this issue in the comments below.

Error 30016-22: How to Fix This Office Installation Bug

Are you getting error 30016-22 when installing Microsoft Office on Windows 10 Pro or Windows 11? If yes, and if you are looking for solutions, then, you have landed in the right place. There are multiple user reports that confirm facing error 30016-22 when installing MS Office.

The issue could pop up because of multiple reasons, such as insufficient disk space, Office license issues, internet connectivity, and much more. In this guide, we will give you multiple solutions that will help you fix the error 30016-22 when installing MS Office problem.

Why am I getting error code 30016-22 when installing MS Office?

Here are a few of the most common reasons you would encounter the error code 30016-22 when installing MS Office:

  • System files are damaged: One of the solutions that helped users was to fix missing or corrupt system files to resolve the error 30016-22 when installing the MS Office problem.
  • There are some issues with MS Office files: If the installation process was interrupted, then it might have caused the installer to skip some files, which is ultimately causing the error.
  • Network or firewall restriction: If you have set aggressive Firewall or antivirus settings on your PC, then this could block certain programs to access the network or important files.
  • Multiple copies installed: If you have multiple MS Office installations on your PC, then this could cause issues and trigger the error code 30016-22.
  • Disk space error: Disk space error or insufficient storage are some of the genuine reasons that could trigger the issue.

How can I fix error code 30016-22 when installing MS Office?

1. Disable Firewall

  1. Press the Win key to open the Start menu.
  2. Type Windows Defender Firewall and open it.
  3. Select Turn off Windows Defender Firewall on or off option from the left.
  4. Check the boxes of Turn off Windows Defender Firewall (not recommended) for both Public and Private networks.
  5. Click OK.

Windows Defender Firewall or any other third-party antivirus is often known to block certain programs from installing as they ask for elevated permissions.

In such a case, we would suggest you disable the firewall and then try installing the MS Office program. However, once you are done installing the program, it is recommended that you turn on Windows Defender Firewall or antivirus as it keeps your PC secure and protected.

If you are confused about which antivirus tool to get for your Windows 11 PC, then you can check out our dedicated list that mentions some of the best antivirus tools.

2. Uninstall all instances of MS Office

  1. Download the Office removal tool.
  2. Hit the Install button.
  3. Agree to the terms and conditions.
  4. Select the version you wish to install. If you see multiple instances of MS Office, check the boxes for each one.
  5. Click on the Next button.
  6. Uninstall the program.
  7. Restart your PC.
  8. Launch the MS Office installer.
  9. Follow the on-screen prompts and install it on your PC.

If there are multiple MS Offices installed on your PC, then it could conflict with the new installation. In such a case, you should uninstall all the instances of MS Office from your PC and give a clean slate for the MS Office installation.

3. Run the MS Office installer as admin

  1. Visit this website.
  2. Sign in with your Microsoft account associated with Microsoft 365.
  3. Select Install Office. (This will work only if your Microsoft 365 subscription)
  4. Select Other options in the Download and install Office window.
  5. Select the language you want to install the Microsoft 365 apps in.
  6. Check the box for Download an offline installer.
  7. Click Install.
  8. Locate the folder where you downloaded the offline installer.
  9. Right-click on the offline installer and select Run as administrator.
  10. Do note that you need to be connected to the internet for the offline installer to work.
  11. Follow the on-screen prompts to install MS Office and see if this fixes the issue or not.

Using the MS Office offline installer gives you the freedom to install Office at your convenience. You can keep the Offline installer handy with you on a USB drive and take it with you anywhere.

Also, one user suggested that running the offline installer as an administrator fixed the problem of error 30016-22 Installing Office. So, follow the above steps carefully and see if this fixes your problem.

4. Check Disk error

  1. Open File Explorer.
  2. Right-click on the target folder where you are installing the MS Office and getting error 30016-22.
  3. Select Properties.
  4. Switch to the Tools tab.
  5. Click on Check under Error checking section.
  6. Select the Scan drive option.
  7. The system will run a scan on the drive and will prompt you to apply the fixes if it finds any disk errors.

5. Fix corrupt system files

  1. Open the Start menu by pressing the Win key.
  2. Type command prompt and run it as an admin.
  3. Type the below command and press Enter. sfc /scannowsfc scan 0xc00000e
  4. Wait for the process to complete.

You can use the in-built SFC Scan tool to fix the corrupt or missing system files. It is an easy process, however, it isn’t as effective as a dedicated system repair and optimizing tool.

That is it from us in this guide. For users that are facing the cannot open MS Word, Excel, or PowerPoint. problem, we have a guide that will help them fix the problem.

Some users have reported that they are not able to zoom in MS Word. Such users can refer to our guide and easily resolve the problem. We also have a guide that will eliminate confusion on which version of MS Office will work on their Windows 11 PC.

If MS Office disappeared from your PC, then you can check out our guide and resolve the issue. We also have a guide to help you fix the burning issue of Olicenseheartbeat.exe stopped working.

For users facing MS Office product activation failed error, we have created a list of solutions that will help you resolve the error in no time.

Feel free to let us know in the comments below, which one of the above solutions helped resolve the error 30016-22 Installing Office.

Unable to Rename a Folder in Windows 11: How to Force it

There are some users that have reported that they are unable to rename a folder in Windows 11. The users confirm that the context menu disappears not allowing them to rename the folder. Else, they are treated with an error message.

Why am I unable to rename a folder in Windows 11?

After some research, we have found some of the most common reasons that would restrict you from renaming folders in Windows 11.

  • There is a glitch in the current Windows update: Chances are that there is a bug in the Windows update installed on your PC that is causing the problem.
  • Issues with the Windows Explorer: If the Windows Explorer or File Explorer itself is experiencing some issues then it will misbehave and trigger errors such as not allowing you to rename folders.
  • The folder is already in use: If you are using the folder or it is open in another window, then you won’t be able to rename it.
  • Your PC is infected with a virus: Often malware and viruses tend to restrict user input on a PC, which could be the reason you aren’t able to rename the folder in Windows 11.
  • You don’t own the folder: If you are not the admin of the folder, then you won’t be able to rename the folder.
  • Controlled Folder Access feature is enabled: Controlled Folder Access feature lets you protect an important folder from anyone making changes to it. Chances are this feature is turned on and preventing you from making the changes.

How can I fix unable to rename a folder in Windows 11 issue?

Here’s what you should do first:

  • Make sure that the folder that you wish to rename or modify isn’t open in the background or another window. Simply close all the Windows Explorer processes and go to the folder, right-click on it and select Rename.
  • You should also check and make sure that any file inside the folder isn’t opened.

1. Disable Controlled Folder Access

  1. Press the Win button to open the Start menu.
  2. Type Windows Security and open it.
  3. Select Virus and threat protection.
  4. Click on Manage ransomware protection.
  5. Toggle off Controlled folder access.
  6. Restart your PC for the changes to take effect.
  7. Locate the folder and see if you can rename it or not.

2. Take ownership of the folder

  1. Locate the folder that you aren’t able to rename.
  2. Right-click on it and select Properties.
  3. Switch to the Security tab.
  4. Click on Advanced.
  5. Click on Change for the Owner section.
  6. Select Yes in the prompt that appears.
  7. Type the username in the Enter the object name to select box.
  8. Click Check Names.
  9. Select OK.
  10. Check the box for Replace owner on subcontainers and objects.
  11. Click Apply and OK.
  12. Restart your PC.

Having the necessary privileges ensures that you can move, delete or rename the folder in question. You can easily get admin access to the folder by following the above steps.

3. Scan your PC for virus

  1. Press the Win button to open the Start menu.
  2. Type Windows Security and open it.
  3. Select Virus and threat protection.
  4. Hit the Quick Scan button.
  5. You can select Scan options and click on Full Scan for a deep scan of your PC.
  6. If the system detects any viruses, then follow the prompts to remove them from your PC.

Do note that the Windows Security antivirus tool is limited in features and often it is found that it isn’t as effective as dedicated antivirus software.

So, we would suggest you check out our list of the best antivirus software that you can use on your Windows 11 PC and see if this fixes the issue or not.

4. Check for Windows updates

  1. Press the Win + I keys to open the Windows Settings.
  2. Select Windows Update from the left pane.
  3. Click on the Check for updates option.
  4. Install the update, if there is a new one available.
  5. Restart your PC and see if you can rename the folder or not.

You should make sure that you are running the latest available version of the Windows OS to make sure everything runs perfectly fine without any issues.

5. Restart the Windows Explorer process

  1. Press Ctrl + Shift + Esc to open the Task Manager.
  2. Click on the Processes tab.
  3. Locate Windows Explorer.
  4. Right-click on it and select Restart.

Often due to multiple opened instances, Windows Explorer can misbehave. In such a case, it is better to restart the process and start from scratch.

6. Run SFC Scan

  1. Open the Start menu by pressing the Win key.
  2. Type the command prompt and open it as an admin.
  3. Type the below command and press Enter. sfc /scannow
  4. Wait for the process to fix the missing or corrupt system files.
  5. Restart your PC and see if this resolves the problem of unable to rename a folder in Windows 11 issue or not.

You can use the SFC Scan tool to fix missing or corrupt system files. While this is effective, it isn’t as effective as a dedicated third-party repair tool.

How to force rename a folder in Windows 11?

  1. Open the Start menu by pressing the Win key.
  2. Type the command prompt and open it as an admin.
  3. Type the below command and press Enter. REN "Full Path of Folder" "New Folder Name"
    • For example, to rename a folder with the current name XX in the C Drive to YY, the above command will look like REN “C:XX” “YY”.

That is it from us in this guide. If File Explorer is crashing or freezing in Windows 11, then you should check out our guide and fix the problem.

We also have a guide that will help you to delete files with a long name without any issues. You can also check out our guide that will help you disable the auto arrange in folders on Windows PC.

Feel free to let us know in the comments below, which one of the above-listed solutions helped you resolve the unable to rename a folder on Windows 11 PC.

How to Add a Period for Double-Tapping the Spacebar

There are some user reports that bring to light that they are not able to apply a period when they double-tap the space bar on their Windows 11 PCs. Some have even reported that for them the option to add a period when they double-tap the space bar isn’t visible on their Windows 11 PCs.

Well, if you are also experiencing the same issues, then either you are not looking at the correct place for the setting or you have recently discovered that you can add a period when you double-tap the space bar in Windows 11.

For both cases, we have mentioned some solutions in this guide that will help you get rid of the query in your head.

How do I add or stop the period after double spacing on Windows 11?

1. Use the Settings menu

  1. Press the Win + I keys to open the Settings menu.
  2. Click on Time & language option on the left pane.
  3. Select Typing.
  4. Expand the Touch keyboard drop-down.
  5. Check the box for Add a period after I double-tap the Spacebar option.

Once you have enabled the above-mentioned option, you can now apply a period when you double-tap the space bar on your keyboard. This solution works for those who are facing the double tap space bar period not working on Windows 11 issue.

2. Use Registry Editor

  1. Press the Win + R keys to open the Run dialogue.
  2. Type regedit and press Enter.
  3. Navigate to the below path. HKEY_CURRENT_USER\Software\Microsoft\TabletTip\1.7
  4. Right-click in the empty space on the right side.
  5. Select New and DWORD (32-bit) Value.
  6. Name the new DWORD as EnableDoubleTapSpace.
  7. Double-click on EnableDoubleTapSpace DWORD.
  8. In the Value data field, type 1.
  9. Set Base as Hexadecimal.
  10. Click OK.
  11. Close Registry Editor.
  12. Restart your PC.

In order to remove this feature of adding a period when you double-tap the space bar on Windows 11, you can simply change the DWORD value to 0.

3. Use a third-party tool

  1. Download and install AutoHotkey.
  2. Right-click on your desktop.
  3. Click on New.
  4. Select Text document.
  5. Give any name to the file and save it with the AHK extension. For example, Myscript.ahk.
  6. Open the newly created file.
  7. Paste the below script into the document. :*: ::{NumpadDot}{space}
  8. Click on File.
  9. Select Save.
  10. Close the document.
  11. Open the AutoHotkey.
  12. Click on New script.
  13. Click the Windows Search logo.
  14. Locate the script file that you created and select it.
  15. Hit the Create button.
  16. A new script file will be created.
  17. Right-click on it and select Run script.
  18. Open any app and start typing. You will see when you double-tap the spacebar, it inputs period.

This is another way to run other different scripts and get the option that isn’t available under the Windows Settings menu.

AutoHotkey is a pretty small-sized app and runs like a charm. There isn’t a learning curve apart from the steps mentioned above to run scripts and in our case, double-tap the space bar in Windows 11 to enter period.

If you are expending an issue where the keyboard isn’t working on your laptop or PC, then we would suggest you check out our guide that mentions some of the best solutions to fix the problem.

For some users, the keyboard switches language on its own, which could be a frustrating issue. Such users should check out the guide on how to fix keyboard switches language on its own guide.

The mouse and keyboard are two of the most important input devices on a PC. In case, you are having issues with it or your PC isn’t detecting the connected devices, then you can check out our guide to resolve the problem.

Feel free to let us know in the comments below, which one of the above solutions you used to accomplish the task of entering a period when you double-tap the space bar on your Windows 11 PC.

Fix: You Have Been Denied Permission to Access This Folder

In order to protect your files from unauthorized access, Windows 10 can lock certain folders. This means that some folders are inaccessible for certain non-administrator users.

Users reported You have been denied permission to access this folder message, and here we’re going to show you how to fix it.

What can I do if I don’t have permission to access this folder?

1. Change the ownership of the folder

  1. Locate the folder that you can’t access and right-click it. Choose Properties from the menu.
  2. Go to the Security tab and click the Advanced button.
  3. Look for the Owner section at the top of the window. Click the Change button.
  4. In the Enter the object name to select field, enter your account username.
  5. Now, click Check Names. If your input is correct, the input field will change.
  6. Click the OK button to save the changes.
    check names
  7. Next, go back to the Advanced Security Settings page and check the Replace owner on subcontainers and objects box.
  8. Click the Apply button, followed by OK.

As we already mentioned, many folders are protected by Windows, and you can’t access them without certain privileges.

However, by changing the folder ownership, you can fix You have been denied permission to access this folder message.

After taking ownership of the folder, you should be able to access it without any problems.

2. Modify your registry

  1. Download the Take Ownership.zip file.
  2. Open the zip file and extract the available files to any folder.
  3. Now, run the Install Take Ownership.reg file.
  4. When the confirmation message appears, click Yes to confirm.
  5. After doing that, right-click the problematic folder and choose the Take Ownership option from the menu.

Modifying the registry can be risky, so before you make any changes, we advise you to back up your registry just in case.

If you’re getting You have been denied permission to access this folder message, you can fix it by changing the ownership of that folder using your registry.

3. Use TakeOwnershipEx

  1. Start the TakeOwnershipEx tool.
  2. Click the Take Ownership button.
  3. Now select the problematic folder.
  4. After doing that, you’ll see a success message on the screen.
  5. Optional: If you want, you can always restore ownership settings to default by using the Restore Ownership option.

Unlike the previous solution, this one offers a way to restore ownership, which can be useful if trying to access any system file.

If you’re not comfortable modifying your registry and want to use a third-party tool to fix You have been denied permission to access this folder message. Feel free to use this simple tool.

4. Close Shared Folder Sessions

  1. Press Windows key + X and select Computer Management from the menu.
  2. When Computer Management opens, navigate to System Tools > Shared Folders > Sessions.
  3. You should now see all available sessions. Right-click them and choose Close Session from the menu.
  4. You can also right-click Sessions in the left pane and choose Disconnect All Sessions.
  5. After that, close Computer Management and check if the problem is resolved.

Several users reported that you have been denied permission to access this folder issue occurs even after changing ownership settings. If that’s the case, you might have to close Shared Folder Sessions.

5. Try using a different explorer application

If you’re getting You have been denied permission to access this folder message, you might want to try using a different explorer application.

File Explorer is the default application for file access in Windows 10. However, it is not free from issues like frequent crashes and the inability to open some folders.

Hence, we suggest that you download Q-Dir. Simply download and run this portable application and try accessing the folder using this tool.

6. Copy the folder to a different location

You can try a simple workaround if you can’t access a folder because you have been denied permission to access this folder message.

According to users, you can copy the folder to a different location and try it access it from there. This might not be the best solution, but it works according to users, so try it out.

7. Use Command Prompt to access files

You have been denied permission to access this folder message can prevent you from accessing certain folders, but there’s a way to circumvent this issue.

According to users, you can access any folder on your PC simply by using Command Prompt as administrator. You only need to press the Windows key, type cmd and select the Run as administrator option under Command Prompt.

After Command Prompt starts, you can access and copy files from the problematic folder.

8. Create a new group and add your user account to it

  1. Press Windows key + R, type lusrmgr.msc, and press Enter.
  2. When the Local Users and Groups window opens, select Groups in the left pane.
  3. Right-click Groups and choose New Group.
  4. A New Group window will appear. Enter the desired Group name. Now, click the Add button.
  5. In Enter the object names to select field, enter your username or Microsoft account email. Click Check Names.
  6. If your input is valid, click OK.
  7. Click the Create button to create a new group.
  8. Now, close that window.

According to some users, they fixed you have been denied permission to access this folder issue simply by creating a new group and giving ownership of the folder to the new group.

After creating a new group, you need to change the ownership of the problematic folder. You can do that simply by following the steps from Solution 1. Remember that you need to enter the group’s name while changing the ownership instead of your username.

In addition, if you see Replace all existing inheritable permissions on all descendants with inheritable permissions from this object option while changing the ownership, be sure to select it.

Fix – You have been denied permission to access this folder USB

1. Connect your USB flash drive to a different PC

Many users reported that they are getting You have been denied permission to access this folder message while trying to access certain folders on removable storage.

If you have the same problem, we advise you to connect the problematic USB flash drive to a different PC. After that, create a copy of the problematic folder and delete the original.

Rename the copy, and connect the flash drive back to your PC. After doing that, the issue will be resolved, and you should be able to access that folder.

2. Use xcopy command

If you can’t access a folder on your USB flash drive due to this error, we suggest that you try using the xcopy command.

This is a bit advanced process, so before you can perform it, we advise you to research and learn how to use xcopy command.

In addition, you’ll need to use this command from Command Prompt. We already explained how to start Command Prompt as an administrator in one of our previous solutions, so be sure to check it out.

3. Uninstall the USB driver

  1. Press Windows key + X and choose Device Manager from the menu.
    device manager
  2. Go to the View menu and check Show hidden devices option.
    show hidden
  3. Now, Double-click the Universal Serial Bus controllers option and right-click your USB flash drive.
  4. Select the Uninstall device option.
    uninstall device You have been denied permission to access this folder
  5. Finally, click the Uninstall button to confirm the action.
    uninstall button

According to users, they fixed You have been denied permission to access this folder message simply by uninstalling their USB device driver.

Now you need to connect your USB flash drive to a different port on your PC. After doing that, Windows 10 will automatically install the necessary drivers, and the issue will be fixed.

4. Make sure that you’re authenticated

Users reported You have been denied permission to access this folder message on certain HP computers. According to them, they cannot access their USB flash drive until they are properly authenticated.

To do that, you need to click the HP icon in the lower right corner and follow the authentication process. This is a security measure on some HP computers, and if you own an HP PC, we advise you to try this solution.

5. Change the security settings

  1. Open HP Client Security.
  2. Navigate to the Device Permissions.
  3. Click on Change.
  4. Now change the removable storage settings and allow full access for administrators and users. A few users reported that this option is grayed out but can still be changed.
  5. After doing that, save the changes and try to access your USB flash drive again.

If you’re having this issue on your HP computer, you might be able to solve it by changing the security settings.

This fixed You have been denied permission to access this folder message for some users on their HP computers. So, you might want to try this solution out.

6. Uninstall HP software

  1. Press the Windows key + I to open the Settings app and select the Apps option.
    apps You have been denied permission to access this folder
  2. Now, select any HP software there and click the Uninstall button.
    uninstall
  3. Finally, follow the onscreen instructions to complete the process.

The HP software can often interfere with your USB flash drive and prevent you from accessing it. If you’re getting You have been denied permission to access this folder message on your HP computer, you can solve it by removing HP software.

7. Change the ownership of the drive

You have been denied permission to access this folder is an ownership issue, and in most cases, you can fix it by changing the ownership. If you have this problem with your USB flash drive, we advise you to change the drive owner.

To do that, right-click your USB flash drive and choose Properties. Now go to the Security tab and follow the steps from the first solution in this article.

After taking ownership of the desired drive, the issue should be resolved.

8. Use Partition Wizard software

According to users, you can fix You have been denied permission to access this folder message simply by running Partition Wizard software. You need to run this software and let it scan your USB flash drive.

After doing that, close the application, and you should be able to access the USB drive without any problems.

Fix – You have been denied permission to access this folder no Security tab

1. Connect your drive to a different PC

You might need to change your security permissions if you have a problem accessing certain folders due to the You have been denied permission to access this folder message.

We already explained how to do that in our previous solutions. However, some users reported missing the Security tab on their PC.

This is an unusual problem, and if you have this issue, you might have to remove your hard drive or removable storage and connect it to a different PC. After doing that, you should be able to access the files and make the necessary changes.

This is a workaround, but if you need to access your files urgently, try it out.

2. Use Command Prompt

  1. Press the Windows key, type cmd, and click Run as administrator under Command Prompt.
    cmd admin You have been denied permission to access this folder
  2. Type the commands below and press Enter after each: takeown /F <folder path> /R /D Ytakeown C:>icacls <folder path> /grant administrators:F /Tc icals
  3. Be sure to replace <folder path> with the correct path to the folder that you can’t access.
  4. After running those commands, close Command Prompt and check if the problem is resolved.

Since You have been denied permission to access this folder message requires you to change your security permissions, you need to use the Settings tab.

Unfortunately, several users reported that this tab is missing on their PC. However, this doesn’t have to be a major problem since you can take ownership of the folder from Command Prompt.

3. Change Group Policy settings

  1. Press Windows key + R, type gpedit.msc, and press Enter.
  2. Navigate to the path below in the left pane: User Configuration > Administrative Templates > Windows Components > File Explorer
  3. In the right pane, double-click the Remove Security tab.
  4. Now, select the Disabled option from the menu and click the Apply button, followed by OK to save changes.
  5. Close Group Policy Editor.

If you can’t find Settings tab in Properties window, you might have to change Group Policy settings. This is a simple procedure.

After making the changes, the Security tab will become available and you should be able to access it and change the folder ownership.

You have been denied permission to access this folder message usually appears if you don’t have the necessary privileges to access a specific folder.

In most cases, you can fix this problem simply by changing the ownership of the folder or by removing the problematic apps.

If you are facing a similar issue in you don’t have permission to open this file on Windows 10, check our detailed guide to fix it. Additionally, we can help you out if you encounter a pop-up saying “Unable to execute file in the temporary directory.“

Feel free to let us know the solution that helped you fix this issue in the comments below.