Could Not Find the Recovery Environment [Reset Error Fix]

Have you tried performing a system refresh because your Windows 10 PC works slower than it should?

Some Windows 10 users are having issues with the error message Could not find the recovery environment which occurs just at the beginning of the refresh or reset process.

This can be frustrating, as it prevents them from carrying out the refresh process. In this guide, we will show you how to fix the error and complete your system refresh as you intended.

What does Could not find the recovery environment mean?

This error message mainly appears because your Windows 10 Installation media disk is broken. Also, it might be because you don’t have the installation media disk.

Irrespective of the cause, we will show you how to fix it in the ensuing sections of this article.

Moreover, the following are the most common error variations that you may encounter:

  • Could not find the recovery environment. Insert your Windows installation or recovery media – This is the most common error message attributed to these situations, but there are plenty of other variations you might encounter.
  • Autopilot reset ran into trouble. Could not find the recovery environment – Enable recovery mode in this case.
  • Could not find the recovery environment for Windows 11, 10, 8, and 8.1 – It can affect most Windows versions, luckily the solutions below work on all of them.
  • Windows 10 factory reset could not find the recovery environment – This error also stated that there was a problem resetting your PC which will probably let you only enter recovery mode.
  • Error when initializing the recovery environment Lenovo, Surface Pro 3, Asus, HP – Use a Restore point in order to solve this on any laptop brand.
  • Could not find recovery nor admintool binaries – Create a new Windows 10 installation media.
  • Reagentc.exe: the Windows re image was not found/the specified path was not found (reagentc /enable not working)
  • We can’t create a recovery drive on this PC. Some files are missing – Try to create a new installation media back from 0 to include all files.
  • Windows 10 could not find the recovery environment when trying to reset PC – Your installation media is at fault here and will need to be replaced.

Following the tutorial below, you will learn how to make a Windows 10 installation media disk properly and start the system refresh process.

How do I fix Could not find the recovery environment?

1. Enable recovery environment

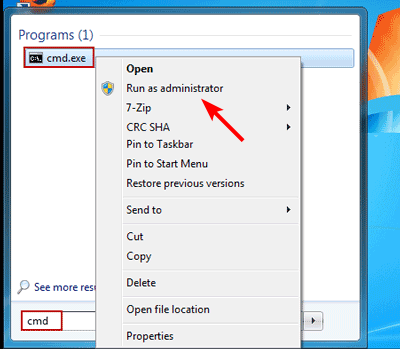
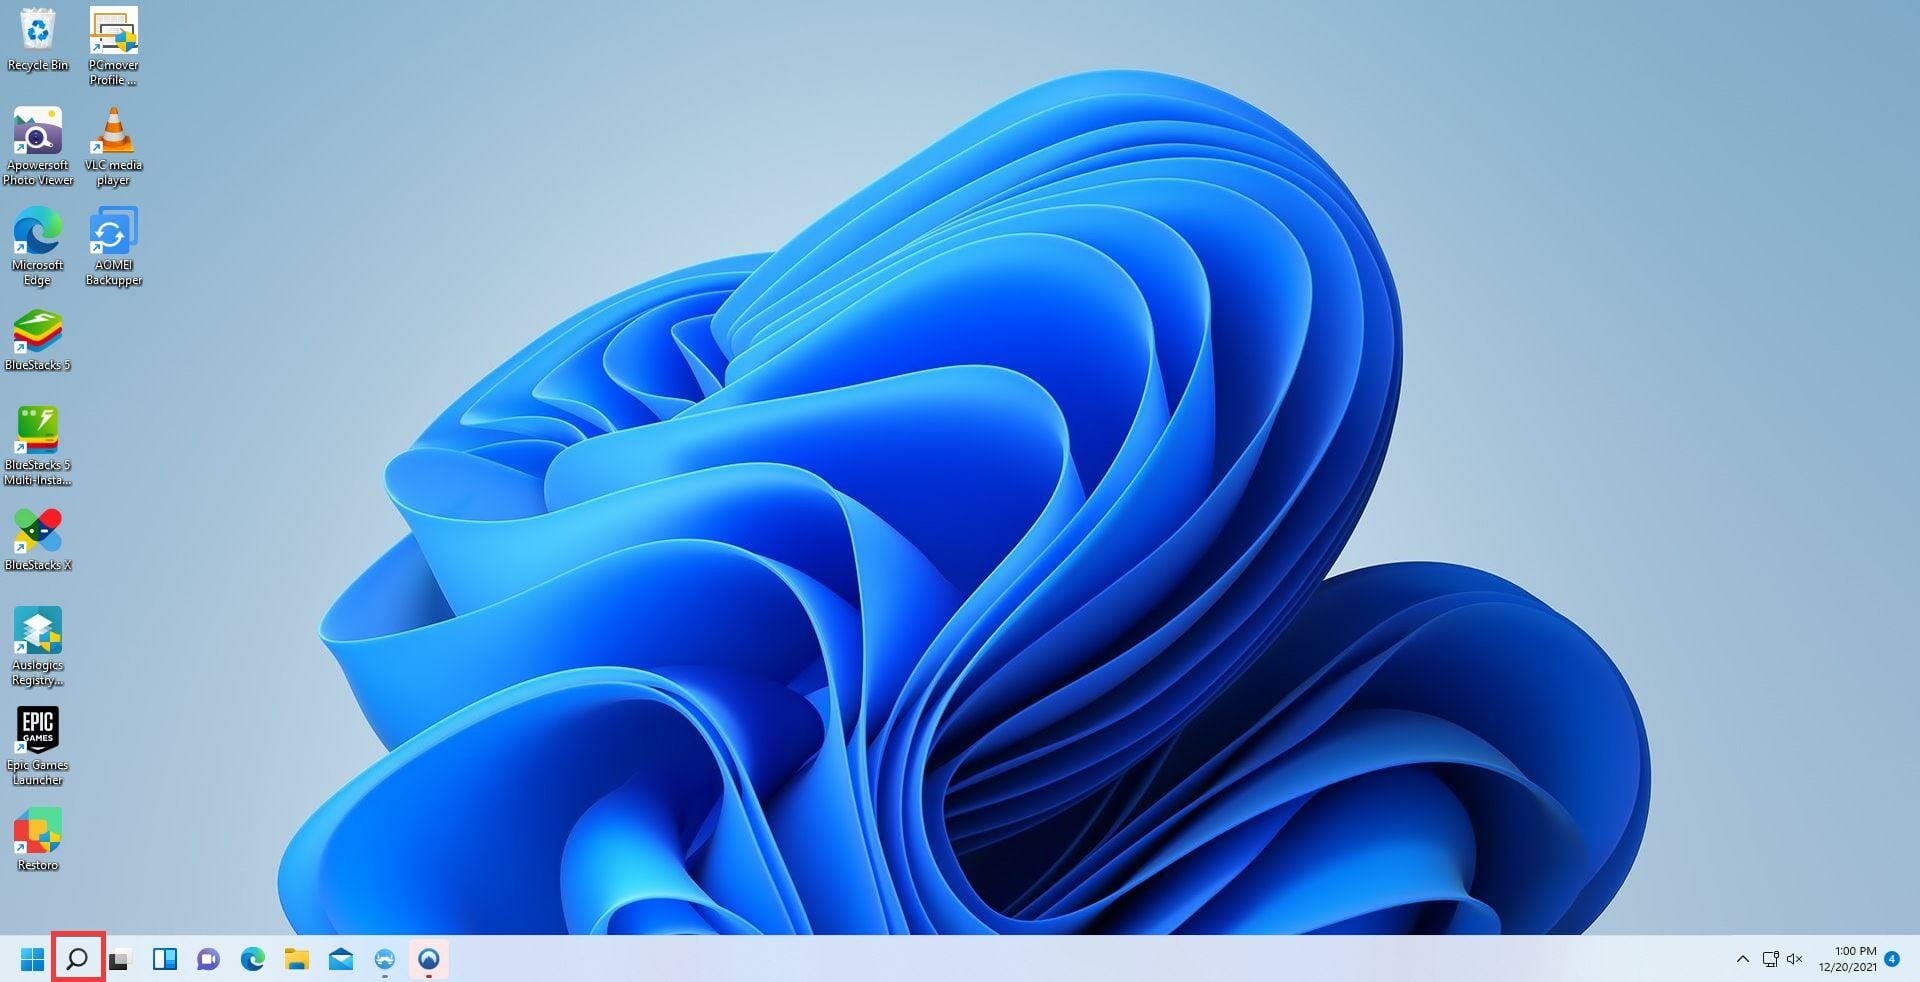
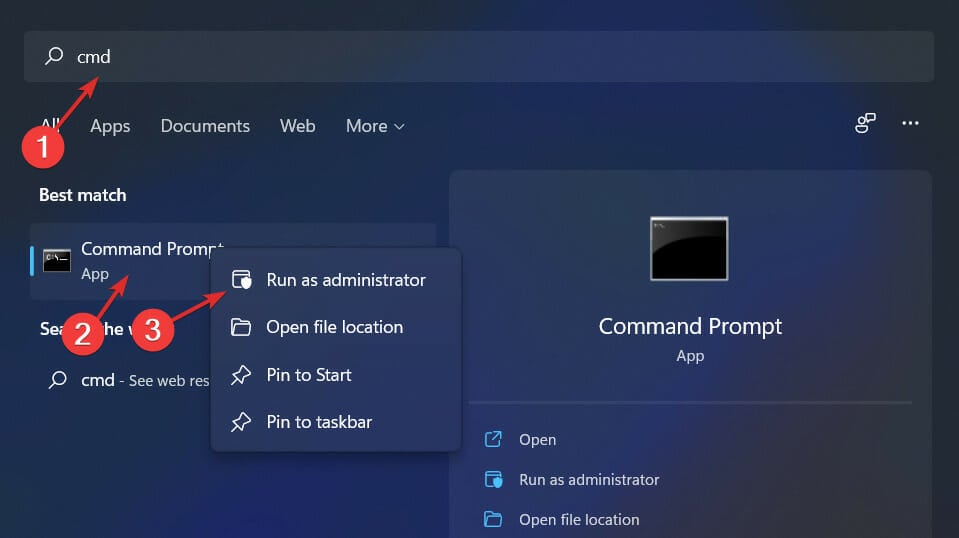
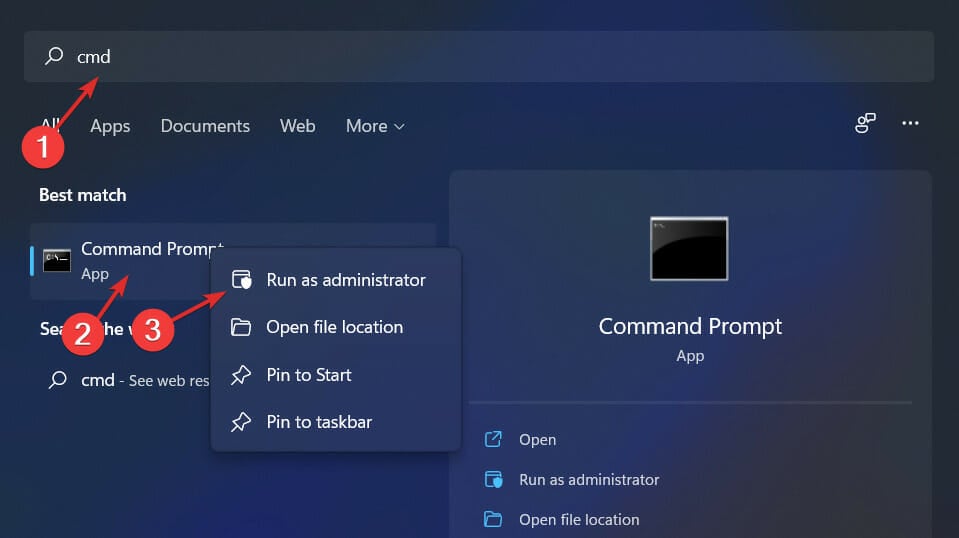
  1. Press the Windows button and search for cmd.
  2. Right-click on Command Prompt and choose Run as administrator.
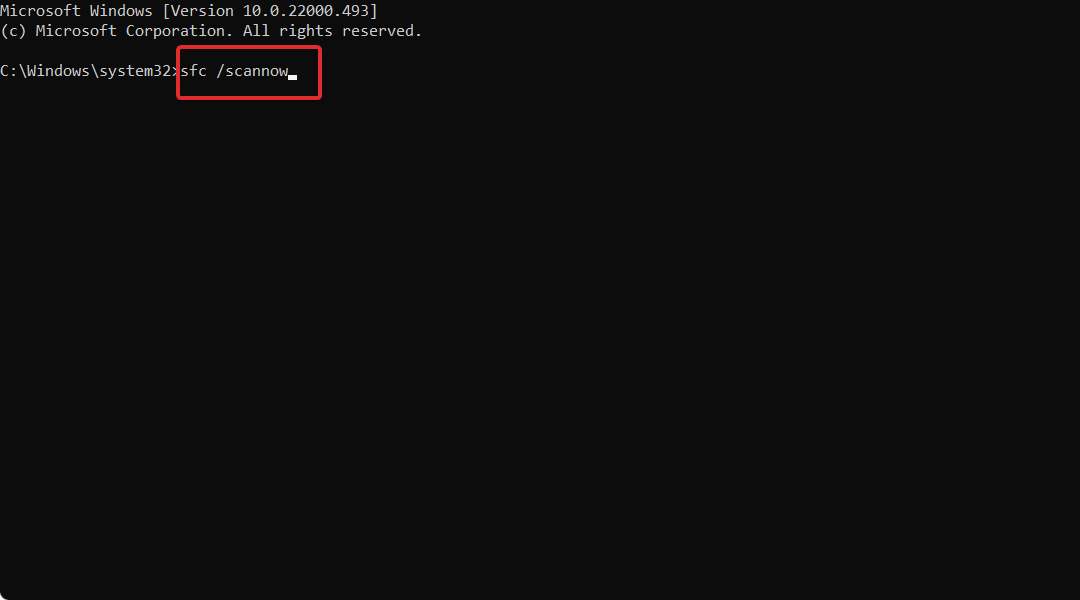
  3. Type the code below and press Enter: reagentc/inforeagent could not find recovery environment the
  4. If it shows Windows RE to be disabled, type the code below and hit Enter: reagentc/enablere status
  5. This will enable the Windows recovery environment.

Enabling the recovery environment with the reagentc.exe tool on CMD is one of the quick ways to fix the could not find the recovery environment, reset this PC error. After running the code, you can check if the recovery feature is now working.

2. Create Windows 10 installation media

2.1. Preliminary requirements for creating a Windows 10 installation media

  • USB stick that has at least 8 GB of space on it.
    Note: Be sure that you do not have any vital data on the USB drive before you use it in this step.
  • Stable internet connection.

2.2. Create a Windows 10 installation media

  1. Insert the blank USB stick into your Windows 10 device.
  2. Download the Media Creation Tool.download media creation tool windows 10
  3. On the pop-up window that appears, select the Save File button.
  4. After downloading, go to the directory where you have saved the executable file.
  5. Right-click or hold tap on the executable file and select the Run as Administrator option.
  6. Follow the on-screen instructions to create your installation media using the USB stick.
  7. After the process has finished, reboot your operating system.
  8. Unplug and plug in the USB again with the Windows 10 Installation media on it.
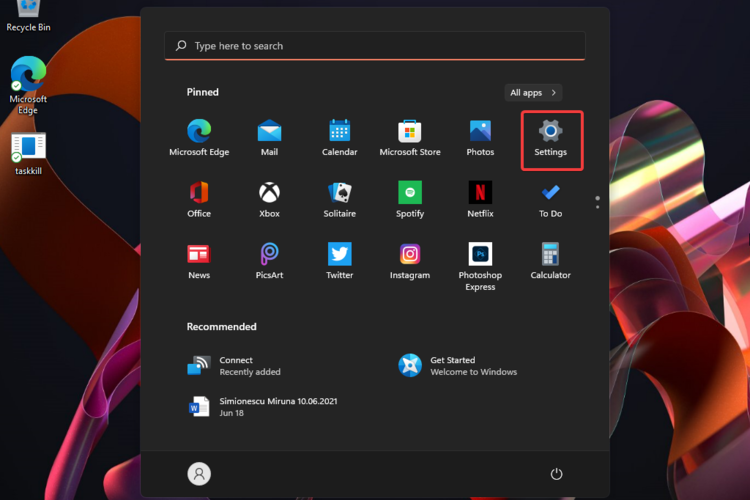
  9. Press the Windows button and select the Settings option.
  10. Select the Update & Security option.
  11. Choose Recovery in the left pane.
  12. Click the Get Started button under the Reset this PC section.
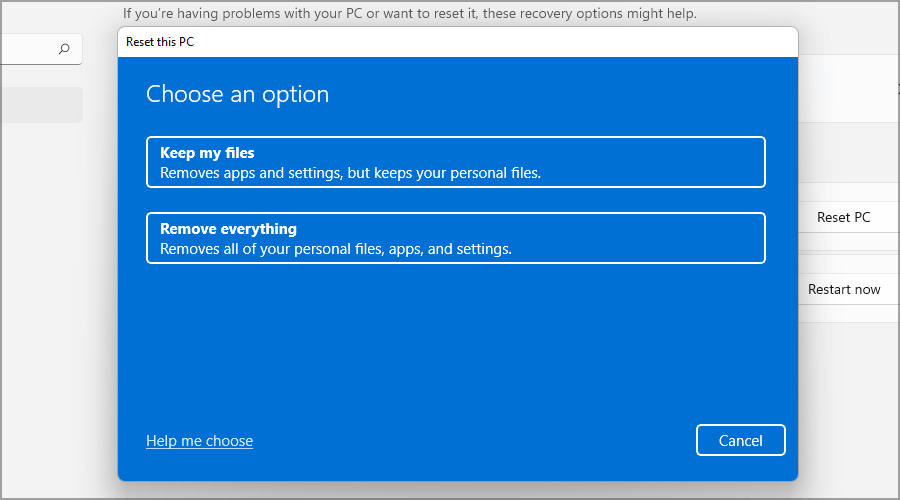
  13. On the next screen, you have to choose whether you want to keep your files or remove all and install Windows 10 fresh.
  14. You should no longer get the Could not find the recovery environment error with the USB stick plugged in.
  15. Follow the on-screen instructions to complete the system refresh.

If you encounter any errors while running the Media Creation Tool, the following troubleshooting guide may help. If nothing happens when you click on Run as administrator, don’t worry. We’ve got the correct fix for you.

If you can’t reset your PC, we’ve got the right solution for you.

3. Use a Restore Point

    If you want to go for a permanent solution that can save your PC from Windows errors, using the restore point can surely help. Thus, carefully use the steps from down below.

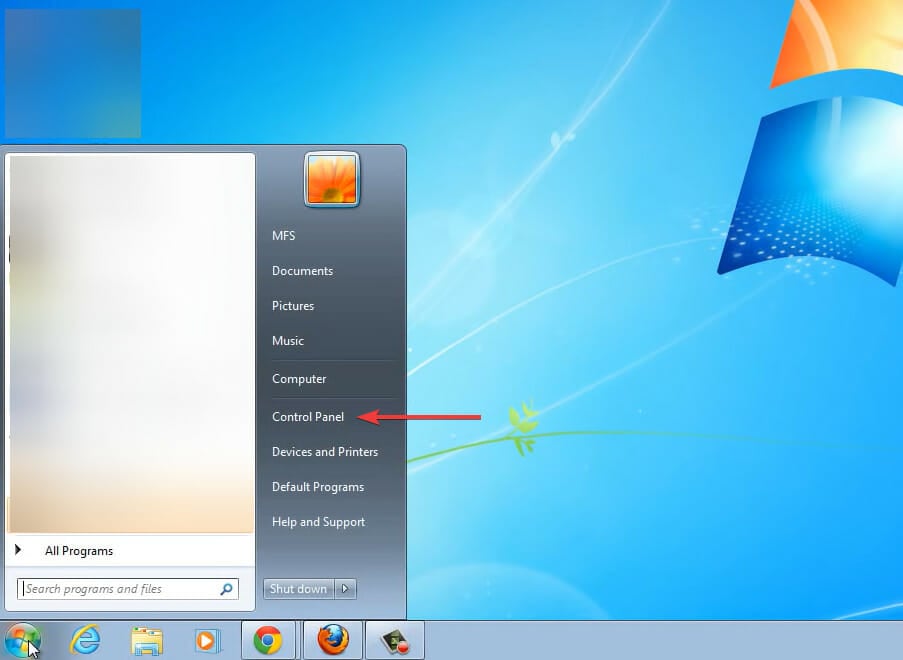
  1. 1. Type control and select Control Panel from the results.
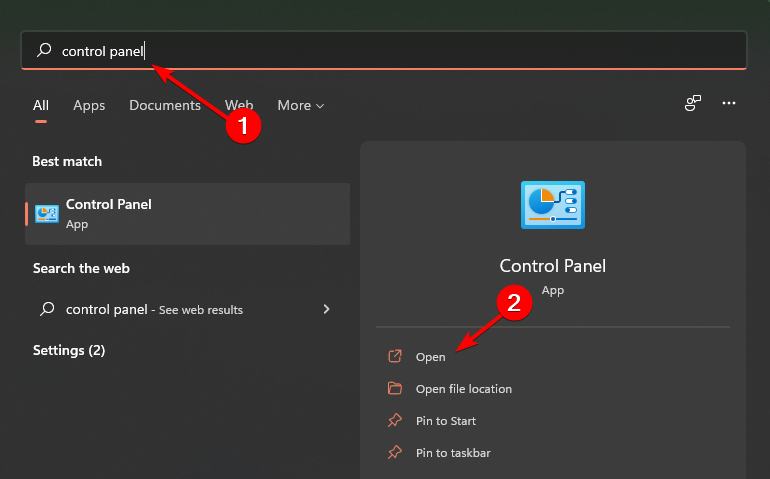
    could-not-find-the-recovery-environment
  2. 2. In the Control Panel search box, type Recovery.

    could-not-find-the-recovery-environment
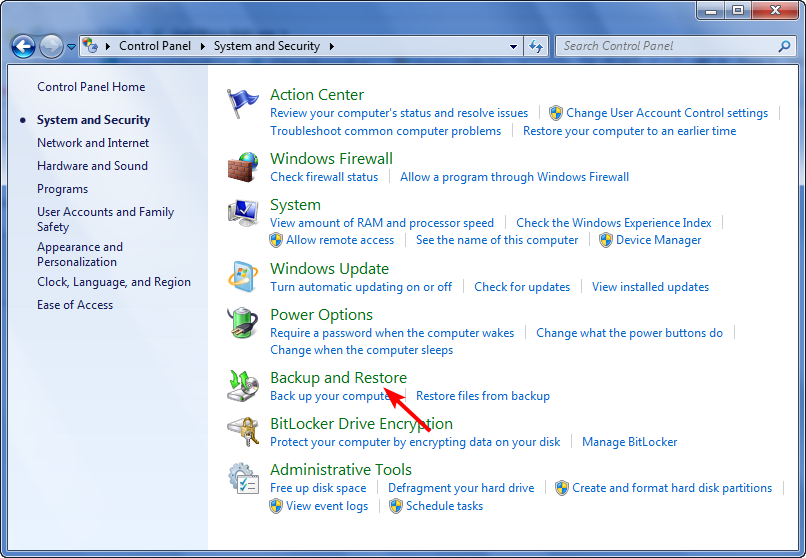
  3. 3. Select Recovery from search results, click on Open System Restore, and click on Next.

    system restore windows 10
  4. 4. Choose the restore point you want to use and select Next and Finish.

  5. 5. Once the process completes, go to Settings, navigate to Recovery, select the Reset this PC option and check if the issue persists.

Can’t open the Control Panel? Take a look at this step-by-step guide to find a solution.

If you’re interested in more info on how to create a restore point and how that would help you, take a look at this simple article to find out everything you need to know.

If the System Restore isn’t working, don’t panic. Check our helpful guide and set things right once again. Using the Restore point can also help you fix issues like Please insert the external storage media and press OK; read this guide to learn more.

If none of the manual options worked, it’s time to install a third-party application that can use System Restore to get your computer back to a previous state before the error.

How do I get to the recovery environment in Windows 11?

  1. Press the Windows key + I to open the Settings app.
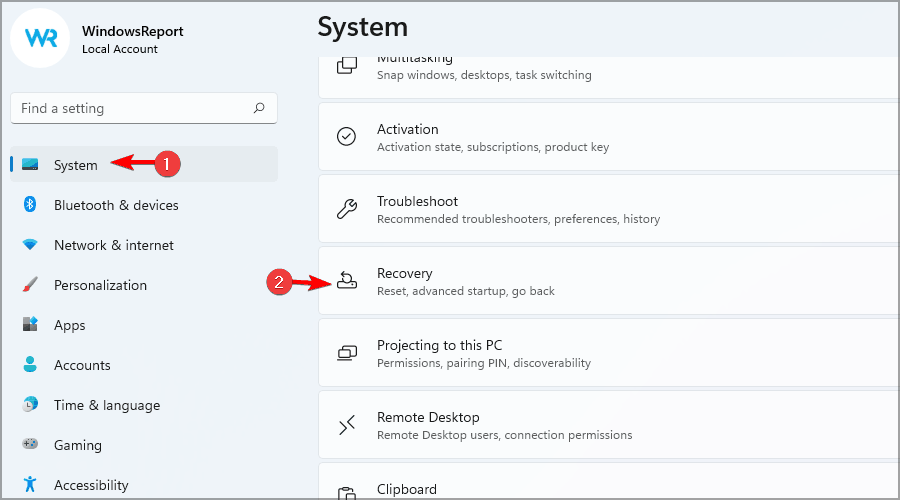
  2. Under the System menu, scroll down on the right pane and click on Recovery.
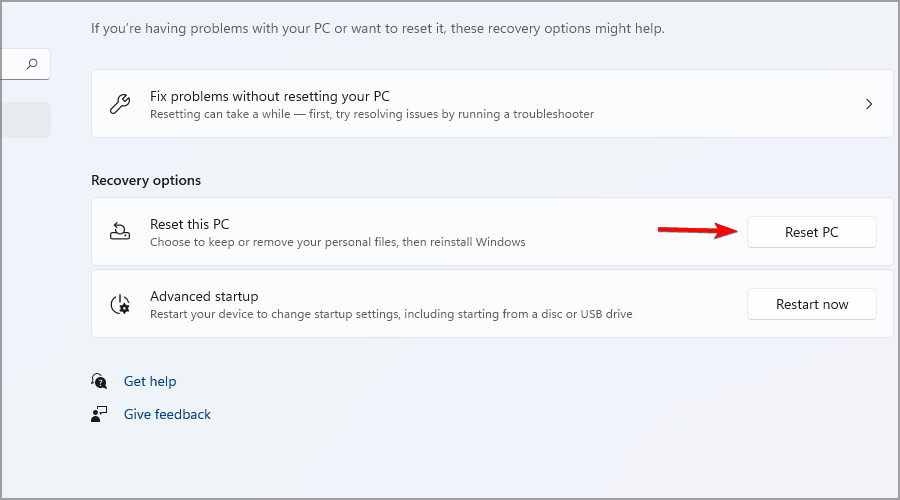
  3. Click on Restart now under the Advanced startup option.

The Windows recovery environment can be found on your PC settings, as shown above. After following the steps, you can decide what to do in the recovery environment.

How do I get to the Windows 10 recovery environment?

The Windows 10 recovery environment is on your PC settings. We have explained the steps in detail earlier in this guide.

So, be sure to check it out and follow the steps carefully.

That’s it. There you have a few easy steps that will not take more than 10 minutes to complete and get your System Reset feature in Windows 10 up and running in no time.

Are you facing other issues like Restore Point not working in Windows 10/11? Then, check our detailed guide to fix it effectively.

If you have additional questions regarding this issue, drop us a line in the comments section below.

How to Increase Ethernet Speed on Windows 10: Best Tricks

Today we’ll walk you through some tried and tested tricks to increase the Ethernet speed on your Windows 10 PC. Now, as a rule of thumb, LAN is faster than WiFi, but there’s always room for improvement.

Below we’ll show you how to increase Ethernet speed on your Windows PC.

How do I speed up my Ethernet connection in Windows 10?

Before we start, power cycle your router/ modem. Also, try using a different port and use a good cable. In our experience, Cat-6 cables are extremely reliable.

If you’re still having trouble, follow the steps below to make Ethernet faster:

1. Update your operating system

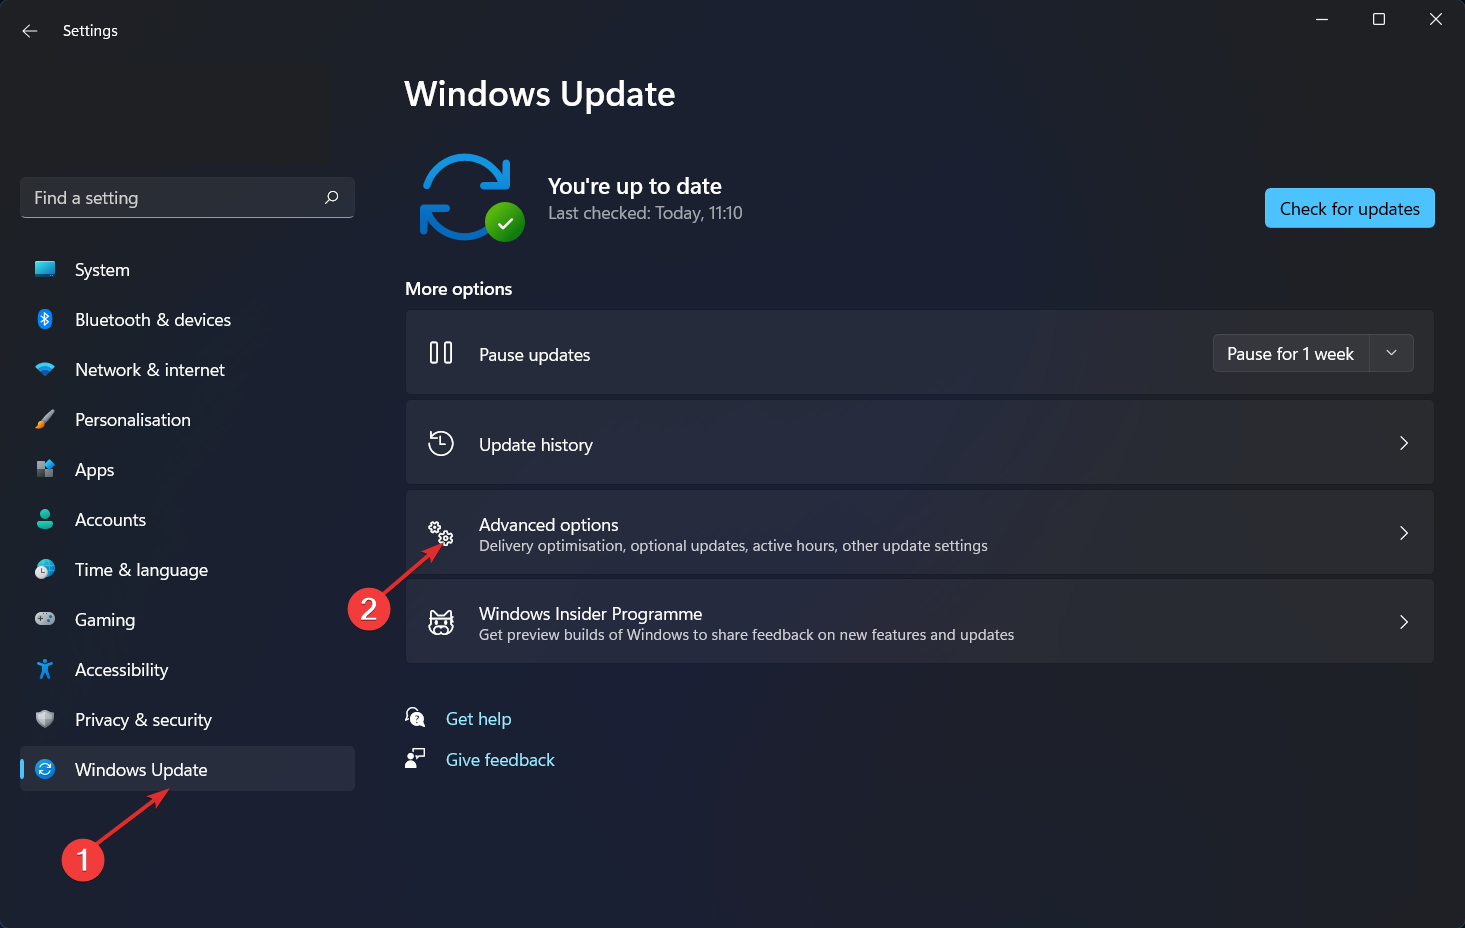
  1. Press Windows + I to open the Settings app, and click on Update & Security.update & security
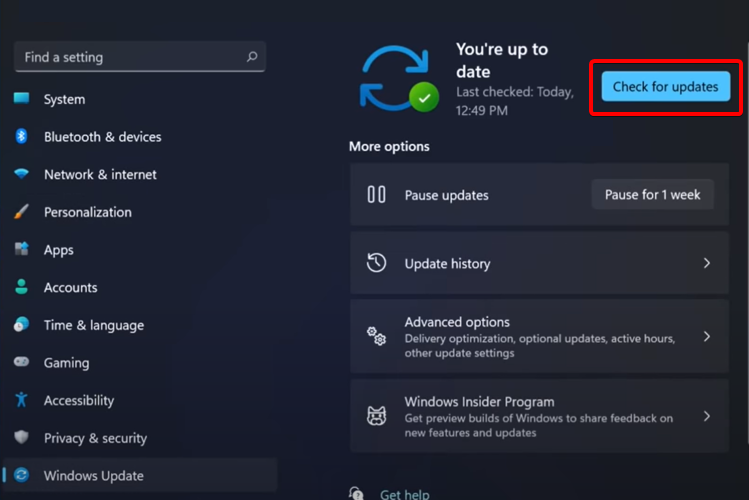
  2. Now click the Check for updates button.check for updates
  3. Windows will now check for available updates and download them automatically in the background.

2. Update your network drivers

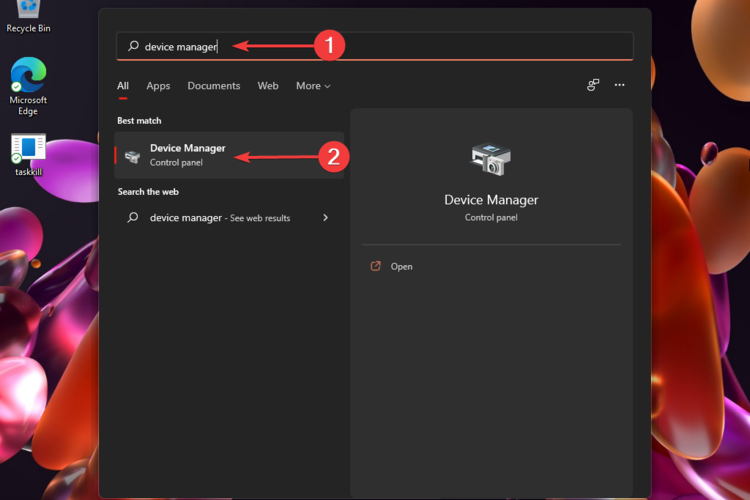
  1. Open Device Manager.
  2. Locate the Network adapters section and expand it.
  3. Select the Ethernet adapter you’re currently connected to.network adapters in device manager
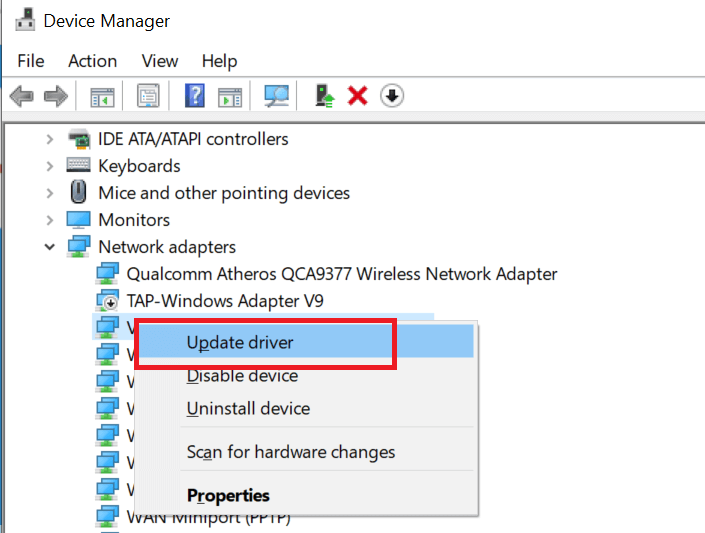
  4. Right-click on it and select Update driver.Update Ethernet driver
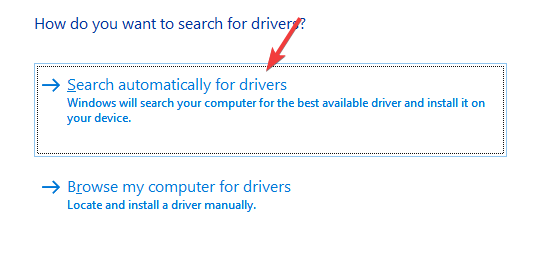
  5. Select Search automatically for drivers and wait for the process to complete.

Alternatively, you can update your drivers by downloading them directly from the manufacturer’s website. However, if you do this, you have to be extra careful not to install a mismatched version.

To avoid that and speed up the process you can use an automated driver updater such as Fortect’s The program will scan your system for outdated, missing, or broken drivers and then fix them.

⇒ Get Fortect Driver Updater

3. Disable or uninstall the VPN/Proxy

    1. Press Windows + I to open the Settings app and navigate to Network & Internet section.
    Network & Internet
  1. 2. Select Proxy in the left pane, and then disable all the options on the right.

    disable proxy to fix slow lan speed windows 10
  2. 3. Restart the PC and your ethernet should be faster now.

The best VPN for your Windows 10 PC should have proven security, a decent number of servers, and a well-established privacy policy

4. Disable Windows Auto-Tuning Feature

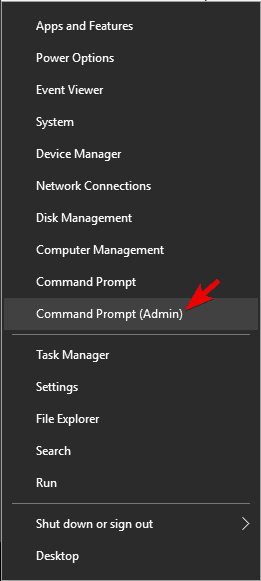
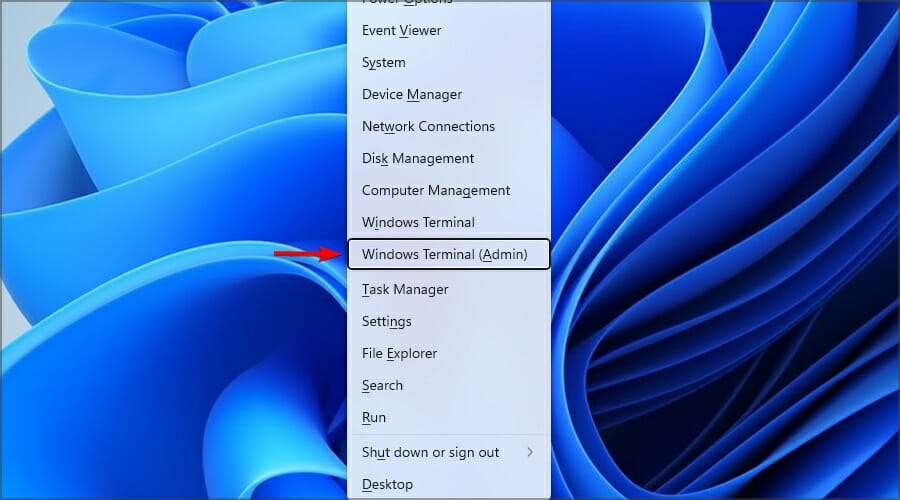
  1. Press Windows + X to open the Power User menu and select Command Prompt (Admin).Slow LAN Netgear router
  2. Click Yes in the UAC prompt.
  3. Now, paste the following command and hit Enter:netsh interface tcp show globalcommand to fix slow lan speed windows 10
  4. Now, look for the Receive Window Auto-Tuning Level feature, and verify if it’s enabled or disabled.enabled or disabled
  5. In case it’s enabled, execute the following command to disable it:netsh int tcp set global autotuninglevel=disableddisable

According to might, you should be able to fix slow LAN speed in Windows 10 simply by disabling the Receive Window Auto-Tuning Level feature. In case this doesn’t work, head to the following method.

5. Disable Large Send Offload (LSO)

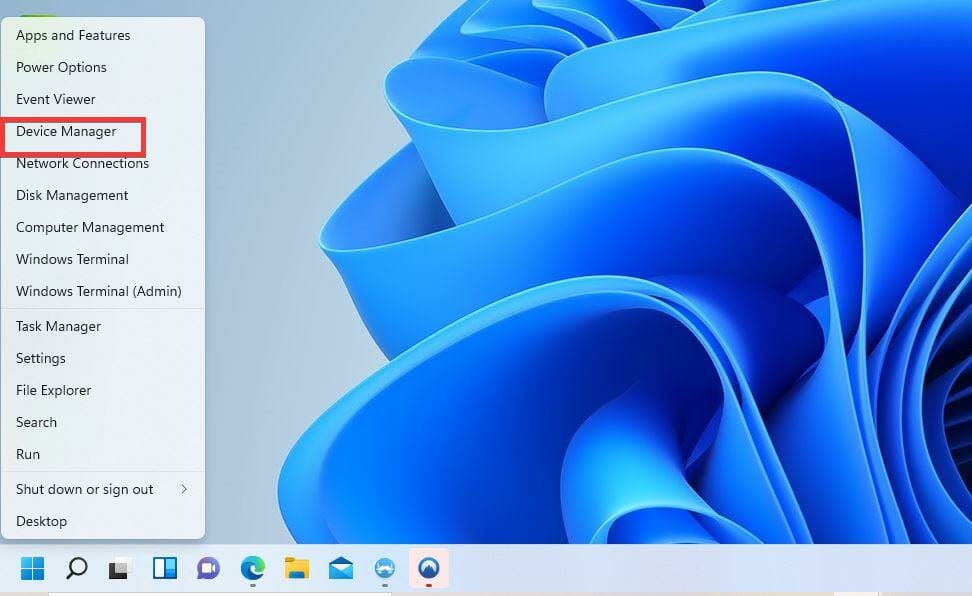
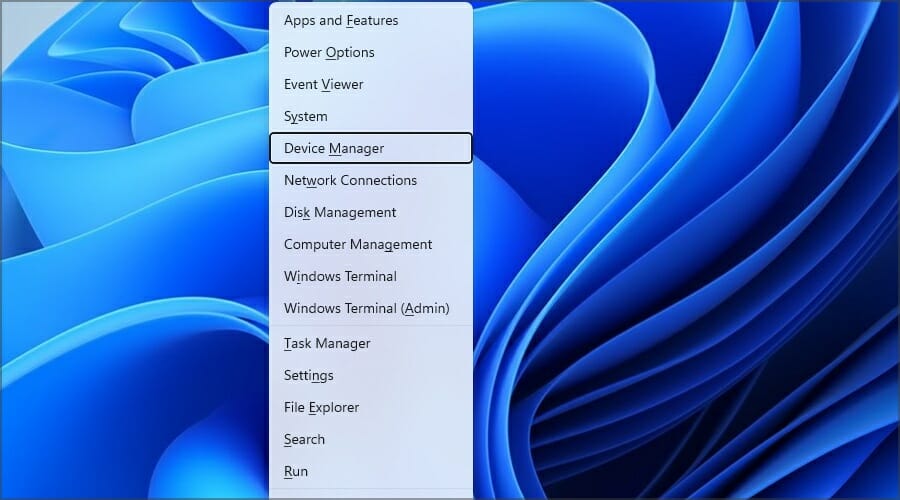
  1. Press Windows + X and choose Device Manager from the list.
    Router slow LAN speed
  2. Double-click to expand the Network adapters entry.network adapters
  3. Right-click on the network card in use and select Properties from the context menu.properties to fix slow lan speed windows 10
  4. Please navigate to the Advanced tab, select Lage Send Offload V2 (IPv4) under Properties, and set it to Disabled.disable to fix slow lan speed windows 10
  5. Similarly, disable Lage Send Offload V2 (IPv6), and then click on OK to save the changes.save changes

6. Change your DNS settings

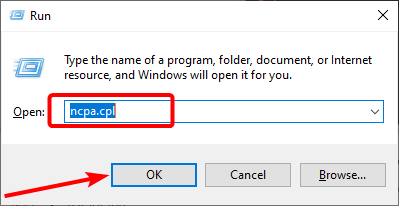
  1. Press Windows + R to open Run, type ncpa.cpl in the text field, and click OK.ncpa.cpl
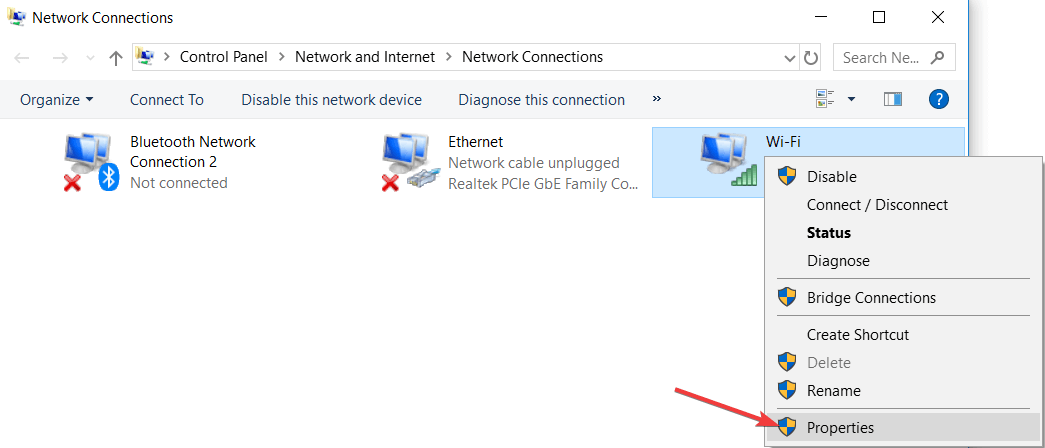
  2. Right-click the Ethernet option and select Properties.ethernet properties
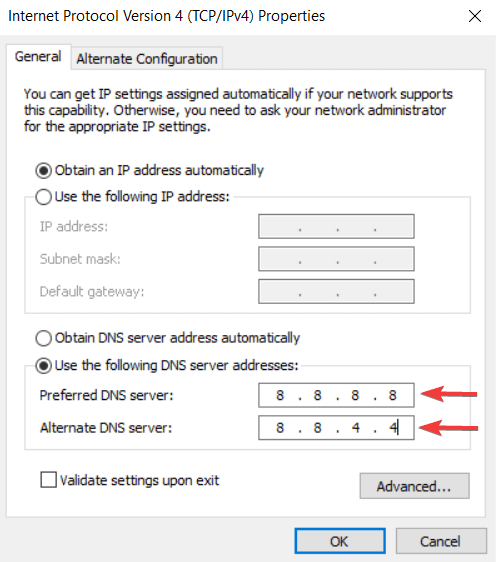
  3. Select Internet Protocol Version 4 (TCP/IPv4) and go to Properties.
    Router slow LAN speed
  4. Select the “Use the following DNS server addresses” option, enter the value provided below in the available fields, and click on OK.
    • Preferred DNS server: 8.8.8.8
    • Alternate DNS server: 8.8.4.4
      Slow LAN speed Windows 7

If you’re getting slow LAN speed in Windows 10, there might be a problem with the DNS. This issue is usually related to your ISP and its DNS, but you can always change your DNS.

You can use Google’s Public DNS addresses 8.8.8.8 and 8.8.4.4, OpenDNS addresses 208.67.222.222 and 208.67.220.220, or other DNS addresses.

Google also offers the following IPv6 public DNS servers: 2001:4860:4860::8888 and 2001:4860:4860::884.

7. Change duplex settings

  1. Press Windows + R to open the Run command, type devmgmt.msc in the text field, and click OK.devmgmt.msc
  2. Expand Network adapters, right-click on the Ethernet/LAN network card, and select Properties.properties to fix slow lan speed windows 10
  3. Navigate to the Advanced tab, click on Speed & Duplex settings under Property, select 100 Mb Full Duplex from the Value dropdown menu, and click OK to save the changes. You can also try the other values here and verify which works in your case.Speed and Duplex

According to users, sometimes you might experience slow LAN speed in Windows 10 due to the duplex settings, and modifying the value should fix it.

8. Disable IPv6

  1. Type View network connections in the Search bar and click on the relevant search result.view network connections
  2. Select your network connection, right-click on it, and choose Properties from the menu.properties
  3. Locate Internet Protocol Version 6 (TCP/IPv6), uncheck the box for it, and click OK to save the changes.disable to fix slow lan speed windows 10

Because IPv6 is a newer IP version, some systems, apps and networks may not be fully compatible with it.

To fix the problem, users recommend disabling the IPv6 feature entirely. After disabling this feature, check if the slow LAN speed in Windows 10 issue is resolved. If not, head to the following method.

9. Enable the QoS feature

Open your router’s configuration page and enable QoS. We must mention that QoS is an advanced feature, so it might require some configuration before you can properly use it.

It’s also worth noting that this feature might not be available on your router. So be sure to check your router’s instruction manual for more information

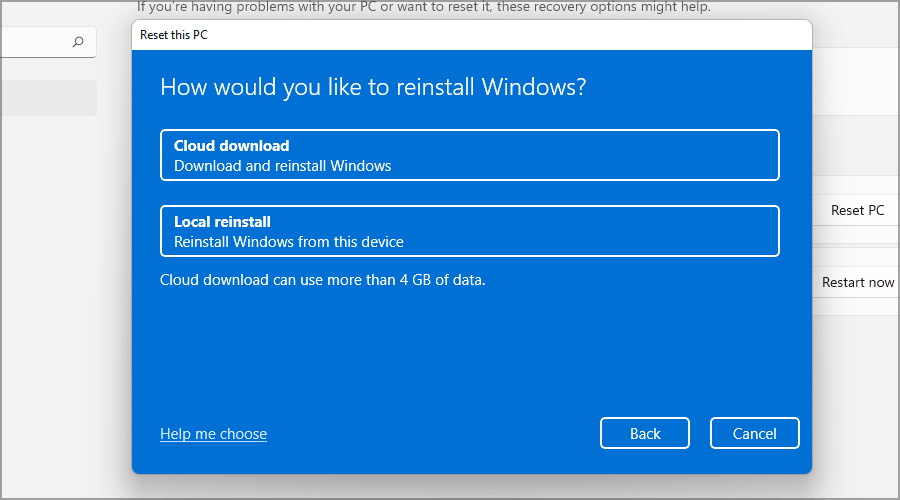
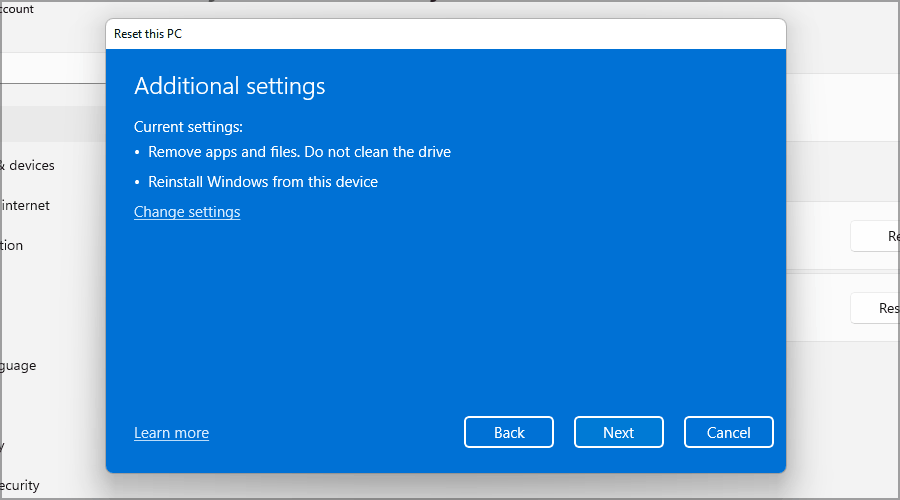
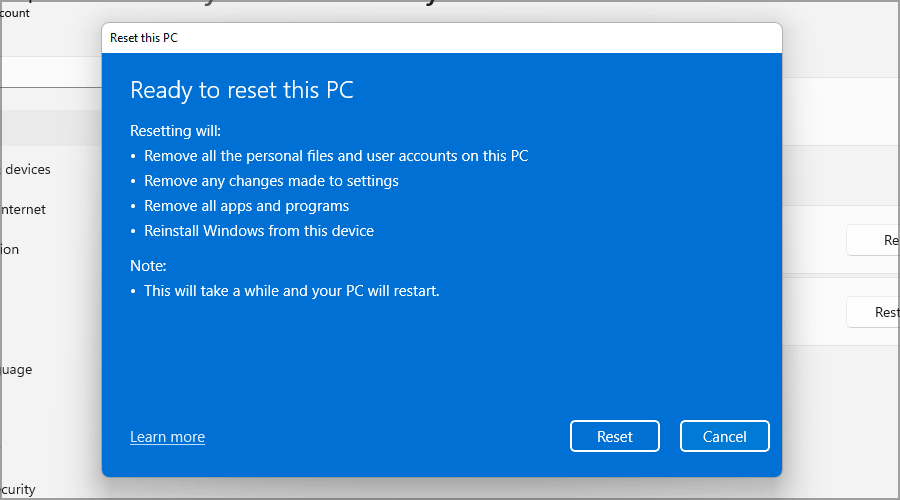
10. Refresh or reset your OS

Refreshing Windows can help you eliminate various issues behind slow LAN speed in Windows 10. The process will take time, but it should work for most.

If it doesn’t, resetting Windows to its factory settings would do the trick, as long as it’s a software-related issue. However, when you reset the OS, all the stored files, installed apps, and configured settings would be lost. So, make sure you try it as a last resort.

Why is my Ethernet speed so slow?

Ethernet is typically slow when the cable or ethernet port on your router/PC is damaged. Out of date network drivers as well as pending updates on your OS may also be at fault.

Besides, configured DNS servers, third-party apps, firewalls, Proxy, and misconfigured network settings likely cause slow LAN speed in Windows 10.

This concludes our guide on how to speed up Ethernet on a Windows 10 PC. Let us know which tips worked best for you. And if you have any questions or additional tips and tricks, feel free to leave a comment.

Your DNS Server Might be Unavailable: 10 Easy Steps to Fix it

Since Windows can fit on any kind of device, especially on portable and touch-based ones, the Internet connection is a must when talking about this new OS developed by Microsoft.

Also, to have access to Microsoft Store and for being able to check your emails, to connect with your friends and coworkers through Skype or social media platforms you must have an internet connection enabled all the time.

So, when dealing with DNS problems, you need to act quickly to restore and troubleshoot your Internet connections, whether we are talking about your router, Wi-Fi adapter, or any other.

Related to your network, a common problem that might be displayed on your device is the following one Your DNS server might be unavailable.

What does it mean when your DNS server might be unavailable?

This alert is telling you that something isn’t working properly and you can’t connect to the Internet until all the issues are being fixed.

It’s possible that the cache in your browser needs to be cleared, or that the router in your network is having some kind of technical issue. The DNS server you’re using might be misbehaving, or perhaps your firewall is the source of the issue.

The reasons that might cause the DNS system error are various, but we will try to address the most common ones by explaining the methods below.

By following the guidelines from this tutorial you will be able to learn how to resolve the Windows Your DNS server might be unavailable error message with ease, so don’t hesitate and check the same.

DNS problems can be serious and they can prevent you from accessing the Internet. Speaking of DNS problems, users reported the following issues:

  • DNS server might be experiencing problems – If this error occurs, be sure to wait for a couple of minutes and try to access Internet again.
  • DNS server might be down – To fix this problem, you might have to temporarily switch to a different DN.
  • Your DNS server might be unavailable Spectrum, Comcast, Verizon Fios – It’s possible that resetting a router will help fix a DNS problem. It is possible that resetting the router would fix the problem because doing so will cause its cache to be updated.
  • DNS server not responding, not available – Sometimes you might get this error message if your DNS server isn’t properly configured; to fix the problem, check your DNS configuration.
  • DNS server timed out, not found, disconnected, keeps disconnecting, could not be found, could not be reached – If you’re getting this error message, your PC might not be able to reach the DNS server.
  • Your DNS server might be unavailable on mobile hotspot, on all devices, Wi-Fi – Using the flush command in Command Prompt is the most efficient way to address the problem of the DNS server not being available.
  • DNS_PROBE_FINISHED_NXDOMAIN – The DNS PROBE FINISHED NXDOMAIN issue manifests itself when a web browser is unable to connect to a website because the domain name system is unable to convert the website’s URL into its associated IP address.

This being said, let’s see how you can fix the DNS server might be unavailable issue in Windows 11 and 10. Follow along!

How do I make my DNS server available?

1. Reset your router

This is the easiest troubleshooting solution to perform when dealing with the DNS server that might be an unavailable error in Windows 10.

In case you are using a router for establishing your network connection, just unplug and reconnect the router cable or press the router reset button.

In this way, if the problem is only minor, you will be able to quickly address the Your DNS server might be an unavailable error.

2. Remove additional security programs

    In case you are using more than one security tool on your Windows device, you might get a DNS alert.

    This is happening due to incompatibility problems and other conflicts between your antivirus and/or antimalware software.

    Therefore, just uninstall the additional security platforms and keep just one antivirus program on your device.

    1. Click the Start button, type security, and select Windows Security from the results.
    virus-and-threat-protection-w10
  1. 2. Choose Virus & threat protection.

    virus-and-threat-protection-w10
  2. 3. If you don’t have a third-party antivirus, you should be able to flick the Windows Defender protection off from here but if you do, then click on Open app to get to your antivirus.

    open-app-antivirus
  3. 4. Go through the Protection or Security menus of your antivirus to disable it.

Several users reported that Avast antivirus caused this problem on their PC, so if you’re using Avast, be sure to remove it and check if that solves the problem.

If you discover that this issue was caused by your antivirus, maybe it’s time to look at our list of the best antiviruses for Windows and get a better one.

3. Run the Internet Connections and Network Adapter troubleshooters

  1. Click the Start button and open Settings.
  2. Select Update & Security.
  3. Click on Troubleshoot from the left pane, then choose Additional troubleshooters from the right.
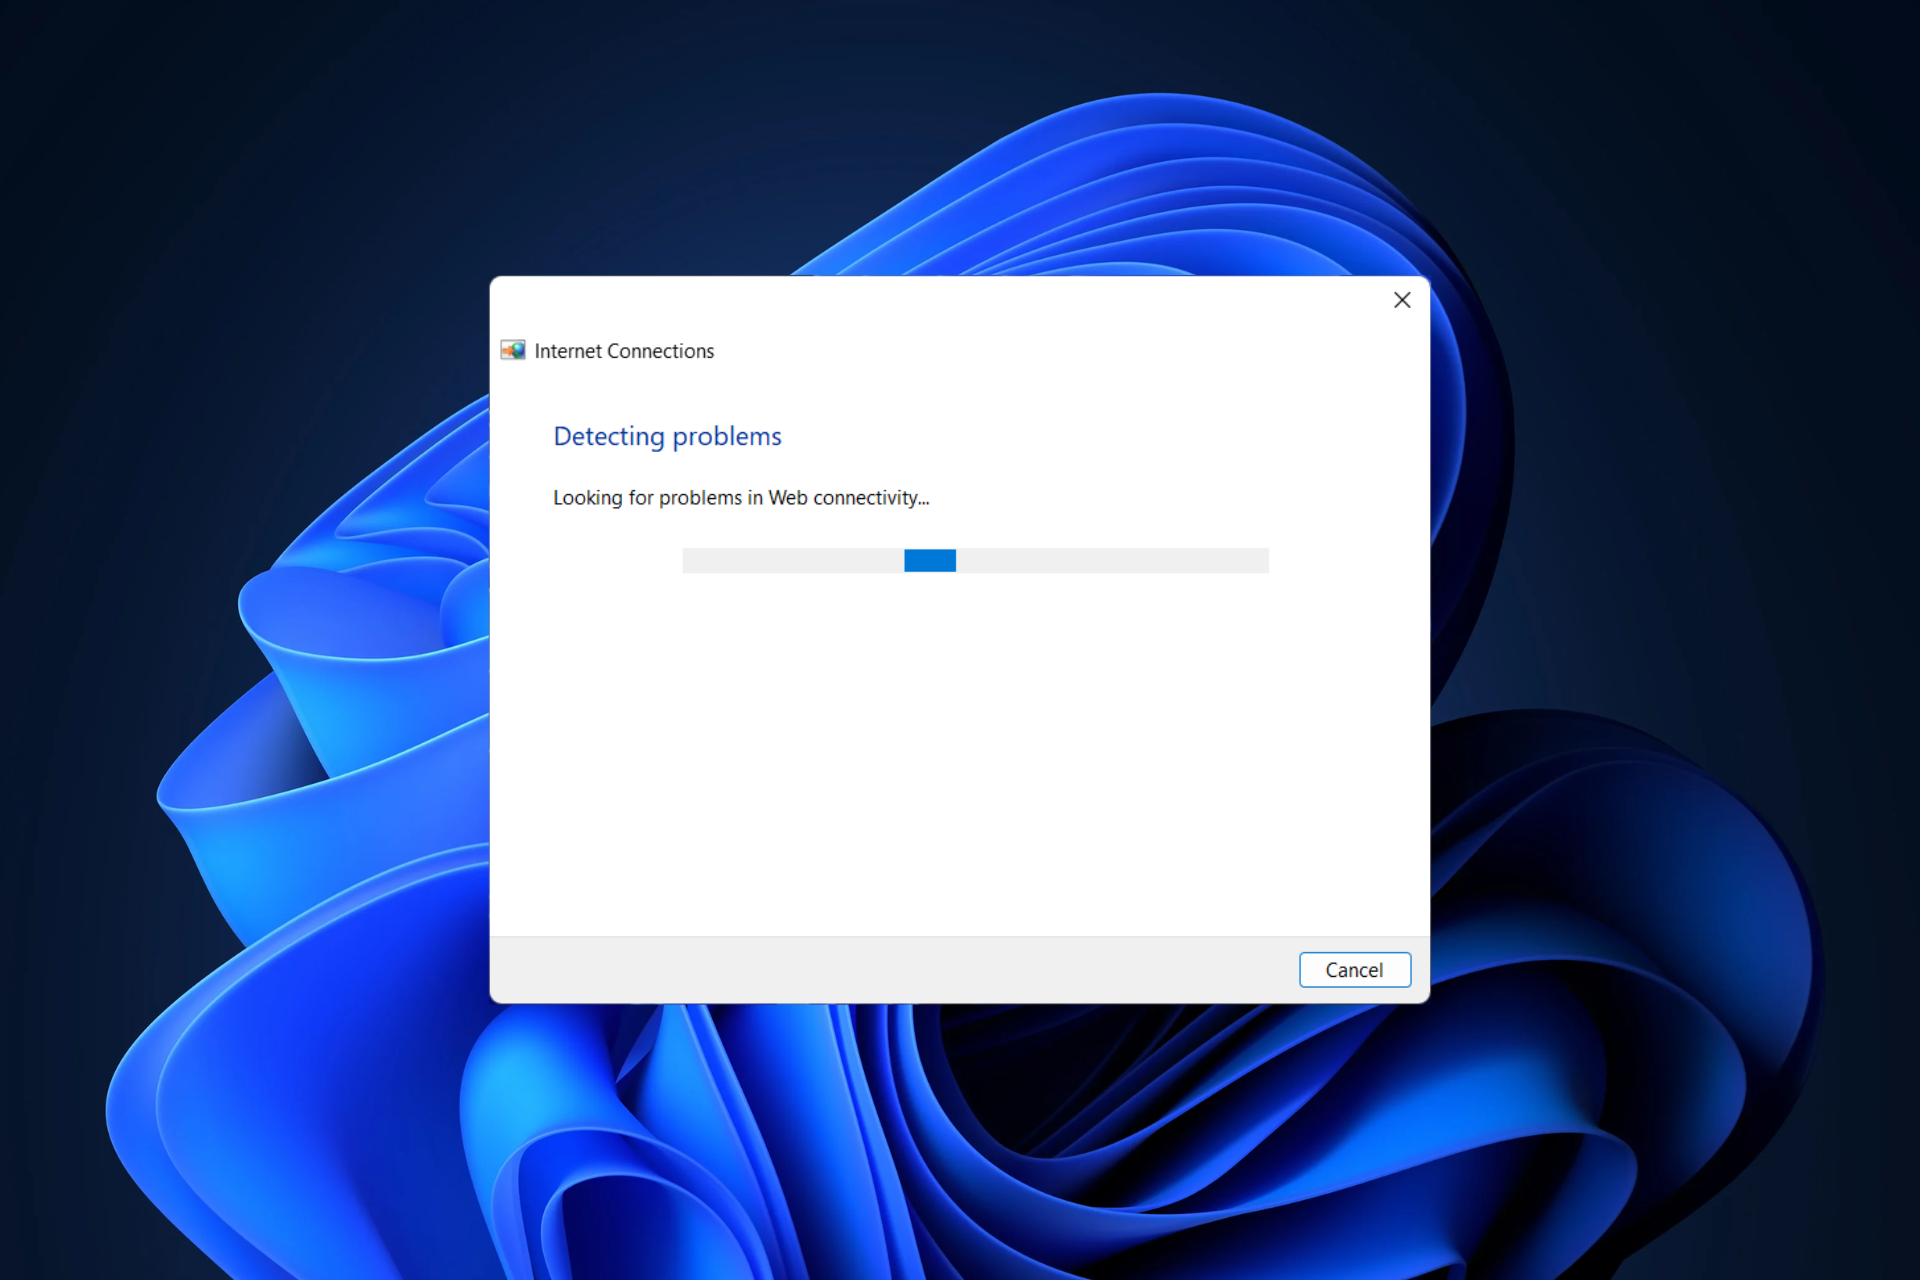
  4. Select the Internet Connections option to expand it, then hit the Run the troubleshooter button.
  5. Go on with the steps to clear any possible issue with the Internet connection.
  6. If this still didn’t fix the problem do the same to start the Network Adapter troubleshooter from the Additional troubleshooters list.

Each Windows system features an inbuilt network troubleshooter. By running the same you will be able to find the cause of your DNS problem and address the issue.

The Internet Connections and Network Adapter troubleshooters are perfect for newbies and for those who don’t know how to manually fix a system problem.

4. Update the Network adapter driver

  1. Right-click the Start button and select Device Manager.
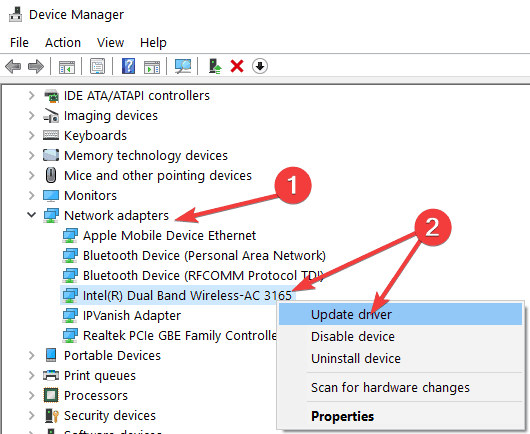
  2. Click on the Network adapters, locate the Wi-Fi adapter, right-click on it and select Update driver. update network adapter driver
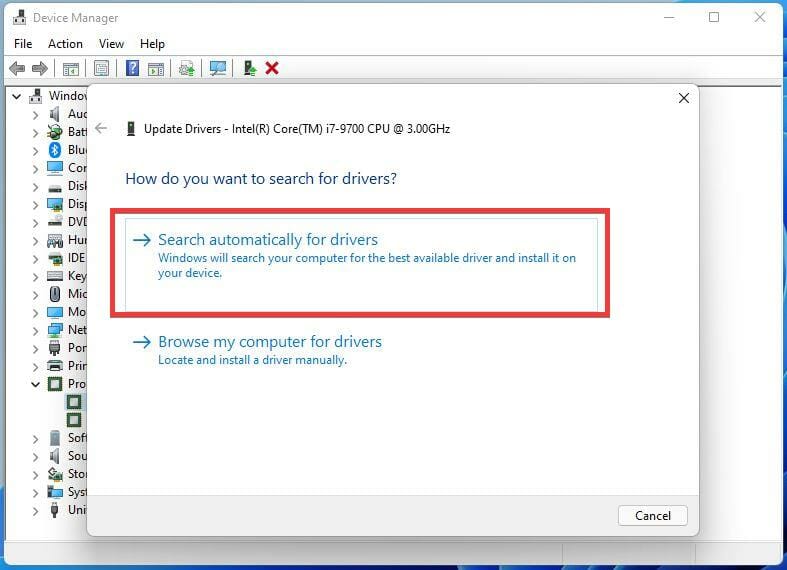
  3. Now select the first option, Search automatically for drivers. search for graphics drivers
  4. If the system finds a new driver it will install it and you will be prompted to restart your PC.

4.1 Update drivers automatically

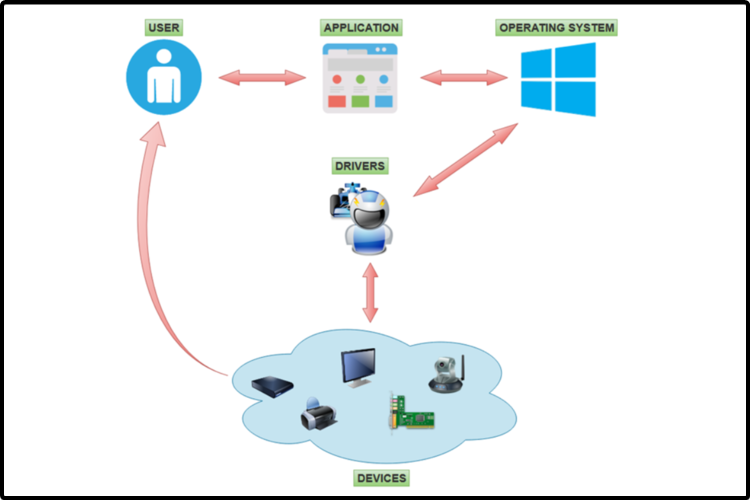
A computer cannot control video cards, computer applications, sound cards, or wireless connections; they must be managed by a driver. You may manually update drivers if you are completely familiar with the drivers your PC requires for network adapters.

The best alternative is to use a driver updater application like Outbyte Driver Updater, which searches deeper into the system for the best match for your PC.

This solution has a large daily-updated driver database, so it will propose the most recent drivers available after scanning your system. In addition, you will receive a completely thorough report detailing the precise state of your Windows 10’s missing, damaged, or obsolete drivers.

Outbyte Driver Updater

Keep your drivers up to date, regardless if you encounter errors, for the health of your PC.
Free trial Download now

5. Flush the DNS

  1. Click on the Start button, type cmd, and select Run as administrator from the results.
  2. Then, on the Command Prompt window enter the following commands and press Enter after each one:ipconfig /flushdns
    ipconfig /release
    ipconfig /renew

This way, you will be able to request a new IP address from your ISP server and this might just resolve your network issue.

6. Reset the TCP/IP

  1. Hit the Start button, then type cmd, and select Run as administrator from the list in the results.
  2. When Command Prompt opens, type the following command, and press Enter to run it: netsh int ip reset

If you’re getting Your DNS Server Might be Unavailable message frequently, you might be able to solve the problem simply by using the netsh command.

After the command is executed, check if the problem still appears. If you stumble into problems, here’s what to do if you can’t run Command Prompt as admin.

7. Enter the IP address manually

  1. Press Windows + R and enter ncpa.cpl, then press Enter or click OK.
  2. Locate your network connection, right-click it, and choose Properties.
  3. When the Properties window opens, select Internet Protocol Version 4 (TCP/IPv4), and click the Properties button.
  4. In the General tab, select Use the following IP address option. Enter the desired IP address, Subnet mask, Default gateway, Preferred DNS server, and Alternate DNS server. Once you’re done, click on OK. If you don’t know the correct values to enter, you can check the network configuration on another device on your network.

Sometimes, the Your DNS Server Might be Unavailable error message might appear if your IP address isn’t set manually. After doing that, the problem should be resolved and you should be able to access the Internet.

8. Make sure that DNS is automatically obtained

  1. Press Windows + R and type ncpa.cpl, then hit Enter or click OK.
  2. Right-click your network connection and choose Properties.
  3. Now, select Internet Protocol Version 4 (TCP/IPv4) and click on Properties.
  4. Select Obtain DNS server address automatically and click OK.
  5. Now select Internet Protocol Version 6 (TCP/IPv6) and click on Properties.
  6. Select Obtain DNS server address automatically and click OK button to save changes.

9. Use OpenDNS or Google’s DNS

  1. Press Windows + R, type ncpa.cpl in the window, then press Enter or click OK.
  2. Right-click your active network connection and select Properties.
  3. Next, highlight Internet Protocol Version 4 (TCP/IPv4) and click on Properties.
  4. Select Use the following DNS server addresses. Now enter 8.8.8.8 as Preferred DNS server and 8.8.4.4 as Alternate DNS server. Alternatively, you can use 208.67.222.123 and 208.67.220.123 instead. Now click OK to save the changes.

If you’re getting Your DNS Server Might be Unavailable message, you might be able to fix it simply by setting your DNS manually.

10. Check if your PC is properly connected

Sometimes, the Your DNS Server Might be Unavailable message can appear if your computer isn’t properly connected to your modem or router.

A few of our readers reported that this error occurred because their PC was connected directly to the modem instead of the router.

If you use both modem and router, be sure to check if your PC is properly connected. Of course, you should also check the cables for any damage and try to replace them.

How do I fix Your DNS server might be unavailable errors in Windows 11?

Even though the new Windows 11 has a new design and some improved features, it doesn’t mean that it’s immune to such issues as the Your DNS server might be unavailable error.

As it’s a common problem in Windows 10, it’s no surprise that you also encountered it in the latest iteration.

Luckily, Windows 11 still has a lot of the menus and functionalities from the previous OS so all the solutions we provided above can apply to the new one.

The menus have rounded corners and a slightly different design but the contents are the same, especially the networking part.

The only notable difference is that in solution 2 you have to click on Manage settings from the Virus & threat protection settings to turn off Windows Defender.

Your DNS Server Might be Unavailable is a common problem that can occur on almost any PC, but we hope that you managed to fix it by using one of our solutions.

You also might be interested in reading our guide on what to do if your PC isn’t connected to the Internet because it might offer additional useful solutions.

If you know other methods that can be used in the same matter, don’t hesitate and share the same with us – just use the comments field from below.

Of course, we will update this tutorial accordingly and we will assist you as soon as possible.

6 Fixes to Try if Outlook Keeps Crashing on Windows 11

There are so many Windows 11 updates available that it’s nearly impossible to keep track of them all at the same time. Today, we’ll take a closer look at several changes that have a significant influence on the Outlook Mail operation.

If you start the Outlook Mail app and it crashes due to a memory or other problem, you should be aware that this is a widespread issue that affects many people.

Other of our readers reported that Outlook hangs, freezes or it’s not responding in Windows 11.

There were even some who reported that Outlook crashes when replying to emails.

Why does my Outlook keep crashing?

It might be the case that Outlook is crashing after a Windows Update. In this case, a rollback of the latest update might be the right choice.

With the help of its Windows Update mechanism, Microsoft was able to resolve the issue. Because there is no hotfix available, all you need to do is ensure that you are running the most recent version of your Windows 11 operating system in order for this repair to take effect.

If, however, you have installed the latest update and it still doesn’t work, let us see a few other workarounds that you can use to prevent Outlook from crashing on startup.

Our guide will address all these Windows 11 Outlook issues.

 How do I fix Outlook crashing in Windows 11?

Is Outlook compatible with Windows 11?

The short answer is yes. Outlook is fully compatible with Windows 11, especially Outlook 2016.

1. Disable add-ins

  1. Exit the Microsoft Outlook app, then launch Run by pressing the Windows key + R on your keyboard and type in Outlook/safe and click the OK button.
    outlooksafe-run  windows 11 outlook crashing
  2. Now, go to the File section, followed by Options, and click on the Add-Ins button.
  3. Select the COM Add-ins option and click on the Go button.
  4. Click OK to clear all the checkboxes and restart Outlook.

It is possible that add-ins will cause your Outlook service to act in an unexpected way at times. Disabling add-ins may assist you in resolving this issue more quickly.

2. Repair Office

    Let the Repair process complete, then proceed with a computer reboot to apply the changes made. Restart Outlook to see whether its functionality has been restored.

    1. Press the Windows key + I to open the Settings app then go to Apps, followed by Apps & features.
    apps-apps-and-feature windows 11 outlook crashing
  1. 2. Once you are inside the Apps & features window,search for Office in the search bar then click on the three dot menu next to it followed by Advanced options.

    office-advanced-option windows 11 outlook crashing
  2. 3. Scroll down until you find the Reset section, then click on the Repair button.

    repair-app windows 11 outlook crashing

3. Reset the app

  1. Press the Windows key + I to open the Settings window and click on Apps followed by Apps & features.
    apps-apps-and-feature windows 11 skype crashing
  2. Within the Apps & features box, seek for the Office application by typing its name into the search area and selecting it from the three-dot menu, then selecting Advanced settings.office-advanced-option  windows 11 outlook crashing
  3. Scroll down until you reach the Reset area, and then click on the Reset button to restart the process.reset-app windows 11 skype crashing

When you reinstall Office, all of the data that you have previously saved to the application will be deleted. Consequently, before commencing the process of resetting your smartphone, we strongly recommend that you create a backup of any important data stored on your device.

4. Run the Windows troubleshooter

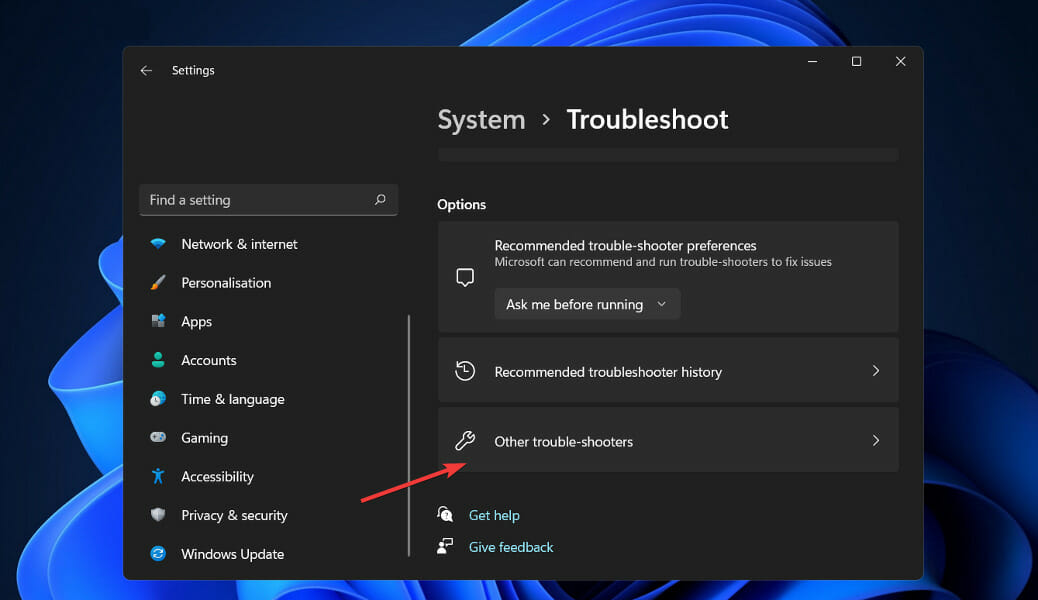
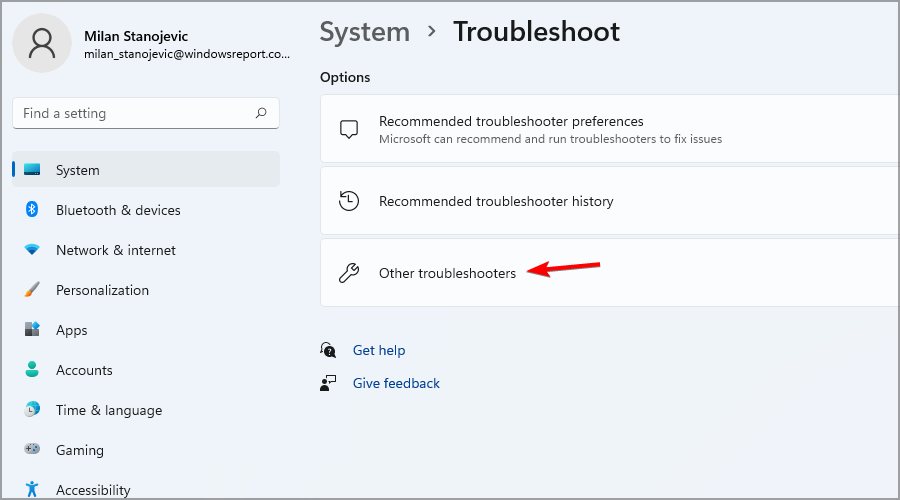
  1. Press the Windows key + I to open the Settings app, and navigate to System in the left panel followed by Troubleshoot from the right side.
    troubleshoot-menu windows 11 skype crashing
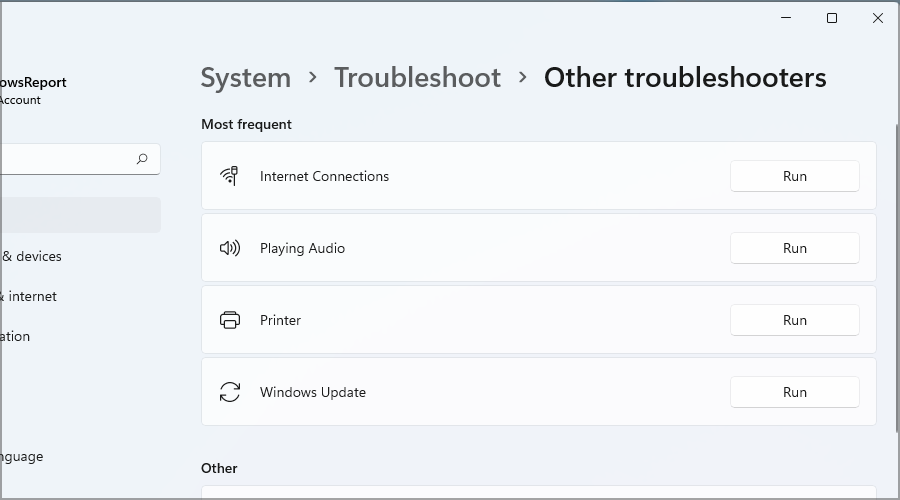
  2. Once you have entered the Troubleshoot menu, select the Other troubleshooters option from the drop-down menu.other-troubleshooters-option windows 11 skype crashing
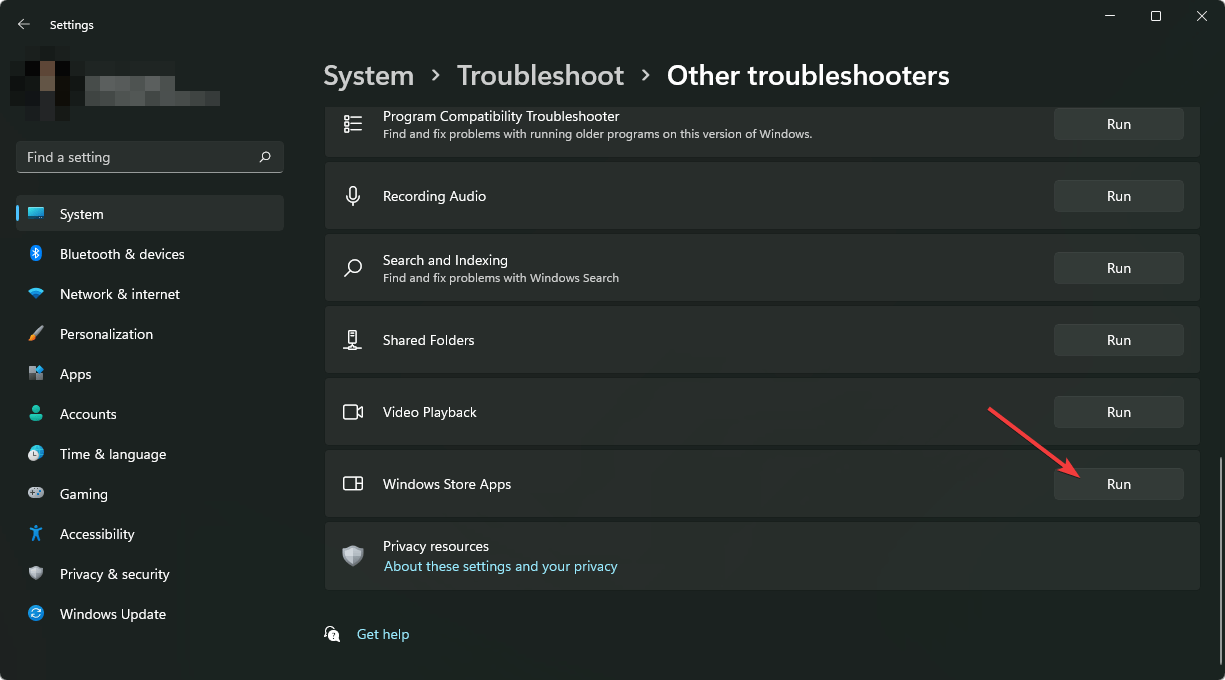
  3. Now, scroll down until you come across the Windows Store Apps troubleshooter, and click the Run button next to it to start the process.windows-store-app-run windows 11 skype crashing

Upon completion of the troubleshooting process, the troubleshooting tool will identify the precise bug that has occurred, as well as provide guidance on how to resolve the bug. It is crucial that you adhere to the directions provided exactly as they are laid out in the written form.

5. Reinstall Office

  1. Press the Windows key + I to open the Settings window and click on Apps followed by Apps & features.apps-apps-and-feature  windows 11 outlook crashing
  2. Once you’re inside the Apps & features window, search for the Office app by typing it in the search bar and click on the three-dot menu, followed by the Uninstall button.uninstall-office  windows 11 outlook crashing

Now go back to your browser and search for the Office application, which you should then download and run according to the instructions that are shown to you.

6. Try another email client

If the Outlook application keeps crashing and nothing seems to resolve it, then it might be a good idea to consider a more stable email software.

For instance, Mailbird is the go-to email option in terms of efficiency and integration with other apps you’re using.

You can sync all the emails from multiple accounts in one inbox and manage all your work from one place.

Plus, customize your layout how you prefer on this platform and integrate platforms like Dropbox, Todoist, and Google Calendar.

⇒ Get Mailbird 

How do you reset Outlook?

  1. Click the Start button, type control panel, and open the app from the results.
  2. Hit the View by button and choose Small icons from the drop-down menu.
  3. Select the Mail option which should also feature Microsoft Outlook.
  4. Click on the Show Profiles button.
  5. In the next window, click on Add to add a new profile.
  6. Enter a name for the profile and click OK.
  7. Now, instead of completing the form, click on Cancel.
  8. In the next pop-up window, click on OK.
  9. Select the drop-down menu and select the profile you have just created.
  10. Now close Control Panel.
  11. After you configure the profile settings, Microsoft Outlook will go to factory settings and start fresh.

For more information on the Microsoft app bundle, check out our article on compatibility and other tips for Office on Windows 11.

Aside from that, you’ll definitely want to take a look at the new design of the Office applications for Windows 11 and update the apps to enjoy a new style.

Alternatively, if you continue to experience difficulties with the Outlook application, see our guide on how to solve Outlook crashes on Windows 10 for more solutions that are applicable in the latest OS as well.

Let us know in the comments below which solution worked best for you as well as how often you use Microsoft Outlook over Gmail. Thanks for reading!

Fix LiveKernelEvent 141 Hardware Error with 7 Tested Methods

If you recently experienced the LiveKernelEvent 141 error on your Windows 10 device, you are in the right place.

In this article, we will review why this malfunction can occur in the first place and try to fix it by using dedicated troubleshooting solutions.

What is LiveKernelEvent 141?

Right from the start, you need to know that the Live kernel event 141 error is a hardware error triggered by the failure of a PC component.

However, luckily, it can also happen due to corrupted drivers or because of specific third-party software.

LiveKernelEvent 141 is often caused by overclocking, RAM, NVIDIA, or ATI GPUs, but our readers have also encountered the problem while gaming, especially in Warzone.

What causes Live Kernel Event?

The LikeKernelEvent is a widespread hardware error that has a lot of other forms depending on the manifestation and the affected component.

That’s why we thought it’s essential to let you know about the most common such issues and that most of them can be fixed by using the solutions below.

  • LiveKernelEvent 117 – This problem usually happens due to the nvlddmkm.sys Nvidia video driver failure.
  • Problem event name: LiveKernelEvent code: 141, LiveKernelEvent 141 hardware error, LiveKernelEvent 193, 124 – The issue is mostly caused by faulty or corrupt drivers but our solutions below will help you fix it.
  • LiveKernelEvent 1A1 – If you get this error, the culprit is the PSU, so here’s how to fix PSU errors in Windows.
  • LiveKernelEvent 1A8 – The issue might be caused by the Intel Wireless driver, and it often occurs on HP laptops, so reinstalling the driver should fix it.
  • LiveKernelEvent 1B8 – Overclocking and the XMP profiles might be the likely source of the problem

Anyway, with the right solutions, you can address this hardware error 141, as well as the above ones, by using the steps below.

How do I fix the LiveKernelEvent 141 error?

1. Check your memory

  1. Click the Start button, type memory and click Run as administrator to start Windows Memory Diagnostic with full privileges.
  2. Now, click on the first option, Restart now and check for problems.
  3. After the restart, the system will run a diagnostic on your RAM modules and find any possible problems. Unfortunately, you will have to replace the damaged module(s) if it does.

One or more RAM modules can be responsible for the Windows hardware error code 141.

If you recently experienced the LiveKernelEvent code 141 error on your Windows device. The first step would be to check the integrity of the memory by using the Windows Memory Diagnostic tool, as shown above. This also helps with LiveKernelEvent Code 1a1.

Should you discover that the RAM works fine, you might still try one of the best RAM cleaners and optimizers that will help you get a faster Windows 10 PC and avoid future LiveKernelEvent hardware errors.

2. Run DISM and SFC scans

    It’s very likley to resolve LiveKernelEvent error code using the detailed steps in the Command Prompt app that helps you detect and remove corrupted files or unwanted programs from your OS.

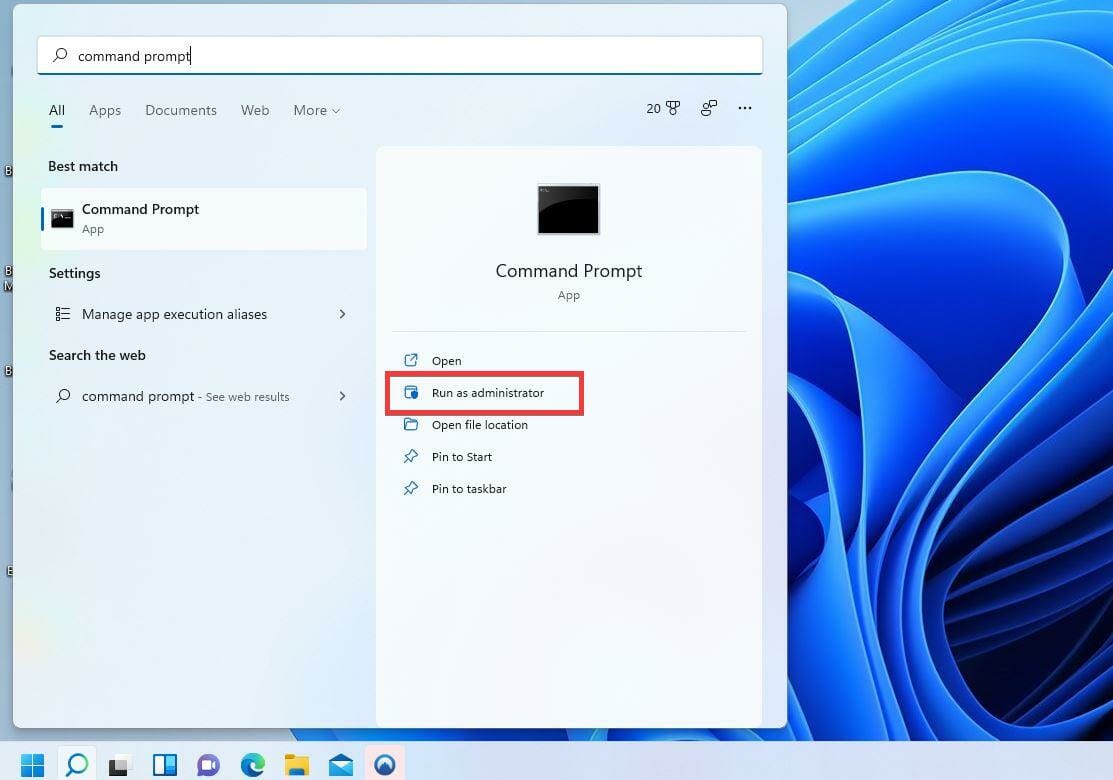
    1. Click the Start button, type cmd, and select Run as administrator to open Command Prompt with full privileges.
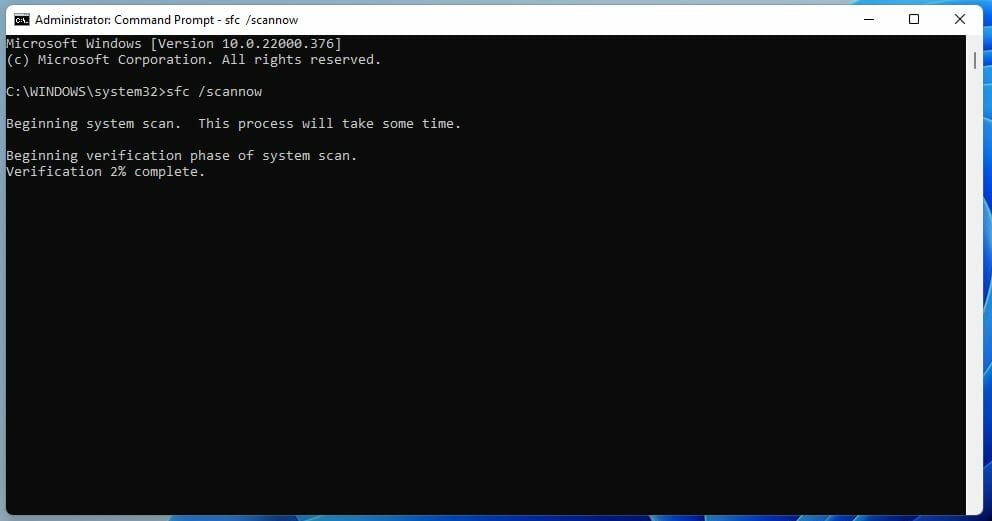
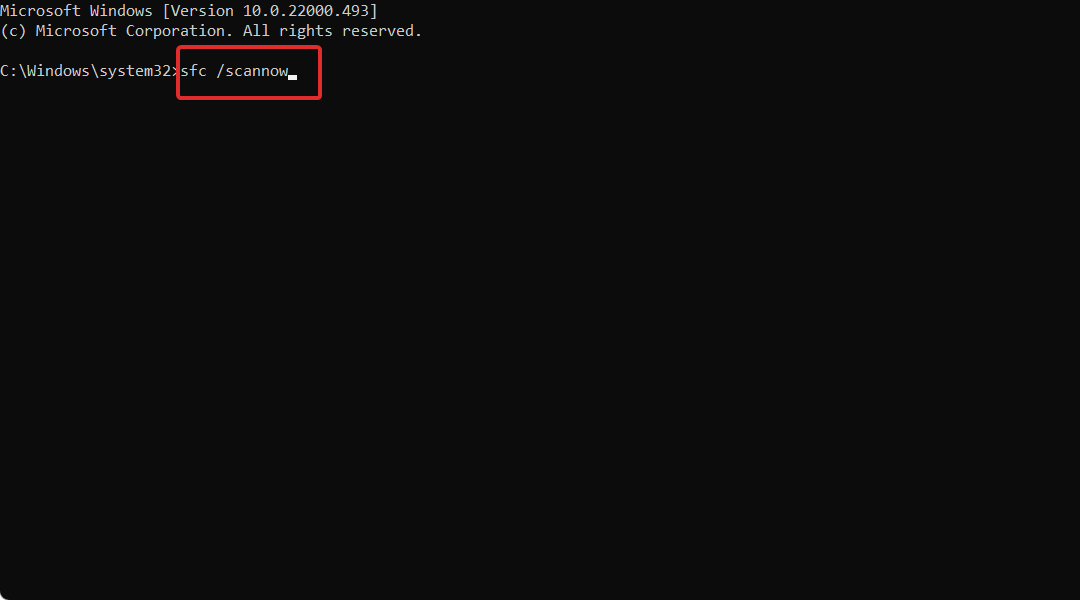
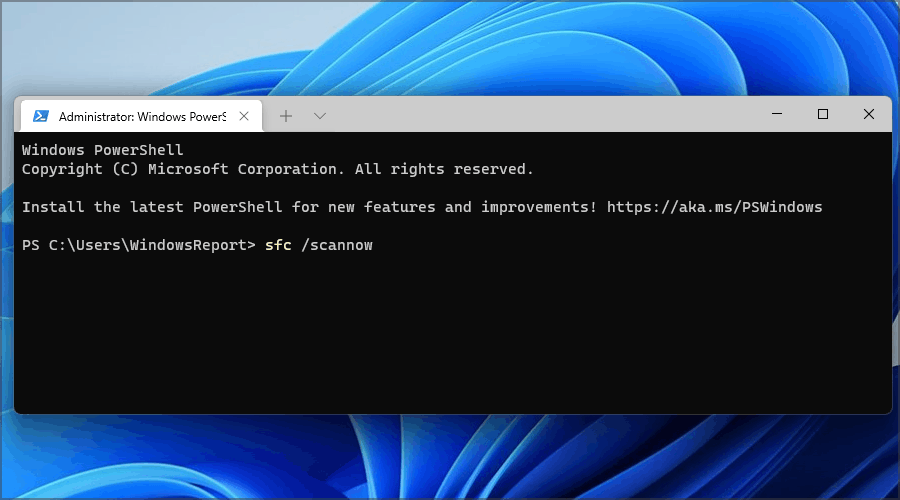
  1. 2. In the command-line, type the following command, and hit Enter:  sfc/scannow

    sfc-scannow-w10
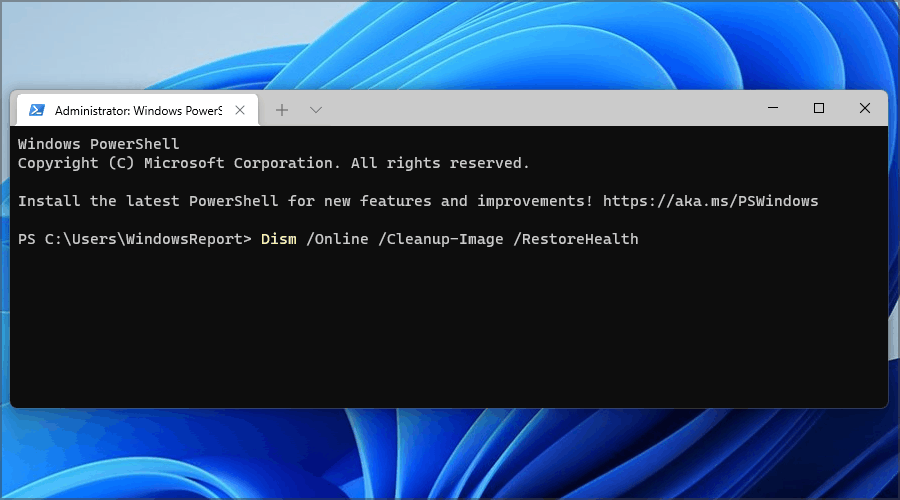
  2. 3. After it’s done, type the following command and press Enter after each:DISM /online /Cleanup-Image /ScanHealthDISM /Online /Cleanup-Image /RestoreHealth

    dism-command-w10
  3. 4. When the procedure ends, restart your PC and see if the hardware error code 141 persists.

In case that did not help solve the Kernel 141 error, we recommend giving a try to a reliable repair program that is more advanced and can fix various PC issues.

Running these scans can also help you fix similar issues like LiveKernelEvent 144. To know more about this error, read this guide.

3. Turn off GPU overclocking or uninstall the overclocking software

  1. Press the Start button and select Settings from the menu.settings-w10 live kernel event 141
  2. Now, click Apps.
  3. Look for the overclocking software you’re using, click on it and hit the Uninstall button.
  4. Follow the procedure for a complete uninstallation.

If you’ve overclocked your GPU or your CPU, something might have gone wrong and that triggered the code 141 hardware error.

The logical solution is to tweak the app you’re using for overclocking and stop the process but if that doesn’t work, try uninstalling it by using the steps above.

If the overclocking is performed at the BIOS level, you will have to change the settings from there. If you don’t know how to do that, our guide on how to access BIOS on a Windows 7,10, 11 PC will definitely help you.

4. Uninstall the video graphic drivers and reinstall them again

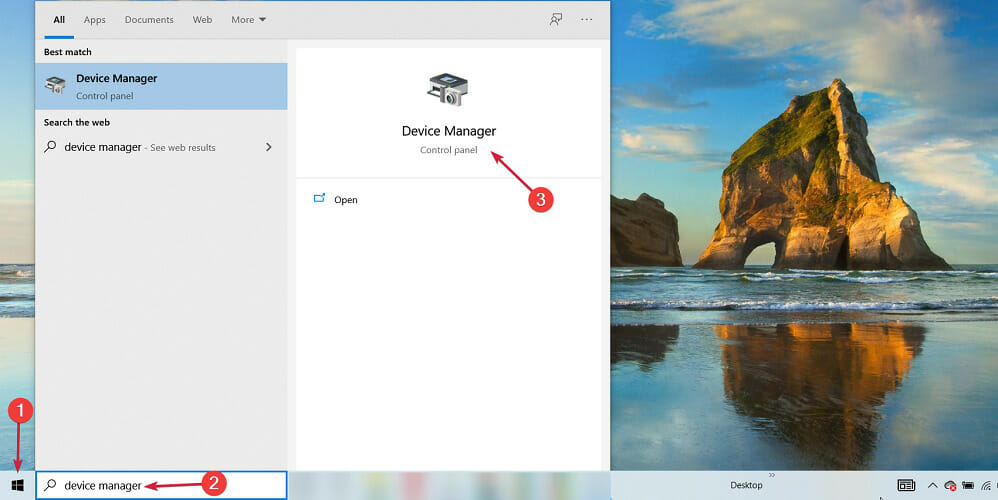
  1. In order to fix the hardware error LiveKernelEvent 141, right-click the Start button, type device manager and select the app from the list.
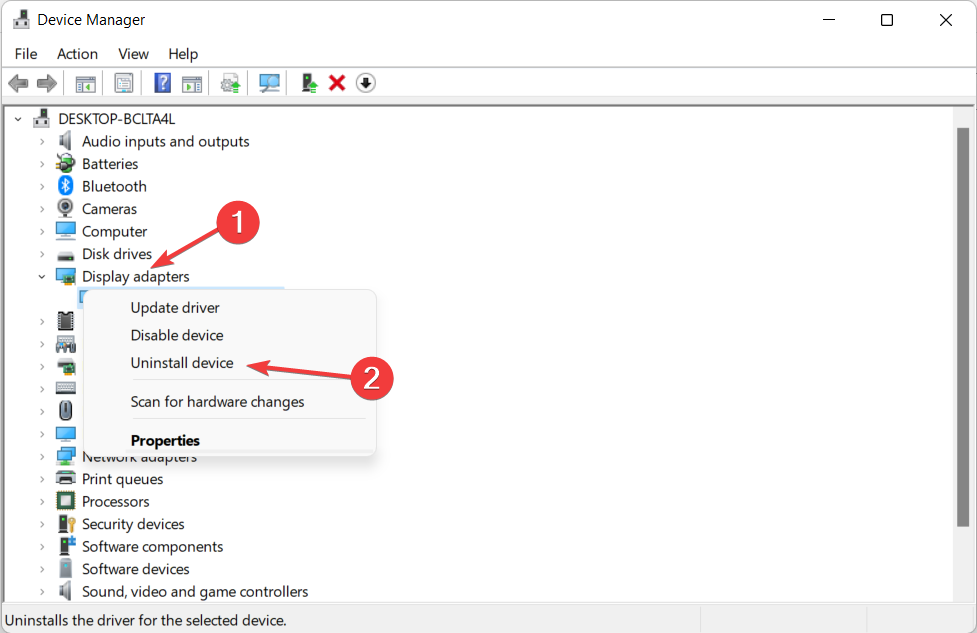
  2. Look for the graphics driver under the Display adapters section, right click on it and select Uninstall device.uninstall-desktop live kernel event 141
  3. Now, you have the choice of restarting your device, and the system will automatically replace the driver or you can go to the manufacturer’s dedicated support page and download the correct driver.

If, after applying the steps from above you are still experiencing the LiveKernelEvent 141 hardware error you should reinstall the graphic cards drivers.

5. Disconnect external devices

Since there might be a conflict between specific drivers within the Windows 10 system, you should start the troubleshooting process by disconnecting the peripherals. Do that and check if the issue persists.

Afterward, you can reconnect your external devices, but when you do so also reinstall any associated drivers from scratch.

If needed, go to Device Manager first and uninstall these drivers (press Win +X hotkeys, click Device Manager, and select the drivers that must be uninstalled).

If you want to completely remove the drivers from your Windows 10 PC, consider using an uninstaller. Check out our list including the best uninstaller software available right now and fix the Kernel Event 141 issue.

6. Apply Windows 10 updates waiting for your approval

  1. Press the Win + I keyboard hotkeys then from System Settings click Update & Security.update-security live kernel event 141
  2. From the window that will be opened, under Windows Update you should be able to search for any possible updates.
  3. Note: if an update is already available it will be displayed automatically.
  4. Agree with the update process and just wait while the new firmware patch is flashed. In the end, restart your Windows 10 device.

If your system is not running on the latest available updates, you might receive the Live Kernel Event 141 in Warzone. So, check and apply the updates that might be waiting for your approval in the background.

In some instances, you won’t be able to update your system because there is no update button. We have a guide on what to do if the Check for updates button is missing so don’t panic.

7. Initiate a clean boot

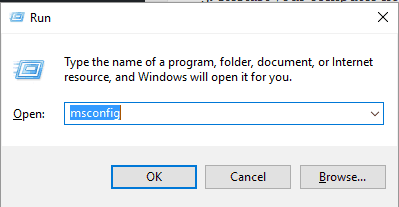
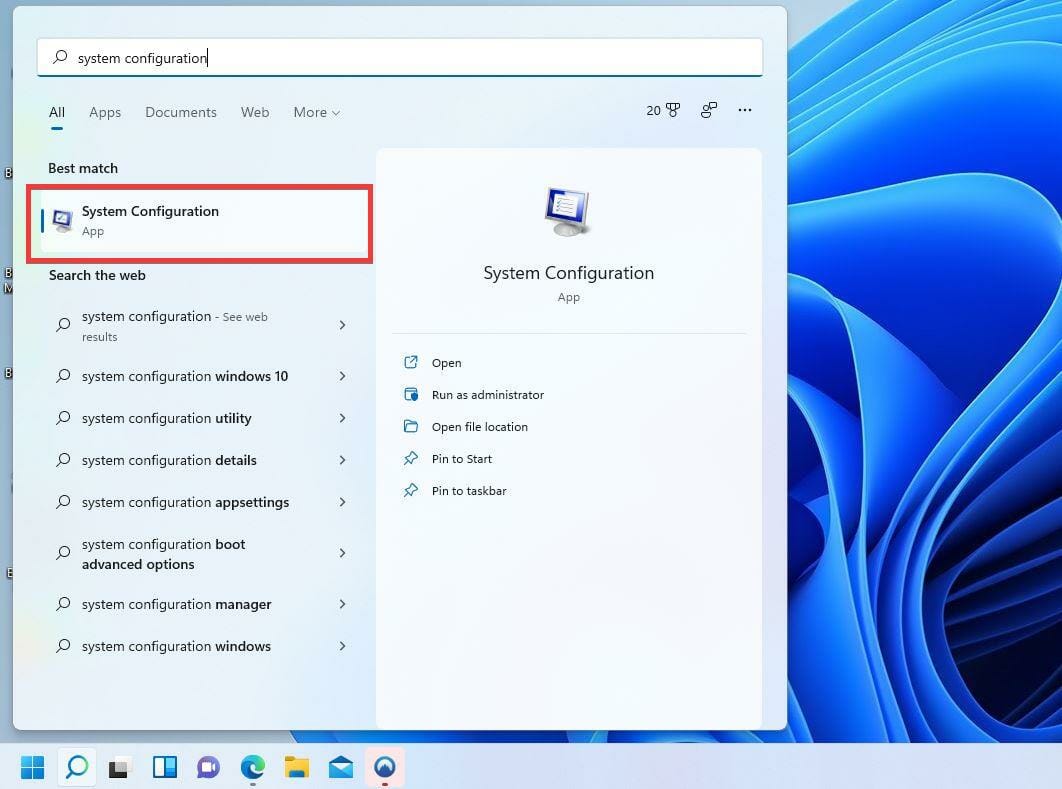
  1. Press Win + R and in the Run field that will be opened enter msconfig.msconfig windows 10
  2. Under System Configuration select the General tab.
  3. Look for the Selective Startup entry and uncheck the Load startup item option.
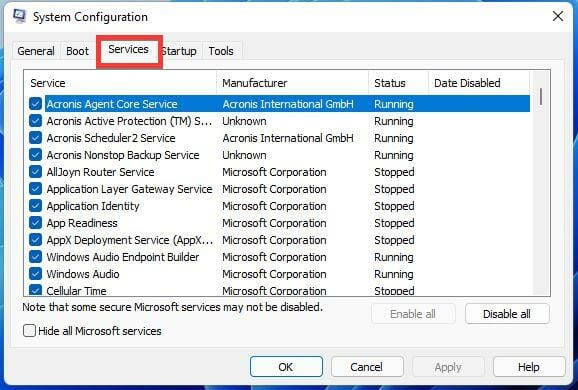
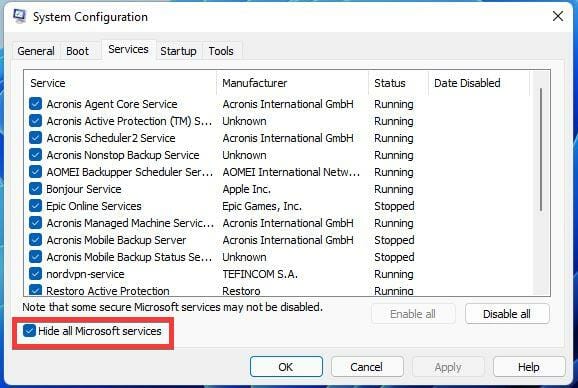
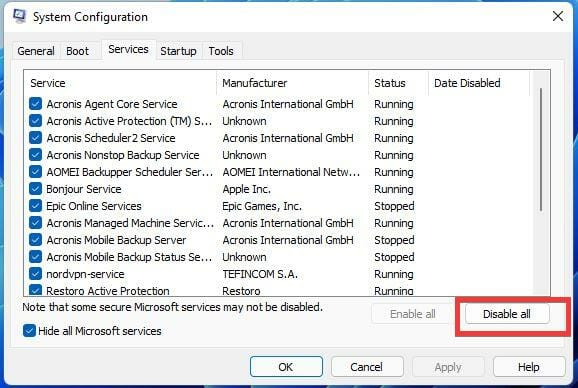
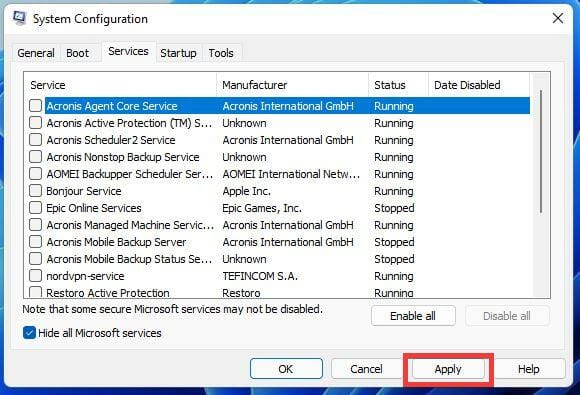
  4. Go to the Services tab and click on the hide all Microsoft services check-box and hit Disable all.clean boot windows 10
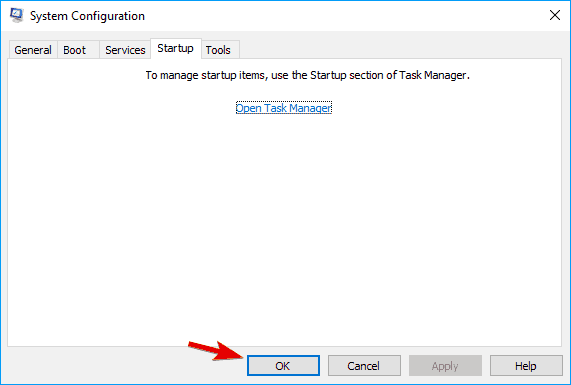
  5. Next, access the Startup tab and click on the Open task manager link.
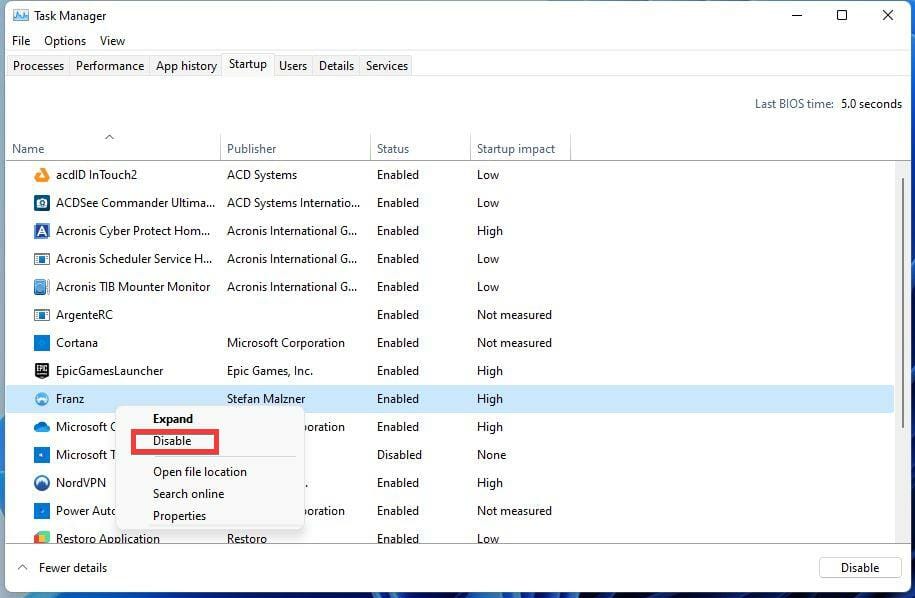
  6. From Task Manager disable all Startup programs. Save your changes and close these windows.
  7. Restart your Windows 10 system.

If a third-party app was causing the Live Kernel Event 141 Nvidia error now you can eliminate software conflicts that occur when you install a program or an update or when you use a process that’s not compatible with the Windows 10 OS.

You can start by removing any unnecessary startup apps on Windows. That will stop the third-party app from acting up again.

How do I fix the LiveKernelEvent 141 error in Windows 11?

  1. Press Windows + X then select Device Manager from the quick menu.device-manager live kernel event 141
  2. Here, navigate to the Display Adapters section, right-click the driver you have installed and select Update driver.update-graphics live kernel event 141

Updating your graphics card driver will address the Live Kernel Event 141 error in Windows 11. Note that you need to keep your drivers up-to-date in order to have a well-functioning computer.

How is LiveKernelEvent diagnosed?

The LiveKernelEvent Code: 141 problem is most often associated with the graphics processing unit (GPU) of the machine that is afflicted.

Uninstalling the graphics driver and then installing a fresh copy of the program that has been kept up to date is the simplest solution to this problem.

Is live Kernel Event 141 a hardware error?

Live Kernel Event 141 is a hardware error that is usually caused by faulty drivers. This issue can also be due to problems with PC components.

So, it is important to follow the steps in this guide to troubleshoot your hardware components.

So, these are the troubleshooting solutions that can be applied to fixing the Windows 10/11 Live Kernel Event 141 error, assuming that there was no problem with your hardware that caused Windows to stop working correctly.

This isn’t the only error you can encounter, and we also covered LiveKernelEvent Code 1a8 and 1b8 in one of our other guides.

If you managed to address this issue using a different method, share your experience with us – we will then update this tutorial accordingly, giving you the credit for providing additional solutions.

You can get in touch with us quickly by using the comments section from down below. Thanks for reading!

Microsoft Money: Download & Install for Windows 10

Managing finances isn’t always the simplest task. In the past, many users relied on tools such as Microsoft Money to help them manage their finances.

Microsoft Money was a popular tool, therefore today we’re going to show you how to install it on Windows 10.

Is Microsoft Money still available?

Yes, it still is available for the time being. Remember that this service was launched in 2020, and Microsoft offered a premium Money in Excel template to Microsoft 365 Family and Personal subscribers. 

However, back in May 2022, the Redmond-based tech giant announced that this would be withdrawn on June 30, 2023.

Microsoft is focusing distribution efforts for Microsoft Money Plus software online via download and discontinuing traditional box sales of the software at retail.

On June 10th, 2009 Microsoft announced that it would discontinue sales of the software on June 30, 2009.

Can I still download Microsoft Money?

Yes, you can still download and install this software, and we are about to show you how to do just that in the article below.

Please take your time and carefully go through these steps and you will be accessing this Microsoft-designed software in no time.

Quick tip:

Since Microsoft Money is officially discontinued, we recommend you try the best alternative to it.

Moneyspire

The best personal finance software to manage your money. Join all the people around the world who already switched from Microsoft Money!
Check price Visit website

What was the last version of Microsoft Money?

Well, the last version of this software, released in August 2007, was called Microsoft Money Plus. Also know that it comes in four editions: Essentials, Deluxe, Premium, and Home & Business.

Will MS Money run on Windows 10?

This is a free tool and we already covered how to download and use Microsoft Money Plus Sunset version on Windows 10.

This tool is designed as a replacement for Money Plus Deluxe and Money Plus Home & Basic, therefore if you have any of the previous versions of the software installed, we suggest that you don’t install Money Plus Sunset over it.

Microsoft Money has a long history, but unfortunately, this tool isn’t actively developed anymore.

The first version of this program was released way back in 1991, and it was available for the desktop version of Windows. After several versions, Microsoft Money made its way from 2000 to 2006 on select versions of Windows Mobile.

In 2008 Microsoft announced that it would stop releasing new versions of the software each year and that there are no plans to release the version for 2009. The sales were discontinued on June 30, 2009. 

In January 2011 the online services were stopped and users could no longer enjoy any support from Microsoft.

Even though the software was discontinued, Microsoft didn’t completely abandon its users. In 2010 Microsoft announced the release of Money Plus Sunset.

Even though Microsoft Money Sunset offers the same features as its predecessors, we have to mention that certain features are missing. For example, you cannot import data files from non-US versions of Microsoft Money.

Since all online support isn’t available anymore, you can’t use any of the previously available online features such as bill payment, online quotes, statement downloads, data sync with MSN Money, etc.

Keep in mind that there’s no online help and no Assisted Support, therefore if you have any issues you won’t get any support from Microsoft.

Using Microsoft Money is simple, and in the following section, we’ll show you how to download Microsoft Money on your PC.

Where can I get a copy of Microsoft Money?

  1. Go to Microsoft Money’s download page on Softpaz.
  2. Click the Download button and wait for the download to start.
    download-button microsoft money software, ms money
  3. Locate the downloaded file that you just downloaded and double-click it.
  4. You might get a message saying that your antivirus software can interfere with Microsoft Money setup. Click OK.
  5. Read the license terms and click the I Accept button.
  6. Wait for the installation to finish.
  7. Once the installation is completed, click the Finish button.

The software is officially discontinued, but you can still use Microsoft Money on Windows 10, with certain features missing.

After you installed Microsoft Money, do not hesitate to double-click the Microsoft Money shortcut.

Microsoft Money for Mac

Many are wondering, so why not get straight to it: Is Microsoft Money available for Mac? Unfortunately, it is not and it never was any version of Microsoft Money available for other platforms than Windows.

Nevertheless, that does not mean you cannot use this app to track your investment in MacOS. Here are some useful workarounds:

Finally, we have to mention that there are plenty of Microsoft Money alternatives that you can use on Mac such as Moneydance, Quicken, or Moneyspire.

This is all you need to know about Microsoft Money downloads for Mac.

Will Microsoft Money run on Windows 11?

Yes, it definitely can, so keep that in mind if you want to give this software a try on the latest operating system from Microsoft.

If you need some assistance in installing it, you can always refer to our dedicated article on how to download Microsoft Money Sunset on Windows 11.

Can I convert Microsoft Money to Quicken?

To answer that, you should know that Quicken is currently able to import files from Microsoft Money 2007 and 2008, and Money Plus Deluxe only.

Thus, if you have an older version of Microsoft Money, you will need to upgrade. You can download Microsoft Money Plus Deluxe to use for the process of importing your file into Quicken

So, if you are trying to use the Microsoft Money software, this is all you need to know about how to get MS Money on your device.

We’ve shown you to get Microsoft Money on both Windows 10 and Windows 11, so don’t be scared to download the Microsoft Money app. Also, it’s the perfect option to open TXF files.

If you are looking for a Microsoft Money Plus download link, know that Microsoft Money has been gone for years.

Has this article been helpful to you? Let us know in the dedicated comments section located below.

Nvidia Installer Cannot Continue [GeForce Error Fix]

The NVIDIA installer cannot continue is an error message that will prevent you from installing drivers for your graphics card.

You will almost certainly receive the same message over and over again no matter how many times you attempt to install them on your computer.

Why is my NVIDIA not installing?

In addition, this error occurs with a wide range of drivers and Windows iterations, indicating that there are numerous potential causes.

That is to say, it does not exclude anyone, and for many users, resolving the issues can be a frustrating experience.

Fortunately, there is a good chance that one, if not more, of the methods below will be effective for you, so continue reading to find out which one is the most effective.

Even if the installation of the drivers failed, an NVIDIA folder will be created in the partition where your operating system is installed after you have downloaded and installed the drivers.

This is due to the fact that it extracts its setup before beginning the installation process.

This folder will be required even if the setup fails, so if it has been deleted after the setup has failed, re-enter the setup to have it created. But now let’s see shortly what Game Ready Drivers do and then jump into the list of solutions.

After understanding the potential causes, if you’re specifically struggling to download NVIDIA drivers, our comprehensive guide on resolving NVIDIA driver download issues on Windows 10 might provide additional solutions.

Additionally, here are some common error variations that you might encounter:

  • Nvidia installer cannot continue other installations are running – Nvidia installer Cannot continue a newer or same version is present
  • Nvidia installer cannot continue not compatible with this version of Windows
  • Nvidia installer cannot continue Windows 11, 10, 7
  • Nvidia installer cannot continue Windows task scheduler
  • Nvidia installer cannot continue a system restart is required
  • Nvidia installer cannot continue DCH driver package
  • NVIDIA installer Cannot continue the graphics driver could not find compatible graphics hardware – Nvidia installer cannot continue requires an Nvidia GPU

How do I fix NVIDIA installer Cannot continue?

This being said, let’s jump into the list of solutions and keep in mind that they also work for the NVIDIA installer cannot continue in Windows 10 error.

1. Update your graphics card drivers to fix NVIDIA installer cannot continue

  1. Right-click on the Start icon from your Taskbar and select Device Manager. device-man nvidia control panel missing
  2. Next, expand the Display adapters folder and right-click on the NVIDIA driver to select Uninstall device.uninstall-nvidia nvidia control panel missing

Note that if the full error message states as NVIDIA installer cannot continue, not compatible with this version of Windows, you will have to update your operating system as well.

Check out the article linked for a thorough guide on how to do it.

We must also note that the Device Manager may not always be able to accurately detect new driver versions. If you want a more precise utility, we recommend you install something like Outbyte Driver Updater.

It scans your system and automatically installs new driver versions whenever necessary. It’s easy to use and you can set it up to run in the background and ensure all your drivers are in check.

⇒ Get Outbyte Driver Updater

2. Enable your NVIDIA driver to fix NVIDIA installer cannot continue

  1. Begin by right-clicking on the Start icon from your Taskbar and choosing Device Manager. device-man nvidia control panel missing
  2. Tap on the Display adapters option, then right-click on the NVIDIA driver. Make sure you select the Enable device option. If it is selected, you will be shown the option to Deselect it.ewnable nvidia installer cannot continue

    3. Restart the NVIDIA services to fix NVIDIA installer cannot continue

    If you get the NVIDIA installer cannot continue error, then you should restart all the NVIDIA services. There might be an issue with one of them, which causes the installation to fail.

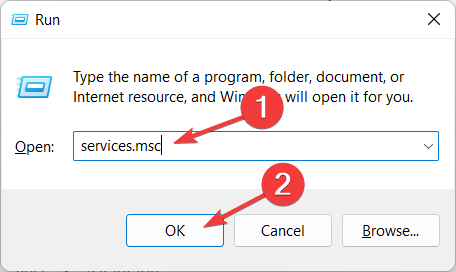
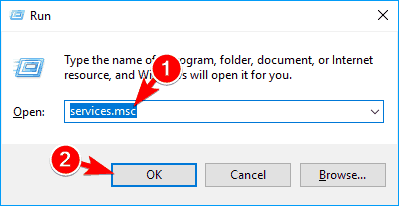
  1. 1. Press the Windows + R buttons to open the Run dialog.

  2. 2. Type services.msc and then press Enter or click OK.

    services-msc wacom pen tablet driver not running
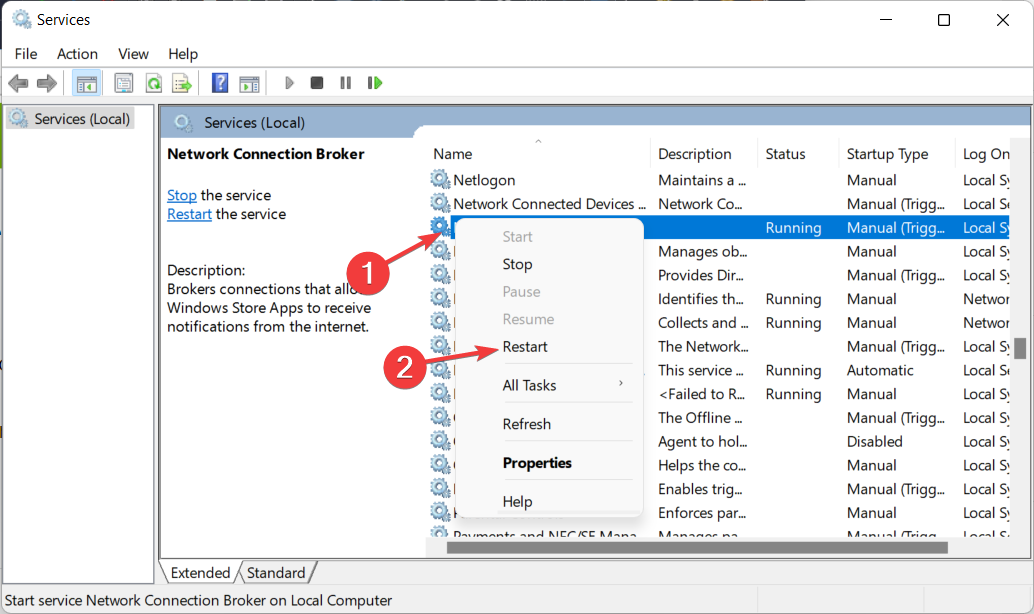
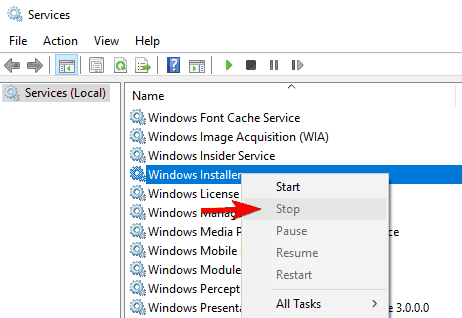
  3. 3. Scroll down until you meet the services that start with NVIDIA.

  4. 4. Right-click on each of them to select the Restart option.

    restart-services nvidia control panel missing
  5. 5. Reboot your PC if the full error message states that the NVIDIA installer cannot continue, a system restart is required.

4. Stop the NVIDIA processes to fix the NVIDIA installer cannot continue

  1. Press CTRL + SHIFT + ESC in order to open the Task Manager app and navigate to the Details page.details-page nvidia installer cannot continue
  2. Here, find the NVIDIA processes, click on them and choose End task.
  3. We showcased another process since we don’t have any NVIDIA ones enabled at the moment.end-task nvidia installer cannot continue
  4. Reopen the NVIDIA installer in order to see if the error is gone.

Note this solution works particularly for the NVIDIA installer cannot continue, other installations are running error messages.

Installing the most recent graphics card drivers has a variety of advantages, including improved gaming and clearer visuals, such as more upgraded photos, as well as improved video generation, particularly when using pure video technologies.

However, the primary advantage of a dedicated graphics card over a locally available GPU is that it speeds up the processor. For example, when using installed designs, more pressure is placed on the CPU.

But, because with a dedicated Graphics card, all graphical calculations are handled by the GPU, the processor is free to work on other tasks, resulting in overall better program execution.

What do Game Ready drivers do?

The most frequently encountered drivers are those for NVIDIA’s GeForce Game Ready Technology.

They are able to provide users with better gaming experiences because they make use of the most up-to-date display technologies.

GeForce drivers nvidia
GeForce Drivers (Source: NVIDIA)

In general, when a new major game is released, Game-Ready drivers are released to improve game performance, fix game bugs, and enhance a user’s gaming experience for those who are playing the game.

If the new games simply get better support, we wouldn’t classify it as a driver update, but rather as an improvement.

In case the update simply states that it adds support for certain games that you do not play, then you do not require it. However, if the update is a large one that fixes bugs and other issues, then you do need it.

Regular Game-Ready drivers and Studio drivers are the same things, with the exception that the Studio drivers have been optimized and tested with specific applications.

For more information on how to fix NVIDIA issues, check out our guide on what to do if NVIDIA drivers keep crashing.

Alternatively, take a look at how to solve the NVIDIA drivers not installing on Windows 11 error, and get back to your favorite games.

Leave us a comment in the section below and tell us what you think. Thanks for reading!

Best USB-C Adapters For Your Devices: Get Charged Up!

There’s no way you can get away from wall adapters in this day and age, whether you have USB cables or other forms of powering up your devices.

USB-C wall adapters or chargers are always suitable to have around, as they come with myriad benefits, most of which cannot be delivered by cables.

The introduction of the type C connector and port has also come with many advantages, including fast speeds and power supply to your devices.

With the best USB-C wall adapters, you also enjoy the advantages of wall adapters such as more electrical current supplied to your devices, convenience when you have a limited number of ports, durability, and its design complements that of your office or home.

So you’ll never go wrong by having one. This article looks at the best USB-C wall adapters you can get this season.

Best USB-C wall adapter deals to get

1. Anker USB C Charger 40W

  • Delivers up to 40W of power
  • Two ports for simultaneous device charging
  • Compatible with a wide array of Apple devices
  • Lightweight and compact
  • Prongs aren’t foldable

Although it’s not the most powerful device, this model from Anker is still a great choice. It delivers up to 40W of power, allowing you to charge your devices quickly.

The device offers two USB ports, allowing you to charge multiple devices quickly. As for compatibility, this charger works with a wide array of Apple devices, Galaxy Z Flip, S10+, Pixel 3, and newer phones.

It’s important to mention that the career comes with ActiveShield technology that monitors the temperature of your device, ensuring that it’s being charged safely without damaging your battery.

Anker USB C Charger 40W is a compact device, and it’s smaller than the AirPods Pro case so that you can carry it with you at all times, and since it’s available in multiple colors, you’ll quickly find one that matches your style.

2. UGREEN 45W USB C Wall Charger

  • 45W max output
  • Two ports for simultaneous charging
  • Lightweight and compact
  • Offers protection against overheating, overcharging, and overvoltage
  • Compatible with multiple devices
  • It doesn’t come with a charging cable

This might be a perfect choice if you’re looking for a powerful USB-C adapter. It has 45W max charging to charge Macbook Air M2 up to 72% in an hour.

The device comes with two USB C ports allowing you to charge multiple devices simultaneously. In addition, the device is compatible with the latest Apple, Samsung, and other devices.

This charger comes with next-gen safety that adjusts the power output to protect the battery. Speaking of which, there are other protections against overheating, overcharging, and over-voltage.

Regarding the size, this is a small and lightweight charger that can fit in your bag, which makes it a perfect everyday companion.

If you’re looking for an offer, you can navigate to the official UGREEN website, and use the code NC30 to get 30% off the price.

3. Belkin 40W Dual Port USB C Wall Charger

  • 40W output
  • Can charge two devices simultaneously
  • Foldable prongs
  • USB-C PD 3.0 certified
  • Might not fit tightly in every outlet

If you’re looking for a 40W charger, then this model is a perfect choice for you. The charger is fast, allowing you to charge your iPhone 13 up to 50% in 25 minutes.

The device comes with a programmable power supply technology that allows you to adjust the output voltage based on the current charging device.

Dual ports are available, allowing you to charge multiple devices quickly. However, remember that output power will be lower if you set two appliances instead of one.

The charger is travel-ready and comes with foldable prongs, making it a must-buy if you’re traveling or want to carry your charger comfortably with you at all times.

4. Ceptics USB-C wall adapter

  • Can charge a wide array of devices
  • Comes with European connector
  • Has slots for US-style adapter
  • Dual USB ports
  • Delivers only 5V 2.4A power

Designed in the USA, this is among the best USB-C wall adapters judging by user reviews and ratings.

Features include a compact size, international output type C plug compatibility in most European countries among 80 other countries globally, a limited lifetime warranty, and 3-in-1 input that accepts the standard North American two or 3-prong flat pin plug.

It has dual USB ports and a no-mess universal outlet, charging up to 2.4A, and is ideal for different devices and other chargers.

However, it is only compatible with dual voltage electronics, as it is not a voltage converter, so you won’t be able to convert from 220V to 110V and vice versa. Ensure your device supports 100-240V if traveling overseas to use this adapter.

5. Highsay USB C Charger

  • 40 power output
  • Two USB ports for simultaneous charging
  • Foldable prongs make it perfect for traveling
  • 40% smaller than other chargers
  • Power can be interrupted when disconnecting cables

This adapter can deliver up to 40W, and since it comes with two USB ports, it allows you to recharge two devices. Remember that each port can deliver up to 20W when charging multiple devices.

As a result, this device delivers up to 3x faster charging than a regular 1A/5W charger and can charge your iPhone up to 60% in about 30 minutes.

Regarding compatibility, the device can work with the latest gadgets that use the Lightning connector or with devices with a USB-C connector.

As for the size, this model is 40% smaller than its competitors, and with foldable prongs, it’s a perfect traveling companion.

Did you like any of these best USB-C wall adapters? Let us know which one you’ll get by leaving a comment in the section below.

Fix You’ll Need A New App to Open This MS-Windows-Store Link

The error message You’ll need a new app to open this shows up when you try to open any or specific apps on the system and prevents you from accessing them. The error can be encountered for several reasons, including file corruption, issues with the installed apps, and misconfigured settings.

Also, a corrupt app cache often prevents it from functioning effectively, and subsequently, you come across this error. Besides, problems with the configured policies can lead to the You’ll need a new app to open this error on your computer.

How do I fix You’ll need a new app to open this?

1. Run the Windows Store Apps troubleshooter

  1. Press Windows + I to open the Settings app, and then click on Troubleshoot on the right.troubleshoot
  2. Now, click on Other troubleshooters.other troubleshooters
  3. Click on the Run button next to the Windows Store Apps troubleshooter listed here.windows store apps to fix you'll need a new app to open this
  4. Follow the on-screen instructions to complete the troubleshooting process.

The first thing we’re going to try is also the simplest one. We’ll run the Windows Apps Troubleshooter, to see if it can identify and resolve issues for us.

2. Reset Microsoft Store

  1. Press Windows + R to open the Run command, type wsreset.exe in the text field, and then click on OK.wsreset to fix you'll need a new app to open this
  2. Now, wait for the process to complete.command in process

If the troubleshooter didn’t get the job done, we can as well try to reset the Store. It’s a one step process, and can fix things in a jiffy.

3. Reset the app’s Cache

  1. Press Windows + E to open the File Explorer, click on the View menu, hover the cursor over Show, and then select Hidden items.Hidden items
  2. Paste the following path in the Windows File Explorer address bar, while replacing <username> with your account name:C:UsersusernameAppDataLocalPackagesWindowsStore_8wekyb3d8bbweLocalStatepaste path
  3. Now, choose a different name for the Cache folder.
  4. Next, create a new empty folder, and then name it Cache.
  5. Restart your computer, and you are good to go.

If the Microsoft Store app’s cache accumulated over time, it’s a good idea to clear it. Once done, check if the You’ll need a new app to open this error is fixed. In case the issue persists, head to the next method.

4. Check your Region settings

    u003c!u002du002d wp:paragraph u002du002du003ernrnu003cspan id=u0022urn:enhancement-be3de562-ca0e-4e08-aa57-386b58b0c182u0022 class=u0022textannotationu0022u003eMicrosoft Storeu003c/spanu003e doesn’t u003cspan id=u0022urn:enhancement-cc8f3ad5-286e-4177-8a5b-5533dec6b650u0022 class=u0022textannotationu0022u003eworku003c/spanu003e the same way in every region. Also, if the region on your computer is different to your actual location, there might be some problems.rnrnu003c!u002du002d /wp:paragraph u002du002du003e u003c!u002du002d wp:paragraph u002du002du003ernrnSo, verify if your region u003cspan id=u0022urn:enhancement-6ee7c8bc-e6c1-4520-93de-8742f8a2ad08u0022 class=u0022textannotationu0022u003esettingsu003c/spanu003e are set correctly, u003cspan id=u0022urn:enhancement-084eef73-8f75-4524-967a-fd27aa1221b5u0022 class=u0022textannotationu0022u003emakeu003c/spanu003e the required changes, and u003cspan id=u0022urn:enhancement-e79d55a5-752e-4dc5-892e-512f50b43aabu0022 class=u0022textannotationu0022u003echecku003c/spanu003e if the u003cemu003eYouu003cspan id=u0022urn:enhancement-a64493f1-b3f7-4448-81fe-de0d07e2dda1u0022 class=u0022textannotationu0022u003e’llu003c/spanu003e need a new u003cspan id=u0022urn:enhancement-3e75d5d9-507a-4531-be16-21b4f9846610u0022 class=u0022textannotationu0022u003eappu003c/spanu003e to open thisu003c/emu003e u003cspan id=u0022urn:enhancement-7eb519bd-cec2-4903-aca3-9abb2cc68e1du0022 class=u0022textannotationu0022u003eerroru003c/spanu003e is fixed.rnrnu003c!u002du002d /wp:paragraph u002du002du003e

  1. u003cspanu003e1. Press u003c/spanu003eu003ckbdu003eWindowsu003c/kbdu003eu003cspanu003e + u003c/spanu003eu003ckbdu003eIu003c/kbdu003eu003cspanu003e to open u003c/spanu003eu003cemu003eSettingsu003c/emu003eu003cspanu003e, and select u003c/spanu003eu003cstrongu003eTime u0026amp; languageu003c/strongu003eu003cspanu003e from the left.u003c/spanu003e

    time and language
  2. 2. u003cspanu003eSelect u003c/spanu003eu003cstrongu003eLanguage u0026amp; regionu003c/strongu003eu003cspanu003e from the right.u003c/spanu003e

    language and region
  3. 3. u003cspanu003eNow, click on the u003c/spanu003eu003cstrongu003eCountry or regionu003c/strongu003eu003cspanu003e dropdown menu, and then select yours from the list.u003c/spanu003e

    correct country to fix you'll need a new app to open this

5. Install Windows updates

  1. Press Windows + I to open Settings, and then select Windows Update from the left.Windows Update
  2. Now, click on Check for updates to look for newer versions of the OS.check for updates to fix you'll need a new app to open this
  3. If an update is available, download and install it, and then restart the computer for the changes to come into effect.

As the Store is a part of Windows, frequent Windows updates may affect it. So, if this is a widespread problem, there’s a good chance Microsoft will eventually release a patch for it.

Once done, verify if the You’ll need a new app to open this error is resolved.

6. Create a new User Account

Some users also suggest that accessing the Store from an account different than your default one can be helpful. This is the case when the problem lies with the current user account.

In this case, you need to create a new user account on the Windows PC. Once done, just sign in to the new account, and the You’ll need a new app to open this error should be fixed.

7. Re-register the Store app

  1. Press Windows + S to open the Search menu, enter Terminal in the text field, right-click on the relevant search result, and then select Run as administrator.Terminal
  2. Click Yes in the UAC prompt.Yes
  3. In the command line, paste the following command and then press Enter:Get-AppXPackage | Foreach {Add-AppxPackage -DisableDevelopmentMode -Register "$($_.InstallLocation)AppXManifest.xml"}reregister to fix you'll need a new app to open this
  4. Once done, restart your PC for the changes to come into effect and try to log-in again.

If none of the previous solutions resolved the problem, you can go with re-registring the Store app package.

8. Revert Windows Back to a Restore Point

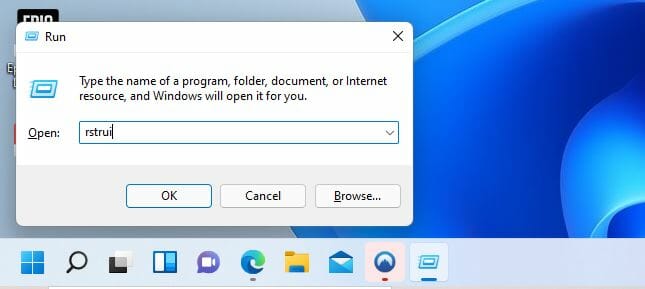
  1. Press Windows + R to open the Run command, enter rstrui.exe, and then click OK.rstrui.exe
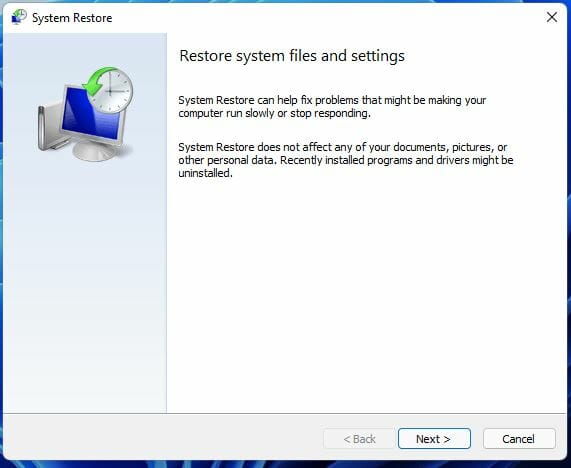
  2. Click Next in the System Restore window to proceed.Next
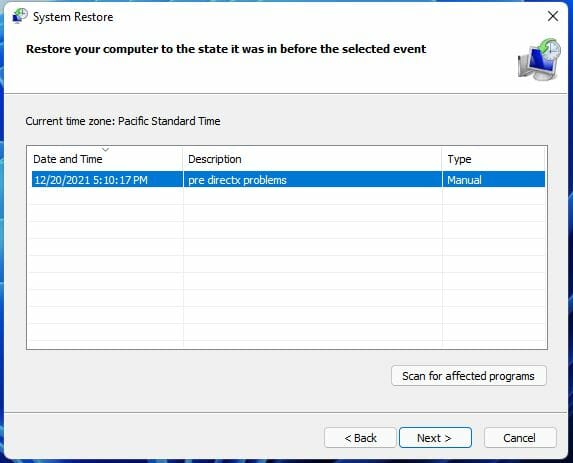
  3. Now, choose a restore point from the list, and then click Next.select restore point to fix you'll need a new app to open this
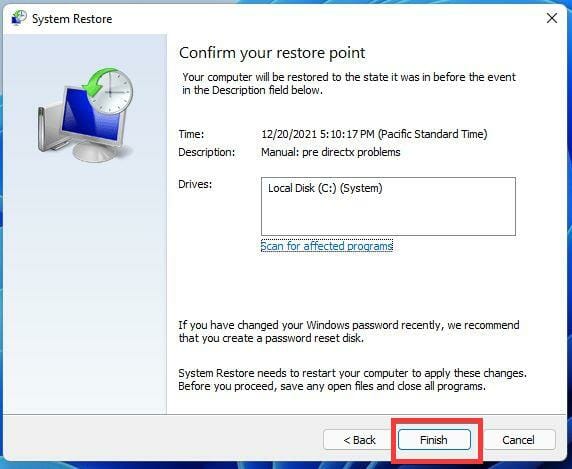
  4. Next, verify the restore details, and then click on Finish to start the process.Finish

If Store was working fine a few weeks or months back, then recently installed third-party software, especially anti-virus utilities, that might be crashing the app or the OS in some way.

Reverting Windows back to the system restore point will remove third-party programs installed after the restore point’s date and could feasibly fix the You’ll need a new app to open this error. Just make sure to choose a point created before the error was first encountered.

The error may show up on several apps, and we decided to list the common ones to clear any uncertainties or confusion.

  • You’ll need a new app to open this ms-contact-support link
  • You’ll need a new app to open this ms-windows-store link
  • You’ll need a new app to open this ms-action center link
  • You’ll need a new app to open this ms-paint link
  • You’ll need a new app to open this asus-support link
  • You’ll need a new app to open this ms-people link
  • You’ll need a new app to open this windowsdefender link
  • You’ll need a new app to open this ms-word link
  • You’ll need a new app to open this ms-gamingoverlay link
  • You’ll need a new app to open this steam link
  • You’ll need a new app to open this about link teams
  • You’ll need a new app to open this windowsdefender link in Windows 11

In some cases, users have found that Microsoft Store is missing after an update, which too might be an underlying cause to this error, so check out our guide to fix it.

Also, find out how to boost the performance of Windows and make your PC run faster.

If you have any other questions, post them in the comments section below.

Xbox Companion App Fix: To Continue Sign In on Your Console

There are several Xbox users who reported coming across To continue, sign in on your console using this account​ error message.

Apparently, this error message pops up when your profile does not exist on the Xbox console. Thankfully in this guide, we have come up with a bunch of solutions that you can try as it has helped users fix the To continue sign in on your console error on the Xbox companion app. Let us check it out.

What causes the continuing sign in error on your console error on the Xbox companion app?

Here are a few things that could trigger the To continue sign in on your console error on the Xbox companion app:

  • Server error: If the official servers are down and the Xbox companion app is having issues connecting to it then this error could pop up.
  • Temporary bug or glitch: There are chances that because of a temporary glitch or bug the issue is happening, so rest assured that the below solutions will help.
  • Outdated version: You should always ensure that you are running the latest update of the Xbox companion app and the console as well.
  • Account error: Because of some profile error or account-related issues, your Xbox companion app can misbehave and throw up multiple errors.

How can I fix the To continue sign in on your console error on the Xbox companion app?

Here are a few regular checks that you can perform prior to applying the advanced troubleshooting solutions:

  • Restart your console. You can try restarting the console and also restarting the PC to check if this resolves the issue or not.
  • Install the latest update for the companion app as well as check if there are any pending updates available for your Windows PC.

Let us take a look at the advanced solutions to fix this problem.

1. Power cycle your Xbox

  1. Press and hold the Xbox power button on the console for a few seconds to shut down.
  2. Unplug the console from its power source for a couple of minutes.
  3. Reconnect your console.
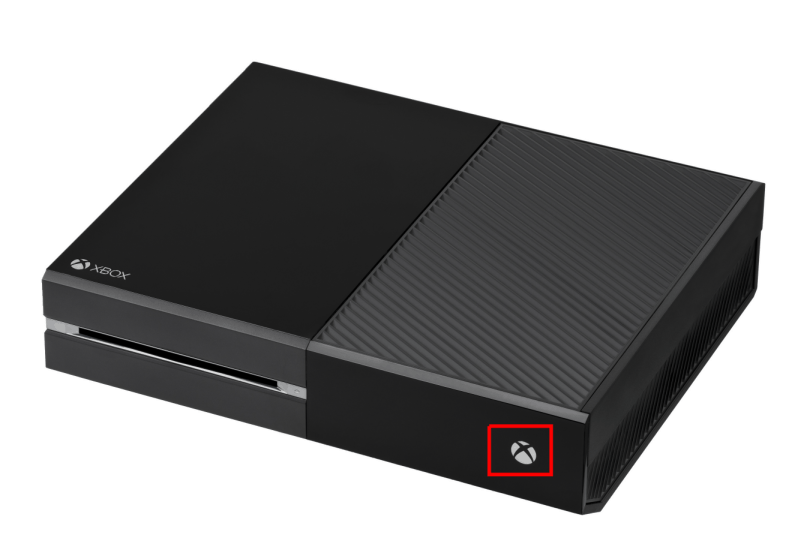
  4. Press the Xbox button to turn on the console.

By performing a power cycle on your Xbox console, you are ensuring that the console loads all the system files from scratch, which might have been missed during the previous session.

2. Re-add your profile

  1. Press the Xbox power button on the console to open the guide.
  2. Select Profile & system.
  3. Choose Settings.
  4. Select Account.
  5. Select Remove accounts.
  6. Choose the profile you wish to remove and select Remove to confirm.
  7. Go back to Profile & systems.
  8. Select Add or switch.
  9. Choose Add new.
  10. Enter the email address of your Microsoft account.
  11. Enter the password.
  12. Agree to the Microsoft terms and statement.
  13. Follow the on-screen steps and finish adding your profile.

3. Run the Windows Troubleshooter

  1. Press Win + I keys to open the Settings menu.
  2. Select Troubleshoot from the right side.
  3. Click on Other troubleshooters.
  4. Click the Run button for Windows Store apps.clicking run windows store apps troubleshooter
  5. Wait for the troubleshooter to complete the process and follow the prompts to fix the issue.

Windows comes with a built-in troubleshooter for issues such as the one at hand. There might be some problems with the Xbox console app, which can be easily fixed using the troubleshooter.

4. Check the time and date

  1. Press Win + I buttons to open the Settings menu.
  2. Click on Time & language from the left.
  3. Select Date & time.
  4. Toggle on Set time automatically option.
  5. From the Time zone drop-down menu, select the correct time zone for your region.
  6. Hit the Sync now button.

5. Enable Xbox services

  1. Press the Windows button to open the Start menu.
  2. Search for Services and open it.
  3. Right-click on Xbox Live Auth Manager and select Properties.
  4. Under Startup type, select Automatic.
  5. If the service isn’t started, hit the Start button.
  6. Repeat the same steps for Xbox Live Game Save and Xbox Live Networking Service.

In case you are facing Xbox update errors then you can refer to our guide that gives you some of the best solutions to resolve the problem.

Also, this is not the only error that you will come across. If you are facing Oops not sure what happened there Xbox Store error, then check out our article that gives you a bunch of solutions to fix the error.

Let us know in the comments below, which one of the above solutions helped you resolve the To continue sign in on your console error on the Xbox companion app.

Microsoft suspended almost 5 million Xbox accounts in 6 months

In an effort to contribute to online safety, Microsoft published its first ever Xbox related Digital Transparency Report.

The Microsoft Xbox gaming platform Digital Transparency Report is a six month snap shot of activities taken by the Xbox team to “foster spaces that are safe, positive, inclusive, and inviting for all players,” according to CVP of Xbox Player Service Dave McCarthy.

In this first ever Transparency Report, the Xbox teams lays out its vision for the community that includes a detailed list of Xbox Community Standards such as Shared Values, Conduct, Content, Attitude, Cross-Platform Play, Spam, legality, fraud and the prohibition of other harmful behaviors.

Perhaps the most notable piece of data from the detailed report is the one associated with the Xbox team’s “proactive enforcement” of its standards that has resulted in the team taking action up to 4.78 million times on accounts that violated community guidelines.

A large percentage of the 4.78 million actions flagged resulted in temporary suspensions over the course of the six-month window for the report that includes January 1, 2022 through June 30th of 2022.

The length of suspension is primarily based on the offending content with repeated violations of the policies resulting in lengthier suspensions, an account being permanently banned from the service, or a potential device ban.

Based on the report, the Xbox team has been a bit more aggressive with their “proactive enforcement” – up 9X than in previous reporting with account suspensions up for “inauthentic accounts,” as well as cheating; which were oddly grouped together.

Xbox Transparency Report

The net result of more policing of its policies on the Xbox platform has been a drop in players reporting one another. The fear of a 7 to 14-day suspension may be playing a role in the reduction of player reports or that more players understand the platform guidelines a bit better than they might have a couple of years ago.

Of the 33.07 million player reported files this year, most were flagged for in-game conduct relating to cheating, teamkilling and, or purposeful team sabotage.

The Xbox team is also committed to empowering players to self-police in more nuanced cases as the number of Xbox Ambassadors continues to grow beyond 150,00.

Visit here to read the full report.

5 Best Wireless Charging Pads for Multiple Devices

Wireless charging pads might not be as fast as cable chargers, but they are more convenient to use, and this is why many prefer them. Speaking of which, in today’s guide, we’re going to show you the best wireless charging pads you can get for this season.

Note: Deals are subject to change. Keep in mind that the price tag often varies. We recommend going to the vendor’s website to check the price. Some of the products may be out of stock by the time you’ve made your purchasing decision. So, hurry up and hit the buy button.

What are the top deals on wireless chargers for multiple devices?

Anker MagGo UFO – Best overall

  • Portable with a unique foldable design
  • Can charge up to 3 devices simultaneously
  • Offers 15W fast charging
  • Compatible with Qi2 and MagSafe devices
  • Comes with a 40W adapter
  • Magnets could be stronger

If you need a fast-charging wireless charging pad, look no further than Anker MagGo. This device comes with a foldable design, allowing you to fold it and carry it with you at all times.

The charger can charge up to 3 devices simultaneously. Regarding the supported devices, you can use it to charge iPhone 16-12, Apple Watch, AirPods, and other MagSafe devices that support the Qi2 standard.

Regarding the power, the device delivers 15W fast charging and can charge iPhone 15 Pro to 20% in 15 minutes. It’s worth mentioning that the device has a stand-by mode, so you can use it as a phone stand as well.

Overall, Anker MagGo offers an amazing design, and it comes with a 40W adapter, so if you have a compatible device, this will be a perfect traveling companion for you.

UGREEN MagFlow – Incredible design

  • Delivers 15W, can charge up to 3 devices simultaneously
  • Compatible with Qi2 devices
  • 3 different viewing angles
  • Measures 4.6×2.6×1.0
  • Weighs only 9.2 oz
  • Can feel a bit wobbly

The first thing you’ll notice about this charger is its sleek and foldable design. The charger has 3 different angles you can use, so it can work as a stand.

As for the charging, MagFlow can deliver 15W charging, and it can charge up to 3 devices simultaneously. This allows you to recharge your iPhone 15 Pro from zero to 41% in just 30 minutes.

Regarding compatibility, this model works with Qi2 devices, so you can use it with your iPhone 16-12, AirPods 3,2, Pro, and Apple Watch.

This is a sleek charger that will fit perfectly with your iPhone, so if you’re looking for a quality charger with a great design, look no further than UGREEN MagFlow

Belkin MagSafe 3-in-1 Wireless Charging Pad – Simple to use

  • Offers up to 15W power output
  • Measures 0.835 x 3.4 x 9.3 inches
  • Can charge up to 3 devices
  • Compatible with iPhone 16-12
  • Minor charging issues with AirPods

This model from Belkin comes with a simple design, and while it’s not foldable, the device itself isn’t too cumbersome, so it can easily fit in any bag.

As for the power, this charger delivers up to 15W, and it can charge up to three devices simultaneously. In terms of compatibility, this model works seamlessly with iPhone 16-12, Apple Watch, and AirPods.

It’s worth mentioning that the charger has MagSafe technology, so you can rest assured that all your devices will remain in place while charging.

Even though this model isn’t foldable, it’s still a great charging pad with a simple design, so you might want to check it out.

Belkin MagSafe 3-in-1 – Works great as a stand

  • Supports Apple Fast Charging
  • Powerful magnetic connection
  • 2-year limited warranty and CEW warranty up to $25.00
  • Keeps your devices safe and secure
  • Magnetism in the Mag-Safe is not very strong

This 2nd generation MagSafe charger from Belkin is another amazing option that will surely de-clutter your desk, while also providing your devices with the perfect amount of power at all times.

This device fully supports the Apple Fast Charging feature, the Belkin charging device is MagSafe-compatible, but it is worth noting that the magnetic power is not as strong as described. That being said, our expert testers have chosen this option as the second best in the list based on its overall capabilities.

As in the case of the previous item on this list, the charging suite is fully compatible with all iPhone models, Apple Watch models, and AirPods.

Besides the 2-year warranty that comes with this product, you also get a Connected Equipment Warranty (CeW) of up to $2500, ensuring that no damage could come from using the device.

UGREEN MagFlow 2-in-1 – Small with lightweight design

  • 15W output
  • Compatible with all Qi-supported devices
  • Doubles as a stand
  • Foldable design
  • USB-C port for charging additional devices
  • Can charge only 2 devices
  • Can’t charge Apple Watch using the second charging pad

If you’re looking for something simplistic, then this model from UGREEN might be what you need. This charging pad offers up to 15W and it can charge up to 2 devices.

This allows you to charge your iPhone at 7.5W and your AirPods at 5W. Due to its foldable design, this charging pad works as a stand thanks to the strong magnet that ensures your phone doesn’t move.

Regarding compatibility, you can charge all Qi-certified devices without any issues. Due to its small design, the charging pad can be folded and easily placed into your pocket, which makes it perfect for traveling, so be sure to consider it.

Qi chargers still do not offer the speed your traditional USB type-C port offers. However, it provides the convenience of charging your device without the hassle of wires.

Some chargers in this list can charge up to 3 devices simultaneously. First, read the description to understand if the devices need an extra case, wall adapter, etc., to operate.

If you don’t have as many devices to charge, you can always consider using a wireless charging pad instead.

Gaming Features Aren’t Available For Windows Desktop [Fix]

You can get Gaming features aren’t available for the Windows Desktop or File Explorer while trying to use the Game Bar. You’ll most likely get this error because media files are missing or you disabled gaming features

Here’s how to fix it:

How do I enable gaming features on Windows desktop?

Before proceeding to the fixes in this guide, try to open Game Bar from the Microsoft app as a workaround. Also, keep your Windows up to date.

1. Enable Game Mode

  1. Press the Windows key + I and select the Gaming option.
    option gaming features arent available for the windows desktop
  2. Toggle the switch under the Game bar section forward to enable it.
    xbox game bar
  3. Now, click the Capture option in the left pane.
  4. Toggle the switch under Record in the background while I’m playing a game forward to activate it.
    capture
  5. From here, choose Game Mode in the left pane.
  6. Finally, toggle the switch for Game Mode forward to enable it.
    game gaming features arent available for the windows desktop

Before you can use the Xbox Game Bar to record games, you need to enable the necessary features from the settings. Else, you will keep getting the same prompt.

2. Reset Xbox Game Bar

  1. Press the Windows key + I and select Apps.
    app
  2. Select Xbox Game bar from the list of apps and click the Advanced options.
    advanced gaming features arent available for the windows desktop
  3. Now, click the Reset button and wait for the process to complete.
    reset

If you have been using the Xbox Game Bar in the past but suddenly got the gaming features aren’t available for the windows desktop error, then you need to reset the app.

This will reverse all the changes made to it that might have caused this issue.

3. Uninstall and reinstall the Xbox Game Bar app

  1. Press the Windows key + X and select the Windows PowerShell (Admin) option.
    powershell admin gaming features arent available for the windows desktop
  2. Type the command below and hit Enter: get-appxpackage *Microsoft.XboxGamingOverlay* | remove-appxpackagepowershell
  3. Wait for the command to finish running, copy and paste the command below, and press Enter: Get-AppXPackage *Microsoft.XboxGamingOverlay* -AllUsers | Foreach {Add-AppxPackage -DisableDevelopmentMode -Register "$($_.InstallLocation)\AppXManifest.xml"}powershell reinstall
  4. Finally, restart your PC.

4. Add the Windows Media Pack to Windows 10 KN or N

  1. To do that, open the Windows Media Pack page.Media Feature Pack page gaming features aren't available for the windows desktop
  2. Click the Download button.
  3. Select an installation pack for either 32 or 64-bit Windows, and press the Next button.
  4. Then open the downloaded installer to install the media pack.

Windows 10 KN and N users might need to install the Windows Media Pack to ensure they have all the media technologies required for the Game bar.

This isn’t the only problem you can encounter, and many reported that Xbox Game Bar is not working for them. If that happens, and you don’t use this feature, you can always disable Xbox Game Bar.

We hope the options above helped you fix the Gaming features aren’t available error. If you need further help, let us know in the comment section below.

How to Fix Run.vbs Error on Windows 10: 5 Quick Methods

Windows runs a series of essential scripts on startup, but sometimes users may encounter various error messages preventing them from logging in. One such is the run.vbs error in Windows 10.

The complete run.vbs error in Windows 10 reads, Can not find script file C:\WINDOWS\run.vbs. As a result, you can’t log in to Windows or perform any operation.

How can I fix run.vbs error in Windows 10?

1. Run a malware scan

  1. Type Windows Security in the Search bar, and click on the relevant search result.windows security to fix run.vbs error windows 10
  2. Click on Virus & threat protection.virus & threat protection
  3. Now, click on Scan options to view all the available ones.scan options
  4. Select Full scan and then click on Scan now at the bottom.full scan to fix run.vbs error windows 10
  5. Now, wait for the scan to complete.

In most cases, it’s malware that is causing the run.vbs error in Windows 10. Also, if the built-in Windows Security couldn’t find any, use an effective antivirus to scan for malware.

If you are not sure which antivirus to use, we recommend TotalAV. It has one of the best anti-malware security features and a quick scan will tell you if your PC really has malware.

2. Edit the script

Note icon NOTE
If you can’t find the Run.vbs file, create a new one by the same name (use the .vbs extension), and make sure its content is as per the steps below.
  1. Press Windows + E to open File Explorer, and navigate to the path listed in the error message, which in this case is:C:\Windows\run.vbspath
  2. Find the run.vbs file, right-click on it, and select the Open with option.edit file to fix run.vbs error windows 10
  3. Next, choose Notepad and click OK.notepad
  4. Press Ctrl + A and then Del to delete the contents of the file.
  5. Now, type/paste Wscript.Quit and then hit Ctrl + S to save the changes.
  6. Restart the computer and verify if the problem is fixed.

3. Disable the file from loading at startup

  1. Press Ctrl + Shift + Esc to open the Task Manager, and navigate to the Startup tab.startup tab
  2. If you find the run.vbs file there, select it, and then click on Disable.disable to fix run.vbs error windows 10

Once done, restart the computer and check if the run.vbs line 31 error in Windows 10 is fixed. If not, head to the next solution.

4. Download the Autoruns tool

  1. Open Microsoft’s official website, and click on the link to download the Autoruns tool.autoruns tool
  2. Now, right-click on the downloaded file, and select Extract All.extract all to fix run.vbs error windows 10
  3. Choose the desired location or go with the default one, and click on Extract.choose location
  4. Once done, open the extracted files, and run Autoruns.exe.autoruns.exe to fix run.vbs error windows 10
  5. Click on Agree to proceed.agree
  6. Now, look through all the entries here and locate any with run.vbs under Image Path.
  7. If you find any, right-click on the process, and select Delete. delete

That’s it! Now, verify if the run.vbs error in Windows 10 is fixed. Also, the Autoruns tool will help in the case of the startup check.vbs error.

5. Perform an in-place upgrade

  1. Go to Microsoft’s official website, and click on Download tool now to get Windows 11 installation media.windows 10 media creation tool
  2. Now, right-click on the setup and select Run as administrator.
  3. Click Yes in the UAC prompt.
  4. Wait while the setup gets things ready.wait
  5. Click on Accept to agree to the terms.accept
  6. Next, click on Upgrade this PC now, and then on Next at the bottom.upgrade this pc now to fix run.vbs error windows 10
  7. Wait for the download to complete, and then follow the on-screen instructions to complete the in-place upgrade.

What causes run.vbs error on Windows 10?

Here are a few reasons why you might be having issues with the Run VBS file in Windows:

  • Script configured to load at startup – A likely reason behind the problem is that the script or file is configured to load at startup, thus throwing the error.
  • Malware or virus – If the computer is infected with malware or virus, you are likely to encounter a range of issues, including the Run vbs on startup in Windows 10.
  • Issues with the registry – A misconfigured or corrupt registry can wreak havoc if not fixed immediately.

If none of the previous methods worked, an in-place upgrade would surely fix things in the case of run.vbs error in Windows 10. And the best part is you wouldn’t lose any files or installed apps.

Also, find out how to easily improve the performance of Windows 10 and get your tasks done a lot quicker.

In case you have any queries, drop a comment below, and we will get back to at the earliest.

How to Fix a Corrupt Registry in Windows 7

The Windows Registry plays an important role in the functioning of Windows 7. When you install new software or hardware, it frequently installs itself in the registry and adds entries to it. 

These entries tell Windows how to interact with that software or hardware and what kind of programs should be used to open documents created by it. If you have a corrupt registry it can cause problems such as system crashes and blue screen errors. 

What causes a corrupt registry in Windows 7?

If you are wondering why you have a corrupt registry, below are some common causes:

  • Malware – Malware often modifies the Windows Registry. This can cause several problems such as slow boot times, random crashes and so on. A good antivirus program is recommended.
  • Incompatible programs – If you have recently installed any software or hardware, it is possible that the registry is corrupt due to incompatibility issues. 
  • RAM and hard drive errors – This can happen when there’s not enough RAM available on your computer due to a lack of available memory slots or an insufficient amount of RAM installed in your computer at the time of purchase. 
  • Hardware failure – If you have bad RAM chips or faulty hard drives, they could cause corruption in the registry as well as other parts of your PC. 
  • Unexpected shutdowns – These can cause file corruption if they happen unexpectedly while you are working on something important.
  • Corrupt drivers or system services – As time goes by, drivers and services may become outdated and no longer compatible with newer versions of Windows 7. 
  • Improperly shutting down your computer – This can happen when you shut down your computer while there is an active program running, such as playing a game or watching a video file. 
  • Incorrectly uninstalling software – The problem is that these programs don’t always remove all traces of the program from your system, leaving behind bits and pieces that can cause problems. 

How can I fix a corrupt registry in Windows 7?

If you have a corrupt registry, there are a number of things you can do before stepping up to advanced troubleshooting:

  • Make sure you have all the latest drivers for your hardware devices.
  • Check for viruses and malware on your PC.
  • Finally, try restarting your computer. Here’s what to do if your PC ends up stuck on restarting.

1. Run the DISM command

  1. Hit the Start icon, type cmd, and select Run as administrator.
  2. Type this command and press Enter: DISM /Online /Cleanup-Image /CheckHealth 

2. Run the System File Checker command 

  1. Hit the Start icon, type cmd, and select Run as administrator.
  2. Type this command and press Enter: sfc /scannow 

3. Run a registry cleaner

If you are not tech-savvy or just don’t have the time to manually go through multiple steps, an automatic tool will come in handy. There are many such programs available in the market that can do the job. 

4. Perform a System reset

  1. Click on the Windows key to launch the Start menu, and then select Control Panel from the options on the right.
  2. Navigate to System and Security.
  3. Select Backup and Restore.
  4. Find Recover system settings on your computer.
  5. Click on Advanced recovery methods.
  6. Select Return your computer to factory condition.
  7. Follow the on-screen instructions to complete the process.

If you need to restore your computer from a backup created earlier, first make sure it’s from a time before the corrupt registry errors began.

For detailed instructions on restoring your PC to its default settings, check this complete guide on how to factory reset Windows 7.

Can Windows fix registry errors?

Windows Registry Checker is a free tool to scan, clean and repair Windows registry problems. It detects and removes obsolete or incorrect information from the Windows registry and helps you optimize your PC’s performance.

Here are some of the features of this tool:

  • Registry Defragmentation – The software will help you defragment your registry in order to fix any errors and make it work more efficiently. This will help speed up your PC performance by making sure that all files are in the right place and easy for Windows to find them.
  • Registry cleanup – The tool can detect and remove obsolete or incorrect information from the Windows registry to optimize your PC’s performance.
  • Registry backup – The tool allows you to backup your registry before performing any changes so that if anything goes wrong, you won’t lose any important data from your system.

Hopefully you will find these solutions helpful for any problems you encounter and can fix the corrupt Windows 7 Registry.

As you may already know, the sun officially set on Windows 7 in January 2020. The OS will continue to be available for users who need access to security updates or other patches until 2023.

Windows 7 may still be pretty secure, but once its support ends, your computer becomes vulnerable to viruses and malware. We can’t emphasize this enough. These will not only slow down your computer but could also compromise your private data.

We’re already living in a world of constant online threats and the last thing you need is an unprotected operating system with security vulnerabilities.

As such, we recommend upgrading to Windows 11. Take advantage of the free upgrade while you still can.

Do let us know which method fixed your corrupt registry in the comment section below.

3 Easy Methods to Rebuild Boot Partition on Windows 10

The Windows 10 boot partition is important in starting up your PC. However, you might mistakenly delete the boot partition while troubleshooting your PC.

Also, the partition can develop some issues and fail to startup your PC normally. this guide will show you the steps to follow to rebuild your boot partition easily on Windows 10.

What causes boot partition problems on Windows 10?

There are a few reasons that can lead to boot partition problems on Windows 10. Below are some of the common causes:

  • Deleted boot partition: If you accidentally deleted Windows 10 boot partition, you will need to rebuild it to be able to start your PC normally.
  • Damaged Main Boot Record: Sometimes, it might just be that your Media Boot Record (MBR) is damaged while troubleshooting your PC. In this case, you need to rebuild the boot partition on Windows 10 MBR.

How can I rebuild the boot partition on Windows 10?

1. Repair EFI Bootloader

  1. Insert a bootable installation media and boot your PC from it.
  2. Choose your language and other available info and click Next.
    language next
  3. Select the Repair your computer option.
    repair computer
  4. Choose Troubleshoot > Advanced options.
    advanced options rebuild boot partition windows 10
  5. Now, select the Command Prompt option.
    command prompt
  6. From here, type the following commands and hit Enter after each: Diskpartdisk part rebuild boot partition windows 10 list disklist disk
  7. Note if there is an asterisk under the GPT column. This shows that you are using the EFI boot and not MBR. If there is no asterisk, you need to use Solution 2 instead.
    gpt asterik rebuild boot partition windows 10
  8. Now, type the commands below and press Enter after each: sel disk 0select disklist partitionlist partitionlist volume
  9. Note the volume with FAT32 and with a size or approximate size of 100MB.
    list volume
  10. Type the commands below and hit Enter after each to assign a letter to volume containing the EFI bootloader: Note that you need to replace the volume with asterisk with the volume in Step 8: select volume with asterik assign letter k
  11. Now, type the command below and hit Enter to exit Diskpart: exit
  12. Copy-paste the command below and press Enter to go to the directory of the hidden volume: Note that K is the drive letter we assigned in Step 9 and you should replace it accordingly. cd /d K:\efi\microsoft\boot\
  13. Finally, type the following commands and press Enter after each: %WINDIR%\System32\Config\BCD-Template attrib BCD -s -h -r ren BCD BCD.bak bcdboot C:\Windows /l en-us /s k: /f ALL

The steps above are what you need to do to rebuild the boot partition on Windows 10 on a GPT disk. Also, these are the steps you need to fix issues with your UEFI boot with Command Prompt.

2. Rebuild the Main Boot Record Boot Configuration Data

  1. Repeat Steps 1 to 4 in Solution 1 above.
  2. Type the commands below and hit Enter after each: bootrec /fixmbrfixmbr rebuild boot partition windows 10 bootrec /fixboot bootrec /rebuildbcd
  3. Finally, restart your computer and the deleted partition should now be restored.

That is what you need to do if you need to recover the boot partition on Windows 10 for MBR. When you want to restart your PC, remember to remove the bootable installation media.

3. Restore recovery partition using a third-party tool

An easier way to format your partition could be using dedicated software. In that matter, we recommend that you give AOMEI Partition Assistant Professional a try.

It’s a great tool, the interface is extremely intuitive, and all you need to do once you download it is to select the new partition and press the Format Partition option.

Moreover, you can rest assured that no data will be lost during the process due to its advanced data protection features.

AOMEI Partition Assistant Professional will run smoothly on your device without having to interrupt your work or reboot your device.

AOMEI Partition Assistant Professional

Simplified partition management with close to zero errors. Get the best deal now!
Check price Visit website

There you have it, everything you need to rebuild your boot partition on Windows 10 without issues. You only need to follow the instructions in this guide carefully and you should be able to start your PC normally.

Do you need a list of the best Windows 10 boot repair tools that really fix your PC? Check our excellent guide for the best tools to use today.

Feel free to let us know if you encounter any problems trying to rebuild your partition in the comments below.

Repair All DirectX Errors Easily: Updated Steps That Work In 2026

Struggling with DirectX errors on Windows 11? Outdated drivers, corrupted files, or even bugs can cause issue with these APIS.

Today, we’ll show you how to end all errors so you can use DirectX to enhance video playback, gaming, and media production.

We’ll tell you all about what causes errors in the first place, but first, let’s fix them:

How do I fix DirectX errors on Windows 11?

1. Checking the DirectX version

  1. Click on the magnifying glass icon on the bottom taskbar to bring up the Search bar.
  2. Type dxdiag and click on the first entry you see to run the DirectX Diagnostic Tool.
  3. Underneath the System tab, you will see which version of DirectX is installed on your computer.
  4. As you can see in this example, this computer has DirectX 12. If you don’t have this version or DirectX 12 Ultimate installed, we recommend that you download the latest version from Microsoft.

2. Download the latest version of DirectX

    You can rely on the next method that will most probably fix the DirectX error on Windows 11 by getting the latest version of the program.

    1. On your preferred search engine, search for Download DirectX 12 and click the first entry you see. This will begin the download automatically.
    windows-11-directx-error
  1. 2. You’re going to download the dxwebsetup.exe file. Click Open file.

    windows-11-directx-error
  2. 3. A small window will appear asking if you want to make changes. Select Yes.

    windows-11-directx-error
  3. 4. An installation wizard will appear to guide you. Select I accept the agreement.

    windows-11-directx-error
  4. 5. Click Next in this next window. You’re also given the option to install the Bing bar. We recommend that you deselect this option to save your computer space.

    windows-11-directx-error
  5. 6. At this point, DirectX 12 will begin downloading and installing.

    windows-11-directx-error
  6. 7. As soon it’s done installing, click Finish.

    windows-11-directx-error
  7. 8. Go back to the DirectX Diagnostic Tool and double the version for good measure.

3. Using Device Manager

  1. Right-click on the Start button.
  2. Select Device Manager and open the tool.
  3. Identify which driver you want to update. For example, in this guide, we will select to update the drivers for the computer’s processors.
  4. Click on the arrow to expand.
  5. Please select the driver you want to update and right-click it. Then choose Update driver.
  6. A wizard will appear to give you an option on how you want to update the drivers. We recommend that you select Search automatically for drivers.
  7. If an update is found, Windows 11 will automatically download and install it. If there’s no update, you’ll get this screen.
  8. After the driver has been successfully updated, select Close.

If that does not work, we recommend trying a specialized driver updater tool, which will scan your PC for missing or outdated drivers and prompt you to update them.

4. Checking for Windows Updates

  1. Click on the Start button and select the Settings icon.
  2. Click on Windows Update on the left.
  3. Select Check for updates to have Windows 11 download and install any updates, including drivers.

5. Installing optional updates

  1. Some driver updates may be considered optional by Windows 11. However, if you’re still experiencing DirectX issues, download the optional updates by clicking on Windows Update in the settings menu.
  2. Select Advanced options.
  3. Under Additional options, select Optional updates.
  4. In the next window, click the Driver updates drop-down menu and select the optional update you want to install.
  5. Then select the blue Download & install button.
Note icon NOTE
Upgrading to DirectX 12 will solve the Runtime issue plaguing Valorant players.

6. Disable third-party apps and startup services

  1. Press the Ctrl + Alt + Del keys on your keyboard.
  2. Click Task Manager to open the Task Manager window.
  3. Click on the Startup tab.
  4. Here, you will find a list of apps and services that run on startup; they can slow down your PC and conflict with other programs.
  5. Right-click a service and then select Disable.
  6. Check to see if DirectX works now. If it works, the app or service you disabled was the culprit.
  7. If you want further control over a broader range over which startup services are activated, open the search bar and type in System Configuration.
  8. Select the first entry you see.
  9. Go to the Services tab, and you will see all of the background services currently running on your PC.
  10. Tick off the Hide all Microsoft services checkbox to remove them.
  11. Select Disable all to shut down all these processes. This is not permanent, as you can return and enable them back on.
  12. Hit the Apply button.
  13. Restart your PC and see if DirectX works. If it is, then one of these services caused the problem.
  14. You should enable them one by one, so you can find the problematic app.

7. Run command prompt

  1. In the search bar, type in command prompt.
  2. Select Run as administrator.
  3. Enter the command below and hit Enter.
    sfc /scannow
  4. System File Check will scan Windows 11 and verify each file. This will take some time.
  5. Once the scan is complete, all of your system files will have been checked and repaired.

8. Perform a system restore

  1. Press the Windows key + R to bring up the Run dialog.
  2. In the dialog box, type rstruit, then hit Enter to open the System Restore wizard.
  3. In the System Restore wizard, click Next.
  4. The following window will show you the restore point currently available. Select the restore point and hit Next.
  5. Hit Finish, and the computer will revert to the point when DirectX worked or before the problems started.
Note icon NOTE
Be aware that restoring the system should be a last resort. This process will erase everything created or added after that restore point.

What causes a DirectX error?

By and large, DirectX is updated automatically, so there are rarely any issues, but sometimes there’s that odd moment where you’ll encounter an error. Sometimes your drivers aren’t up to date, or there’s a glitch, or something got corrupted along the way.

There is a myriad of reasons why DirectX won’t work for you. Here are a few of the most common ones:

  • Antivirus or PC boosters – They may often prevent your game from starting correctly, resulting in the DirectX error.
  • Corrupted game files – Your game files can be damaged, or essential files might have been destroyed. You may either attempt to fix the game or uninstall it and install a new copy.
  • Unexpected bugs – This error may occasionally appear in games or on your computer due to a random bug. In such cases, restart your computer and attempt to launch the game once more. 

Errors associated with DirectX come in different forms; a few include:

  • DirectX encountered an unrecoverable error in windows 11
  • DirectX error in Warzone
  • The DirectX internal system error in windows 11
  • DirectX runtime error in windows 11
  • DirectX not installing in Windows 11

How do I enable DirectX on Windows 11?

  1. Open the search menu, type Windows features, and select the Turn Windows features off or on option.
    directx error windows 11
  2. Expand the Legacy Components option, then select DirectPlay, and click OK.
    directx error windows 11
  3. Now you should have DirectX enabled.

How to reinstall DirectX Windows 11?

To reinstall DirectX in Windows 11, you only have to follow the steps in Solution 2: Download the latest version of DirectX.

With the steps above you should be able to fix common DirectX errors such as dxerror.log and directx.log in Wwindows 11.

Remember, it’s essential to ensure your Windows 11 stays healthy, free of any corrupted files or malware slowing everything down. Because of this, it’s recommended that you download PC Health Check to test your system and ensure it stays healthy.

Also, you should update to Windows 11 DX12 for the next experience using the tech. For older games, check for DirectX 9 graphics card compatibility.

Need help getting started? Here’s how to download DirectX 12 on Windows 11 and enable it properly if it’s not already active. If you’re running into issues, you can always reinstall DirectX 12 for a fresh start.

Feel free to comment below if you have questions about other Windows 11 problems or bugs. And leave comments about the most relevant solutions.

4 Ways to Fix Minecraft Launcher no Internet Connection

One of the most popular games worldwide, Minecraft, has been reported to throw errors from time to time. The error that affected many users is one that reads No Internet connection in Minecraft launcher, even though they can access everything else online.

The error message usually reads, Minecraft, something went wrong, try checking your internet connection in the launcher. In the following sections, we will explore the underlying causes and the solutions to the error.

Why does Minecraft Launcher no Internet connection error appear?

Here are a few reasons why you might be encountering the error:

  • Problems with the Internet connection – Usually, the Internet connection is slow, or you don’t have access to the Internet.
  • VPN, antivirus, or firewall blocking access – In some cases, it was the VPN or firewall that conflicted with the Internet and led to the error. Also, a third-party antivirus is just as likely to blame.
  • A bug in the installed version of Minecraft – There was a known bug in one of the versions of Minecraft that led to the No Internet connection error with the launcher.

How can I fix Minecraft Launcher no Internet connection error?

Before we head to the slightly complex solutions, here are a few quick ones you can try to get things up and running:

  • Wait for a while, an hour or two, and verify if Minecraft works perfectly on other devices. Sometimes, it could be issues with the server or a maintenance downtime affecting things.
  • Restart the computer. It’s the easiest way to fix issues with Minecraft or any other application, for that matter.
  • Turn off the modem/router for a minute, and then turn it back on.
  • Disable any third-party antivirus, firewall, or VPN installed on the computer.

If these two don’t work, the solutions below would definitely fix things when the Minecraft launcher can’t connect to Minecraft services.

1. Delete app data

  1. Press Windows + E to open File Explorer, and navigate the following path while replacing Username with the one on your computer:C:\Users\Username\AppData\Roaming.minecraft\versionsdelete files to fix minecraft launcher no internet connection
  2. Now, press Ctrl + A to select all the files here and hit Del.
  3. Once done, restart the computer for the changes to apply and open the launcher.

This is by far the simplest method to fix things when you see the No Internet connection error in the Minecraft launcher.

2. Disable Windows Firewall

  1. Press Windows + S to open the Search menu, enter Windows Defender Firewall in the text field, and click on the relevant search result.windows defender firewall
  2. Now, click on Turn Windows Defender Firewall on or off.turn off windows defender firewall to fix minecraft launcher no internet connection
  3. Select Turn off Windows Defender Firewall (not recommended) under both Private network settings and Public network settings, and then click on OK.disable firewall

3. Reinstall Minecraft

  1. Press Windows + R to open Run, type appwiz.cpl in the text field, and click OK.appwiz.cpl
  2. Now, locate the Minecraft entry here, select it, and click on Uninstall.uninstall app to fix minecraft launcher no internet connection
  3. Follow the on-screen instructions to complete the process.
  4. Once done, download Minecraft from the official website.download Minecraft
  5. Next, launch the setup and complete the installation process.install Minecraft

After you are done with the installation, check if the No Internet connection error in the Minecraft launcher disappears.

Reinstalling the game not just fixes issues with the game but also gets you on the latest version when Minecraft Bedrock is unable to connect to the server.

4. Reset network settings

  1. Press Windows + R to open Run, type cmd, and press Ctrl + Shift + Enter.command prompt
  2. Click Yes in the UAC prompt that appears.
  3. Now, paste the following commands one at a time, and hit Enter after each:ipconfig /release ipconfig /flushdns ipconfig /renew netsh int ip reset netsh winsock resetreset network to fix minecraft launcher no internet connection
  4. Once done, restart the computer for the changes to apply.

If nothing else worked to fix the No Internet connection issue in the Minecraft launcher, it’s likely misconfigured network settings to blame. Resetting it should do the trick.

And by now, the problem should be fixed. Also, find out how to update Minecraft and seamlessly fix a range of issues with it.

The Error occurred during initialization of VM also appears when initializing a Minecraft server so click the highlighted link to fix it.

If you have any queries or know of another solution, drop them in the comments section below.

Fix: System Thread Exception Not Handled BSOD on Windows 11

System thread exception not handled in Windows 11 is a critical error wich will make your computer throw in a big sad face bluescreen whenever you start it.

Unfortunately, a simple restart of your PC won’t fix the error, but the better solutions aren’t that complicated. Typically, a wrong driver that has been installed on your machine is the cause of the system_thread_exception_not_handled error in Windows 11 and Windows 10.

How do I fix the System Thread Exception Not Handled in Windows 11?

1. Boot into Safe Mode

    Using this practical solution with Safe Mode, you can get rid of BSOD issues like System thread exception not handled error on Windows 11.

  1. 1. Press the Win + I buttons to open the Settings menu.

  2. 2. From the left side, select System.

  3. 3. Click on Recovery.

    windows-11-error-system-thread-exception-not-handled
  4. 4. Under Advanced startup, select Restart now.

    windows-11-error-system-thread-exception-not-handled
  5. 5. Your PC will reboot, and multiple options will appear.

  6. 6. Select Troubleshoot.

    windows-11-error-system-thread-exception-not-handled
  7. 7. Click on Advanced options.

  8. 8. Select Startup Settings.

    windows-11-error-system-thread-exception-not-handled
  9. 9. Click on Restart.

    windows-11-error-system-thread-exception-not-handled/
  10. 10. After your PC reboots, press F5 to boot your PC into Safe Mode.

2. Use the Event Viewer to find the faulty file

While booted in safe mode, you will have acces to some windows programs that might help you fix your errors. Event Viewer is Windows native app that will allow you to look for files that have caused errors. Here is how it works:

  1. Open the Windows Search console by presing the Windows + S key combination
  2. Type Event Viewer and open the app
  3. Expand the Windows Logs and select filter current log
  4. Input the time frame during which the error occured
  5. Check the log for items that might have caused the error

You can double-click each entry so you can view a detailed report of what happened and find the file which has caused the error.

3. Rename faulty system file

If during your Event Viewer check, you found out that the issue was caused by a system file, you can rename that file and so force Windows to download a fresh copy of it.

  1. Press Windows + S key combination to open the search console
  2. Type the name of the file you identified in the event viewer
  3. Right-click on the file and click Open File Location
  4. Right-click the file in it’s current folder and press rename
  5. Input a new file name, it can be whatever you want

4. Reinstall the graphics card drivers

  1. Right-click on the Start icon.
  2. Select Device Manager.device-man windows 11 error system thread exception not handled
  3. Now expand the Display adapters section.
  4. Right-click on your GPU and choose Uninstall device. display-adapters windows 11 error system thread exception not handled
  5. Restart your computer.
  6. After restarting, your PC will automatically install the graphics driver.

We can’t stress enough how vital updating your drivers are, given these can trigger System Thread Exception Not Handled in Windows 11 on startup.

5. Repair your system files

  1. Open the Start menu.
  2. Type in cmd and choose Run as administrator.cmd-search windows 11 error system thread exception not handled
  3. Type or paste the following command inside the CMD window and press Enter: sfc /scannowsfc-scannow windows 11 error system thread exception not handled

6. Use a Windows Restore Point

  1. Open the Start menu.
  2. Search for Create a restore point and open it. create-a-restore-point windows 11 error system thread exception not handled
  3. Click on the System Restore button.system-restore-button windows 11 error system thread exception not handled
  4. Click on Next.
  5. Select the restore point to undo the latest changes to your computer. restore-point windows 11 error system thread exception not handled

What does SYSTEM_THREAD_EXCEPTION_NOT_HANDLED mean?

It is necessary to understand what is causing the System Thread Exception Not Handled problem because it will be easier for you to fix the problem the next time you face it.

Upon startup, Windows 11 will automatically detect and load all of the essential drivers installed on your machine. However, it is possible that a driver is incompatible with your Windows iteration or that a bug has been introduced into it.

As a result, a blue death screen (BSOD) will appear, stating the error SYSTEM_THREAD_EXCEPTION_NOT_HANDLED on the screen.

The message also sometimes lists the file triggering the System Thread Exception Not Handled error, say, ntfs.sys, nvlddmkm.sys, rtwlanu.sys, or ndis.sys.

Sometimes difficulties appear out of nowhere. For example, your computer is operating normally one day, and the next day it refuses to start.

What causes system thread exception not handled?

  • The drivers installed on your PC are outdated – Chances are that you haven’t updated your drivers in quite a while, which triggered this problem.
  • Overclocking can also cause this issue – You might have overclocked your PC for gaming or running graphics-intensive software, which also has been reported to be one of the reasons for this error.
  • You have installed an incompatible driver – If you install an incompatible driver and the error is because of backward incompatibility, i.e., you cannot install 64-bit software on a 32-bit PC.
  • Some critical files of the driver are corrupt or missing – Because of faulty installation or pro-longed usage, some essential files of the driver got corrupted.
  • Important system files are missing or corrupt – Some third-party software might have replaced or tweaked the critical system files, which got corrupted or replaced.

For more information on Windows system restore points, check out our article on creating a Windows 11 restore point.

Alternatively, if you’ve made a mistake you want to delete from your past, we’ve got you covered with a guide on undoing a system restore in Windows 11.

And lastly, since we are on the same subject, we suggest you read our post on how to fix System Thread Exception not Handled ntfs.sys in Windows 10 since it includes solutions applicable to Windows 11.

Can the Blue Screen of Death Be Fixed?

Are you getting the BSoD or Blue Screen of Death issue on your Windows 11 PC, and none of the solutions seems to resolve the problem for you? Then do not worry, as we have got you covered.

You can check out our dedicated guide that lists effective solutions to fix the Blue Screen of Death error on Windows 11.

We also have a guide on Handle Error On Critical Thread, so feel free to check it out.

Was this guide helpful for you and your friends? Then, do tell us in the comments section below whether you have more solutions in mind.

raiseactivationauthenticationlevel: How to Raise DCOM Level

DCOM authentication is an alternative to the default anonymous authentication. The latter uses a username and password to authenticate an application. The higher the level of authentication, the more access with how apps communicate with each other.

In addition to offering better security than anonymous authentication, DCOM authentication offers more flexibility. This is because it lets you specify which users can access your applications. A lot of people are increasingly embracing remote software so it is recommended to stay secure at all times.

What is DCOM authentication level?

The DCOM (Distributed Component Object Model) is a protocol for remote method invocation. It is a Microsoft technology that allows software to be called remotely. 

The DCOM authentication level controls how much information DCOM provides about itself when it attempts to connect to another application and is based on COM.

COM is an object-oriented programming standard that was developed by Microsoft to allow applications written in one language (for example C++) to be used by applications written in other languages.

A COM object can be used by any application supporting the standard, provided that it implements the required interfaces. This approach makes it easier to reuse code and share data between applications and software components.

In general, DCOM is a technology that enables remote procedure calls (RPCs) between clients and servers. It provides a mechanism for applications to communicate across the network without having to expose their internal data structures and functions to other applications. 

Why should I enable DCOM?

Some of the benefits of enabling DCOM include:

  • Communication between applications – It is possible for different computers or networks to communicate using DCOM. 
  • Troubleshooting – Enabling DCOM can help you troubleshoot issues with applications such as Microsoft Exchange Server.
  • Manage and control – DCOM allows you to remotely administer software and hardware on your computer from another computer. It’s almost similar to remote desktop protocols. You can also use DCOM to access information about the capabilities of your computer and its performance.

While DCOM has immense benefits, unfortunately, it also has its downsides. These include: 

  • Excessive control – When you enable DCOM, you allow other programs to control your computer. This means that they can send commands to execute programs on your computer, change the Registry settings, and access other files.
  • Security issues – DCOM can be used by hackers to gain access to your computer. The security risks are high as anyone with malicious intent can take control of your PC.
  • Loss of privacy – If one of the applications on your computer has been infected with a virus or malware, then it can easily steal passwords and sensitive information from other applications on your computer.
  • Slow performance – DCOM requires more system resources than normal applications do and this can interfere with their performance as well as yours.
  • Limited programs – You may be unable to install certain programs. Some software companies do not support DCOM because of security concerns.

How can I raise the DCOM authentication level?

  1. Hit the Windows + R keys to open the Run command.
  2. Type regedit and press Enter.run regedit command
  3. Navigate to the following location: HKEY_LOCAL_MACHINE\SOFTWARE\Microsoft\Ole\AppCompatnavigate to regedit ole
  4. Right-click on an empty space and select New DWORD and create a Value Name as RaiseActivationAuthenticationLevel.
  5. Type in 1 or 2 as the Value Data depending on the level of authentication you desire.
  6. Restart your PC for the changes to take effect.

If you get a message such as The server-side authentication level policy does not allow the user %1\%2 SID (%3) from address %4 to activate DCOM server. It means that you need to raise your DCOM activation authentication level.

Also, you can only edit the registry if you have the KB5004442 Windows update. 

How do I check if DCOM is enabled?

DCOM can be enabled by default on some systems, but it can also be disabled by default or manually. To check whether DCOM is enabled, follow the steps below.

  1.  Hit the Windows + R keys to open the Run command.
  2. Type dcomcnfg in the dialog box then press Enter.
  3. In the left pane, click on Component Services to expand then select Computers.
  4. Right-click on My Computer and select Properties.
  5. Navigate to the Default Properties tab, check the Enable Distributed COM on this computer and click OK.

By enabling DCOM you expose your system to security vulnerabilities. This can allow attackers to remotely execute code on your computer. If you are not using the protocol, it is best to disable it.

For more information on how to manage the DCOM changes, refer to Microsoft’s page. You may also run into a DCOM error 10016 so be sure to check out our guide on how to bypass this issue.

We’d love to know what authentication level you have applied if you have enabled DCOM and why. Share in the comment section below.

How to Manually Install Drivers on Windows 11 [3 Ways]

We can strongly admit that without drivers, our PC and OS won’t run in normal conditions. Before anything else, you should know that you can both automatically and manually install drivers on Windows 11.

A device driver is able to simplify programming, acting as a translator and communicator between your device and the apps or OS that use it.

Drivers are important considering that if they are not working properly, you might notice malfunctioning or unresponsive hardware. Even more, they hide the intrinsics of your hardware devices, allowing you to use an extremely easy interface.

In the picture below you can view how drivers work on your PC. As you can see, drivers are software components related to your device, that allow your OS to start, use and control all the hardware and software pieces.

Source: Digital Citizen

It seems like some users need to know how to manually install drivers on Windows 11, and we’re going to show you the easiest ways you can do it.

In order to discover the most proper option, make sure you try all the listed ones below.

How can I manually install drivers on Windows 11?

1. Use the Settings menu

    An efficient and incredibly practical way to manually install drivers on Windows 11 is with the Settings menu, namely using the Windows Update tool from your computer.

  1. 1. Open Settings.

    settings
  2. 2. Go to Windows Update, then select Advanced options.

    manually-install-drivers-windows-11
  3. 3. Select Optional updates.

    manually-install-drivers-windows-11
  4. 4. Expand the Driver updates section, then checkmark the recommended drivers.

    manually-install-drivers-windows-11
  5. 5. Click on the Download and Install button.

    manually-install-drivers-windows-11
  6. 6. Wait for the process of installing drivers to finish.

2. Get drivers on Windows 11 from the manufacturer’s website

  1. Open any web browser, then search for your driver manufacturer’s driver download center.
  2. In most cases, you should search for the exact model of your product, but you can also look for the general driver.
  3. So let’s say you access the Intel download center. In the search bar, you can type your needed specifications, as in the example below:
  4. A list will appear, then you’ll have to select one of the available drivers (We recommend choosing the latest ones).
  5. Click on the Download button.
  6. Follow the on-screen instructions to install it.

3. Use Device Manager

  1. Open Device Manager.
  2. Expand the related-driver section, then right-click on the needed driver, and select Update driver.
  3. Choose Browse my computer for drivers.
  4. Click on the Browse button, then select a location for your driver.
  5. Click on the Next button.

What are the most common driver problems?

To prevent any issue related to your drivers, we prepared a list of the most common driver problems. Also, make sure we’ll come up soon with full-fix articles regarding these problems in Windows 11.

  • BSOD errors, also known as the Blue Screen of Death errors
  • Computer screen freezing issues
  • Printer or scanner not responding properly
  • Mouse, touchpad or touchscreen driver related issues
  • Sound and audio driver issues
  • USB or keyboard driver problems

To prevent all of these troubles, we recommend constantly updating your drivers. It’s possible that you’ll feel overwhelmed if you have to update each driver manually whenever it’s needed.

When there are issues with hardware, peripherals, or software performance, having your drivers up and running is a must-do operation.

As for automatic scans of missing or outdated drivers, we can only encourage you to use a dedicated driver updating tool.

However, an automated solution not only downloads and installs drivers, but also manages them by troubleshooting, backing up, and restoring them.

You may rely on these tools to make such changes to ensure a proper installation and upgrade with the most latest and compatible Windows 11 drivers.

How often should I check for updated drivers?

In general terms, you don’t have to manually check for your updated drivers, and that’s because Windows will let you know if there’s a new one available for update.

However, like any other software component, it is possible that it won’t always notice you when if there’s such an available actualization. Thus, you may need to manually check for updated drivers.

If you wonder how often should you inspect for this kind of action, take a look at the information listed below:

  • Before anything else, consider checking for driver updates after every large Windows update.
  • You need to examine the driver updates every time you install a new app on your PC.
  • Considering the GPU drivers (graphic processing unit), you can update them every time a new game or video editing program comes up.
  • If you need to connect any peripherals to your device (such as USB cable, printers or scanners), you should check for the related drivers as soon as you associate them to your computer. Thus, you’ll make sure that they won’t harm your PC.

Having an optimized driver requires every three-month update. In addition, consider that you can also access the Microsoft Download Center, and search for the driver you need to install.

So these are the easiest methods that will help to manually install drivers on Windows 11. Of course, you can also do it in an automatic manner, which is a less time-consuming option.

If you have any other questions regarding this subject, do not hesitate to comment in the section below.

Windows 11 File Explorer Keeps Crashing [Fix]

Is File Explorer crashing randomly on Windows 11? You can go through this article to get the best solutions.

File Explorer is an important integrated part of the latest OS versions. In these terms, keeping it running in proper conditions is mandatory.

To find out how File Explorer is different from the previous OS version, check out some new features, comparisons & update tips.

Besides the great features that the new File Explorer brings, users have claimed to get into some worrying problems.

You might sometimes notice that in Windows 11, the desktop File Explorer keeps crashing without any certain explanation. There are some reasons why this happens, and we’re going to describe them.

Why does Windows File Explorer keep crashing?

➡ Improper system settings

One of the most common reasons why Windows 11 File Explorer crashes can be related to improper system settings. Thus, you should consider adjusting and optimizing its advanced options.

If this is why your File Explorer can not properly work, make sure you’re going to find some solutions later in this article.

➡ Incompatible third-party software

It is possible that third-party antivirus programs or other kinds of harmful apps can cause damage to Windows File Explorer by entering into conflict.

This reason might generate delays or lags when using File Explorer. To avoid such situations, you should definitely find out how to block third-party app install on Windows PCs.

➡ Large number of files in history

Having too many files in File Explorer can make it oversaturated by unnecessary storage. In these terms, history will negatively affect it, causing crashes or slow-down situations.

➡ Corrupted system files

Corrupted system files might get inoperable or unusable due to various reasons. Thus, they can also affect how your File Explorer acts.

This usually happens unexpectedly, leaving you unable to access File Explorer or to normally use it.

You should know that these reasons are not uncommon, so there are plenty of options to fix them. Fortunately, they are similar to what you know was applied to fix Windows 10 file corruption issues.

Moreover, there are multiple variations that can occur, which are all fixable with the solutions below:

  • Windows 11 file explorer crashes when I right-click
  • Windows 11 file explorer not opening from Taskbar
  • File Explorer crashing after update in Windows 11
  • Windows 11 Explorer crashes after sleep
  • Windows Explorer keeps restarting in Windows 11
  • File Explorer keeps crashing in Windows 11
  • Windows Explorer crashes when selecting file
  • Windows 11 file explorer crashing on startup

What is Windows Explorer?

Windows Explorer is one of the key components of this OS. Without it, you cannot do anything in a normal way. Unfortunately, there is no way to reinstall Windows Explorer. However, you can repair it using various methods like SFC or DISM commands, etc.

We have a separate guide on this. Read: How to repair corrupted Windows components

Probably, you want to reinstall Windows Explorer just because you have been encountering some problems with it. Don’t worry. There are various methods that you can try to solve your problem.

To find out some of the best solutions to consider if your Windows 11 File Explorer is acting weird, make sure you read this article completely.

How do I fix File Explorer crashing on Windows 11?

1. Adjust the File Explorer options

  1. Open Control Panel.windows control panel
  2. In the top right corner search bar, type File Explorer options and open it.
  3. Select the General tab.
  4. Next to the Open File Explorer To: drop-down menu, select the This PC option.windows this pc
  5. Click on Apply, then on OK.

This is the first and the easiest method to try if your File Explorer keeps crashing. It might help, considering this issue can occur due to some improper settings.

2. Use Command Prompt

  1. Click on the Start button, type Command Prompt, then right-click on it and select Run as administrator.windows cmd
  2. In the pop-up window, type the following command, then press Enter: sfc /scannowwindows 11 click enter
  3. Wait until the process is completed.
  4. Restart your PC.

This command is also known as System File Checker and allows you to scan and restore corruptions in Windows system files. Thus, it can definitely help if Windows 11 File Explorer is in a crash loop.

A more advanced alternative for this issue is to use specialized software that finds and repairs corrupted Windows files.

3. Clear the Cache

  1. 1. Click on the Start button on your taskbar to open the search box.

  2. 2. Type Control Panel in the search box, then click on the first result.

    control panel search box windows 11
  3. 3. In the top right corner search bar, type File Explorer options and press Enter to open it.

    file explorer windows 11
  4. 4. Navigate to the General tab.

    windows 11 explorer crash fix clear file explorer history
  5. 5. In the Privacy section, click on Clear.

  6. 6. Select OK to confirm the selection.

  7. It is possible that sometimes the File Explorer history cache gets corrupted or turns out too big. In these situations, files and folders are loading slowly or not loading at all.

    With this option, you’ll be able to clear the history and also prevent unnecessary memory usage, which might be some explanations for your Windows 11 File Explorer crashing.

It is possible that sometimes the File Explorer history cache gets corrupted or turns out too big. In these situations, files, and folders are loading slowly or not loading at all.

With this option, you’ll be able to clear the history and also prevent unnecessary memory usage, which might be an explanation for your Windows 11 File Explorer crashing.

4. Check for Windows updates

  1. Open Settings.windows settings
  2. Go to Windows Update.windows update
  3. Select Check for updates.windows check for updates

With this method, your OS will automatically recommend and fix problems like corrupt settings that create other problems. If you are facing Windows 11 desktop File Explorer crash or fail issues after an update, you can skip this method.

5. Execute certain commands with Windows PowerShell

  1. Right-click on the Start icon, then select Windows Terminal (admin).windows 11 start icon
  2. In the PowerShell, type the following command, then execute it: Repair-WindowsImage -Online –RestoreHealth
  3. Wait until the process is completed. 
  4. Restart your PC. 

Running the repair command will fix things in no time when Windows 11 File Explorer closes automatically.

6. Restart Windows 11 File Explorer

  1. Press Ctrl + Alt + Delete on your keyboard, then select Task Manager. windows 11 task manager
  2. Click on the Processes tab, search for the File Explorer, then select it.windows 11 file explorer
  3. Click on the Restart button.

7. Update the GPU driver

We suggest you depend on a third-party tool to update the GPU driver. It is because, with the Windows Update, you will only get a generic video driver update that may not be up to date.

So, we advise you to use Outbyte Driver Updater. It can scan and update any drivers to the latest version within a single click. The process is also very fast. Else, it has so many advantages that you will get to know once you start using it.

⇒ Get Outbyte Driver Updater

How can I prevent my Windows 11 File Explorer from crashing?

We consider properly delivering some useful options to prevent your Windows 11 File Explorer from crashing. Check out the following tips:

  • Constantly update your OS
  • Regularly clear your File Explorer history
  • Fix the corrupt files and drives
  • Remove items from the Quick Acess menu
  • As an additional suggestion, you should disable third-party extensions and antivirus programs.

You won’t get again into File Explorer troubles by constantly applying the above aspects.

If your File Explorer is having problems in Windows 11, make sure at least one of the listed options will help you with a minimum of effort. Otherwise, we prepared more solutions in this article dedicated to Windows 10/11 File Explorer search not working.

Note that with its most requested feature, Windows 11 File Explorer allows you to add additional tabs, which can ensure a much-personalized view. Considering this, Microsoft Store is one of your main allies.

However, for those who are not so happy with the latest UI changes, feel free to read how to get the Windows 10 File Explorer ribbon on Windows 11.

Do not forget to share your thoughts and opinions regarding the presented subject by leaving a comment in the section below.

3 Easy Ways to Fix Windows 11 Error Reference by Pointer

The adage that nothing is perfect certainly applies to software development, as flaws may and will derail the user experience. Thus, today’s topic is how to fix Windows 11 error reference by the pointer.

Unfortunately, if your PC crashes with a Blue Screen of Death, it indicates a significant PC fault, which is usually (but not always) caused by defects in some programs, or drivers.

The reference by pointer BSOD is one of the most unusual faults to emerge. Trying to figure out what caused it is difficult, but it frequently points to problems that are simple to repair.

What causes reference by Pointer BSOD?

A pointer-based reference BSOD error (also known as a reference by pointer or 0x00000018 error) typically indicates a problem with your system files or device drivers.

Windows internally refer to running elements (such as an open window) as objects with numbers indicating how many times the components are referred (or used) elsewhere to assist prioritize system resources.

scan device drivers windows 11 error reference by pointer

This value lowers until the item is eliminated, freeing up system memory for other services that are operating.

When a reference by pointer warning is displayed, Windows detects an erroneous reference count for a running object. Because this could be a significant security concern, Windows will stop and display a BSOD. Forcing your system to restart and erase all current memory.

In almost every case, though, this is due to a faulty piece of software. The most typical source is hardware drivers, however graphics cards and other components like network devices can also trigger it. It can also be caused by other difficulties, such as faulty system files or malfunctioning hardware.

How can I fix Windows 11 error reference by pointer?

1. Start in Safe Mode

    A recommended solution to work out the Windows 11 error reference by pointer issue would be to start your PC in Safe Mode.

  1. 1. In order to fix the BSOD REFERENCE_BY_POINTER 18 issue, click the Windows/Start icon from your Taskbar. Then select the Power icon.

    start-power bcdedit windows 11
  2. 2. Hold the Shift key on your keyboard and click on the Restart now option.

  3. 3. You will be redirected to the menu below from where you can choose Troubleshoot and Advanced options.

    windows-11-error-reference-by-pointer
  4. 4. Now, click on Startup Repair and tap on the Restart button if it shows up.

    startup-repair bcdedit windows 11
  5. 5. After your computer has been restarted, hit the number 4 key on your keyboard to navigate to the relevant option on the following screen.

As a result, the machine will enter the Safe Mode environment as a result of the above steps.

2. Update device drivers

  1. Press the Windows key + I to launch the Settings interface and navigate to the left panel and select Windows Update. Now select Advanced options from the right side as we have shown below.windows-advanced  windows 11 dynamic refresh rate not working
  2. Next, tap on Optional updates under the Additional options section.optional-updates-option  windows 11 dynamic refresh rate not working
  3. Select Driver Updates from the drop-down menu that appears, then select all of the driver updates that are displayed to you. Lastly click on the Download and install button to complete the process. It is not necessary for me to install any additional updates at this time. no-update windows 11 dynamic refresh rate not working

Even though Windows is frequently in charge of driver updates, if you are having trouble, you can manually search for updates.

We strongly advocate using a specialist program such as Outbyte Driver Updater to do automatic scans for out-of-date drivers. And avoid getting errors such as Reference by pointer BSOD every 30 minutes.

3. Run an SFC scan

  1. To open the Command Prompt interface you need to press Windows and S then type in cmd. Lastly, right-click on the top result and choose Run as administrator.cmd-search-result windows 11 error reference by pointer
  2. Now type or copy-paste the following command as we have shown below and let it run: sfc /scannowsfc-scannow windows 11 error reference by pointer

If you get the Reference by pointer error in Windows 11 on a Dell computer, you should try to apply all the above solutions.

In case nothing works, users reported they were able to fix the Reference by pointer issue by downloading the Dell Support Assist program. Simply hit the Download SupportAssist button in order to install and run it.

Is the Blue Screen of Death fixable?

Blue Screen of Death is the message that shows on your computer when it has encountered a problem that cannot be repaired. Should this occur, the computer will shut down to protect itself from further damage.

Nonetheless, any BSOD error is fixable! You may explore the issue and pinpoint the root cause of the problem by using the specific code that corresponds to each mistake. If a specific file was the cause of the crash, the name of that file will be included in the error message as well.

We recommend that you refer to our dedicated article about BSOD errors in Windows 11 and how to fix them.

Errors of this kind are frequently brought on by issues with the hardware on your system. The RAM is almost often the source of the problem. But you need also to take into account a number of additional elements that are not related to the hardware.

For more information and potential solutions to the Windows 11 error reference by pointer, check out our post on how to fix reference by pointer BSOD error [Bugcheck 0x00000018].

Alternatively, you should take a look at our article on what to do if you get a BSOD error on Windows 11, and find out how to further troubleshoot the problem.

Let us know in the section below which solution worked for you. Thanks for reading!

3 Best Sound & Audio Calibration Software for Windows

You’ve just bought the best speakers and connected them to your Windows PC? Now, you need a sound calibration tool to get the best quality sound.

These apps not only address sound distortions but they help you optimize the sound for your environment.

Why do I need sound calibration software?

Every room or environment influences the frequency response of the sounds you’re listening to.

In fact, after the sound exists in your speakers, it bounces between all objects and walls until it gets absorbed.

That is why, in a completely empty room, you will experience a hall effect and echoes, while in an overpacked environment, the sound will be heard almost muffled.

Moreover, when the sounds from two opposite speakers meet, they will create peaks or dips, if they are in phase or out of phase.

Long story short, the tools below will help you tweak your sound for a reference studio audio quality and achieve a balance between the left and right channels

What are the best sound calibration apps?

SoundID Reference – Best sound calibration solution

If you want to achieve perfect studio sound for your musical creations, Sonarworks’s SoundID Reference is the ultimate tool for sound calibration.

Apart from adapting the sound for any of your headphones or speakers, this software is able to adjust the sound coloration to adapt to all devices.

Here’s how it works: All the speakers have their own specific sound or sound coloration, as the specialists call it.

So, when you’re mixing a song, it will be influenced by those properties. SoundID Reference has a database of over 400 types of headphones and speakers and their sound coloration patterns.

After you choose your device from a list, the tool will eliminate all those frequency patterns to get the perfect studio reference sound.

That means every mix you make will translate the same for all the listening devices of the target audience.

For headphones, you will just need to select the pair from the available list, but things are a bit more complicated for speakers.

To calibrate the sound for them, you will need the SoundID Reference measurement mic, which is individually calibrated for this job.

The software also allows you to adjust the target curve in real time or perform simulations for certain types of headphones or speakers.

SoundID Reference has a free trial complete version that can be tested for 21 days so feel free to use it.

Let’s review some of its best features:

  • Sound calibration for over 400 types of headphones and speakers
  • Get accurate studio reference sound for your mixes
  • DAW plugin and Systemwide Calibration
  • Customize your target sound using a parametric equalizer
  • Check your mix in different listening environments

SoundID Reference

Calibrate your mixes for the perfect studio reference sound with a large database of devices.
Free trial Visit website

ARC System 3 – Great for speaker calibration

Unlike SoundID Reference, IK Multimedia’s ARC System 3 comes only as a DAW plugin and may be used for speakers and room calibration.

However, you also need a measurement microphone to perform the actual calibration. And with the latest iteration of the software, it now supports third-party devices for this job.

ARC System 3 applies the same system to null out the sound coloration of your speakers, but it doesn’t have a device database to choose from.

The tool measures the sound of your room within a guided step-by-step process and then generates a correction profile.

That is loaded into the ARC plug-in for your DAW and creates the needed reference studio sound.

Take a look at its key features below:

  • Measurement mic, room analysis software, and correction plug-in
  • Improves frequency balance and stereo imaging in any room
  • Work faster and create better mixes without expensive room treatment
  • Virtual monitoring emulates the sound of common listening devices

⇒ Get ARC System 3

TRACT System Calibration – Great sound plugin

Wave’s TRACT System Calibration is also a DAW plugin dedicated to Smaart, the standard audio analysis software from Rational Acoustics.

Just like the tools above, it is used to auto-correct EQ issues and time-align any sound system.

TRACT calculates a corrective FIR EQ curve and makes time alignment adjustments by using data from Smaart v8 or Di v2.

The plugin takes 8 measurement snapshots of your system and merges them up to use it as a reference for your EQ corrections.

Once the FIR EQ is calculated, you can change the reference curve, or add up to 8 bands of IIR EQ filters.

TRACT includes a minimal-phase FIR component, which works at very low latency and with low phase distortion, as well as a linear-phase FIR component.

The fun part is that you can use it in a live setting with a mixing console or within any major DAW.

Check out its best features:

  • Built-in 8-band FIR EQ
  • Uses data from Smaart v8 or Di v2
  • 8 bands of IIR EQ filters
  • Can be used in live settings with any mixing console
  • Calculates delay for aligning audio systems

⇒ Get TRACT System Calibration

This concludes our list of the best sound calibration software and we hope that you found the right one for your needs. You can also try Dynamic Audio Normalizer for simple sound balancing.

In the same respect, you might be interested in our selection of the best speaker calibration software for Windows.

Have you used any of the tools highlighted above? If so, tell us about your experience in the comments section below.

No Physical Memory is Available at The Location Required [Fix]

Booting errors are one of the frustrating things that occasionally plague Windows users. One such error is that no physical memory is available at the location required for the Windows boot manager.

We’ve also noticed a lot of complaints from our readers on this and similar issues like not enough physical memory in VMware. So, this guide will examine the likely causes and solutions.

Why do I encounter no physical memory available at the location required?

The following are some of the reasons why you’re experiencing no physical memory available at the location required:

  • Hard drive failure – If the hard drive has been recently damaged, your system won’t be able to boot up. Also, Windows may refuse to boot with the second hard drive if that’s what you are using.
  • Corrupted modules – If the memory modules on your computer are not fitted properly, the system might not boot up.
  • Damaged CMOS battery – CMOS batteries have about 4 – 5 years’ lifespans. If they’re way past their valid life cycle, it might be the reason you’re experiencing this error.
  • BIOS error – You might have accidentally triggered an error if you’ve recently changed the configuration settings of your BIOS. This may also cause Windows to skip BIOS.

Irrespective of the causes, any of the solutions below should fix it.

What can I do if there’s no physical memory at the location required?

Troubleshooting is the only way to resolve system errors. However, users should ensure that they’ve performed the following preliminary checks:

  • If you’ve experience handling disk drives, open up the system unit to check if the hard drives and memory modules are tightly fitted. Sometimes, hard disks can be slightly displaced when they experience forceful external contact. 
  • You can also try narrowing down the problems by inserting your current hard disk into another working computer. This will help you determine if the fault is from the hard disk or your system.

Here are a couple of things you can do to help you resolve this error.

1. Adjust your Boot Sequence

  1. Hit the power button to turn on the computer.
  2. To enter the BIOS, hit the F2 or Del button. (Depending on the system’s manufacturer)
  3. In your BIOS setup, click the Boot tab.
  4. Reorder the Boot sequence to the following by clicking the + or - keys: Hard Drive > CD > Removable devices
  5. Click on the Exit tab and select Exit Saving changes or Save changes.

Your computer will restart once you save your changes and exit the BIOS setup. Try the fixes here should your laptop ignore the boot order on Windows 11.

2. Replace your CMOS Battery

  1. Disconnect your system’s power cable or remove the battery if it’s a laptop. 
  2. Press and hold the power button to discharge residue electricity.
  3. Locate the CMOS battery (It looks like a quarter; you can find it on the motherboard.) Hold the motherboard firmly to ensure that you only remove the damaged CMOS battery.
  4. Replace the battery with a new version of the current cell.

BIOS settings will be erased when you replace a CMOS battery. However, it will fix the no physical memory is available at the location required for the Windows boot manager.

3. Reinstall Windows

  1. Go to Windows Insider’s download page, select the version you want to download, and click on Confirm.
  2. Now click on 64-bit Download.
  3. Press the Windows + E keys to open File Explorer. By default, the file should be in the Downloads folder.
  4. Expand the Windows 11 ISO file to mount it and double-click on setup.exe.
  5. Click Next on the welcome screen.
  6. Once the updates are downloaded, click Accept.
  7. Choose the Keep personal files and apps option and click Next to proceed.
  8. Follow the instructions on the screen to complete the process.

Reinstalling Windows will wipe out your entire system files. We recommend you have a working backup before reinstalling Windows. 

You should note that this error isn’t similar to the not enough memory in Windows 11. So, you can check our guide to get solutions for that. Further, you can look at what to do if your computer is low on memory.

Let us know in the comment section if you have any other suggestions or solutions. 

Fix: No Permission to View or Edit this Object’s Settings

Some of our readers have recently reported that the error stating You do not have permission to view or edit this object’s permission settings is very frustrating as they cannot access some files or folders on their PC. This issue is mostly inevitable if you do not have administrative privileges.

Why do I encounter no permission to view or edit this object’s settings error?

There can be several reasons you don’t currently have permission to access certain object settings. Some of them are as follows:

  • Other programs are using your file/folder simultaneously – Whenever this happens, you are prevented from viewing or editing the permissions settings of an object.
  • Corrupt user account – The permission problem is likely to arise if the user account is corrupted due to a computer crash or the PC gets affected by viruses or malware.
  • A file or folder is encrypted – If a file or folder is encrypted, you cannot have access to it unless it is decrypted by the person who encrypted it or you get the certificate that was used to encrypt such file/folder.
  • A user account is no longer active – When a file is created or owned by a user account that is no longer active on your computer, it could result in this issue. However, it can quickly be resolved in Safe Mode.

You can check here to learn more causes of these permission issues.

What can I do if I have no permission to view or edit this object’s permission settings?

Before trying any of the advanced fixes, you should consider performing the following steps in case your problem is not far-fetched:

  • A straightforward workaround is to copy the folder to a different location. Having moved it to a new location, you can try to access it from there. This might not be the best fix, but it might be worth trying out.
  • Restart your PC to check if the issue persists. Do not hesitate to take immediate action if your computer fails to restart.

Having confirmed the above checks, and the error is yet to fix, you can try any of the fixes below.

1. Take ownership of the directory

  1. Press the Windows + E keys to open File Explorer.
  2. Locate the file that can’t be accessed, right-click on it and choose Properties from the drop-down menu.
  3. Navigate to the Security tab and click on Administrator from Group and user names. Then click on the Advanced button.
  4. Locate the Owner section at the top and click on Change.
  5. In the Select user or group window, click on the Advanced button.
  6. Then, click on the Find now button in the Advanced Settings window and select which group should have full file permission on your computer.
  7. Next, click OK to close this window.
  8. Then navigate toward the Permissions tab and check if your user account is there. If it’s not, click on the Add button.
  9. Next, click on Select a principal.
  10. Here, repeat Steps 5 and 6 to select the desired user or group.
  11. Set Type to Allow and Applies to This folder, subfolders, and files, and check the Full control option. Now click the OK button to save the changes.

After following the above steps, you will have ownership over the selected file and also be able to edit without restrictions.

You can also explore other methods to change the ownership permission of files if your access is denied in this guide.

2. Remove an account from the permissions

  1. Press the Windows + E keys to open File Explorer.
  2. Right-click on the file/folder with the issue and select Properties.
  3. Navigate to the Security tab and click on Advanced.
  4. If the entry at the top lists Denied under Access, select it and then click on Remove.
  5. If any error message pops up, click on the Disable inheritance button.
  6. Next, select Convert inherited permissions into explicit permissions on this object, and then remove the account.
  7. Lastly, click OK to save the changes.

Now check if removing an account from the permission has fixed the issue.

Alternatively, you can also check our detailed guide on how to fix administrator access denied on Windows 10 and 11.

Do not hesitate to use the comments section below if you have questions or comments.

Download the Latest Microsoft Lifecam Software and Drivers

In this article, let us discuss Microsoft LifeCam software and show you how to download and use it.

When you make Skype calls, it’s not uncommon for you to use the webcam to communicate with others.

Regarding webcams, Windows 10 users have reported some issues with Microsoft LifeCam, and today we’re going to fix those issues.

Is Microsoft LifeCam plug-and-play?

Yes, LifeCam Cinema HD is a (PnP) plug-and-play camera. And for most users, it is already prepared for use with Windows 10.

After you connect it, Windows will set everything up for you, including downloading the required drivers. This means it is ready to be used from the minute it is connected to a Windows 10 device.

Microsoft LifeCam cameras may now be used with Windows 10 or later without additional firmware, software, or drivers.

Note that there may be a rare instance where your PnP devices will not be detected, but these can easily be fixed.

How do I install LifeCam drivers?

1. Use a dedicated driver software

There are various third-party tools that you can use to install the latest drivers on your Windows computer automatically. However, professional driver updater software is one of the most efficient options.

You need to know from the start that a professional tool makes updating drivers simple, even for newbies. The Microsoft Lifecam software will always work perfectly if you keep an updated driver.

More precisely, you can use an automatic tool to find, download, and install the correct driver version on your Windows PC in just a couple of clicks, and we strongly recommend Fortect Driver Updater.

⇒ Get Fortect Driver Updater

2. Install Skype

  1. Open the Microsoft Store app and search for Skype.
  2. Once found, click on Install.
    microsoft lifecam software
  3. Wait for the installation to complete, and the necessary drivers to run a LifeCam device should have also been installed.

On Windows 10 and 11, you will not need to install drivers for the Microsoft Lifecam HD-3000 since the OS software already caters to this. However, in the rare case you may need drivers, we recommend using any of the suggestions in this guide.

Let us know what worked for you in the comments below.

How to Fix League of Legends Not Opening on Windows 11 or 10

League of Legends not opening in Windows 11 or 10 is often caused by corrupted files, outdated drivers, or Riot Client issues. Follow these step-by-step solutions to get back in the game quickly.

Fix League of Legends Not Launching: Step-by-Step Guide

1. Run League as administrator

  1. Right-click on LeagueClient.exe.
  2. Select Run as administrator to give it the necessary permissions.
  1. Press Ctrl + Shift + Esc to open Task Manager.
  2. End these processes:
    • LeagueClient.exe
    • RiotClientServices.exe
    • LoLLauncher.exe
    • LoLClient.exe

3. Launch the client from the install folder

  1. Go to: C:\Riot Games\League of Legends\.
  2. Double-click LeagueClient.exe.
  3. If successful, create a new shortcut to replace any broken ones.

4. Repair game files via Riot Client

  1. Open Riot Client.
  2. Click your profile icon → Settings > League of Legends.
  3. Click Repair and wait for the process to finish.

If issues persist, your system may have corrupted files. Check this guide on repairing system file corruption for more help.

5. Reinstall your graphics card drivers

  1. Use Display Driver Uninstaller to remove existing GPU drivers.
  2. Reinstall the latest version from NVIDIA, AMD, or Intel.

6. Check for Windows updates

  1. Press Windows + I to open Settings.
  2. Navigate to Windows Update and install all pending updates.

7. Disable antivirus or firewall temporarily

  1. Turn off real-time protection from your antivirus settings.
  2. Ensure Riot Client isn’t blocked by the firewall.

Not sure how to check that? Here’s a guide on how to tell if Windows Firewall is blocking a program.

8. Delete the LeagueClient settings file

  • Navigate to: C:\Riot Games\League of Legends\Config\.
  • Delete LeagueClientSettings.yaml.
  • Restart the client afterward.

9. Disable fullscreen optimizations

  • Right-click LeagueClient.exe and choose Properties.
  • Go to the Compatibility tab.
  • Check Disable fullscreen optimizations, then click Apply.

10. Enable compatibility mode

  • Stay in the Compatibility tab.
  • Check Run this program in compatibility mode for Windows 8.

11. Close conflicting background apps

  • Exit overlays and hardware apps like Discord, Razer Synapse, MSI Afterburner, and Steam.
  • Relaunch League after.

12. Reinstall Riot Client

  • Uninstall Riot Client from Control Panel.
  • Download and install the latest version from the League of Legends website.

13. Fully reinstall League of Legends

  • Uninstall the game.
  • Delete these folders manually:
    • C:\Riot Games\
    • %localappdata%\Riot Games\

Then reinstall the game clean. This also fixes related issues like League of Legends black screen.

If you need to fully uninstall League of Legends to fix launch issues or perform a clean reinstall, you can follow the steps in our Leage of Legends uninstall guide.

14. Use CCleaner or Revo Uninstaller

  • Run CCleaner or Revo Uninstaller to remove all leftover data and registry keys.
  • This ensures no corruption remains after reinstalling.

15. Perform a clean boot

  • Press Windows + R, type msconfig, and press Enter.
  • Under the Services tab, check Hide all Microsoft services, then click Disable all.
  • In Startup tab, open Task Manager and disable all startup items.
  • Restart your PC and try launching League again.

16. Recreate a clean shortcut

  • Go to: C:\Riot Games\League of Legends\.
  • Right-click LeagueClient.exe → Send to > Desktop (create shortcut).

17. Install missing DirectX and C++ files

  • Download and install the latest DirectX Runtime and Microsoft Visual C++ Redistributables.
  • These are required for the client to run properly.

For extra optimization, check out how to fix League FPS drops, boost in-game performance, or fix fullscreen issues.


FAQs

Why won’t League of Legends launch even after a reinstall?

Residual files or system dependencies like DirectX or C++ may still be missing. Use a cleanup tool before reinstalling.

Can antivirus or firewall block the Riot Client?

Yes, especially aggressive antivirus software. Temporarily disable it or whitelist Riot files.

Is Riot Client necessary to run League of Legends?

Yes, the Riot Client handles launching, login, and updates for all Riot games.

Where can I find LeagueClient.exe?

It’s typically located in C:\Riot Games\League of Legends\.


Conclusion

Most League launch failures boil down to system conflicts, missing dependencies, or corrupt files. A combination of driver cleanup, Riot Client reinstall, and system tweaks like clean boot should resolve the issue. If you follow these steps closely, you’ll be back on the Rift in no time.

FIX: Please wait until current program finished uninstalling

Uninstalling programs is relatively simple in Windows 10, but some potential errors are possible, and things might get complicated.

One of these errors is also a never completed uninstallation, which doesn’t allow you to uninstall any program, by telling you Please wait until the current program is finished uninstalling or being changed.

This could be a really serious issue, because you’ll eventually need to uninstall a program, and this error won’t allow you to. So, I prepared a couple of solutions, and I hope they’ll be helpful.

Not being able to uninstall your applications can be a big problem, and in this article, we’re going to address the following issues:

  • Add remove programs stuck on please wait
    • Several users reported that they are unable to remove applications from their PC.
    • According to them, they are getting this message while using Add or remove programs app.
  • Please wait until the current program is finished uninstalling AVG
    • Third-party applications can often interfere with your PC, and many users reported this problem while trying to uninstall AVG antivirus.
  • Please wait until the current program is finished uninstalling stuck
    • In some cases, users might get stuck while trying to remove certain applications.
    • This can be a big problem, but you should be able to fix it with one of our solutions.

How do I fix the Current program is finished uninstalling error?

  1. Restart your computer
  2. Use a third-party uninstaller
  3. Perform a System Restore
  4. Restart explorer.exe
  5. Remove/disable your antivirus
  6. Re-register Windows Installer
  7. Stop Windows Installer service
  8. Download Microsoft’s troubleshooter
  9. Try to remove the application in Safe Mode

1. Use a third-party software

There are some third-party uninstallers that are more powerful than Windows’ own uninstaller. Unfortunately, removing software from the add or remove programs panel, often leaves behind unwanted files or registry entries.

Third-party uninstallers are created specifically for this type of issue. They have integrated scanners that will find and remove any leftover files from your computer. Just select the app you want to uninstall and wait for the process to finish.

Additionally, uninstaller software such as IObit Uninstaller is equipped with forced uninstall features, which can be used to remove stubborn software that won’t be removed from the Windows settings list.

  1. Click the Programs icon on the left side of the IObit Uninstaller.
  2. Select the program you want to remove and then click on the trash icon.
  1. Enjoy more free space.

IObit Uninstaller displays a list of your installed apps immediately and allows you to eliminate any program from the All programs list. This is useful because it will remove any apps and their leftovers from your PC.

⇒ Get IObit Uninstaller

2. Restart your PC

If you didn’t restart your computer after you noticed the message about the incomplete previous uninstallation, you definitely should.

Sometimes Windows is unable to complete the uninstallation of the program normally, and as you probably know, you can’t uninstall two programs at the same time.

So if the uninstallation of one isn’t completed, you can’t run another process.

Restarting your computer will kill all processes, including the corrupt uninstallation, so you can try to uninstall the desired program once again when your computer boots.

But if you’re facing this issue even after you’ve restarted your computer, try one of the solutions below.

3. Perform a System Restore

If restarting and trying another uninstaller didn’t get the job done, you can try restoring your Windows 10 to the state before the problem existed.

To perform a System Restore in Windows 10, do the following:

  1. Go to Control Panel > Recovery.
  2. Go to Open System Restore.
  3. Select the proper restore point, and follow further on-screen instructions.
  4. Wait for the process to finish.
  5. Try to uninstall the desired program to see if the problem has been resolved.

4. Restart explorer.exe

If you’re getting Please Wait Until Current Program is Finished Uninstalling or Being Changed error message, the problem might be the Windows Explorer process.

According to users, you might be able to fix the problem simply by restarting explorer.exe. To do that, follow these steps:

  1. Press Ctrl + Shift + Esc to open Task Manager.
  2. When Task Manager opens, right-click Windows Explorer and choose Restart from the menu.
    restart windows explorer process

After doing that, the error message should disappear. Keep in mind that this is just a workaround, so you might have to repeat this solution if the problem reappears.

5. Remove / disable your antivirus

According to users, Please Wait Until Current Program Is Finished Uninstalling or Being Changed error message can appear sometimes due to your antivirus software.

Certain antivirus apps can interfere with your operating system and cause this error to appear.

To fix the issue, it’s advised to disable your antivirus software and check if that solves the problem.

If disabling the antivirus doesn’t solve the issue, you might have to uninstall it.

The best way to remove all files associated with your antivirus is to download the dedicated removal software for your antivirus.

After using this tool the application should be completely removed.

Now you just have to install the latest version of your antivirus software or switch to a completely new antivirus solution.

Users reported issues with AVG, but keep in mind that other antivirus tools can cause this problem to appear.

6. Re-register Windows Installer

According to users, this issue can appear due to problems with the Windows Installer service.

However, you can fix this problem simply by re-registering the Windows Installer service. This is rather simple, and you can do it by following these steps:

  1. Open Command Prompt as administrator. To do that, just press Windows Key + X to open Win + X menu and choose Command Prompt (Admin) from the list. You can also use PowerShell (Admin) if you don’t have Command Prompt available.
    open command prompt as admin
  2. When Command Prompt starts, enter the following commands:
    • msiexec /unreg
      msiexec /unreg cmd
    • msiexec /regserver
      msiexec /regserver cmd

After running these commands, check if the problem is resolved.

7. Stop Windows Installer service

  1. Press Windows Key + R and enter services.msc. Now press Enter or click OK.
    run services.msc
  2. List of available services will now appear. Locate Windows Installer service, right-click it, and choose Stop from the menu. If Stop option isn’t available, it means that Windows Installer service isn’t currently running on your PC.
    restart the Windows Installer service

If you’re getting Please Wait Until Current Program is Finished Uninstalling or Being Changed error message, you might be able to fix the problem simply by disabling the Windows Installer service.

This service starts when you try to remove a certain application, and it can prevent you from uninstalling other apps.

Some users are recommending restarting Windows Explorer after disabling the Windows Installer service, so you might want to do that.

8. Download Microsoft’s troubleshooter

Sometimes Please Wait Until Current Program is Finished Uninstalling or Being Changed error message due to corrupted registry or other third-party apps.

However, you can easily fix the problem by downloading Microsoft’s Troubleshooter.

After downloading the application, run it and it will automatically fix any installation issues that you have. Now check if the error appears again.

9. Try to remove the application in Safe Mode

Several users reported that they fixed the Please Wait Until Current Program is Finished Uninstalling or Being Changed error message simply by removing their application from Safe Mode.

To access Safe Mode, do the following:

  1. Open the Settings app by pressing Windows Key + I and navigate to Update & security section.
    open update & security windows 10 settings
  2. In the left pane, select Recovery, and in the right pane click on Restart now button.
    recovery settings advanced startup
  3. Your PC will now restart and you’ll be presented with three options. Select Troubleshoot > Advanced options > Startup Settings. Now click on the Restart button.
  4. You’ll see a list of options. Select any version of Safe Mode by pressing the appropriate key on your keyboard.

After Safe Mode starts, try to uninstall the problematic application.

Tip icon Tip
Drivers are one of the most cumbersome issues for any OS so head out to our Driver FIx Hub. Out Windows 10 Errors page is filled with other useful articles.

That’s about it, I hope these solutions helped you to uninstall your program normally. If you have any comments or questions, just reach out to the comment section below.

Posted in Fix

Windows 7 Keeps Installing the Same Update Over And Over

It can be frustrating if your Windows 7 keeps installing the same update over and over. However, this issue mainly occurs when the Windows system cannot establish specific updates correctly and continues to reinstall them.

Why do Windows updates keep repeating?

Different factors may be responsible if Windows keeps installing the same update over and over on your PC. Here are the most common reasons:

  • Partially installed updates – Whenever the OS cannot install an update wholly and correctly, this error is mostly inevitable. In instances such as this, you should delete the failed Windows updates.
  • Windows failed to detect updates – Although rare, sometimes, even after an update is installed successfully, the Operating System may be unable to detect it, which can lead to fresh installation attempts.
  • Disabled Windows services – Certain Windows services are vital to successfully installing updates. If these services are disabled, it can lead to this issue.

Having seen what could be the reason behind the issue, let’s explore the best solutions.

What can I do if Windows 7 keeps installing the same update?

Before engaging in any troubleshooting or settings tweaks, users should ensure they perform the following simple steps:

  • Make sure you have enough disk space on your computer.
  • Update your Windows to the latest available version.
  • Restart your PC. Here’s what to do if your computer fails to restart.
  • Check to know what update it is that keeps installing.

Having confirmed the above checks, and the error is yet to fix, you can try any of the fixes below.

1. Delete the Software Distribution directory

  1. Press the Windows key + R to open the Run box, input cmd, and click OK.
  2. In the Command Prompt window, type the following and press Enter after each one: net stop wuauserv  rename c:windowsSoftwareDistribution softwaredistribution.old   net start wuauserv
  3. Press the Windows key + R and type C:Windows, then press Enter or click OK to open the Windows folder.
  4. Right-click the SoftwareDistribution folder and select Delete.
  5. After deleting the directory, restart your computer.

With this, all backups and your problematic Windows update are deleted, so you shouldn’t face this issue anymore.

2. Uninstall the problematic updates

  1. Left-click the Start button and select Control Panel.
  2. Select Uninstall a program under Programs after changing the View by to Category.
  3. Next, click on View installed update
  4. Select Microsoft Windows and click on Uninstall updates.
  5. Then, double-click an update to remove it.

You can repeat the above steps to uninstall problematic updates. Also, you’ll need to prevent Windows from installing updates automatically again. This should help resolve the problem.

3. Perform a system restore

  1. Press the Windows key + S, type system restore, and launch it.
  2. Click on Next when the System Restore window opens.
  3. Select the desired restore point and click Next.
  4. Finally, follow the on-screen instructions and click Finish to complete the system restoration process.

Alternatively, you can use other third-party tools to scan your registry automatically to remove the problematic entries compared to the system restore process.

4. Run the Windows update troubleshooter

  1. Press the Windows key + I and select the Updates & Security option.
  2. In the left pane, choose Troubleshoot and click on Additional troubleshooters.
  3. Next, select Windows Update and click Run the troubleshooter.
  4. Finally, follow further on-screen instructions, restart your computer, and check if the Windows update keeps reinstalling.

The Windows Update troubleshooter automatically detects and fixes most incorrect settings on your computer.

5. Run the SFC and DISM scans

  1. Go to Start at the bottom-left corner of the home page.
  2. Type command, right-click on Command Prompt, and select Run as administrator.
  3. Type the line below in the text field and hit Enter: sfc /scannow
  4. Finally, wait until the scan and repair process is finished.
  5. Type the line below in the text field and hit Enter: DISM.exe/Online /Cleanup-image /Restorehealth
  6. Once done, restart your PC and check if the issue is fixed.

If the Windows update keeps reinstalling on your devices, running the SFC and DISM scans should help fix the issue.

However, note that whether the SFC scan is successful or not, you should still run the DISM. After the DISM scan completes, you can now run the SFC scan again.

6. Manually update with Microsoft Update Catalog

  1. Press the Windows key + I to open the Settings shortcut, then click the Update & Security section.
  2. Next, click on View installed update history.
  3. Note down the updated version that is installing again and again. (It should be something like KB12345678)
  4. Visit Windows Updates Catalog and search for your version code then press Enter or click the Search button.
  5. Click the Add all button and a new pop-up window will appear.
  6. Click the update download link and then install it.

In case you do not know how to access the Windows Updates Catalog, you can check our detailed guide on how to access Microsoft Update Catalog on any browser.

And that is all you should do if Windows 7 keeps installing the same update over and over on your devices.

Also, please use the comments section below if you have any questions, comments, and further suggestions, or if somehow none of these solutions work for you.

Posted in Fix

How to find out which Edge browser version you have on Windows 11 right now

If you use a different Microsoft Edge browser version, there are ways to keep Edge up-to-date on Windows 10, Apple, and Android. But do you know which version you are running right now on Windows 11? You can check your Edge version by clicking on the Options icon (three dots) in the top-right corner of your browser. From there, select About Microsoft Edge to see the version information.
edge browser version number

But did you know that there is an even faster way to check? Moreover, you don’t even need to use Edge settings! Follow this guide to learn what to do.

Find Edge browser version

  1. Type (or copy and paste) edge://version into the Edge browser address bar and press Enter.
    edge browser version number
  2. The Microsoft Edge version will appear at the top of the page.

Next to the Edge version number, you can use the Copy button to copy the version number information to your clipboard.

edge browser version numberOther pertinent Edge browser version number information includes the executable path to Edge, the operating system you are running, active variations (tabs or pages open) in Edge you are running, and more. You can use a variation of this command to check the version information in other Chromium-based browsers, including Chrome and Brave too.

Get other browsers’ information

Instead of trying to search and find this information buried somewhere in settings, you can access the browser version information using the address bar. Replace edge with the name of your browser. In this case, use the command brave://version to find the version information.

edge browser version number

This method also works with others, including Chrome, Vivaldi, and FireFox browsers.  Do you use Microsoft Edge or do ou use a different browser? Let us know in the comments!

Keep your PC Clean and Fast with Wise Care 365 Pro Software

We all know that after a while, our PCs start to get slower and even unresponsive but Wise Care 365 Pro can make a difference.

You can clean your PC manually but it takes a lot of time and effort. With this tool, everything is automatic.

What is Wise Care 365 Pro and how does it help you?

Created by WiseCleaner, Wise Care 365 Pro is a smart app that helps you clean up the disk from junk files and fix registry problems on your PC.

However, it also protects your privacy and makes your PC more secure in the process.

But ultimately, the software makes your PC faster and clears up all the errors you now go past and tolerate.

What are Wise Care 365 Pro’s best features?

1. Complete cleanup for useless junk files

The most important feature of Wise Care 365 Pro consists of the cleaning tools. It has no less than 5 dedicated options.

The Registry Cleaner takes care of all the possible issues in the Registry, including leftovers from uninstalled software, paths, shared DLLs, and a lot more.

The Common Cleaner looks at the files on your PC, the system, and the browsers and cleans them from junk files, tracking files, cache, etc.

If you want to clean even further, the Advanced Cleaner will find all the .dmp and .tmp files and gets rid of them thus freeing important space on your disks.

You can even optimize your OS by using the System Slimming feature that discards old Windows Installer files and baseline cache that is still using space unnecessarily.

Lastly, the Big Files Manager tool available in the Pro version scans your disk for big files on your PC.

This tool is really useful when you need some space while those 4K movies you’ve already seen are hogging huge chunks from your disk.

2. Real-time system protection

Wise Care 365 Pro has an interesting feature similar to the one included in some antiviruses. It monitors all your applications and identifies any of their attempts to silently change the Windows Registry.

After that, it simply blocks the process and warns you about this promptly.

For instance, it prevents apps from taking over your browser homepage or adding themselves to the Windows startup.

It also prevents such intrusions in the Windows context menu or changing the default browser.

3. Privacy protection

The Privacy Protector feature has no less than 5 components to it. The Privacy Eraser deletes all the history for all your viewing habits, whether it’s pictures, videos, files or visited pages on your browsers.

That way, you will leave no traces behind after using the PC. However, this feature is only available in the Pro version.

Disk Eraser will help you completely erase your disks if you want to sell your computer. The tool not only permanently deletes any files on your disk but it’s also able to apply rewrites and deletes so that the information can’t be retrieved.

The Password Generator tool allows you to create strong passwords and copy them to the clipboard for later usage.

And finally, Sites Notifications, also available in the Pro version mutes the notifications from the annoying websites that keep sending them.

4. PC tuning for speeding up your PC

Whether you want to play a new game and your configuration is barely on par, or you just want to speed up your PC, System Tuneup from Wise Care 365 Pro will do the job automatically.

This tool can improve startup and shutdown, improve system stability, and overall system speed at a glance.

However, it also tweaks the network settings and optimizes your disk settings for ultimate PC speed.

How do I get Wise Care 365 Pro and how much does it cost?

As we’ve mentioned above, Wise Care 365 has a free version but that only covers the PC Checkup, cleaning and speeding it up, and your computer hardware inventory.

That’s extremely helpful as it is but for the more advanced features, some of which we covered above, you will need to sign up for the Pro version.

WiseCleaner has right now a Wise Care Pro offer for only $29.96 that covers 3 PC for one year. And even if you commit, the developer has a 60-day money-back guarantee policy.

⇒ Get Wise Care 365 Pro

We hope that our article offered you a comprehensive on how to keep your PC clean and speed it up by using Wise Care 365.

Some of our readers asked: Is Wise Care 365 safe? We can answer that question with a hard yes.

That being said, you may also check our list of the best Registry cleaners for Windows 11.

Did you try Wise Care 365? Tell us about your experience in the comments section below.

DNS Server Not Responding in Windows 7: How to Fix it

The DNS server ensures that you are able to connect to the internet and surf through it. Sadly, there have been multiple user reports regarding DNS server issues on Windows 10.

So much so that this issue has also troubled Windows 7 users in the past. Users have been complaining about the DNS server not responding in Windows 7 error. This guide will give you a bunch of solutions that will help you resolve the problem quickly.

What causes the DNS server not to respond in Windows 7?

Here are a few reasons that could trigger the DNS server not responding in Windows 7:

  • Misconfigured DNS settings: If the DNS settings are misconfigured then your browser will have a hard time connecting to the internet.
  • Outdated network driver: Outdated drivers often cause multiple issues and conflict with the smooth performance of the PC.
  • DNS Cache: The presence of unwanted DNS cache can also trigger multiple issues, such as the one at hand.
  • Problem with your internet connection: You should ensure that the internet that you are connected to is working and there are no issues with it.
  • Your browser is at fault: Often due to a bug or glitch the browser may misbehave and throw up errors like the DNS server not responding in Windows 7.

How can I fix the DNS server not responding in Windows 7 error?

Before jumping to the advanced solutions, let us first go through a bunch of preliminary solutions that could help you fix the problem:

  • Try restarting your PC. There might be a temporary glitch that is causing the problem.
  • Restart your modem or router. This will ensure that the router starts from scratch and connects to the server without any issues.
  • Install all the latest Windows updates as this could very well be because of a bug on the earlier version of Windows update.

1. Change the DNS server manually

  1. Press Windows + R to open the Run dialogue.
  2. Type ncpa.cpl and click the OK button.
  3. Right-click your network and choose Properties.
  4. Select Internet Protocol Version 4 (TCP/IPv4) and click the Properties button.
  5. Click on Use the following DNS server addresses option.
  6. Set the Preferred DNS server to 8.8.8.8. and the Alternate DNS server to 8.8.4.4.
  7. Alternatively, you can also use 208.67.222.222 as Preferred and 208.67.220.220 as the Alternate DNS server.
  8. Click OK.

2. Clear DNS cache

  1. Press the Windows button to open the Start menu.
  2. Search for the command prompt and right-click on it to select Run it as an administrator.
  3. Type the below command and press Enter. ipconfig /flushdnsipconfig/flushdns command
  4. Close the command prompt and check if this resolves the issue or not.

3. Update network drivers

  1. Press the Windows key and open the Start menu.
  2. Type Device Manager and open it.
  3. Expand the Network adapters section.
  4. Right-click on your network adapter and select Update driver.
  5. Click on Search automatically for drivers.search for drivers automatically - rog gaming center not showing cpu and gpu
  6. Your system will check if there is a new update available and install it if it finds one.

Updated drivers not only bring new features on board but also get rid of the bugs and glitches present in the version that is currently installed on your PC.

While you can manually update the driver following the above steps, you can ease the process by using a dedicated driver updater tool. For this purpose, we recommend you use Outbyte Driver Updater.

Outbyte Driver Updater not only updates your drivers but can automatically scan for all of your drivers and update them for you. It can create driver backups, fix system-related issues, schedule scans, and much more.

Outbyte Driver Updater

This tool keeps all your drivers updated to maintain your system in top shape.
Free Trial Download Now

4. Perform network reset

  1. Press the Windows button to open the Start menu.
  2. Search for the command prompt and right-click on it to select Run it as an administrator.
  3. Type the below command and press Enter after each command. netsh int ip reset reset.txt netsh winsock reset netsh advfirewall reset

5. Run the Network Troubleshooter

  1. Open the Start menu by pressing the Windows key.
  2. Open Control Panel.
  3. Under Network & internet heading, select View network status and tasks.
  4. Click on Troubleshoot problems.
  5. Select Internet Connections.
  6. Click Advanced.
  7. Check Apply repairs automatically.
  8. Click Next.
  9. Select Troubleshoot my connection to the Internet.
  10. Your system will begin the diagnosis and will prompt you to perform steps to resolve the issue.

6. Use a different browser

Often the DNS server is not responding in Windows 7 error is associated with the browser itself. Because of some glitch or bug in the browser, it may throw up unnecessary errors.

In such a case, we would suggest you switch to a different browser and check if the problem exists there as well or not.

If you are confused about which browser to download, then we have a guide that gives a list of some of the best browsers that you can install on your Windows 7 PC.

Let us know in the comments below which one of the above solutions fixed the DNS server not responding issue.

5 Speedy Fixes to Try if Apex Legends is not Launching

Apex Legends has taken Windows gaming by storm. However, that game can still have some startup issues. For example, some players might need to fix Legends not launching a splash screen on a PC.

It’s also perhaps the most recent title that can compete with Fortnite and PUBG on a level playing field. Thus, we understand why you might be in a hurry to fix it.

Why won’t Apex open?

Ordinarily, this type of problem with a game is caused by corrupted or faulty installation files. But it could also be related to incorrect system setups, malfunctioning display drivers, or the fact that you are playing an out-of-date game version.

apex legends news

Another possibility is that your machine does not fulfill the minimal requirements for the game, which would explain why it is unable to launch. Or, as our users reported, Apex Legends won’t start after an update performed automatically by Windows or the game itself.

How do I fix launch error in Apex Legends?

1. Run the game as an administrator

    In order to repair launching error on Apex Legends, you can simply run the game in the Administrator mode using the steps below.

    1. Press the Windows key + S keyboard shortcut to open the search tool. Enter Apex Legends as the search keyword. Right-click it and select Open file location.
    file-location-w10 apex legends wont launch
  1. 2. Next, right-click the Apex Legends EXE to select Properties.

    prop-apex apex legends wont launch
  2. 3. Click the Compatibility tab then select the Run this program as administrator setting and select the Disable fullscreen optimizations option.

    disable-full apex legends wont launch
  3. 4. Click the Apply option then press the OK button to exit the window.

Running the game and game launcher with admin rights can help you prevent other issues like Apex Legends Anticheat error and Memory could not be read.

2. Update your graphics card driver

The easiest way to update your driver is to use dedicated driver updater software that lets you update your graphics card driver and any other with just one click.

Once you run it on your system, it will automatically start searching for any drivers that need updating on your PC. As soon as the analysis process is done, you can choose to update only the graphics card driver, but we recommend that you take the time to update all the drivers you can.

This will ensure your system runs smoothly and does not crash the Apex Legends game because of any other unforeseen issues.

⇒ Get Fortect Driver Updater

3. Turn off the Windows firewall

  1. Click the Type here to search button on the left side of Windows 10’s taskbar.
  2. Input firewall in the search box.
  3. Click Windows Defender Firewall to open its Control Panel applet.
    Windows Defender Firewall apex legends won't launch pc
  4. Next, click turn Windows Defender Firewall on or off to open the options in the shot directly below.
    the Turn off Windows Defender Firewall settings apex legends won't launch pc
  5. Select the Turn off Windows Defender Firewall radio buttons.
  6. Click the OK button.

Note: If that resolution fixes the issue, WDF was probably blocking the game. You can turn the firewall off and back on after playing Apex. Alternatively, add Apex Legends to the firewall’s exception list.

4. Select the Repair option for Apex in Origin

  1. Open the Origin client software.
  2. Click My Game Library in Origin.
    My Game Library tab apex legends won't launch pc
  3. Right-click the Apex Legends game to open its context menu.
  4. Then select the Repair option.

5. Repair Easy Anti-Cheat

  1. Launch File Explorer by pressing the Windows key + E hotkey for it.
  2. Open your Origin Games folder in File Explorer (which will usually be in the Program Files folder).
  3. Open the Apex subfolder from the Origin Games folder.
  4. Then, open the EasyAntiCheat subfolder from there.
  5. Click EasyAntiCheat_Setup to open the Anti-Cheat Service Setup window.
    Easy Anti-Cheat Service Setup window apex legends won't launch pc
  6. Press the Repair Service button.
  7. Thereafter, click the Finish button.

6. Reinstall Apex Legends and Origin

  1. Press the Windows key + X hotkey, and select Run on the menu that opens.
    Win + X menu apex legends won't launch pc
  2. Input appwiz.cpl in the Open box and click OK to open Programs and Features.
    The Programs and Features applet apex legends won't launch pc
  3. Select Apex Legends in the uninstaller window.
  4. Click the Uninstall/Change button for Apex.
  5. Select Yes on any confirmation prompts to remove the game.
  6. In addition, uninstall the Origin game client.
  7. Restart Windows after uninstalling the software.
  8. Open the Origin download page in a browser.
  9. Click Download to save the installer for Origin.
  10. Reinstall Origin with its setup wizard.
  11. Open the Apex Legends page in the Origin Store. Then you can download the game from there to reinstall it.

Moreover, here are some error variations that our readers reported and that you can fix with the solutions above:

  • Apex Legends won’t launch after easy anti-cheat – Run the game in administrator mode to fix this issue.
  • Apex not launching after update – If the OS update interferes with Apex, you can opt to uninstall it.
  • Apex Legends not launching in Origin – Reinstall Origin to solve this problem.
  • Apex Legends not launching in Windows 11, 10 – The solutions below are applicable for both OS iterations so make sure to follow them.
  • There was a problem processing game logic error: Change the data centers.

Those are some of the more likely fixes for Apex Legends not launching or when you encounter an error code: clog. Repairing Apex Legends and Easy Anti-Cheat, as outlined for resolutions three and five, are two of the more widely confirmed fixes.

For more information and potential fixes to this error, check out our guide on how to fix Apex Legends DirectX error permanently.

You can also find troubleshooting articles for Windows games in the Windows 10 section. Our Gaming hub includes a plethora of troubleshooting guides for Windows, Xbox, and PlayStation games.

Was this guide helpful for you? Don’t hesitate to tell us in the comments section below and whether you have more solutions in mind.

Windows 11 Calculator Not Working? 4 Ways to Fix it

The Calculator app on Windows 11 is one of the most basic and important pieces of software you can possibly have. As you can imagine, losing the ability to use the Calculator is pretty frustrating.

A faulty app either won’t open or immediately crashes, but there are fixes that you can apply since they worked on Windows 10 as well. You may certainly try the troubleshooter, but it won’t solve every problem. Sometimes, it requires a finer touch.

Why isn’t the Calculator app working?

Unfortunately, native Windows 11 apps are known to suddenly stop working. It’s much better compared to the launch version of the OS, but these issues still exist. There are a few reasons for this:

  • Your Windows Firewall is blocking the app. To know this for sure, you’ll have to check your Firewall settings or use the Command Prompt to see if anything’s blocked.
  • A faulty update from Microsoft is causing the Calculator app to behave erratically. It is possible to uninstall an update within the Settings menu, but it isn’t too difficult to do.
  • Conversely, corrupted system files within your Windows 11 computer are also likely culprits.
  • Changes or modifications to the registry files can use all Windows native apps, not just Calculator, to suddenly stop working.

How do I fix the Calculator app on Windows 11?

Before we go into the more complex solutions, we think it’s important to point out some of the easier ones you can quickly do. The majority of the time, these will fix the Calculator app:

  • Update Windows 11 Calculator by going to the Microsoft Store and downloading any new updates available.
  • Download any new Windows 11 updates found in the Settings menu.
  • You can create a local account on your computer although you will miss out on other services exclusive to the original.

1. Re-register the Calculator app

  1. Search for Windows PowerShell and click Run as administrator when it appears.
  2. If a User Account Control page appears asking you if you want to make changes, click Yes.
  3. In PowerShell, enter the following command: Get-AppXPackage -AllUsers -Name Microsoft.WindowsCalculator | Foreach {Add-AppxPackage -DisableDevelopmentMode -Register "$($_.InstallLocation)\AppXManifest.xml" -Verbose}
  4. Hit Enter on your keyboard and wait for PowerShell to complete the command.
  5. Close PowerShell and check if that resolved the Calculator problem.

2. Reinstall Calculator via PowerShell

  1. Open PowerShell with administrative permissions again.
  2. Enter the following command into PowerShell and hit Enter on your keyboard: get-appxpackage *windowscalculator* | remove-appxpackage.
  3. Let PowerShell uninstall the Calculator app.
  4. Now open Microsoft Store and search for Windows Calculator.
  5. Click the Get button to install the Calculator app.

3. Reset the Calculator app

  1. Open the Settings app and click the Apps tab on the left-hand side.
  2. In the tab, select Installed apps.
  3. Scroll down and locate the Calculator app in the list. Click the three dots to the right and select Advanced options.
  4. Scroll down again until you see the Reset button. Click it.

Note that this will delete the Calculator’s data fixing any problems it may have.

4. Fix the calculator registry

  1. Bring up the Search bar, look for the Registry Editor, and select the entry that appears.
  2. A User Account Control may appear. Select Yes when it does.
  3. In the Registry Editor’s address bar, enter the following: HKEY_LOCAL_MACHINE\SOFTWARE\Microsoft\Windows\CurrentVersion\AppModel\StateChange\PackageList
  4. Delete everything under the PackageList folder.
  5. When done, close the Registry Editor and restart your computer.

A lot of the time, people upgrade from Windows 11 native apps to something that can do more and Calculator is no different. The Microsoft Store is home to tons of different versions of the Calculator app.

For a complete overview of the default app and its features, read our guide on how to use Calculator on Windows 11 to learn about standard, scientific, and converter modes.

One of them, which we highly recommend, is the Super Calculator which has the ability to generate factorials of large numbers and you can use radians for trigonometry.

If you need something more specific, we recommend checking out our guide on the best accounting software. These will help you create important financial reports for your small business.

Entries in that list include TurboTax to simplify tax returns and Wave to help you with invoicing and payment processing.

Feel free to comment below if you have any questions about any native apps. Also, leave comments about what reviews you’d like to see or information on other Windows 11 software.

How To Fix Critical Process Died in Windows 11

The critical_process_died Windows 11 issue is a BSoD error that can occur randomly or appear when trying to boot to Windows. These errors will make your PC crash and reboot suddenly, so you’ll lose any unsaved data.

Fixing it may take time because finding the culprit is not always easy. The usual causes are related to your drivers or your hardware in some instances, but there are also exceptions.

Rest assured that there are ways to fix this problem, and we’re going to show you a couple of methods you can use to solve the Critical Process Died stop code in Windows 11 right away.

How do I fix the Critical Process Died BSoD in Windows 11?

1. Use the SFC and DISM scans

  1. Press Windows key + X and select Windows Terminal (Admin).
  2. Now run the following command: sfc /scannow
  3. Wait for the scan to finish, restart your PC, and check if the problem is still there.
  4. If the issue still appears, start the Terminal again, and run the following commands:
    Dism /Online /Cleanup-Image /CheckHealth
    Dism /Online /Cleanup-Image /ScanHealth
    Dism /Online /Cleanup-Image /RestoreHealth

You can also fix critical_process_died error on Windows 11 more effectively by using specialized BSoD fixers.

2. Reinstall/update your drivers

  1. Press Windows key + X and choose Device Manager from the list.
  2. Locate the driver that is causing you trouble and right-click it. Choose Uninstall device from the menu.
  3. Now select Uninstall to confirm.
  4. Once the driver is removed, restart your PC and check if the problem is resolved.

Keeping the drivers up to date can also help you prevent similar BSoD issues like Critical_structure_corruption on Windows 11.

To find out which driver is causing the issue, it’s advised to check the crash logs or to remove any drivers that might’ve been recently updated.

You can also try updating your drivers, and you can do that by downloading the drivers from the manufacturer’s website. Alternatively, feel free to use a dedicated tool such as Outbyte Driver Updater to automatically update all your drivers.

Outbyte Driver Updater is the easiest way to update all drivers. With a database of over 18 million driver files, it will find all outdated drivers on your computer and either update or repair them within a few clicks.

⇒ Get Outbyte Driver Updater

3. Access Safe Mode

Note icon NOTE
Accessing Safe Mode won’t fix the problem, but if you cannot boot to Windows 11 due to Critical Process Died then this might be a useful alternative.

    In order to work out this kind of BSOD error on your Windows 11, you may need to use Safe Mode as displayed in the steps below.
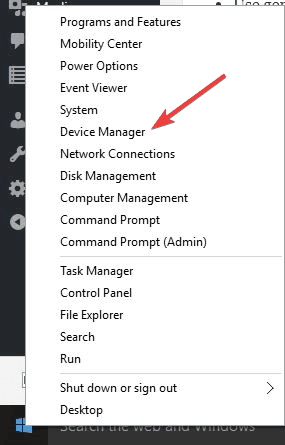
  1. 1. Let your PC restart a couple of times during the boot. Alternatively, click the Power icon on the login screen, hold Shift, and select Restart.

    critical-process-died-windows-11
  2. 2. Select Troubleshoot from the list of options.

    troubleshoot-w11.png
  3. 3. Now, navigate to Advanced options.

    advanced options troubleshoot menu w11
  4. 4. Go to Startup settings.

    critical-process-died-windows-11
  5. 5. Then, click the Restart button.

    critical-process-died-windows-11
  6. 6. Press 5 on your keyboard to start Safe Mode with Networking.

    Computer screeching sound

Need more methods to access Safe Mode? In this case, check our guide for the best ways to start Windows 11 in Safe Mode.

4. Run the built-in troubleshooters

  1. Open the Start Menu and select Settings.
  2. Go to the Troubleshoot in the right pane.
  3. Select Other troubleshooters.
  4. Run a couple of troubleshooters and check if they managed to fix the problem.

If your Windows 11 Start menu is not working, it can be related to some random, temporary bugs. In this case, we have a guide dedicated to solving the Windows 11 Start menu issues right away.

5. Remove problematic updates

Note icon NOTE
You might have to repeat this procedure for multiple updates in order to fix the problem.
  1. Press Windows key + R and enter appwiz.cpl. Click OK.
  2. Go to View installed updates.
  3. Double-click the update you want to remove.

6. Reset Windows 11

Note icon NOTE
This is a relatively simple process but if you choose to perform it, be sure to back up all your important files.
  1. Press Windows Key + I to open Settings.
  2. Navigate to the System section and select Recovery.
  3. Now click the Reset PC button.
  4. Select the desired option. In most cases, it’s better to use Remove everything, but if you choose it, be sure to back up your files beforehand.
  5. Select the type of reinstall that you want. We used the Local reinstall.
  6. Confirm your reinstall settings.
  7. Click Reset to start the process.
  8. Follow the instructions on the screen to finish it.

Resetting might be the only solution if you get stuck in Critical Process Died boot loop on Windows 11, so be sure to check our detailed article on how to reset Windows 11 for detailed instructions.

What causes the Critical process died error in Windows 11?

This Critical Process Died blue screen on Windows 11 appears when a critical component of the Windows operating system detects that data has been modified when it should not have been. Here are some of the causes behind it:

  • Malfunctioning hardware – BSoD errors can appear due to hardware issues. As for software issues, consider them as well as potential culprits. We are most likely referring to compatibility issues with certain applications or drivers.
  • Corrupt or missing system files – Missing system files can also cause this problem, which is the case with the Critical Process Died error on Windows.
  • Malware and BIOS issues – In some instances, malware and bad BIOS updates can cause BSoD errors on your PC.
  • Problematic drivers – Also, don’t forget to check and update your drivers if that’s the case. These tips also apply if you happen to encounter a Critical process died in Windows 10.

To learn more, be sure to check our in-depth guide on Blue Screen of Death causes.

What is the minidump file, and where can it be found?

Once a system crash occurs, your PC will memorize the events that caused it and write them down in a minidump, also known as DMP, file.

Minidump file works as a crash log, and it holds important information that might help you diagnose the problem and find the cause of the BSoD.

Regarding the location, you can find the minidump files in the following directory: C:\Windows\Minidump

You can also use the MEMORY.DMP file for diagnostics usually contains more information, much of which isn’t crucial.

How can I change my system crash settings?

  1. Press Windows Key + R, type sysdm.cpl and press Enter.
  2. Navigate to the Advanced tab and click on Settings in the Startup and Recovery section.
  3. Now you can change the settings as needed. By default, the settings should look like on the screenshot below:
  4. Optional: The only setting that you might want to disable is Automatically restart to see the name of the stop code better.

Fixing this error can be complicated, especially if the Critical Process Died appears on startup on Windows 11, but hopefully, you found our article informative and managed to fix the problem.

For more solutions, check out our guide on how to check the BSoD log file to see what went wrong and what you can do about it.

Did you find a solution on your own to one of the abovementioned situations? Share it with us in the comments section below.