You’ve just bought the best speakers and connected them to your Windows PC? Now, you need a sound calibration tool to get the best quality sound.
These apps not only address sound distortions but they help you optimize the sound for your environment.
Why do I need sound calibration software?
Every room or environment influences the frequency response of the sounds you’re listening to.
In fact, after the sound exists in your speakers, it bounces between all objects and walls until it gets absorbed.
That is why, in a completely empty room, you will experience a hall effect and echoes, while in an overpacked environment, the sound will be heard almost muffled.
Moreover, when the sounds from two opposite speakers meet, they will create peaks or dips, if they are in phase or out of phase.
If you want to achieve perfect studio sound for your musical creations, Sonarworks’s SoundID Reference is the ultimate tool for sound calibration.
Apart from adapting the sound for any of your headphones or speakers, this software is able to adjust the sound coloration to adapt to all devices.
Here’s how it works: All the speakers have their own specific sound or sound coloration, as the specialists call it.
So, when you’re mixing a song, it will be influenced by those properties. SoundID Reference has a database of over 400 types of headphones and speakers and their sound coloration patterns.
After you choose your device from a list, the tool will eliminate all those frequency patterns to get the perfect studio reference sound.
That means every mix you make will translate the same for all the listening devices of the target audience.
For headphones, you will just need to select the pair from the available list, but things are a bit more complicated for speakers.
To calibrate the sound for them, you will need the SoundID Reference measurement mic, which is individually calibrated for this job.
The software also allows you to adjust the target curve in real time or perform simulations for certain types of headphones or speakers.
SoundID Reference has a free trial complete version that can be tested for 21 days so feel free to use it.
Let’s review some of its best features:
Sound calibration for over 400 types of headphones and speakers
Get accurate studio reference sound for your mixes
DAW plugin and Systemwide Calibration
Customize your target sound using a parametric equalizer
Check your mix in different listening environments
SoundID Reference
Calibrate your mixes for the perfect studio reference sound with a large database of devices.
Unlike SoundID Reference, IK Multimedia’s ARC System 3 comes only as a DAW plugin and may be used for speakers and room calibration.
However, you also need a measurement microphone to perform the actual calibration. And with the latest iteration of the software, it now supports third-party devices for this job.
ARC System 3 applies the same system to null out the sound coloration of your speakers, but it doesn’t have a device database to choose from.
The tool measures the sound of your room within a guided step-by-step process and then generates a correction profile.
That is loaded into the ARC plug-in for your DAW and creates the needed reference studio sound.
Take a look at its key features below:
Measurement mic, room analysis software, and correction plug-in
Improves frequency balance and stereo imaging in any room
Work faster and create better mixes without expensive room treatment
Virtual monitoring emulates the sound of common listening devices
This concludes our list of the best sound calibration software and we hope that you found the right one for your needs. You can also try Dynamic Audio Normalizer for simple sound balancing.
Booting errors are one of the frustrating things that occasionally plague Windows users. One such error is that no physical memory is available at the location required for the Windows boot manager.
We’ve also noticed a lot of complaints from our readers on this and similar issues like not enough physical memory in VMware. So, this guide will examine the likely causes and solutions.
Why do I encounter no physical memory available at the location required?
The following are some of the reasons why you’re experiencing no physical memory available at the location required:
Corrupted modules – If the memory modules on your computer are not fitted properly, the system might not boot up.
Damaged CMOS battery – CMOS batteries have about 4 – 5 years’ lifespans. If they’re way past their valid life cycle, it might be the reason you’re experiencing this error.
BIOS error – You might have accidentally triggered an error if you’ve recently changed the configuration settings of your BIOS. This may also cause Windows to skip BIOS.
Irrespective of the causes, any of the solutions below should fix it.
What can I do if there’s no physical memory at the location required?
Troubleshooting is the only way to resolve system errors. However, users should ensure that they’ve performed the following preliminary checks:
If you’ve experience handling disk drives, open up the system unit to check if the hard drives and memory modules are tightly fitted. Sometimes, hard disks can be slightly displaced when they experience forceful external contact.
You can also try narrowing down the problems by inserting your current hard disk into another working computer. This will help you determine if the fault is from the hard disk or your system.
Here are a couple of things you can do to help you resolve this error.
1. Adjust your Boot Sequence
Hit the power button to turn on the computer.
To enter the BIOS, hit the F2 or Del button. (Depending on the system’s manufacturer)
In your BIOS setup, click the Boot tab.
Reorder the Boot sequence to the following by clicking the + or - keys: Hard Drive > CD > Removable devices
Click on the Exit tab and select Exit Saving changes or Save changes.
Disconnect your system’s power cable or remove the battery if it’s a laptop.
Press and hold the power button to discharge residue electricity.
Locate the CMOS battery (It looks like a quarter; you can find it on the motherboard.) Hold the motherboard firmly to ensure that you only remove the damaged CMOS battery.
Replace the battery with a new version of the current cell.
BIOS settings will be erased when you replace a CMOS battery. However, it will fix the no physical memory is available at the location required for the Windows boot manager.
Some of our readers have recently reported that the error stating You do not have permission to view or edit this object’s permission settings is very frustrating as they cannot access some files or folders on their PC. This issue is mostly inevitable if you do not have administrative privileges.
Why do I encounter no permission to view or edit this object’s settings error?
There can be several reasons you don’t currently have permission to access certain object settings. Some of them are as follows:
Other programs are using your file/folder simultaneously – Whenever this happens, you are prevented from viewing or editing the permissions settings of an object.
Corrupt user account – The permission problem is likely to arise if the user account is corrupted due to a computer crash or the PC gets affected by viruses or malware.
A file or folder is encrypted – If a file or folder is encrypted, you cannot have access to it unless it is decrypted by the person who encrypted it or you get the certificate that was used to encrypt such file/folder.
A user account is no longer active – When a file is created or owned by a user account that is no longer active on your computer, it could result in this issue. However, it can quickly be resolved in Safe Mode.
What can I do if I have no permission to view or edit this object’s permission settings?
Before trying any of the advanced fixes, you should consider performing the following steps in case your problem is not far-fetched:
A straightforward workaround is to copy the folder to a different location. Having moved it to a new location, you can try to access it from there. This might not be the best fix, but it might be worth trying out.
Restart your PC to check if the issue persists. Do not hesitate to take immediate action if your computer fails to restart.
Having confirmed the above checks, and the error is yet to fix, you can try any of the fixes below.
1. Take ownership of the directory
Press the Windows + E keys to open File Explorer.
Locate the file that can’t be accessed, right-click on it and choose Properties from the drop-down menu.
Navigate to the Security tab and click on Administrator from Group and user names. Then click on the Advanced button.
Locate the Owner section at the top and click on Change.
In the Select user or group window, click on the Advanced button.
Then, click on the Find now button in the Advanced Settings window and select which group should have full file permission on your computer.
Next, click OK to close this window.
Then navigate toward the Permissions tab and check if your user account is there. If it’s not, click on the Add button.
Next, click on Select a principal.
Here, repeat Steps 5 and 6 to select the desired user or group.
Set Type to Allow and Applies to This folder, subfolders,andfiles, and check the Full control option. Now click the OK button to save the changes.
After following the above steps, you will have ownership over the selected file and also be able to edit without restrictions.
In this article, let us discuss Microsoft LifeCam software and show you how to download and use it.
When you make Skype calls, it’s not uncommon for you to use the webcam to communicate with others.
Regarding webcams, Windows 10 users have reported some issues with Microsoft LifeCam, and today we’re going to fix those issues.
Is Microsoft LifeCam plug-and-play?
Yes, LifeCam Cinema HD is a (PnP) plug-and-play camera. And for most users, it is already prepared for use with Windows 10.
After you connect it, Windows will set everything up for you, including downloading the required drivers. This means it is ready to be used from the minute it is connected to a Windows 10 device.
Microsoft LifeCam cameras may now be used with Windows 10 or later without additional firmware, software, or drivers.
There are various third-party tools that you can use to install the latest drivers on your Windows computer automatically. However, professional driver updater software is one of the most efficient options.
You need to know from the start that a professional tool makes updating drivers simple, even for newbies. The Microsoft Lifecam software will always work perfectly if you keep an updated driver.
More precisely, you can use an automatic tool to find, download, and install the correct driver version on your Windows PC in just a couple of clicks, and we strongly recommend Fortect Driver Updater.
Open the Microsoft Store app and search for Skype.
Once found, click on Install.
Wait for the installation to complete, and the necessary drivers to run a LifeCam device should have also been installed.
On Windows 10 and 11, you will not need to install drivers for the Microsoft Lifecam HD-3000 since the OS software already caters to this. However, in the rare case you may need drivers, we recommend using any of the suggestions in this guide.
Let us know what worked for you in the comments below.
League of Legends not opening in Windows 11 or 10 is often caused by corrupted files, outdated drivers, or Riot Client issues. Follow these step-by-step solutions to get back in the game quickly.
Fix League of Legends Not Launching: Step-by-Step Guide
If you need to fully uninstall League of Legends to fix launch issues or perform a clean reinstall, you can follow the steps in our Leage of Legends uninstall guide.
14. Use CCleaner or Revo Uninstaller
Run CCleaner or Revo Uninstaller to remove all leftover data and registry keys.
This ensures no corruption remains after reinstalling.
15. Perform a clean boot
Press Windows + R, type msconfig, and press Enter.
Under the Services tab, check Hide all Microsoft services, then click Disable all.
In Startup tab, open Task Manager and disable all startup items.
Restart your PC and try launching League again.
16. Recreate a clean shortcut
Go to: C:\Riot Games\League of Legends\.
Right-click LeagueClient.exe → Send to > Desktop (create shortcut).
17. Install missing DirectX and C++ files
Download and install the latest DirectX Runtime and Microsoft Visual C++ Redistributables.
These are required for the client to run properly.
Why won’t League of Legends launch even after a reinstall?
Residual files or system dependencies like DirectX or C++ may still be missing. Use a cleanup tool before reinstalling.
Can antivirus or firewall block the Riot Client?
Yes, especially aggressive antivirus software. Temporarily disable it or whitelist Riot files.
Is Riot Client necessary to run League of Legends?
Yes, the Riot Client handles launching, login, and updates for all Riot games.
Where can I find LeagueClient.exe?
It’s typically located in C:\Riot Games\League of Legends\.
Conclusion
Most League launch failures boil down to system conflicts, missing dependencies, or corrupt files. A combination of driver cleanup, Riot Client reinstall, and system tweaks like clean boot should resolve the issue. If you follow these steps closely, you’ll be back on the Rift in no time.
Uninstalling programs is relatively simple in Windows 10, but some potential errors are possible, and things might get complicated.
One of these errors is also a never completed uninstallation, which doesn’t allow you to uninstall any program, by telling you Please wait until the current program is finished uninstalling or being changed.
This could be a really serious issue, because you’ll eventually need to uninstall a program, and this error won’t allow you to. So, I prepared a couple of solutions, and I hope they’ll be helpful.
Not being able to uninstall your applications can be a big problem, and in this article, we’re going to address the following issues:
Add remove programs stuck on please wait
Several users reported that they are unable to remove applications from their PC.
According to them, they are getting this message while using Add or remove programs app.
Please wait until the current program is finished uninstalling AVG
Third-party applications can often interfere with your PC, and many users reported this problem while trying to uninstall AVG antivirus.
Please wait until the current program is finished uninstalling stuck
In some cases, users might get stuck while trying to remove certain applications.
This can be a big problem, but you should be able to fix it with one of our solutions.
How do I fix the Current program is finished uninstalling error?
There are some third-party uninstallers that are more powerful than Windows’ own uninstaller. Unfortunately, removing software from the add or remove programs panel, often leaves behind unwanted files or registry entries.
Third-party uninstallers are created specifically for this type of issue. They have integrated scanners that will find and remove any leftover files from your computer. Just select the app you want to uninstall and wait for the process to finish.
Additionally, uninstaller software such as IObit Uninstaller is equipped with forced uninstall features, which can be used to remove stubborn software that won’t be removed from the Windows settings list.
Click the Programs icon on the left side of the IObit Uninstaller.
Select the program you want to remove and then click on the trash icon.
Enjoy more free space.
IObit Uninstaller displays a list of your installed apps immediately and allows you to eliminate any program from the All programs list. This is useful because it will remove any apps and their leftovers from your PC.
If you didn’t restart your computer after you noticed the message about the incomplete previous uninstallation, you definitely should.
Sometimes Windows is unable to complete the uninstallation of the program normally, and as you probably know, you can’t uninstall two programs at the same time.
So if the uninstallation of one isn’t completed, you can’t run another process.
Restarting your computer will kill all processes, including the corrupt uninstallation, so you can try to uninstall the desired program once again when your computer boots.
But if you’re facing this issue even after you’ve restarted your computer, try one of the solutions below.
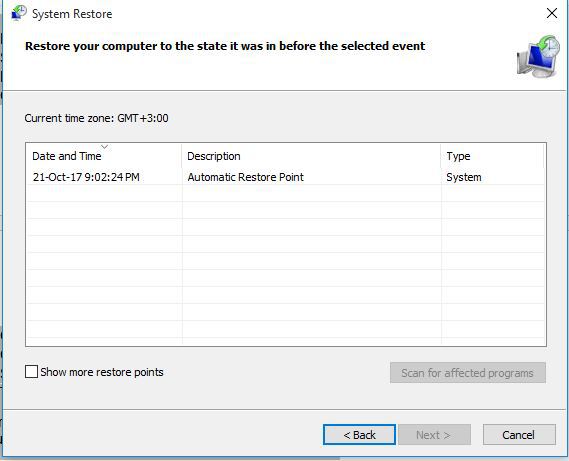
3. Perform a System Restore
If restarting and trying another uninstaller didn’t get the job done, you can try restoring your Windows 10 to the state before the problem existed.
To perform a System Restore in Windows 10, do the following:
Go to Control Panel > Recovery.
Go to Open System Restore.
Select the proper restore point, and follow further on-screen instructions.
Wait for the process to finish.
Try to uninstall the desired program to see if the problem has been resolved.
4. Restart explorer.exe
If you’re getting Please Wait Until Current Program is Finished Uninstalling or Being Changed error message, the problem might be the Windows Explorer process.
According to users, you might be able to fix the problem simply by restarting explorer.exe. To do that, follow these steps:
Press Ctrl + Shift + Esc to open Task Manager.
When Task Manager opens, right-click Windows Explorer and choose Restart from the menu.
After doing that, the error message should disappear. Keep in mind that this is just a workaround, so you might have to repeat this solution if the problem reappears.
5. Remove / disable your antivirus
According to users, Please Wait Until Current Program Is Finished Uninstalling or Being Changed error message can appear sometimes due to your antivirus software.
Certain antivirus apps can interfere with your operating system and cause this error to appear.
To fix the issue, it’s advised to disable your antivirus software and check if that solves the problem.
If disabling the antivirus doesn’t solve the issue, you might have to uninstall it.
The best way to remove all files associated with your antivirus is to download the dedicated removal software for your antivirus.
After using this tool the application should be completely removed.
Now you just have to install the latest version of your antivirus software or switch to a completely new antivirus solution.
Users reported issues with AVG, but keep in mind that other antivirus tools can cause this problem to appear.
According to users, this issue can appear due to problems with the Windows Installer service.
However, you can fix this problem simply by re-registering the Windows Installer service. This is rather simple, and you can do it by following these steps:
Open Command Prompt as administrator. To do that, just press Windows Key + X to openWin + X menu and choose Command Prompt (Admin) from the list. You can also use PowerShell (Admin) if you don’t have Command Prompt available.
When Command Prompt starts, enter the following commands:
msiexec /unreg
msiexec /regserver
After running these commands, check if the problem is resolved.
7. Stop Windows Installer service
Press Windows Key + R and enter services.msc. Now press Enter or click OK.
List of available services will now appear. Locate Windows Installer service, right-click it, and choose Stop from the menu. If Stop option isn’t available, it means that Windows Installer service isn’t currently running on your PC.
If you’re getting Please Wait Until Current Program is Finished Uninstalling or Being Changed error message, you might be able to fix the problem simply by disabling the Windows Installer service.
This service starts when you try to remove a certain application, and it can prevent you from uninstalling other apps.
Some users are recommending restarting Windows Explorer after disabling the Windows Installer service, so you might want to do that.
8. Download Microsoft’s troubleshooter
Sometimes Please Wait Until Current Program is Finished Uninstalling or Being Changed error message due to corrupted registry or other third-party apps.
After downloading the application, run it and it will automatically fix any installation issues that you have. Now check if the error appears again.
9. Try to remove the application in Safe Mode
Several users reported that they fixed the Please Wait Until Current Program is Finished Uninstalling or Being Changed error message simply by removing their application from Safe Mode.
To access Safe Mode, do the following:
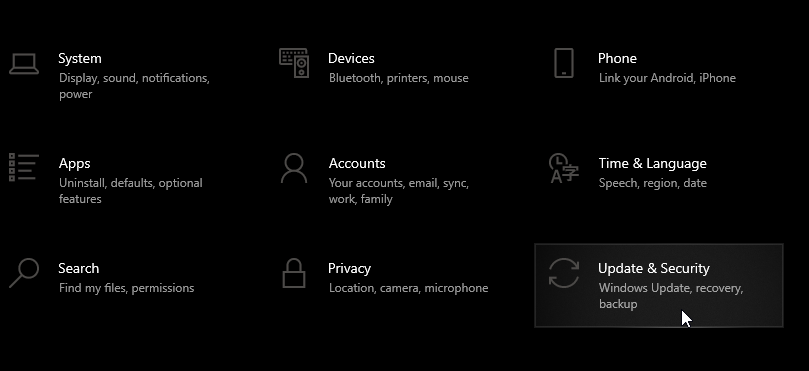
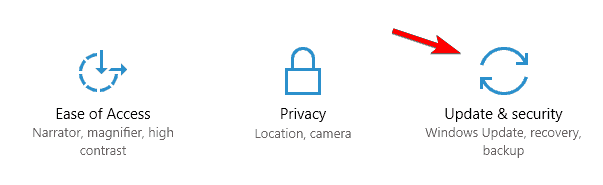
Open the Settings app by pressing Windows Key + I and navigate to Update & security section.
In the left pane, select Recovery, and in the right pane click on Restart now button.
Your PC will now restart and you’ll be presented with three options. Select Troubleshoot > Advanced options > Startup Settings. Now click on the Restart button.
You’ll see a list of options. Select any version of Safe Mode by pressing the appropriate key on your keyboard.
After Safe Mode starts, try to uninstall the problematic application.
Tip
Drivers are one of the most cumbersome issues for any OS so head out to our Driver FIx Hub. Out Windows 10 Errors page is filled with other useful articles.
That’s about it, I hope these solutions helped you to uninstall your program normally. If you have any comments or questions, just reach out to the comment section below.
It can be frustrating if your Windows 7 keeps installing the same update over and over. However, this issue mainly occurs when the Windows system cannot establish specific updates correctly and continues to reinstall them.
Why do Windows updates keep repeating?
Different factors may be responsible if Windows keeps installing the same update over and over on your PC. Here are the most common reasons:
Partially installed updates – Whenever the OS cannot install an update wholly and correctly, this error is mostly inevitable. In instances such as this, you should delete the failed Windows updates.
Windows failed to detect updates – Although rare, sometimes, even after an update is installed successfully, the Operating System may be unable to detect it, which can lead to fresh installation attempts.
Disabled Windows services – Certain Windows services are vital to successfully installing updates. If these services are disabled, it can lead to this issue.
Having seen what could be the reason behind the issue, let’s explore the best solutions.
What can I do if Windows 7 keeps installing the same update?
Before engaging in any troubleshooting or settings tweaks, users should ensure they perform the following simple steps:
Make sure you have enough disk space on your computer.
Update your Windows to the latest available version.
Check to know what update it is that keeps installing.
Having confirmed the above checks, and the error is yet to fix, you can try any of the fixes below.
1. Delete the Software Distribution directory
Press the Windows key + R to open the Run box, input cmd, and click OK.
In the Command Prompt window, type the following and press Enter after each one: net stop wuauservrename c:windowsSoftwareDistribution softwaredistribution.oldnet start wuauserv
Press the Windows key + R and type C:Windows, then press Enter or click OK to open the Windows folder.
Right-click the SoftwareDistribution folder and select Delete.
After deleting the directory, restart your computer.
With this, all backups and your problematic Windows update are deleted, so you shouldn’t face this issue anymore.
2. Uninstall the problematic updates
Left-click the Start button and select Control Panel.
Select Uninstall a program under Programs after changing the View by to Category.
Next, click on View installed update
Select Microsoft Windows and click on Uninstall updates.
Press the Windows key + S, type system restore, and launch it.
Click on Next when the System Restore window opens.
Select the desired restore point and click Next.
Finally, follow the on-screen instructions and click Finish to complete the system restoration process.
Alternatively, you can use other third-party tools to scan your registry automatically to remove the problematic entries compared to the system restore process.
4. Run the Windows update troubleshooter
Press the Windows key + I and select the Updates & Security option.
In the left pane, choose Troubleshoot and click on Additional troubleshooters.
Next, select Windows Update and click Run the troubleshooter.
Finally, follow further on-screen instructions, restart your computer, and check if the Windows update keeps reinstalling.
The Windows Update troubleshooter automatically detects and fixes most incorrect settings on your computer.
5. Run the SFC and DISM scans
Go to Start at the bottom-left corner of the home page.
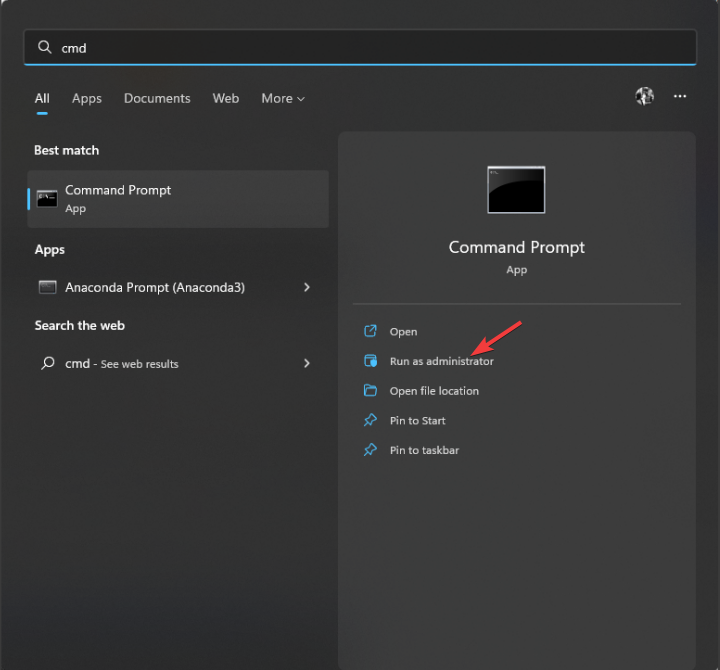
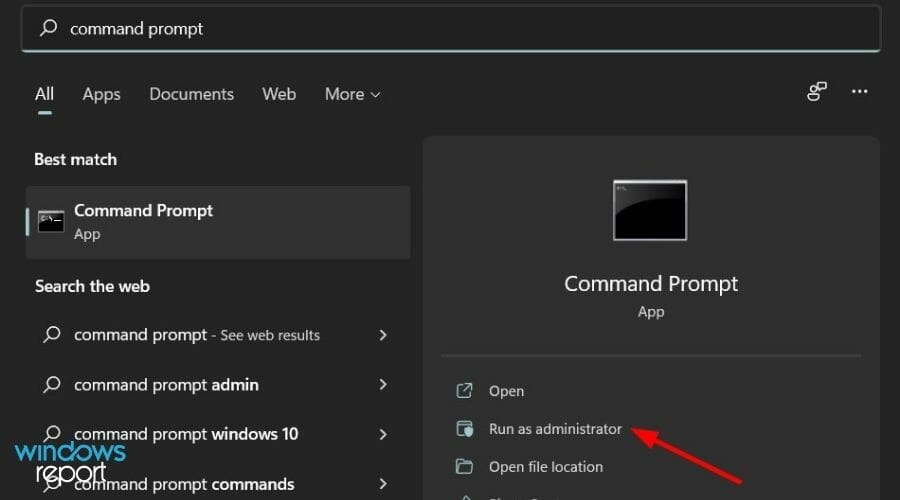
Type command, right-click on Command Prompt, and select Run as administrator.
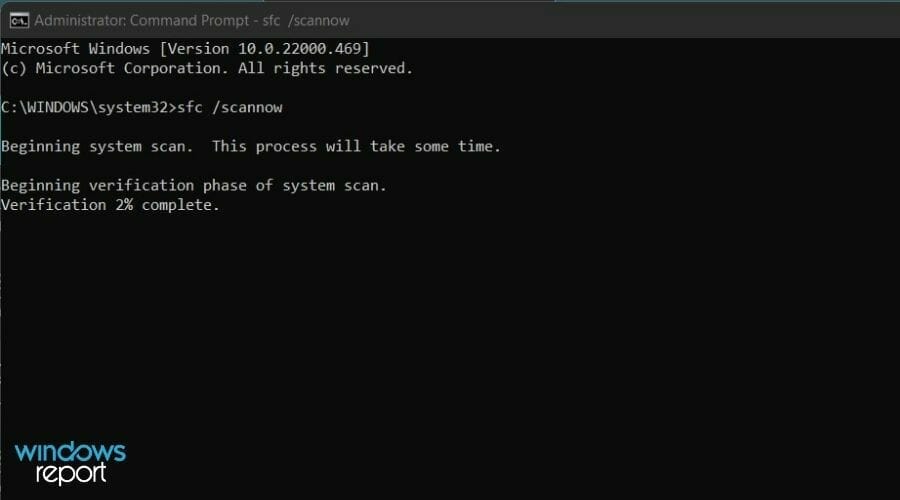
Type the line below in the text field and hit Enter: sfc /scannow
Finally, wait until the scan and repair process is finished.
Type the line below in the text field and hit Enter: DISM.exe/Online /Cleanup-image /Restorehealth
Once done, restart your PC and check if the issue is fixed.
However, note that whether the SFC scan is successful or not, you should still run the DISM. After the DISM scan completes, you can now run the SFC scan again.
6. Manually update with Microsoft Update Catalog
Press the Windows key +Ito open the Settings shortcut, then click the Update & Security section.
Next, click on View installed update history.
Note down the updated version that is installing again and again. (It should be something like KB12345678)
Visit Windows Updates Catalog and search for your version code then press Enter or click the Search button.
Click the Add all button and a new pop-up window will appear.
Click the update download link and then install it.
And that is all you should do if Windows 7 keeps installing the same update over and over on your devices.
Also, please use the comments section below if you have any questions, comments, and further suggestions, or if somehow none of these solutions work for you.
But did you know that there is an even faster way to check? Moreover, you don’t even need to use Edge settings! Follow this guide to learn what to do.
Find Edge browser version
Type (or copy and paste) edge://version into the Edge browser address bar and press Enter.
The Microsoft Edge version will appear at the top of the page.
Next to the Edge version number, you can use the Copy button to copy the version number information to your clipboard.
Other pertinent Edge browser version number information includes the executable path to Edge, the operating system you are running, active variations (tabs or pages open) in Edge you are running, and more. You can use a variation of this command to check the version information in other Chromium-based browsers, including Chrome and Brave too.
Get other browsers’ information
Instead of trying to search and find this information buried somewhere in settings, you can access the browser version information using the address bar. Replace edge with the name of your browser. In this case, use the command brave://version to find the version information.
This method also works with others, including Chrome, Vivaldi, and FireFox browsers. Do you use Microsoft Edge or do ou use a different browser? Let us know in the comments!
We all know that after a while, our PCs start to get slower and even unresponsive but Wise Care 365 Pro can make a difference.
You can clean your PC manually but it takes a lot of time and effort. With this tool, everything is automatic.
What is Wise Care 365 Pro and how does it help you?
Created by WiseCleaner, Wise Care 365 Pro is a smart app that helps you clean up the disk from junk files and fix registry problems on your PC.
However, it also protects your privacy and makes your PC more secure in the process.
But ultimately, the software makes your PC faster and clears up all the errors you now go past and tolerate.
What are Wise Care 365 Pro’s best features?
1. Complete cleanup for useless junk files
The most important feature of Wise Care 365 Pro consists of the cleaning tools. It has no less than 5 dedicated options.
The Registry Cleaner takes care of all the possible issues in the Registry, including leftovers from uninstalled software, paths, shared DLLs, and a lot more.
The Common Cleaner looks at the files on your PC, the system, and the browsers and cleans them from junk files, tracking files, cache, etc.
If you want to clean even further, the Advanced Cleaner will find all the .dmp and .tmp files and gets rid of them thus freeing important space on your disks.
You can even optimize your OS by using the System Slimming feature that discards old Windows Installer files and baseline cache that is still using space unnecessarily.
Lastly, the Big Files Manager tool available in the Pro version scans your disk for big files on your PC.
This tool is really useful when you need some space while those 4K movies you’ve already seen are hogging huge chunks from your disk.
2. Real-time system protection
Wise Care 365 Pro has an interesting feature similar to the one included in some antiviruses. It monitors all your applications and identifies any of their attempts to silently change the Windows Registry.
After that, it simply blocks the process and warns you about this promptly.
For instance, it prevents apps from taking over your browser homepage or adding themselves to the Windows startup.
It also prevents such intrusions in the Windows context menu or changing the default browser.
3. Privacy protection
The Privacy Protector feature has no less than 5 components to it. The Privacy Eraser deletes all the history for all your viewing habits, whether it’s pictures, videos, files or visited pages on your browsers.
That way, you will leave no traces behind after using the PC. However, this feature is only available in the Pro version.
Disk Eraser will help you completely erase your disks if you want to sell your computer. The tool not only permanently deletes any files on your disk but it’s also able to apply rewrites and deletes so that the information can’t be retrieved.
The Password Generator tool allows you to create strong passwords and copy them to the clipboard for later usage.
And finally, Sites Notifications, also available in the Pro version mutes the notifications from the annoying websites that keep sending them.
4. PC tuning for speeding up your PC
Whether you want to play a new game and your configuration is barely on par, or you just want to speed up your PC, System Tuneup from Wise Care 365 Pro will do the job automatically.
This tool can improve startup and shutdown, improve system stability, and overall system speed at a glance.
However, it also tweaks the network settings and optimizes your disk settings for ultimate PC speed.
How do I get Wise Care 365 Pro and how much does it cost?
As we’ve mentioned above, Wise Care 365 has a free version but that only covers the PC Checkup, cleaning and speeding it up, and your computer hardware inventory.
That’s extremely helpful as it is but for the more advanced features, some of which we covered above, you will need to sign up for the Pro version.
WiseCleaner has right now a Wise Care Pro offer for only $29.96 that covers 3 PC for one year. And even if you commit, the developer has a 60-day money-back guarantee policy.
The DNS server ensures that you are able to connect to the internet and surf through it. Sadly, there have been multiple user reports regarding DNS server issues on Windows 10.
So much so that this issue has also troubled Windows 7 users in the past. Users have been complaining about the DNS server not responding in Windows 7 error. This guide will give you a bunch of solutions that will help you resolve the problem quickly.
What causes the DNS server not to respond in Windows 7?
Here are a few reasons that could trigger the DNS server not responding in Windows 7:
Misconfigured DNS settings: If the DNS settings are misconfigured then your browser will have a hard time connecting to the internet.
Outdated network driver: Outdated drivers often cause multiple issues and conflict with the smooth performance of the PC.
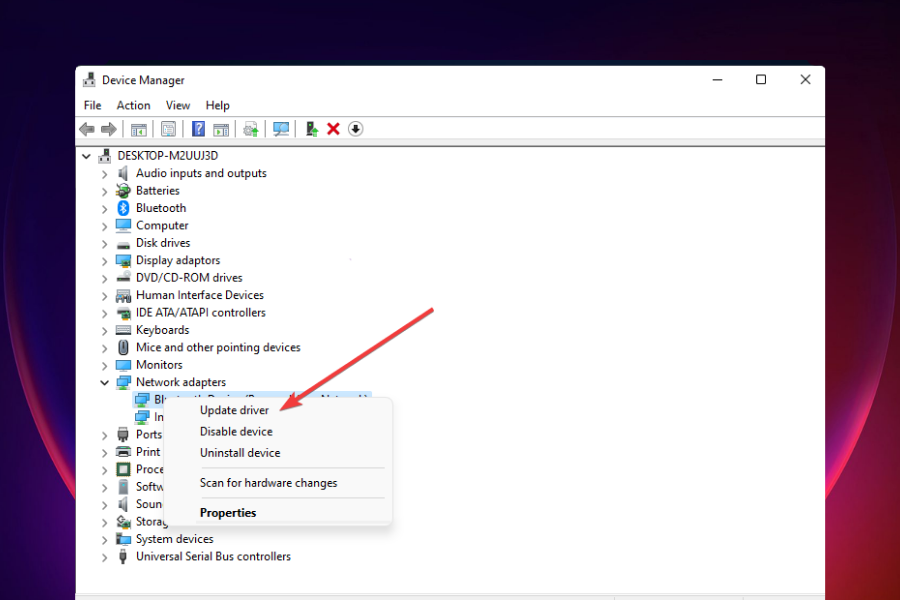
Right-click on your network adapter and select Update driver.
Click on Search automatically for drivers.
Your system will check if there is a new update available and install it if it finds one.
Updated drivers not only bring new features on board but also get rid of the bugs and glitches present in the version that is currently installed on your PC.
While you can manually update the driver following the above steps, you can ease the process by using a dedicated driver updater tool. For this purpose, we recommend you use Outbyte Driver Updater.
Outbyte Driver Updater not only updates your drivers but can automatically scan for all of your drivers and update them for you. It can create driver backups, fix system-related issues, schedule scans, and much more.
Outbyte Driver Updater
This tool keeps all your drivers updated to maintain your system in top shape.
Search for the command prompt and right-click on it to select Run itas an administrator.
Type the below command and press Enter after each command. netsh int ip reset reset.txtnetsh winsock resetnetsh advfirewall reset
5. Run the Network Troubleshooter
Open the Start menu by pressing the Windows key.
Open Control Panel.
Under Network & internet heading, select View network status and tasks.
Click on Troubleshoot problems.
Select Internet Connections.
Click Advanced.
Check Apply repairs automatically.
Click Next.
Select Troubleshoot my connection to the Internet.
Your system will begin the diagnosis and will prompt you to perform steps to resolve the issue.
6. Use a different browser
Often the DNS server is not responding in Windows 7 error is associated with the browser itself. Because of some glitch or bug in the browser, it may throw up unnecessary errors.
In such a case, we would suggest you switch to a different browser and check if the problem exists there as well or not.
Apex Legends has taken Windows gaming by storm. However, that game can still have some startup issues. For example, some players might need to fix Legends not launching a splash screen on a PC.
It’s also perhaps the most recent title that can compete with Fortnite and PUBG on a level playing field. Thus, we understand why you might be in a hurry to fix it.
Why won’t Apex open?
Ordinarily, this type of problem with a game is caused by corrupted or faulty installation files. But it could also be related to incorrect system setups, malfunctioning display drivers, or the fact that you are playing an out-of-date game version.
Another possibility is that your machine does not fulfill the minimal requirements for the game, which would explain why it is unable to launch. Or, as our users reported, Apex Legends won’t start after an update performed automatically by Windows or the game itself.
How do I fix launch error in Apex Legends?
1. Run the game as an administrator
In order to repair launching error on Apex Legends, you can simply run the game in the Administrator mode using the steps below.
Press the Windows key + S keyboard shortcut to open the search tool. Enter Apex Legends as the search keyword. Right-click it and select Open file location.
2. Next, right-click the Apex Legends EXE to select Properties.
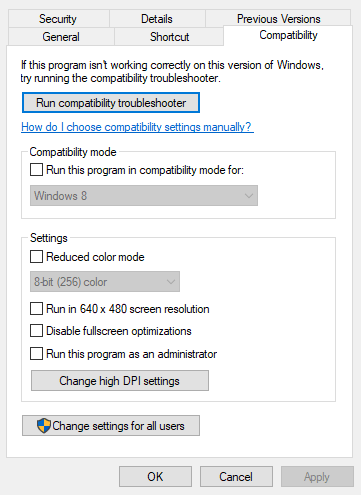
3. Click the Compatibility tab then select the Run this program as administrator setting and select the Disable fullscreen optimizations option.
4. Click the Apply option then press the OK button to exit the window.
The easiest way to update your driver is to use dedicated driver updater software that lets you update your graphics card driver and any other with just one click.
Once you run it on your system, it will automatically start searching for any drivers that need updating on your PC. As soon as the analysis process is done, you can choose to update only the graphics card driver, but we recommend that you take the time to update all the drivers you can.
This will ensure your system runs smoothly and does not crash the Apex Legends game because of any other unforeseen issues.
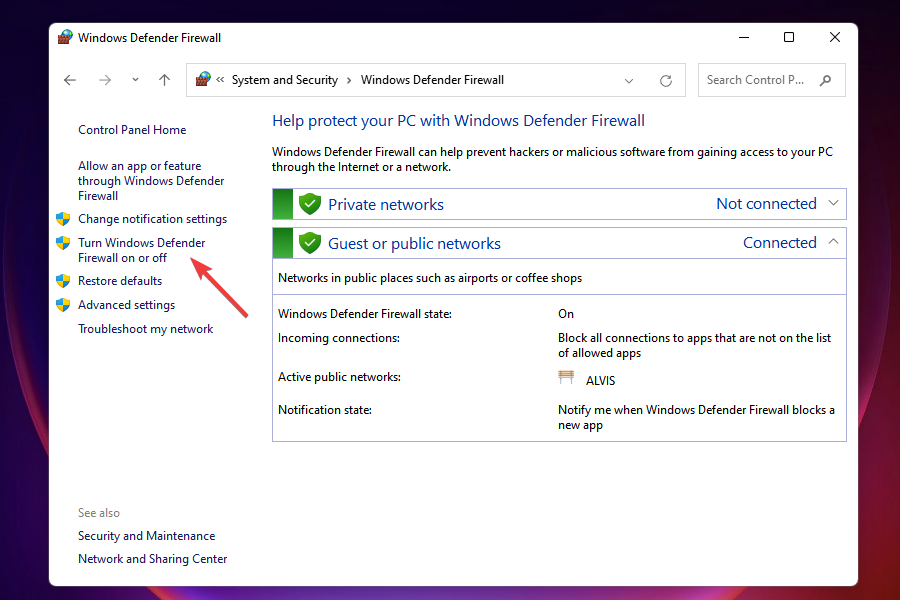
Click the Type here to search button on the left side of Windows 10’s taskbar.
Input firewall in the search box.
Click Windows Defender Firewall to open its Control Panel applet.
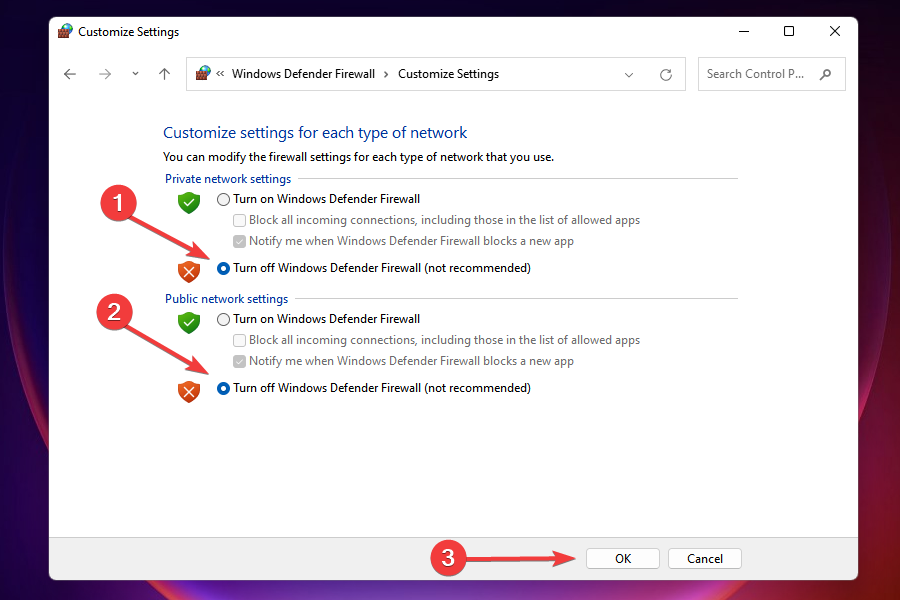
Next, click turn Windows Defender Firewall on or off to open the options in the shot directly below.
Select the Turn off Windows Defender Firewall radio buttons.
Click the OK button.
Note: If that resolution fixes the issue, WDF was probably blocking the game. You can turn the firewall off and back on after playing Apex. Alternatively, add Apex Legends to the firewall’s exception list.
Those are some of the more likely fixes for Apex Legends not launching or when you encounter an error code: clog. Repairing Apex Legends and Easy Anti-Cheat, as outlined for resolutions three and five, are two of the more widely confirmed fixes.
You can also find troubleshooting articles for Windows games in the Windows 10 section. Our Gaming hub includes a plethora of troubleshooting guides for Windows, Xbox, and PlayStation games.
Was this guide helpful for you? Don’t hesitate to tell us in the comments section below and whether you have more solutions in mind.
The Calculator app on Windows 11 is one of the most basic and important pieces of software you can possibly have. As you can imagine, losing the ability to use the Calculator is pretty frustrating.
Unfortunately, native Windows 11 apps are known to suddenly stop working. It’s much better compared to the launch version of the OS, but these issues still exist. There are a few reasons for this:
Your Windows Firewall is blocking the app. To know this for sure, you’ll have to check your Firewall settings or use the Command Prompt to see if anything’s blocked.
A faulty update from Microsoft is causing the Calculator app to behave erratically. It is possible to uninstall an update within the Settings menu, but it isn’t too difficult to do.
Conversely, corrupted system files within your Windows 11 computer are also likely culprits.
Changes or modifications to the registry files can use all Windows native apps, not just Calculator, to suddenly stop working.
How do I fix the Calculator app on Windows 11?
Before we go into the more complex solutions, we think it’s important to point out some of the easier ones you can quickly do. The majority of the time, these will fix the Calculator app:
Update Windows 11 Calculator by going to the Microsoft Store and downloading any new updates available.
Download any new Windows 11 updates found in the Settings menu.
You can create a local account on your computer although you will miss out on other services exclusive to the original.
1. Re-register the Calculator app
Search for Windows PowerShell and click Run as administrator when it appears.
If a User Account Control page appears asking you if you want to make changes, click Yes.
In PowerShell, enter the following command: Get-AppXPackage -AllUsers -Name Microsoft.WindowsCalculator | Foreach {Add-AppxPackage -DisableDevelopmentMode -Register "$($_.InstallLocation)\AppXManifest.xml" -Verbose}
Hit Enter on your keyboard and wait for PowerShell to complete the command.
Close PowerShell and check if that resolved the Calculator problem.
2. Reinstall Calculator via PowerShell
Open PowerShell with administrative permissions again.
Enter the following command into PowerShell and hit Enter on your keyboard: get-appxpackage *windowscalculator* | remove-appxpackage.
Let PowerShell uninstall the Calculator app.
Now open Microsoft Store and search for Windows Calculator.
Click the Get button to install the Calculator app.
3. Reset the Calculator app
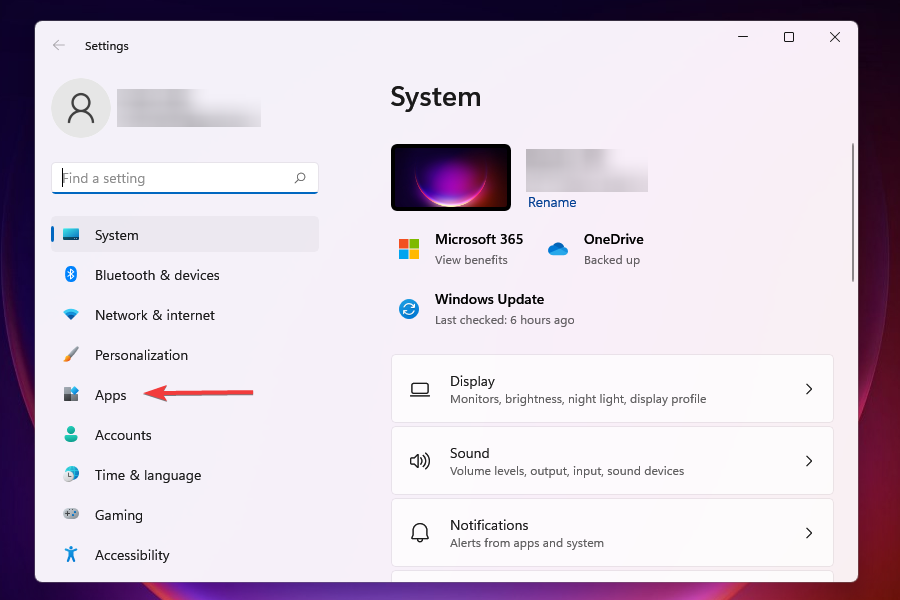
Open the Settings app and click the Apps tab on the left-hand side.
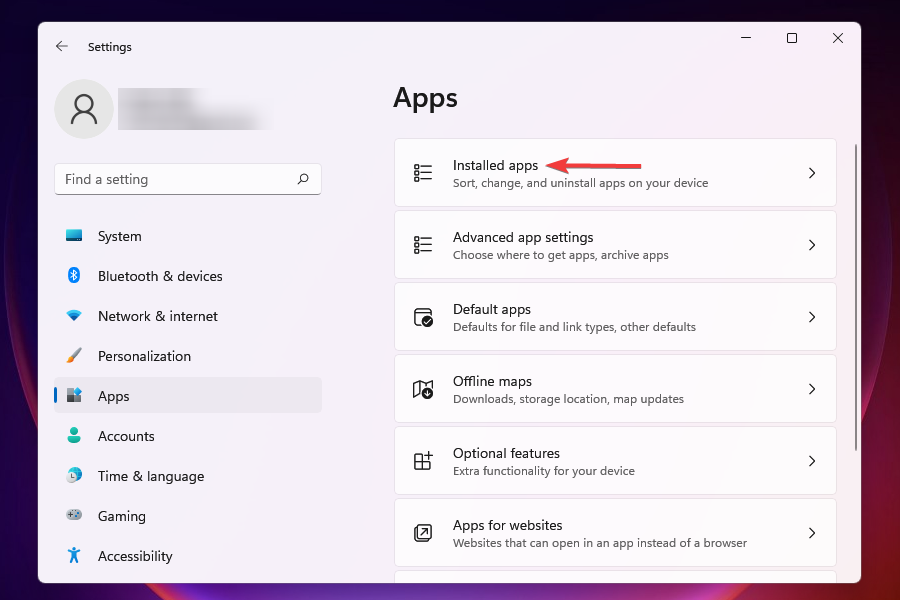
In the tab, select Installed apps.
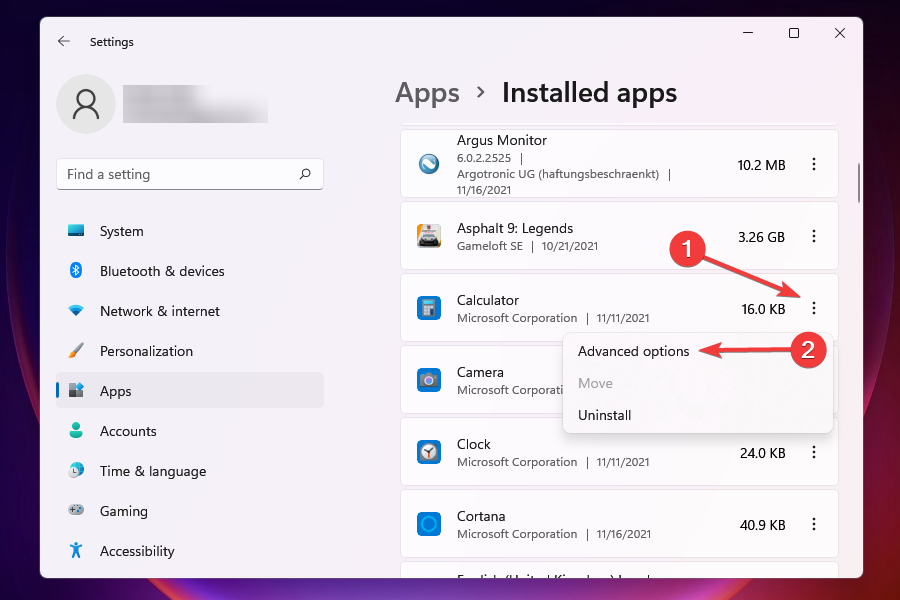
Scroll down and locate the Calculator app in the list. Click the three dots to the right and select Advanced options.
Scroll down again until you see the Reset button. Click it.
Note that this will delete the Calculator’s data fixing any problems it may have.
Bring up the Search bar, look for the Registry Editor, and select the entry that appears.
A User Account Control may appear. Select Yes when it does.
In the Registry Editor’s address bar, enter the following: HKEY_LOCAL_MACHINE\SOFTWARE\Microsoft\Windows\CurrentVersion\AppModel\StateChange\PackageList
Delete everything under the PackageList folder.
When done, close the Registry Editor and restart your computer.
A lot of the time, people upgrade from Windows 11 native apps to something that can do more and Calculator is no different. The Microsoft Store is home to tons of different versions of the Calculator app.
For a complete overview of the default app and its features, read our guide on how to use Calculator on Windows 11 to learn about standard, scientific, and converter modes.
One of them, which we highly recommend, is the Super Calculator which has the ability to generate factorials of large numbers and you can use radians for trigonometry.
If you need something more specific, we recommend checking out our guide on the best accounting software. These will help you create important financial reports for your small business.
Entries in that list include TurboTax to simplify tax returns and Wave to help you with invoicing and payment processing.
Feel free to comment below if you have any questions about any native apps. Also, leave comments about what reviews you’d like to see or information on other Windows 11 software.
The critical_process_died Windows 11 issue is a BSoD error that can occur randomly or appear when trying to boot to Windows. These errors will make your PC crash and reboot suddenly, so you’ll lose any unsaved data.
Fixing it may take time because finding the culprit is not always easy. The usual causes are related to your drivers or your hardware in some instances, but there are also exceptions.
Rest assured that there are ways to fix this problem, and we’re going to show you a couple of methods you can use to solve the Critical Process Died stop code in Windows 11 right away.
How do I fix the Critical Process Died BSoD in Windows 11?
1. Use the SFC and DISM scans
Press Windows key + X and select Windows Terminal (Admin).
Now run the following command: sfc /scannow
Wait for the scan to finish, restart your PC, and check if the problem is still there.
If the issue still appears, start the Terminal again, and run the following commands: Dism /Online /Cleanup-Image /CheckHealth Dism /Online /Cleanup-Image /ScanHealth Dism /Online /Cleanup-Image /RestoreHealth
You can also fix critical_process_died error on Windows 11 more effectively by using specialized BSoD fixers.
2. Reinstall/update your drivers
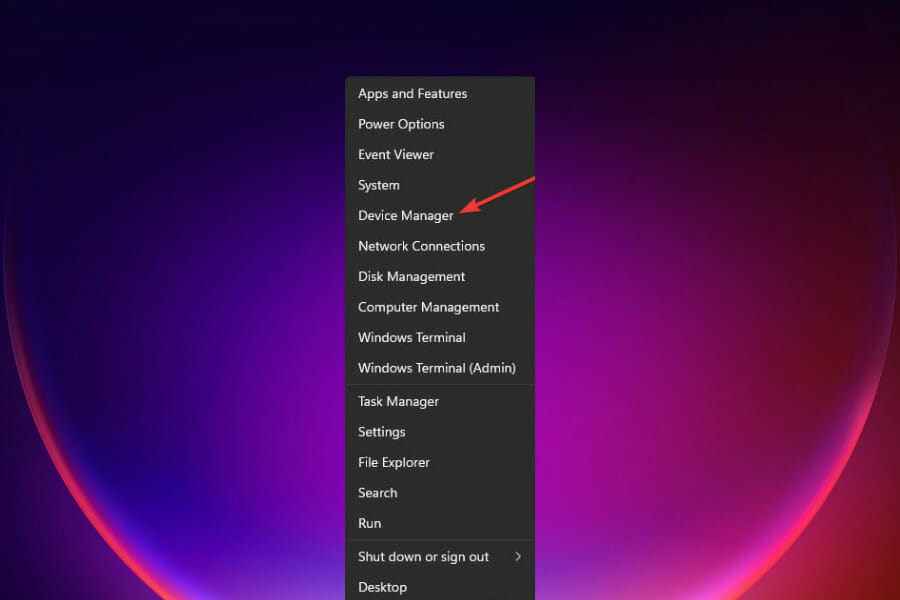
Press Windows key + X and choose Device Manager from the list.
Locate the driver that is causing you trouble and right-click it. Choose Uninstall device from the menu.
Now select Uninstall to confirm.
Once the driver is removed, restart your PC and check if the problem is resolved.
Keeping the drivers up to date can also help you prevent similar BSoD issues like Critical_structure_corruption on Windows 11.
To find out which driver is causing the issue, it’s advised to check the crash logs or to remove any drivers that might’ve been recently updated.
You can also try updating your drivers, and you can do that by downloading the drivers from the manufacturer’s website. Alternatively, feel free to use a dedicated tool such as Outbyte Driver Updater to automatically update all your drivers.
Outbyte Driver Updater is the easiest way to update all drivers. With a database of over 18 million driver files, it will find all outdated drivers on your computer and either update or repair them within a few clicks.
You might have to repeat this procedure for multiple updates in order to fix the problem.
Press Windows key + R and enter appwiz.cpl. Click OK.
Go to View installed updates.
Double-click the update you want to remove.
6. Reset Windows 11
NOTE
This is a relatively simple process but if you choose to perform it, be sure to back up all your important files.
Press Windows Key + I to open Settings.
Navigate to the System section and select Recovery.
Now click the Reset PC button.
Select the desired option. In most cases, it’s better to use Remove everything, but if you choose it, be sure to back up your files beforehand.
Select the type of reinstall that you want. We used the Local reinstall.
Confirm your reinstall settings.
Click Reset to start the process.
Follow the instructions on the screen to finish it.
Resetting might be the only solution if you get stuck in Critical Process Died boot loop on Windows 11, so be sure to check our detailed article on how to reset Windows 11 for detailed instructions.
What causes the Critical process died error in Windows 11?
This Critical Process Died blue screen on Windows 11 appears when a critical component of the Windows operating system detects that data has been modified when it should not have been. Here are some of the causes behind it:
Malfunctioning hardware – BSoD errors can appear due to hardware issues. As for software issues, consider them as well as potential culprits. We are most likely referring to compatibility issues with certain applications or drivers.
Corrupt or missing system files – Missing system files can also cause this problem, which is the case with the Critical Process Died error on Windows.
Malware and BIOS issues – In some instances, malware and bad BIOS updates can cause BSoD errors on your PC.
Problematic drivers – Also, don’t forget to check and update your drivers if that’s the case. These tips also apply if you happen to encounter a Critical process died in Windows 10.
What is the minidump file, and where can it be found?
Once a system crash occurs, your PC will memorize the events that caused it and write them down in a minidump, also known as DMP, file.
Minidump file works as a crash log, and it holds important information that might help you diagnose the problem and find the cause of the BSoD.
Regarding the location, you can find the minidump files in the following directory: C:\Windows\Minidump
You can also use the MEMORY.DMP file for diagnostics usually contains more information, much of which isn’t crucial.
How can I change my system crash settings?
Press Windows Key + R, type sysdm.cpl and press Enter.
Navigate to the Advanced tab and click on Settings in the Startup and Recovery section.
Now you can change the settings as needed. By default, the settings should look like on the screenshot below:
Optional: The only setting that you might want to disable is Automatically restart to see the name of the stop code better.
Fixing this error can be complicated, especially if the Critical Process Died appears on startup on Windows 11, but hopefully, you found our article informative and managed to fix the problem.
For more solutions, check out our guide on how to check the BSoD log file to see what went wrong and what you can do about it.
Did you find a solution on your own to one of the abovementioned situations? Share it with us in the comments section below.
Many users have reported that Windows 10 shuts down instead of going to sleep whenever they choose to enter Sleep Mode.
No matter how you try to set your computer into Sleep Mode (pressing the power button shortly, clicking the Start menu, or closing the laptop lid), the PC shuts down.
In today’s article, we will discuss the best troubleshooting methods you must apply to Windows 10 if it shuts down instead of going to sleep.
Why does my computer shut down when I put it to sleep? The issue is most likely caused by a power setting, a disabled BIOS setting, or a flaw in the driver for the Intel Management Engine Interface (IMEI).
There is a good chance that your device’s power button is programmed to turn off when you quickly touch it.
Users reported similar issues that you can fix using the methods below. Some of the most common ones are the following:
Windows shuts down instead of sleep – If the settings for the hard drive in the advanced power settings for the sleep mode are specified improperly, it would appear that your personal computer is more likely to turn off instead of entering the sleep mode.
PC turns off instead of sleep – A few customers successfully resolved the issue by extending the time before the hard disk was powered down when using the Sleep settings.
PC shuts down when put to sleep – It’s possible that a corrupted system file is the cause of this issue. I would recommend that you perform the System file checkup.
Laptop shuts down instead of sleep – It’s possible that the settings for your power plan are to blame if your computer shuts down unexpectedly after coming out of hibernation.
PCshuts down instead of sleep in Windows 11 – A scan utilizing the System File Checker (SFC) is carried out in order to determine whether or not this issue is being caused by any corrupted system files.
Computer shuts down in sleep mode (Windows 7) – Proceed in Windows 7 as we did below in Windows 10 as the steps shouldn’t be that different.
Computer shuts down when put to sleep (Mac) – Unchecking Power Before you put the computer to sleep automatically, make sure that Energy Saver is enabled and that any screen savers you have been turned off.
If you’ve been wondering Why does my computer shut down instead of sleep on Windows 10? let’s see what you can do to fix it, along with the similar solutions mentioned above. Follow along!
How do I stop my computer from shutting down instead of sleep?
1. Check the power settings of your computer
If you need to get rid of Windows 10 shutting down issues efficiently, be sure to check the power setting and modify what it’s required as described in the steps below.
1. Press the Windows + R keys to open the Run dialog box then type ms-settings:powersleep, and press Enter.
2. Inside the Power & Sleep window, select Additional power settings.
3. Within the Power Options menu, click on Choose what closing the lid does.
4. Change the values for each of these options: When I press the power button to Sleep, When I press the sleep button, and also When I close the lid.
5. Click on Save changes.
Therefore, check to see if changing these settings sorted the problem out. If not, try the next method.
Follow the on-screen instructions to complete the setup.
Predictably, if the laptop shuts down instead of sleep, you might be facing a case of outdated drivers.
Here’s a quick solution to bring those drivers up to date without all the manual work. This spares you from a lot of time spent searching and checking which version you could download and install.
Outbyte Driver Updater allows you to schedule driver scans from a large library of driver files that are accessible for download. If you want to know when you need to update or replace a certain driver, Outbyte Driver Updater will notify you.
The heat generated by a machine set to sleep subjects all of its components to a higher temperature for a longer period.
Moreover, a computer turned off entirely is less vulnerable to damage from power spikes and drops that occur when the machine is being powered by its power adapter than a computer that is simply sleeping. So, you should shut down your PC from time to time.
We hope our methods helped you fix Windows 10 if it shuts down instead of sleeping. For more suggestions or other questions, please access the comments section below.
Experiencing problems and glitches while gaming is nothing new as it has become a regular occurrence for some users, as they reported having an Xbox wireless controller driver error in Windows 11.
A serious problem with the connection between the Xbox controller and the PC has been reported by a large number of customers.
The error notice appears to say that the USB device is not detected, in which case we will need to install the most recent driver update available.
If your Xbox controller isn’t working properly for any other reason, the methods listed below may still be able to resolve your problem. Make sure to carefully try them out, step by step.
Why is my Xbox controller not connecting to my PC Windows 11?
The two best troubleshooting techniques are to either update the driver in case you are using an older version, or to manually install the driver since they are the main cause of this issue. These two methods are bound to eliminate any problems.
If these two don’t work, you can always try disconnecting and then reconnecting the controller. Oftentimes, Windows 11 is unable to install the Xbox controller driver automatically which leads to the error. But simply reconnecting it would most likely fix it.
How do I fix the driver error for my Xbox controller?
1. Unplug and replug the controller
You can restart your Xbox console, do a full power cycle, or physically detach it from your computer to totally reboot it and resolve many common difficulties.
Try unplugging and replugging the controller into the PC several times. This straightforward strategy should always be the first method you try, as it consistently produces positive results.
2. Update the USB driver
It’s most likely to fix the Xbox controller driver issues by assuring all your drivers are up-to-date. Otherwise, you need to update your USB drivers as described in the example below.
1. Open Device Manager
Right-click on the Start icon then choose Device Manager.
2. Update the USB driver
Now, expand the Universal Serial Bus controllers folder, right-click on every USB option and tap on Update driver.
3. Restart your PC to complete de process
Wait for the processes to end, then restart your computer to apply the changes made. Now you can retry using the Xbox controller.
In case you need to update your USB driver automatically and save more time, with Outbyte Driver Updaterthe process will be done in minutes and you will enjoy the latest version of any driver.
3. Reinstall the Xbox controller driver
Right-click on the Start icon then choose Device Manager.
Now expand the Xbox One controller section, right-click it and tap on Uninstall device.
Once the operation is completed, restart your PC. While the computer is rebooting, Windows will automatically reinstall the driver.
4. Disable your antivirus
Click the expand arrow from your taskbar and right-click on your antivirus icon then choose Avast shields control followed by Disable for 10 minutes.
If you have other antivirus programs installed, you can disable the app temporarily by following the same steps as above, or similar steps.
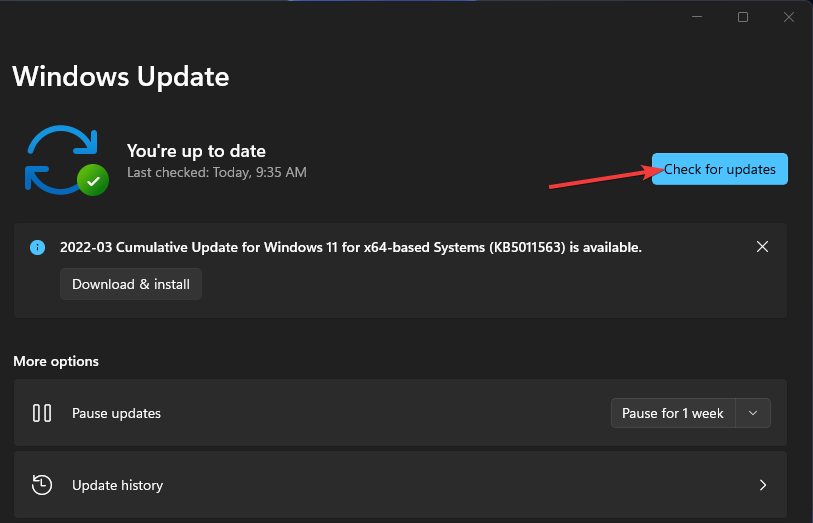
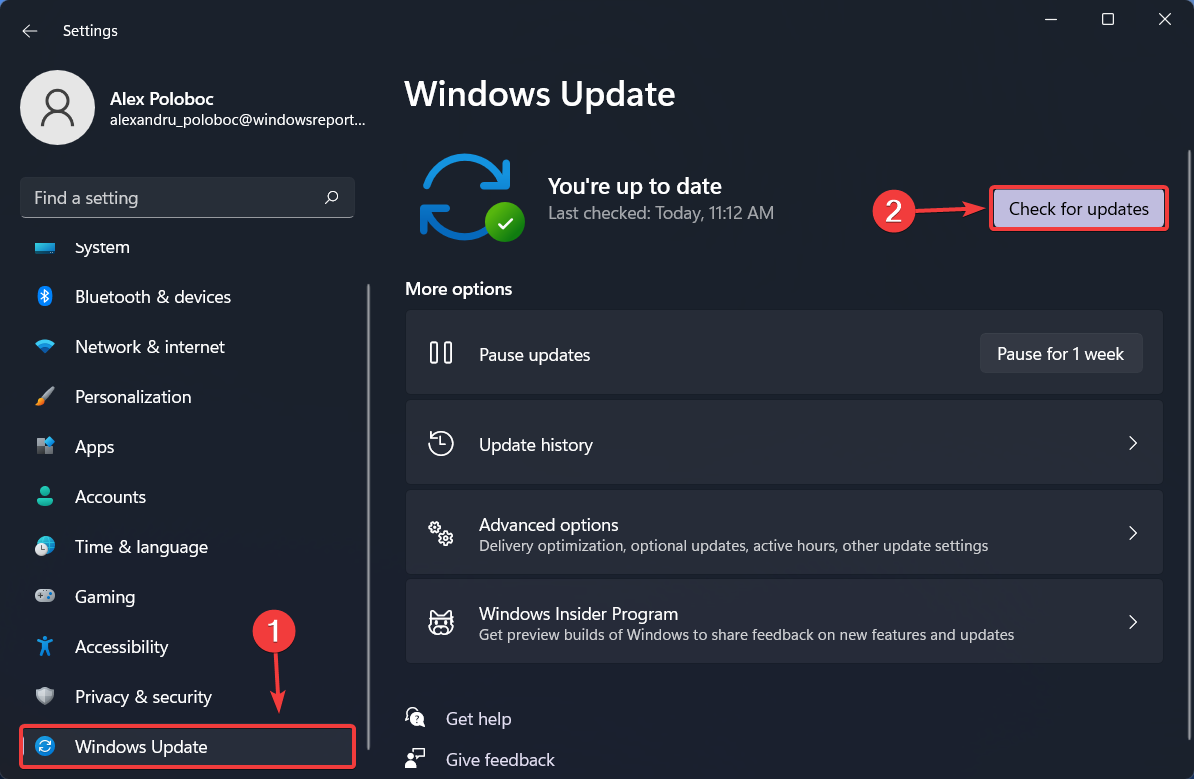
Press the Windows key + I to open the Settings app, then click on Windows Update in the left panel.
In the event that there are any new updates that need to be downloaded, the Install now option should be used; otherwise, the Check for updates button should be used to determine whether any new updates have been issued.
By updating your operating system, it may be able to fix the problem, which could be caused by an earlier version of Windows. The bug will very certainly be fixed in a later version of the software.
6. Change the USB cable
If you’re seeing a notice saying USB device not recognized while trying to use an Xbox controller, it’s possible that the problem is with your cable.
According to users, there are various different types of USB cables, with some cables being built solely for charging and others being designed to allow both charging and data transfer.
To determine if your Xbox controller isn’t working properly or if it isn’t being recognized, try swapping out the USB cord to see if that solves the problem.
Does Xbox controller work with Windows 11?
It’s possible to use an Xbox One controller to play games on your computer if you prefer a gamepad over a mouse and keyboard when gaming on your computer.
Furthermore, because the Xbox One controller is natively supported by Windows 11 (as well as Windows 10), the setup process is extremely simple.
The technique by which you connect your Xbox One controller to your PC, on the other hand, may differ slightly based on the type of gamepad you have and the method by which you choose to connect.
If you don’t mind a wired connection, utilizing a USB cable to connect any sort of Xbox One controller to a PC is by far the simplest method of getting started. Microsoft’s Xbox One S and Elite gamepads can be used using this manner as well.
All Xbox One controllers are equipped with a Micro USB port. Because of this, you can connect them directly to a PC by utilizing a Micro USB to USB Type-A adapter (sold separately). And, since Windows can automatically recognize connected Xbox One controllers, there’s nothing more to it.
Let us know in the comments below which solution worked best for you as well as which game you play the most from the Xbox Game Pass bundle. Thanks for reading!
If you’re among those who deal with Halo Infinite crashing on startup/loading screen, or mid game you’re in luck. In this piece, we’ll walk you through a few tips & tricks for making it stop.
We’ll also get into why this is happening so you know how to avoid it in the future. But first, let’s check out the fixes:
How to fix Halo Infinite Crash on startup
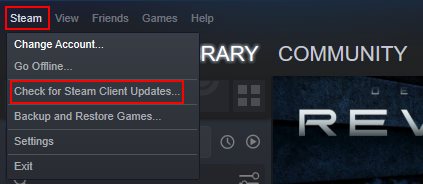
1. Update the Steam client
Launch the Steam Client.
Click on the Steam button located on the top menu bar.
Click on the Check for Steam Client Updates option.
Steam will automatically look for a new update and if available, will download it
2. Disable in-game overlay
This solution can be of great help due to its efficiency with Halo Infinite crashing on PC error, so you can simply do it as illustrated in the next steps.
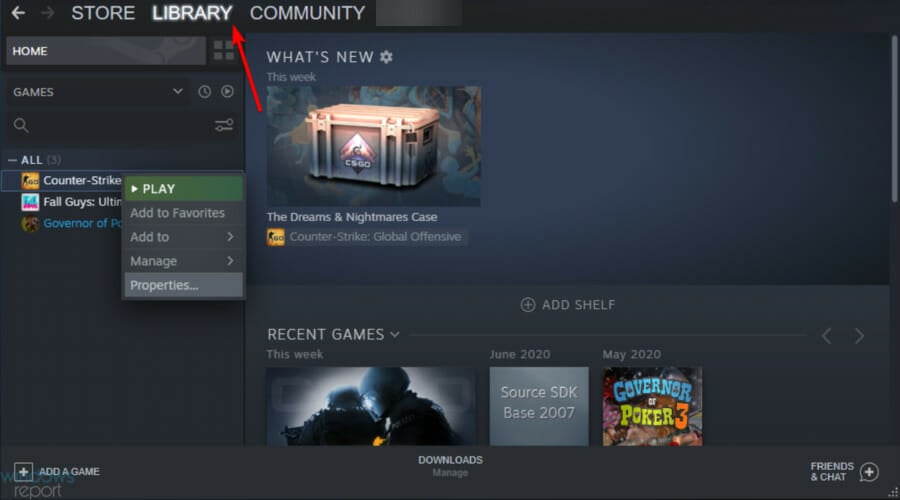
1. Open theSteamclient and go to Library.
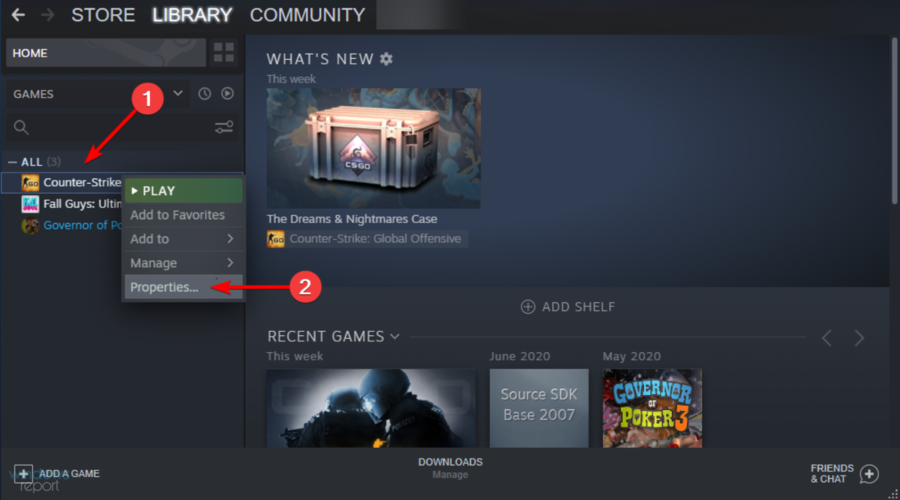
2. Right-click on Halo Infinite and select Properties.
3. Uncheck the box beside Enable the Steam Overlay while in-game option.
4. Relaunch the Steam client and the game and check if this fixes the issue or not.
3. Reinstall the game
Launch the Steam Client on your PC.
Head to the LIBRARY.
Right-click on Halo Infinite.
Navigate to Manage > Uninstall.
Visit the Steam Store and reinstall the game.
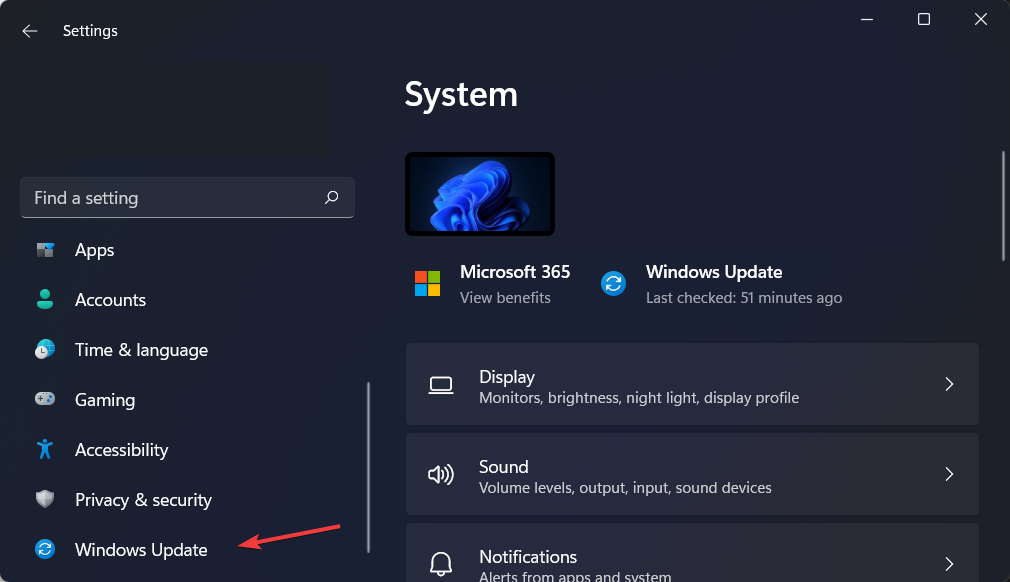
4. Update Windows
Press the Win + I buttons to open Settings.
Select Windows Update from the left pane.
Click on Check for updates button.
5. Run SFC Scan
Search for Command Prompt in the Start menu.
Run it as an administrator.
Type in the below command and press Enter:sfc/scannow
You can use a trusted third-party repair software that will help resolve the issues caused by corrupt system files.
How do I fix Halo Infinite crash mid-game?
1. Restart your PC
Open the Start menu.
Click on the Power button.
Select Restart.
When you reboot your PC, it loads all the system files right from scratch. There are chances that some of the important system files, including game files, did not load during the previous session.
2. Close unwanted background apps
Press Ctrl + Alt + Del to open Task Manager.
Under the Processes tab, select the apps one by one and hit the End task button to stop the process to run in the background.
Playing any game, including Halo Infinite, requires you to provide the required resources to it to get an optimal gaming experience.
There might be some apps that are eating up unnecessary resources while running in the background.
Using the Task Manager, you can close all the unwanted tasks and see if this fixes the Halo Infinite crashing on PC issue.
3. Update drivers
Open the Start menu.
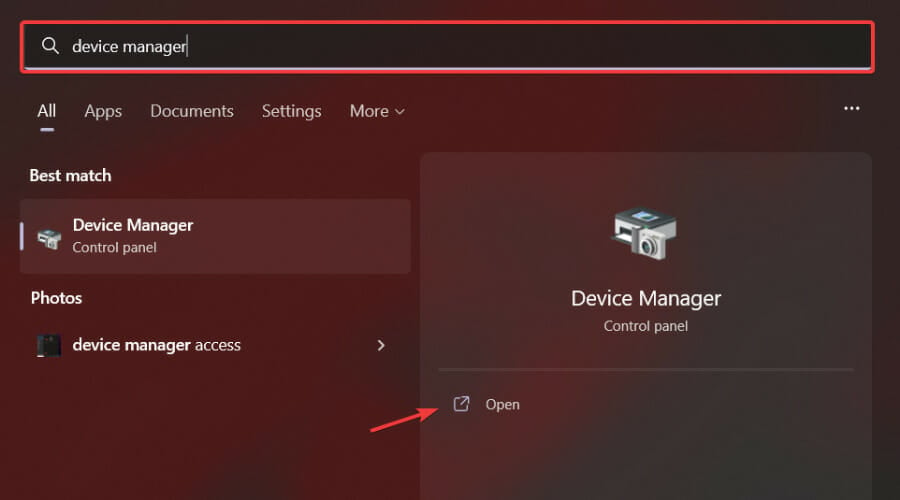
Search Device Manager.
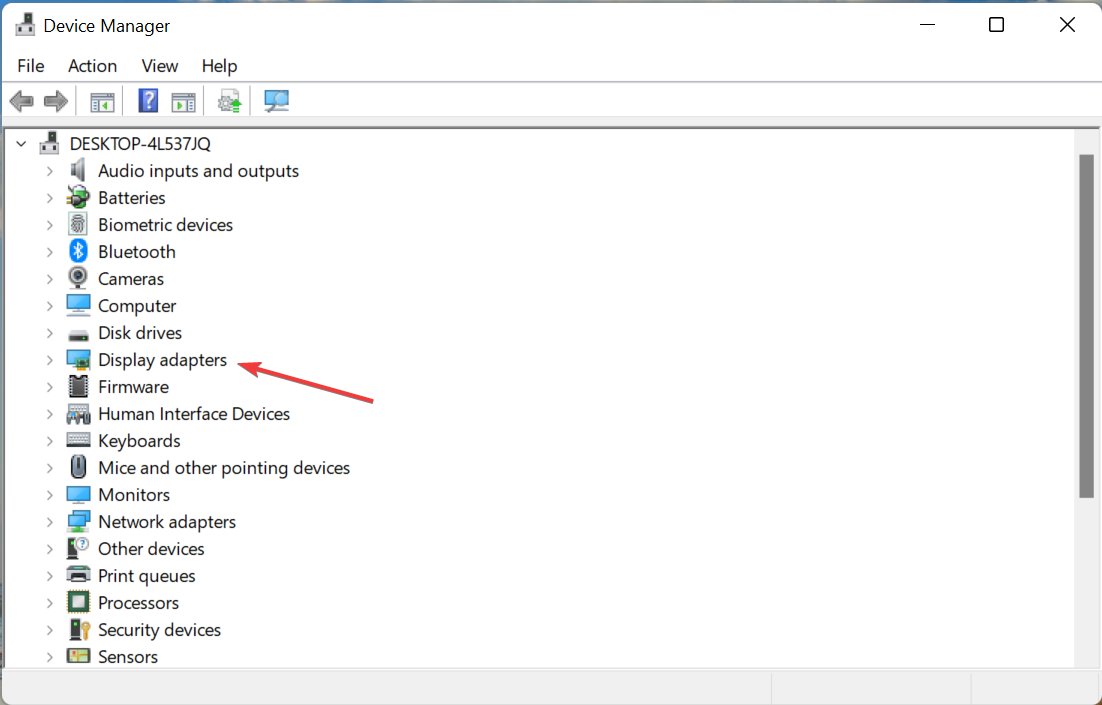
Expand the Display adapters section.
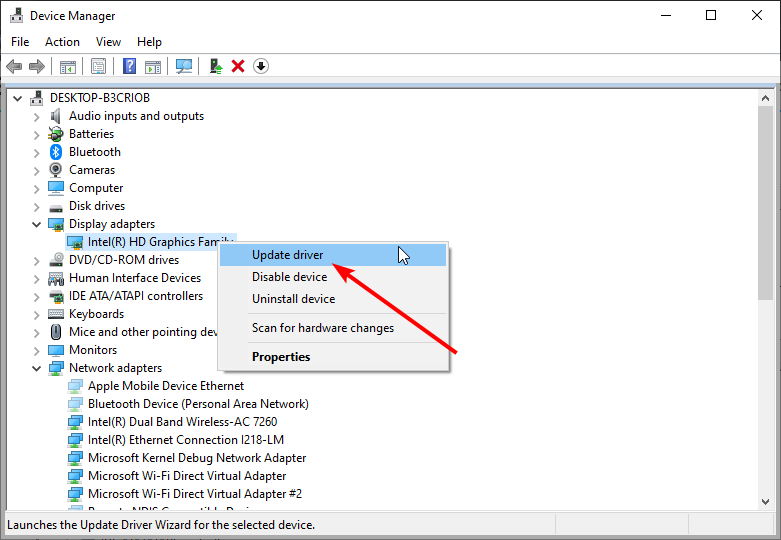
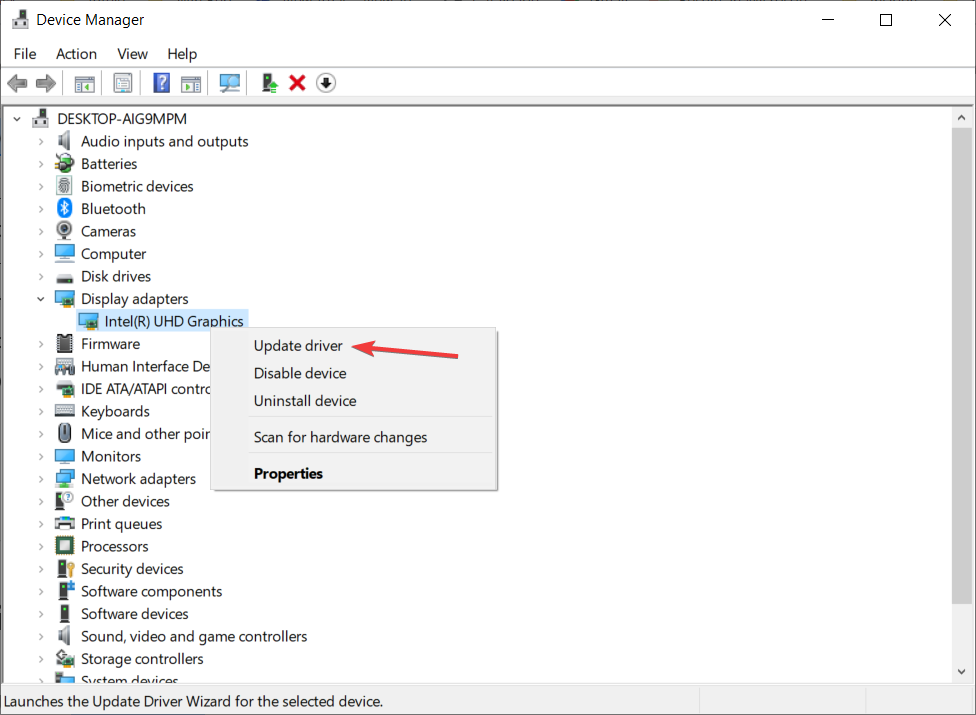
Right-click on your GPU and select Update driver.
Select Search automatically for drivers.
Your system will look for new updates for GPU drivers and will prompt you to install if a new one is available.
Repeat the same steps for audio, DirectX, and other drivers.
You should keep the drivers for GPU, audio, etc. up to date on your PC to enjoy all the latest features as well as the optimal performance of supported apps. Moreover, it also resolves other issues, reduces the chances of other errors with games, and improves overall system performance.
Using the steps mentioned above, you can manually update the drivers one by one. But there is a much quicker way to do it.
We would suggest you use a reliable driver updating tool known as Fortect Driver Updater. It lets you perform a full system scan automatically on startup, locate any outdated, damaged, or missing drivers, and update them with a simple click.
Simply select the drivers you’re interested in updating, and Fortect Driver Updater will automatically take care of the rest.
Click the Start button, type xbox, and click on the app from the results.
Select My Library from the left pane, then go to MANAGE INSTALLS from the right.
Now, make sure that the Automatic Updates are set to on, then click the UPDATE ALL button.
If Halo Infinite is crashing on the PC Xbox app, it’s a great chance that probably your game is not updated because somehow you disabled the automatic updates.
This solution helps you to turn them back on and update your game. Another solution would be to uninstall and reinstall the PC Xbox app.
5. Turn off fullscreen optimization
Open the Steam client.
Go to the LIBRARY.
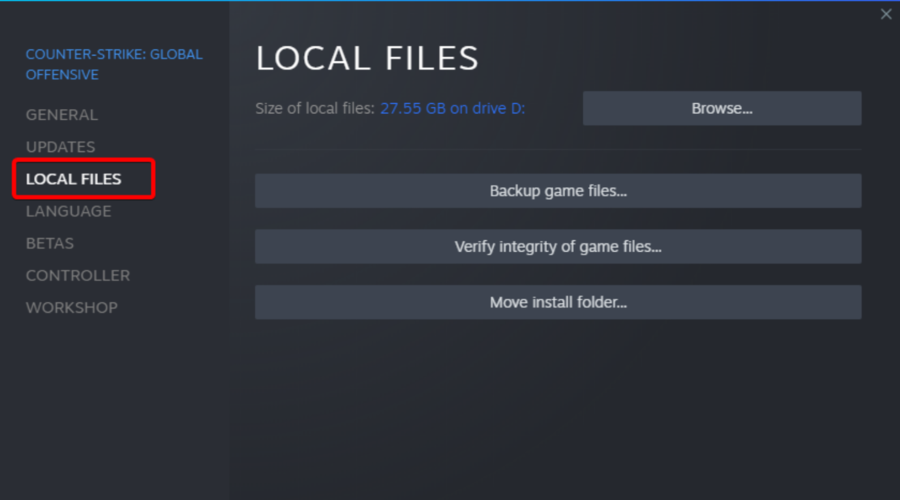
Right-click on Halo Infinite and select Properties.
Click on LOCAL FILES.
Click on Browse.
Right-click on the Halo Infinite EXE file and select Properties.
Under the Compatibility tab check the box next to Disable fullscreen optimizations.
Click on Change high DPI settings.
Under the High DPI scaling override section, check the box next to Override high DPI scaling behavior.
Hit OK to save the changes.
Windows 11 or Windows 10 come with a built-in full-screen optimization setting. This enables you to get optimal performance on supported full-screen apps.
However, this feature can sometimes cause compatibility issues with the app and ultimately cause it to crash either during startup or during mid-game.
Several users have reported that disabling the fullscreen optimization feature on their Windows PC has helped them fix the Halo Infinite crashing on PC issue.
6. Verify the integrity of the game files
Open the Steam client.
From the main menu, click on the LIBRARY section.
Right-click on the faulty game and select Properties.
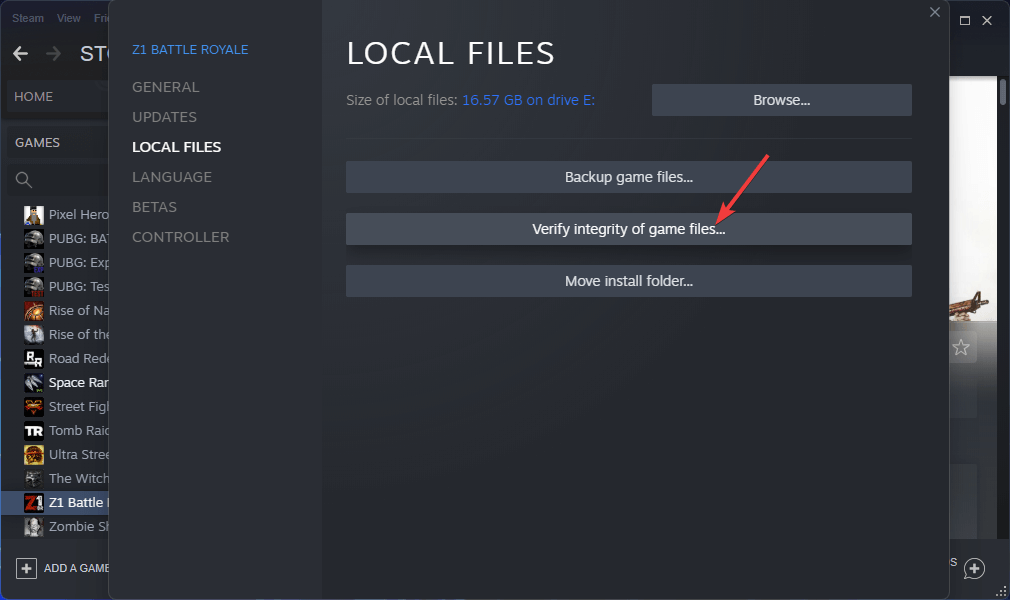
Select LOCAL FILES.
Click on Verify the integrity of game files.
The process will begin.
Once the process completes, try relaunching the game and see if this fixes the issue or not.
One of the most important reasons for different errors within the game is missing game files, one of which is the Halo Infinite crashing on PC problem.
In such a case, we would advise you to follow the above steps and verify the integrity of the game files. This will check for any missing or corrupted game files and fix them.
7. Update DirectX
Press the Win + R keys to open the Run dialog.
Type the below command and press Enter. dxdiag
Under the System tab, check the version of the DirectX.
If it is not the latest version of DirectX, then press Win + I to open Windows Settings.
From the right pane, select Windows Update.
Hit the Check for updates button and Windows will automatically update DirectX if a new update is available.
Using the above steps, you can also keep an eye out for a new Windows update. A new update not only brings some new features but also includes bug fixes, which might be the reason why you are experiencing the Halo Infinite crashing on PC issue.
Update DirectX and then update your Windows PC as well and check if this fixes the problem at hand or not.
8. Reinstall Visual C++ Runtime
Press the Win + I buttons to open Settings.
From the left pane, select Apps.
Select Apps & features.
Find Microsoft Visual C++ programs, and uninstall them one by one.
Download the latest Microsoft Visual C++ Runtime, and install it on your PC.
Restart your PC and check if this fixes the Halo Infinite crashing on PC issue.
Many products require the Microsoft Visual C++ Runtime to run properly. There could be a chance that Halo Infinite isn’t working properly because of incompatible Visual C++ Runtime.
Following the above steps, you can remove all the unwanted ones and install the latest one, possibly fixing the issue.
9. Change the priority of the Halo Infinite
Launch the Halo Infinite game.
While the game is running, press the Win + D buttons to head back to your desktop home screen.
Press Ctrl + Alt + Del buttons to open the Task Manager.
Switch to the Details tab.
Locate Halo Infinite.
Right-click on it and select Set priority.
Choose the Above normal or High option.
Except for system processes, all other programs running on your PC have the priority setting set to normal. There are chances that the game isn’t getting access to optimal resources, which could cause crashing on your PC.
You must set a high priority for applications such as games or editing software. You can follow the above steps and set a high priority for Halo Infinite and check if this fixes the issue or not.
10. Disable CPU overclocking
Open the CPU overclocking software.
Under the Overclocking section, select Normal.
Close the tool and check if this fixes the issue or not.
Several players use the CPU overclocking feature to get the best gaming experience. However, multiple reports confirm that overclocking does not always help, and often causes game crashes. So, disable overclocking and check if this fixes the issue or not.
Right-click on Halo Infinite and select Properties.
From the left pane select DLC.
Uncheck the box next to Multiplayer High-Res Textures.
Restart the game and check if this fixes the issue or not.
Why does Halo Infinite keep crashing?
Several reasons could trigger Halo Infinite’s campaign crashing on PC problem. Although the game has been built to properly use the PC resources and provide an optimal gameplay experience, there are a few hiccups down the road including this game crashing issue.
After careful research, we have found the below-listed reasons to be the cause of Halo Infinite crashing on PC:
A third-party app is conflicting with the game.
Overclocking your graphics card could cause the game to cause issues.
Halo Infinite has received multiple DLCs since its release. But there are often some DLCs that don’t run properly with the game and often crash the game.
To fix the Halo Infinite freezing on PC issue, we would advise you to follow the steps above and disable the specific DLC.
Let us know in the comments section below which one of the above solutions helped you fix the problem of Halo Infinite crashing on your PC. The solutions outlined above can also help fix packet loss and high CPU usage in Halo Infinite.
Windows Defender is a built-in anti-malware security system of Microsoft Windows. One of its core features is that users can select apps or files to exclude from its process. However, users complain about Windows Defender exclusions not working. Also, some reports about Windows Defender not working on Windows 11.
Why is the Windows Defender exclusion not working?
Many factors can cause the Windows Defender exclusions not to work on your PC. These factors impede the exclusion placed on the item, causing it to follow Windows Defender’s processing.
Outdated Windows OS – When the Windows operating system running on your PC is not up-to-date, it can affect several programs. Also, if your Windows update stops working, it can cause bugs. So, the Windows Defender exclusions can be affected by this.
Infected program or file – Windows Defender exclusions not working for some programs or items may be because they are infected or corrupt. Corrupt system files can affect how Windows Defender interacts with the file.
The excluded item not intact – When the file or folder you exclude from Windows Defender is moved to another location, it can compromise the exclusion placed on it. Also, it results in Windows Defender is unable to locate the path.
The causes for the issue may vary on different Windows computers, depending on the instance. However, trying some general fixes can solve the problem.
What can I do if Windows Defender exclusion is not working?
Before trying any troubleshooting steps, go through the following preliminary checks:
Disable third-party antivirus software on your PC.
There are a lot of great microphones out there for gaming and audio recording for everyday use. Some cost much more than others, yet all offer the same performance. Blue Yeti is one of those products that has a huge fan base and following.
It’s the type of microphone that everyone raves about because of its great features. But some people have doubts about this particular microphone. So today, we will go over the pros and cons of Blue Yeti, so you can decide if it’s right for you.
Is the Blue Yeti worth it?
If you’re looking for a high-quality microphone or your built-in Windows microphone is not working, the Blue Yeti is one of the best you can buy. It has a powerful sound and offers excellent features at a reasonable price.
Some of its notable features include:
Multiple pattern selection – The Yeti has been designed with many different uses in mind and can be used for anything from gaming to podcasting and everything in between. It comes with four different modes: stereo, cardioid, bidirectional and omnidirectional — allowing you to choose how you want your sound to come through when recording or streaming.
USB connectivity – All you need is to plug it into your computer’s USB port and you’re ready to record. This makes it more convenient than traditional dynamic microphones that require separate power sources and cables. If for some reason your Blue Yeti is not recognized, it could be due to outdated drivers.
Unique design – The Blue Yeti is designed for portability, with a compact design that makes it easy to carry around or travel with.
Advanced vocal effects – This includes noise cancellation features so your voice comes out clear even if there’s background noise in your room.
Automatic gain control – This feature automatically adjusts volume levels so that loud sounds aren’t too loud or soft sounds aren’t too soothing when they’re recorded by your computer.
What is Blue Yeti best for?
Blue Yeti is one of those no-fuss, easy-to-use microphones that deliver the performance you need without breaking the bank. It has a sleek design and offers quality recordings for podcasting, voiceovers, and even music recording.
The Blue Yeti microphone may be among the more affordable ones, but its capability for great sound recording is arguably one of the best in the industry. It’s also compatible with Mac and Windows computers.
What are some of the pros and cons of Blue Yeti?
Blue Yeti is a USB microphone that offers many advantages over other microphones on the market. Here are some pros:
Pros
Versatility – The Blue Yeti isn’t just for musicians; it can be used by anyone who wants to record their voice or other sounds. Because it has multiple input options, you can use it for podcasts, interviews, voiceovers, or even Skype calls, if necessary, without any audio enhancers. This makes it very versatile and useful in many situations.
Quality sound – It has a quality sound response rate of 20HZ to 20kHZ, which means it can pick up the lowest bass notes and the highest treble notes without needing bass booster tools. The sound quality is crystal clear and it has a built-in headphone jack so you can hear what you’re recording.
Compatibility – The Blue Yeti microphone is compatible with both Windows and Mac devices. You don’t need any special software or drivers; just plug it in and start recording.
Headphone jack – The Blue Yeti also comes with a built-in headphone jack so that you can monitor what you are recording as you go along without having to use separate headphones or speakers.
Cons
Blue Yeti is not perfect and has some negative aspects to it as well, which you should know before buying one. Here are some of the cons of Blue Yeti:
It’s heavy – The device weighs around 3.4 lbs. This could make it inconvenient to carry around while traveling or doing field recordings.
No accessories – The Blue Yeti doesn’t come with any accessories. Unfortunately, you have to buy them separately if you want to use your USB microphone in any way other than recording directly into your computer or laptop.
It’s expensive – The Blue Yeti is one of the most expensive USB microphones. The price goes even higher for the Blue Yeti Nano or Blue Yeti X. You can easily find alternatives with similar features and performance to this model at a much lower price tag.
There are a lot of choices when it comes to microphones. There are condenser mics, dynamic, ribbon, and even noise-canceling mics that can record high-quality audio.
While the Blue Yeti does provide a lot of value for its price, it may not be for everyone. Some could argue that the sound quality is lesser than other microphones in a similar price range.
The overall consensus from most Blue Yeti owners is that the sound quality is quite excellent, while others claim that it could be better, considering it costs over a hundred dollars. The main issue for the nay-sayers is that it’s a jack-of-all-trades mic but a master of none.
Nevertheless, despite its pros and cons, Blue Yeti is a solid mic that, for the most part, it delivers on Blue’s promise to provide studio-quality recording at home.
Many things can happen when restarting your computer, resulting in numerous issues. For instance, users can experience the computer getting stuck when restarting on Windows 7 or frequently restarting when not asked. However, these issues can make your system unusable, so fixing them is crucial.
Why is my computer stuck on restart?
Corrupt system files on your computer are common causes of Windows 7 getting stuck on the Windows logo. Other factors that can cause the Windows 7 computer to be stuck while restarting are:
Issues with Windows update services – The Windows 7 startup process may be interrupted due to problems with the Windows Update services in the computer. If there’s an update interrupted or abruptly canceled before restarting the computer, it’ll affect your computer’s performance.
Malfunctioning RAM or hardware – RAM is one of the essential components of the computer. Its processes can determine how the system functions. It is also often the reason you see, Your VAIO failed to start Windows.
The listed causes above are a few factors that may cause Windows 7 computers to be stuck when restarting. Nevertheless, we’ll discuss how you can generally fix the issue.
What can I do if my computer is stuck on restarting on Windows 7?
Fixing the computer stuck on restarting can be done by troubleshooting your PC. Thus, we recommend you observe the following preliminary check before proceeding:
Plug your Windows 7 computer into a stable power source.
Disconnect any external devices plugged into your computer.
If the computer is still stuck on restarting, try the solutions below:
1. Start Windows 7 in Safe Mode
Press the power button for about 10 seconds, then restart the PC.
Press the F8 key continuously until the Advanced BootOptions menu appears.
Use the direction keys to select the desired Safe Mode option, then press ENTER.
The Windows 7 computer will reboot into Safe Mode. Restarting Windows in Safe Mode will fix system activities, stopping it from restarting.
Press the power button and tap the F8 key repeatedly until you see the Advanced Boot Options page.
Select the Repair Your Computer option and press ENTER.
Choose a language and click the Next button.
Select Startup Repair under Choose a recovery tool menu.
Click the Finish button.
After the startup repair process is complete, restart the computer. Running the Startup Repair tool will scan Windows for errors impeding its startup and fix them automatically.
Press the power button to power the computer, and tap the F8 key continuously as the system powers up.
Select the Repair Your Computer option and press ENTER, then wait for the System Recovery Options page to appear.
Choose a language and click the Next button.
Select System Restore under the choose a recovery tool menu.
Select a restore point, click on Next, and click the Finish button.
Your PC will restart and backdate to the selected restore point. The restore will backdate your system, removing any issues that might have accumulated on your computer since then.
Select the Repair Your Computer option and press ENTER.
Choose a language and click the Next button.
Select Command Prompt.
Type the following command and press ENTER to scan your hard drive for errors: chkdsk /f
Type the following and press Enter to scan and try to repair bad sectors: chkdsk /r
Restart your computer.
The following commands will scan and fix any errors with your hard drive.
5. Replace the Hard Drive
If the previously mentioned solutions don’t work, the last solution we recommend is replacing the internal hard drive.
Replacing the internal hard drive will remove corrupt files deep-rooted in your computer. For additional steps to restore your PC to its default state, see this detailed guide on how to factory reset Windows 7.
Many players have reported the exe/bad_challenge error when playing MW2 (Call Of Duty: Modern Warfare 2). The error makes the game unplayable and stops players from getting a good gaming experience.
What causes the exe/bad_challenge error in Modern Warfare 2?
The exe/bad_challenge error in Call Of Duty: Modern Warfare 2 can occur for many reasons. It is a recurrent error for many players who play on consoles like PS4, PS5, & Xbox. The error sends players back to the menu and prevents them from playing multiplayer.
There are no clear causes of the exe/bad_challenge error in Call Of Duty: Modern Warfare 2. However, some potential factors that may add to the chances of you getting the error are:
Waiting in the Lobby after entering matchmaking – Many players report that they got the error and got sent back to the starting screen of the game whenever they are in the lobby after matchmaking. The bug will be prompted if you don’t engage in something else or move elsewhere.
Outdated game version – Playing an obsolete game version on your console can result in serious PlayStation 4 errors and leave your game vulnerable to bugs attack. It may cause the exe/bad_challenge error.
The cross-play option is enabled – Players may encounter the exe/bad_challenge error in Modern Warfare due to the Crossplay feature. However, it’s at a disadvantage as it’ll affect your chance of playing with players from other platforms.
Nevertheless, various players may encounter the exe/bad_challenge error in Modern Warfare 2 for different reasons. Hence, we’ll take you through some general fixes for the error.
How do I fix the exe/bad_challenge error in Modern Warfare 2?
There are a few solutions for the exe/bad _challenge error in Modern Warfare that you can try. However, we recommend you observe these preliminary checks before proceeding:
First, restart your console to refresh its process.
Connect to a stable and fast network connection.
If the error persists, try the following steps:
1. Don’t wait in the lobby
Players should leave the lobby after joining the game and go to the weapons section. It’ll give the bug no chance of disrupting your game or sending you back to the start.
Also, you don’t have to do anything wherever you go; wait until your game is ready.
2. Update the game to its latest version
2.1 Update Modern Warfare 2 on PlayStation 4 & 5
On the PlayStation homepage, select Modern Warfare 2.
Press the Start button(Options) on your PS4 controller.
Select the Check for Update option from the drop-down menu and wait for the update search.
On the next page, you will either find an available update to install on your console or receive a message saying you have the latest version.
2.2 Update Modern Warfare 2 on Xbox One & Xbox Series X/S
Find Modern Warfare 2 on your Xbox Home Screen, or click on My Games & Apps.
Press the Start button on your controller.
Select Manage Game and Add-ons from the drop-down menu.
Go to Updates and check if there are any updates available to install. Then, download and install updates available for you.
Updating your game can fix bugs and security issues, causing it to run into exe/bad_challenge errors in MW2.
Hyper-V is a feature of Windows that allows you to create virtual machines on your computer. However, you may find that Hyper-V cannot be installed because virtualization support is disabled in the firmware.
When installing Hyper-V, it will automatically detect whether your system has the required hardware and software prerequisites. If your device doesn’t meet the said requirements, you will be prompted to install them before continuing with the installation process.
Why is virtualization support disabled in the firmware?
If you are wondering why you’re getting the hyper-v cannot be installed virtualization support is disabled in the firmware error, it could be due to one of the following reasons:
Outdated OS – You probably use an old version of Windows with Hyper-V disabled. You’ll have to upgrade to Windows 11 or an OS that supports the feature.
Hardware conflict – Hyper-V uses hardware-assisted virtualization. Therefore, if you try to install Hyper-V on a computer that might cause incompatibility issues with the software and hardware, you may get such an error message.
Turn on your PC and hold down the F10 key to boot into BIOS (The specific key will depend on your device’s manufacturer, which is HP).
Use the arrow keys, navigate to the Security tab, select System Security, and press Enter.
Select Virtualization Technology (VTx/VTd), then Enable it.
Press F10 to save your changes and exit the BIOS.
The steps above are specific to HP devices. You may find that Virtualization support is disabled in the firmware for Asus or Lenovo. The steps may differ a bit, but you can also borrow some similarities from this step.
2. Update your BIOS
Hit the Windows + R keys to open the Run command.
Type msinfo32 and hit Enter.
Locate the entry marked BIOS version/date and note it down.
Hit the Windows key, type cmd, and select Run as administrator.
Type wmic baseboard, get product, manufacturer, version, and serial number, and press Enter on the keyboard.
Note this information too.
Now, navigate to the download website (In this case, HP).
Choose a laptop or desktop, depending on the type of computer you’re using.
Enter your exact serial number or your exact computer model.
Select your OS and OS version, then click Submit.
Click on All drivers and then expand BIOS to see available updates.
Hit the Download icon.
Install the .exe file and follow the on-screen instructions.
Restart your PC.
During the startup, you can select Apply Update Now.
The BIOS (Basic Input/Output System) is a chip on your computer that loads when it boots up. It controls the booting process and is responsible for making sure all the hardware works together correctly.
Whereas many users reported that updating their BIOS fixed the hyper-v cannot be installed virtualization support is disabled in the firmware error, you need to exercise extra caution.
Don’t update if you’re not sure what you’re doing. BIOS updates can cause permanent damage to your computer if done incorrectly. Always read instructions carefully before updating your BIOS or asking for technical support.
How do I enable Hyper-V virtualization in Windows 10?
To enable Hyper-V virtualization in Windows 10, follow the steps below:
Hit the Windows key, type Control Panel and click Open.
Click on Programs.
Select Turn Windows features on or off.
Expand the Hyper-V Platform, then make sure both options are checkmarked and click OK. (If the second one is greyed-out, you’ll need to enable hardware virtualization in your BIOS).
Next, you’ll have to reboot your PC, so click on the Restart button.
If you have problems installing Hyper-V, we have an expert guide to help bypass this issue. Some users have also complained that they ran into an error where the Hyper-V is not compatible with VMware, be sure to also check out our comprehensive guide on the same.
We love your feedback, so continue the conversation in the comment below.
The DNS Client event 1014 is an error message that appears when a configured DNS server (Domain Name System) fails to respond to your Windows computer. More specifically, the network connection timed out. When this occurs, the computer creates an event log detailing everything, but you’ll need a log viewer to read it.
Before going into the more complex solutions, try changing the power plan to a performance one, and perform a clean boot. Of course, also check your router and cables for any issues.
How do I fix the 1014 error on my Windows computer?
1. Disable TCP Offload
On your Windows computer, search for the Command Prompt and select Run as administrator.
In the window that appears, select Yes.
Type the following command: netsh int ip set global taskoffload=disabled. And hit the Enter key when you’re finished.
Command Prompt will simply say Ok to indicate Offload has been disabled.
2. Reset the Hosts file to default
On your Windows computer, open Notepad and enter the text you see in the image into the app.
Select File, then Save As.
Go to Desktop, name the file as “hosts” (make sure the quotes are included) and click Save.
Close Notepad and open File Explorer.
Go to C:\Windows\System32\drivers\etc.
Right-click the hosts file and rename it as hosts.old. The User Account Control may appear asking if you want to make changes. Click Yes.
Drag and drop the new hosts file from the desktop to the folder. Click Continue if you need to provide administrator permission.
In the Search bar, bring up Windows Administrative Tools. Select the entry that appears.
Open the Registry Editor in the Administrative Tools folder.
In the top bar, type in HKEY_LOCAL_MACHINE\SOFTWARE\Policies\Microsoft\Windows\Windows Search.
Right-click AllowCortana and select Modify. Set the value data to 0 and click OK.
Do the same thing to DisableWebSearch.
If you get a log viewer and read a 1014 log, you may see “t-ring-fallback.msedge.net”. It looks like this relates to Microsoft Edge, but it doesn’t. It more closely relates to Search and Cortana.
After disabling those two, check if the 1014 error is gone.
4. Fix Wi-Fi connection issues
On Windows 10, open the Settings app, click Network & Internet, then Status on the left-hand side.
Select Network troubleshooter.
Select which network adapter you want to diagnose. Click Next.
Follow the on-screen instructions to solve the problem.
On Windows 11, open the Settings app, select System on the left-hand side, and click Troubleshoot.
Select Other troubleshooters. Click Run next to Internet Connections as well as any other problematic areas. Follow the direction on the screen to fix the 1014 problem.
What causes Event ID 1014 to appear on my Windows computer?
According to an old Microsoft TechNet post from 2011, there are four main reasons why this error appears. From those four, we’ll point out the more likely culprits and add some of our own.
The TCP/IP Offload has been enabled on a network adapter. This is a technology that offsets CPU processing to the adapter and frees up the CPU so it can do another task, but can cause problems.
Your router and PC are on different Wi-Fi channels. Admittedly, this problem is pretty rare since modern routers will change automatically but older models might not.
There’s some kind of problem with your router and we recommend performing a power cycle. We have a guide on a similar 1014 error with instructions on how to safely power cycle.
Your internet service provider (ISP) is dealing with an outage. If this is the case, there’s nothing you can do but wait until your ISP fixes the problem.
Are there other Event ID errors that I should know about?
There are two particular Event ID errors that are particularly notorious. The first is Event ID 7000 which occurs a service on your computer doesn’t have the right credentials to run.
This is the result of an error with the Service Control Manager and has different variations of it like 7023. Solutions include restarting the offending service and using the Group Policy Editor to make adjustments.
The other error is Event ID 1000 which causes software to suddenly close. Culprits for this error involve malware and old versions of Windows OS.
To fix Error 1000, we recommend updating your drivers, reinstalling the problematic app, or performing a clean boot.
Feel free to comment below if you have any questions about all of these Event ID errors. Also, leave comments about what reviews you’d like to see or information on other Windows software.
Windows 11 face recognition not working can leave you unable to access your PC if you don’t have another sign-in method like fingerprints or passwords.
In most cases, it’s a bad driver that is causing it, so you might need to update or reinstall it. Policy settings can also causing, so adjustment might be necessary.
How do I fix Windows Hello face recognition in Windows 11?
1. Reinstall the biometric driver
You can most probably run into face recognition issues on Windows 11 due to driver incompatibility. Hence, apply the following steps to resolve it quickly on your PC.
1. To fix the Windows 11 Hello Face not working issue, press the Windows key + X and select Device Manager.
2. Expand theBiometric devicessection.
3. Right-click the device driver and choose Uninstall device.
4. Click on Uninstall to confirm.
5. Once the driver is removed, restart your PC to install it again.
It’s also advised to update all your drivers if you want to avoid problems such as this one. There are multiple methods that you can use, but for the best results, it’s advised to use specialized driver updater software.
2. Edit the Group Policy
Press Windows key + R and enter gpedit.msc. Press Enter.
Expand Computer Configuration and go to Administrative Templates.
Go to Windows Components and select Biometrics. Now double-click on Allow the use of biometrics.
Select Enabled and save changes.
Restart your PC and check if the Windows 11 Hello Face not working issue is gone.
3. Reset facial recognition settings
Press Windows key + I to open the Settings app.
Now go to Accounts and select Sign-in options.
Select Facial recognition and click on Remove.
Now click on Get Started to set it up again.
4. Rollback the camera driver
Press Windows key + X and select Device Manager.
Locate your camera on the list and double-click it.
Now go to Driver tab and click on Roll Back Driver.
Follow the instructions on the screen to complete the process and fix Windows 11 Hello Face not working.
5. Uninstall recent updates
Open the Settings app by pressing Windows key + I.
Go to Windows Update and select Update history.
Select Uninstall updates.
Now locate the latest update and click on Uninstall.
Follow the instructions on the screen to complete the process.
Apex Legends have been hit by a mysterious bug and many gamers are complaining that Apex Legends crashes out at the logo screen.
If you’re having issues with the game and getting a 0x887a0006 DXGI error device hung Apex Legends error code, this guide should be helpful.
Game crashes are the most annoying thing that can happen to you, especially when you’re trying to reach a new level or constantly investing in new characters.
What does DXGI_ERROR_DEVICE_HUNG mean?
According to Microsoft, the DXGI ERROR DEVICE HUNG error is a problem with command transmission between the system hardware and games.
When it happens repeatedly, this error might be very problematic for certain Windows games. However, with the right solutions, you can get rid of it.
What causes DXGI hung?
Apex Legends error message 0x887a0006 could be caused by several different factors, some of which are listed below:
Admin Privileges: Administrative privileges are required to keep the game running smoothly. The game might crash or trigger errors if it does not have the required permission.
Outdated Drivers: Some games are not compatible with older graphics cards, which can cause the game to crash. To fix this, you just need to update your Windows 11 drivers.
Missing Files: If any of the game’s files are missing or corrupted, the game will not load correctly.
Registry missing key: Some users have reported this error because of a missing key in the Windows Registry that helps to load the game’s graphics. If the key is missing, the game may not load and can result in crashes.
GPU overclocking: Several people pointed out that this might have been due to GPU overclocking.
How do I fix the Apex error 0x887a0006?
1. Run Apex Legends with Administrative privileges
The game needs administrative privileges to function properly. If these permissions are not granted, you can perform it manually as in the example below.
1. Press the Windows key and type Apex Legends into the Search bar.
2. In the right pane, right-click the Apex Legends icon and choose Open file location.
3. Find the Origins.exe file in your game’s folder and right-click on it.
4. Select Properties to switch over to the Compatibility tab.
5. In the compatibility tab, check theRun this program as an Administrator option, then click Apply.
2. Revert to the stock frequency
If you overclock the graphics card by increasing its frequency to a number higher than it was set at by the manufacturer, several issues might arise.
The developers of the game may be limiting the card’s frequency because they know this can increase the card’s temperature and even result in instability.
Applying these changes can help you get rid of the issue.
3. Run Windows Update Troubleshooter
Go to the Windows Search bar and type Troubleshoot Settings. Once done, hit Enter.
In the right pane, select the option, Other troubleshooters.
Navigate to Windows update and click on Run.
Updating your Windows can help fix multiples issue including the 0x887a0006 dxgi_error_device_hung Apex Legends error. In case the issue persists, move on to the next method.
4. Repair missing or corrupted files
To identify the problem with the game, open the Origin client, sign in to your account, and go to Game Library.
Once there, right-click on Apex Legends.
Next, click the Settings icon and select Repair Game.
Now, the client will begin verifying the game files. Once the verification process is complete, it will automatically repair any missing or corrupted files.
Go back to the Home screen and try running Apex Legends again.
Game files can sometimes go missing or become corrupted over time. When this happens, the game might crash. Therefore, applying this method might help in fixing the issue.
5. Update the Graphics card drivers
Press the Windows key on your keyboard and type Device Manager into the Search bar.
In the right pane, click on Open application.
Once in the Device Manager window, scroll down and expand Display Adapters from the menu.
From the pop-up that appears, select Update driver.
Next, choose the option Search automatically for drivers.
Windows will now scan your system for outdated drivers and, if found, it will automatically update them and ask you to restart your PC.
The game isn’t optimally designed to run effortlessly on old Graphics cards and this leads to random crashes. Therefore, updating the Graphics driver may help resolve the issue.
If you want to update and install your graphics card drivers more easily and fully automated, you have specialized software created for this task.
Using Outbyte Driver Updater, you will start by scanning the entire system and detecting outdated or missing drivers. Then, just select the device driver you need to update or choose all the outdated drivers at once.
Click the Windows key on your keyboard and type Notepad. Hit Enter.
Now, copy and paste the following into the text window of your Notepad. [HKEY_LOCAL_MACHINE\SYSTEM\CurrentControlSet\Control\GraphicsDrivers] "TdrDelay"=hex(b):08,00,00,00,00,00,00,00
Next, go to Files tab and click on Save as.
In the next window, choose Desktop and hover over to Save as type.
Select All Files as the file format and name it FIX.REG.
Press Save and close your Notepad.
Right-click the file you have just created.
When prompted to ask whether you want to allow this app to make changes to your device, press Yes to confirm and then click OK.
Launch Apex Legends again and see if it works this time.
The error can also be caused due to missing registry key. Thus, adding a new key can help fix the problem.
7. Rollback the Graphics driver
Press Windows + R key simultaneously and type devmgmt.msc into the Run dialog window. Once done, click OK.
In the Device Manager window, scroll down and click on DisplayAdapter.
From the pop-up that appears, choose the option Properties.
Navigate to the Drivertab and scroll down to select the option Roll back driver.
Finally, click OK to save the changes.
Sometimes the current Graphics driver isn’t compatible with your device and this can result in issues like random crashes.
Therefore, you might be able to get rid of the annoying error by simply rolling back the driver.
Is Apex Legends free to play?
Many players want to know if Apex Legends is free to play. The game was released in early November 2020 and has attracted millions of players worldwide, making it one of the best PC games of all time.
However, while Apex Legends is free to download, some in-game purchases can add up quickly. Some users have also complained that Apex Legends won’t launch on their PC.
Don’t worry though, we have you covered on all these issues, and you can find them in our common Apex Legends bugs guide.
Of the four issues mentioned above, problems with the hard drive or graphics adapter and conflicting applications are more likely to cause a BSOD error like the attempted switch from dpc.
Regardless of the cause, here’s how to fix it:
How do I fix unexpected exception in Windows 11?
1. Check system components
As mentioned above, one of the prime reasons behind the unexpected store exception error in Windows 11 is hardware issues. So check if the hard drive is correctly connected to the system and if there are no loose connections.
Also, ensure that the graphics adapter is firmly placed. Loose connections are also known to cause the BSOD error. Apart from these two, ensure all the other components are firmly connected and optimally placed to eliminate the error.
2. Update drivers
A driver is a critical piece of software that relays commands between the OS and the device. Running an outdated version may cause issues with the device’s functioning, leading to the unexpected store exception error in Windows 11. Thus, see the guide below to update your drivers correctly.
1. Press Windows + S to launch the Search menu. Enter Device Manager in the text field at the top, and click on the relevant search result.
2. Double-click on the Display adapters entry to view the devices under it.
3. Next, right-click on the graphics adapter and select Update driver from the context menu.
4. Select Search automatically for drivers from the options in the Update Drivers window.
5. Windows will now search for the best available driver on the system and install it.
3. Use a specialized tool
You can try one of the best BSoD fixers specializing in Windows repair to examine and diagnose your damaged PC before repairing it using technology that reverses the harm done with a comprehensive database of replacement files.
4. Uninstall conflicting applications
Press Windows + I to launch Settings, and select Apps from the tabs listed in the navigation pane on the left.
Now, click on Apps & features on the right.
Locate the conflicting (discussed later) app, click on the ellipsis next to it and select Uninstall from the menu.
Click on Uninstall in the confirmation prompt that appears.
While uninstalling an app is simple, identifying the conflicting ones to be removed is the trick. To do that, recollect when you first encountered the error and list apps installed around the same period.
5. Run the SFC and Check Disk scan
Press Windows + S to launch the Search menu. Enter Windows Terminal in the text field at the top, right-click on the relevant search result, and select Run as administrator from the context menu.
Click Yes on the UAC (User Account Control) prompt.
Now, click on the downward arrow at the top, and select Command Prompt from the options. Alternatively, you can press Ctrl + Shift + 2 to launch the Command Prompt tab in Windows Terminal.
Type/paste the following command and hit Enter to run the SFC scan. sfc /scannow
Once the SFC scan is run, paste the following command and hit Enter to run the Check Disk utility. chkdsk /r
Press Y and then hit Enter.
Now restart the computer for the Check Disk utility to run and fix problems with the system.
6. Update Windows 11
Press Windows + I to launch the Settings app, and select the Windows Update tab from the navigation pane on the left.
Next, click on Check for updates to scan for any available newer versions of the OS.
If any updates are available, download and install them.
Users have noticed that an update is particularly effective in Dell PCs’ unexpected store exception error, or if you regularly have this error stuck at 0.
7. Turn off Fast startup
Press Windows + S to launch the Search menu. Enter Control Panel in the text field at the top and click on the relevant search result that appears.
Click on System and Security.
Next, click on Change what the power buttons do under Power Options.
Click on Change settings that are currently unavailable.
Untick the checkbox for Turn on fast startup (recommended) and click on Save changes at the bottom.
The fast startup enables the PC to quickly boot when you turn it on by saving specific files during the last shut down. This way, when you turn on the computer, the number of files to be loaded is lesser, thus reducing the boot time.
But it’s also known to cause several problems; hence, you should disable fast startup if you encounter the unexpected store exception error in Windows 11 on startup.
What are BSOD errors, and which ones will I likely encounter in Windows 11?
The BSOD (Blue Screen of Death) errors occur due to the abrupt termination of one or more critical processes, causing the system to crash. If you encounter the error, the OS will be reloaded, and all unsaved data will be lost, making fixing them more critical.
You’re here to fix the widely spread Windows Update error that usually comes with the message Updates Failed. There were problems installing some updates, but we’ll try again later, followed by install error 0x800f0988. This issue is similar to the Windows 10 error 0x800f0900, if you might need to check it out.
How do I fix error 0x800f0988?
1. Clean up the WinSxS folder
Press the Windows key + S and type cmd in the search box.
Right-click on Command Prompt to select Run as administrator.
Now type the command below and press Enter: dism /online /cleanup-image /startcomponentcleanup
Restart your computer after the command has cleared the WinSxS folder. The install error – 0x800f0988 will be fixed.
In Windows 10, you have several ways to perform the cleanup of the WinSxS folder. We’ve selected the easiest one and described the procedure above, so don’t hesitate to apply the given steps.
2. Run the Windows Update Troubleshooter
Type troubleshoot in the Windows search box.
Click Troubleshoot settings to open the Windows troubleshooter.
Select the Additional troubleshooters option.
Click on Windows Update.
Finally, click the Run the troubleshooter button.
If you encounter the 0x800f0988 Windows update error, the dedicated troubleshooter might come in handy for fixing it. This is the official Microsoft tool to help Windows users in resolving all problems related to updates, so it will hopefully do the trick for you too.
If the troubleshooter stops before completing the process, fix it with the help of this complete guide.
3. Reset the Windows Update Components
Open the Command Prompt as an administrator.
Type the commands below and press Enter after each: net stop wuauservnet stop cryptSvcnet stop bitsnet stop msiserver
Now, enter the commands below and press Enter after each: ren C:WindowsSoftwareDistribution SoftwareDistribution.oldren C:WindowsSystem32catroot2 Catroot2.old
Finally, run the commands below to restart the services: net start wuauservnet start cryptSvcnet start bitsnet start msiserver
Resetting update components can also fix cumulative update errors. Thus, don’t postpone applying the given steps to get rid of install error 0x800f0988.
This procedure will take your PC back to a state similar to when you first turned it on, removing or keeping programs and personal files, depending on which option you choose. That should fix update error 0x800f0988 instantly.
1. Click the Windows button and open Settings.
2. Click on System, then select Recovery.
3. Here, click the Reset PC button then choose to keep your files and proceed with the resetting process. The Windows 11 update error 0x800f0988 will be fixed.
Since Windows will handle everything automatically, it does not require much effort. So, it’s a procedure worth trying. Plus, users have confirmed they’ve fixed error 0x800f0988 by resetting their computers.
Why does Windows 11 update get stuck with error 0x800f0988?
This usually happens if your update files are corrupted, so removing and recreating them might help. As for Update error 0x800f0986, this one can be fixed by running the built-in troubleshooter.
If the Microsoft Windows Update tool is not working on your PC, you will likely miss out on essential updates frequently. Some causes of the Update error are network failure, hardware issues, and insufficient disk space.
You can fix the issue by running the Windows troubleshooter to find and fix the possible causes of the problem. For more detailed ways to overcome this issue, check our guide on fixing Windows Update error on Windows 11.
How do I force Windows to update?
There are several ways to force Windows to search and install updates. You can use the settings app, PowerShell, and other built-in tools.
However, the easiest way is to run the command below in Command Prompt: control update
This command starts the Windows Update feature, and it will search for possible updates to install.
These are a few resolutions that might fix error 0x800f0988. If they all fail, you may also manually install cumulative updates by downloading them from the Microsoft Update Catalog.
The update error 0x800f0988 on Windows 11 can be caused by broken or missing system files. In this case, you only need to run the DISM scan as admin in the Windows Terminal.
Another known cause of the issue is corrupt update data. This can be fixed by clearing the Windows Update component. We have shown the steps for these solutions in this guide.
Are things any better now? Don’t hesitate to share your experience with us in the comments below.
Are you encountering errors because the dsound.dll file is missing or has some problems? This article will let you know all about this DLL file.
If you are a gamer or a graphics software user, you may encounter dsound.dll missing or any related problems on Windows. Unfortunately, there may be many ways a DLL file may go missing. But the only way to eliminate such issues is to download a fresh copy of this file.
What is a dsound.dll file?
The dsound.dll file is related to the DirectX technology on Windows operating system. Therefore, it is available on all modern Microsoft operating systems like Windows 11, 10, etc. Usually, you will find such files in the following directory:
So, users only may notice that the dsound.dll file is missing or there is an error when they try to launch or use specific software or games.
How to download the dsound.dll file?
The purpose of downloading this file is to replace the problematic one or place it where this DLL file is missing. So, we recommend the following things before that:
Copy it to your problematic PC in any medium you prefer.
You can use Pendrive or Google Drive, OneDrive, etc., to place it on your problematic computer.
4. Re-install the app/game that requires dsound.dll
4.1 Uninstall
Press Win + I on the keyboard to open Windows Settings.
Go to Apps and click on Installed apps.
Click on the three horizontal dots next to the complex software or game and choose Uninstall.
We suggest you use a tool like Revo Uninstaller to uninstall any software. The built-in uninstaller of Windows always leaves some leftovers of any software. But, such third-party tools can remove everything altogether.
4.2 Install again
Download the latest installer for the game or software from the official source.
Install it on your PC again.
Some games and software installer has all the required DLL files. If you get a dsound.dll missing message for specific software or game, re-install them will help to get the missing DLL file and solve your problem.
This article has shown you all the possible methods to download the missing dsound.dll files on a Windows PC. If you have any suggestions, please write them down in the comment box.
Stuck on that endless Dell “restarting” screen? Annoying, right? Whether your laptop froze mid-reboot or keeps looping, this kind of thing happens more often than you’d think.
The good news? It’s usually not a hardware issue, and most of the time, you can fix it yourself.
Here’s a step-by-step guide to help you get your Dell laptop back to normal, starting with the simplest fixes and working up from there.
How do I fix a Dell laptop if it’s stuck on restarting?
Before proceeding with any advanced troubleshooting, go through the following preliminary checks:
Ensure your Dell laptop is connected to a stable power source.
Unplug any external devices connected to your PC.
If you’re unable to fix the problem afterward, proceed with the solutions below:
1. Force shutdown manually using the keyboard shortcut
Press the Windows + X keys simultaneously, then press the Power button continuously for some seconds until the system shuts down.
Release the keys and wait for the system to shut down.
Press the power button to start the system.
You should be able to get past the start screen. The remaining solutions in this article will prevent your Dell laptop from getting stuck during a restart.
2. Update Windows operating system on your Dell laptop
Left-click the Start button and select the Windows Settings app from the menu.
Click on Windows Update and click Check for updates. (If there are any updates available, Windows will search for and install them)
Windows updates will resolve bugs causing the Dell laptop to be stuck on restart.
Sometimes, Windows may not connect to update services on your Dell laptop, so the steps above will not work. So, check our guide for the best fixes to troubleshoot the problem.
Enabling the Secure Boot feature will prevent the malware software from starting while the system boots up.
Peradventure the Secure Boot fails to work, we recommend you check how to fix it and get it to work on your laptop.
Why is my Dell laptop stuck on restart?
Many factors may be responsible for the Dell laptop being stuck on restart. However, the main culprit for this issue is the corrupt system files. When there are corrupt system files on your Dell laptop, it’ll affect its performance and disrupt the functionality of its system.
Furthermore, a few other factors can cause your Dell laptop to get stuck during a restart. Some are:
Outdated Windows Operating System – Your Dell laptop can get stuck on restart if the Windows OS is not up-to-date. Also, your Windows update may not work in some cases. Hence, your system lacks the necessary updates and patches to fix the bugs affecting its performance.
Malware or virus attack – Virus infection on your Dell laptop can cause it to be stuck on restart. Furthermore, viruses and malware impede the ability of the PC to communicate with its components, prompting them to malfunction. Take a look at our recommended list of anti-malware software.
Outdated drivers on your Dell laptop – Many PC components require drivers to function. Hence, your PC may malfunction due to outdated driver errors affecting its performance. Hence, you can check out different ways of updating drivers in this guide.
External devices connected to Dell laptop – Restarting your PC may be affected by the device connected to it. They can affect its power input and also impede the booting process.
Hackers and intruders can access your computer through unauthorized channels. These channels are called backdoors which means loopholes that leave your PC vulnerable and open to attacks. In addition, it can result in your computer being compromised or hijacked. Hence, you need to know how to find backdoors on Windows 10.
What is a backdoor on a PC?
Backdoors on a PC are loopholes and vulnerable spots that give hackers and malicious intruders access to your computer. They are hidden routes for unauthorized users to infringe on the privacy and security of your PC.
Sometimes, hackers can install a backdoor on your PC without needing to use direct access to it. For example, intruders can install a backdoor by using vulnerable spots on your computer to plant an entryway.
Furthermore, backdoors on Windows 10 will grant remote access to hackers to use resources within an application. For example, databases and file servers allow intruders to access your system remotely.
There are some backdoors on Windows 10 that attackers can exploit to bypass normal authentication processes to access a system.
For instance, a Remote Desktop connection will give an intruder access to control your computer remotely. Also, Ramnit malware and Trojan horse can appear in disguise as harmless programs on your PC.
How do I find and remove a backdoor on Windows 10?
Before proceeding with any steps for finding and removing a backdoor on Windows 10, we recommend you go through the preliminary checks below:
Disconnect any external devices plugged into the desktop.
Stop Remote Desktop connections from your computer.
After observing the steps above, go through the following solutions:
1. Run Windows Defender and enable Real-time protection
Left-click the Start button, type Windows Security in the text space and then click ENTER.
Click on Virus & Threat Protection from the menu and select the Scan options.
Then select Full scan to initiate an extensive scan and click the Scan now button.
Wait while the scan completes, navigate to the Virus & threat protection option, and click Manage settings.
Toggle on the Real-time protection option to enable the Windows Defender Antivirus.
Running Windows Defender scan will find any backdoor on your PC and automatically remove it. However, enabling the Real-time protection option will prevent further threats.
Left-click the Start button, type Restore in the search bar, and click ENTER.
Go to the System Protection tab, then click System Restore.
Select the Choose a different system restore option and click Next to choose a specific Restore Point.
Select the last time your system worked fine, and click on Next.
Click the Finish button. It will prompt your PC to restart and backdate your settings to a previous time.
NOTE
These steps wouldn’t work if you did not create a Restore Point on your system.
Performing a system restore will remove the backdoor and its agents on your PC and backdate your system to a previous date. Check how to fix Restore Point if it’s not working on your PC.
3. Scan and remove the backdoor with antivirus software
One of the most effective ways to find and remove backdoors, such as Trojans on Windows 10, is to install antivirus software on your PC. It offers a complete shield for your PC, preventing attacks or threats.
Do you want to change the default camera on Windows 10? If yes, this article will help you with the proper methods.
If you have a laptop, there should be a built-in camera. But you can use high-quality external webcams if you want. There are several important reasons a user prefers an external camera over the built-in one.
Can you set an external webcam as default on Windows 10?
Yes. You can. The idea of setting a camera as default comes because of the external ones. By default, laptops and some PCs have a webcam. But you may want to use an external one as the primary camera.
Windows 10 and some apps have the option to choose your default camera. This option is handy, mainly when your laptop camera doesn’t work correctly. For your convenience, this article has featured some methods to do it. In the next section, you will learn about these methods.
How Do I Change Default Camera Windows 10?
Before trying out the methods, you should ensure the following things:
With a single click, this tool automatically updates any drivers on your Windows 10 and 11 computer.
2. Set camera device as default in devices and printers
In Start Menu, type the control panel and press Enter to open it.
Click on View devices and printers under Hardware and Sound.
Right-click on your preferred webcam and select the Set as Default Device option.
From the above steps, you have disabled the camera (no longer needed), and the required camera device is set as the default one.
Once you do these, you can use your preferred camera for any application. Do not hesitate to re-enable the camera devices whenever you feel like it.
3. Remove other cameras from devices & printers
Like before, go to the devices and printers again.
Right-click on a camera and click on Remove device.
Remove all extra camera devices except the one you want to use.
Now, by default, your preferred camera that you have not removed will be the primary one on Windows 10.
4. Change in browser
Open your browser, for example, Microsoft Edge.
Type the following address on the address bar and press Enter: edge://settings/content/camera
Select the Camera you want to use as the default camera for this browser.
Sometimes, you may want to change the settings only on the browser. In this situation, the above steps will help set a webcam as the default camera on a Windows 10 browser.
Many users reported that the integrated camera is not working in Windows 10/11. If you ever face this issue, check our dedicated guide to fix the same.
This article has shown you how to switch the default camera device on a Windows 10 laptop or PC. Do you have any relevant questions on this topic? Feel free to mention them in the comments section below.
Encountered a dhcpcsvc6.dll error while opening apps or performing some action on your Windows 10 computer? This issue could occur if you accidentally deleted a shared DLL file or the file got corrupted.
This guide has mentioned all the essential information to eliminate this annoying missing DLL error. Let’s get started!
What causes the DHCPCSVC6.DLL error?
There could be various reasons for dhcpcsvc6.dll is either not designed or contains an error issue. Some of them are listed here:
Damaged Windows Registry – Registry files are corrupted primarily due to power failure, faulty hardware, virus, or malware infection, and damaged registry file can cause this issue.
Misplaced or deleted DHCPCSVC6.DLL – Sometimes, when deleting associated files of uninstalled apps, we remove the DLL file as well, causing the deleted or missed dhcpcsvc6.dll error.
DHCPCSVC6.DLL corrupted by malicious software – If there is a virus or malware on your computer, it could cause this error. You can use real-time protection tools to remove the malware.
A faulty application – If an application is not working correctly or is corrupted, it can cause an issue. It is essential to check the installed apps and remove unwanted and faulty ones.
Right-click on the DLL file and click Extract all. Copy the downloaded DHCPCSVC6.DLL file to the app directory from where it is missing or move it to C:\Windows\System32 or C:\Windows\SysWOW64\
Restart your computer to let the changes take effect.
1.2 Register DLL
Press the Windows key and type CMD and choose Run as Administrator.
Now in the Command Prompt window, paste the following command and hit Enter: regsvr32 DHCPCSVC6.DLL
Wait for the process to complete, then restart the computer.
2. Scan your PC for malware
Press the Windows key and type Windows Security, and hit Enter.
Press the Windows key and type CMD and choose Run as Administrator.
Paste the following command and hit Enter. Instead of the account name, mention the preferred name for the new user profile. net user "account name"/add
Now paste the below command and hit Enter. net localgroup administrators "account name"/add
Exit Command Prompt and go to the new user.
5. Use the System File Checker (SFC)
Press the Windows key and type CMD and choose Run as Administrator.
Paste the command mentioned below and hit Enter after every command:
sfc /scannow
DISM /Online /Cleanup-Image /CheckHealth
DISM /Online /Cleanup-Image /ScanHealth
DISM /Online /Cleanup-Image /RestoreHealth
How do I replace DHCPCSVC6.DLL?
You can run the sfc/scannow command to replace the DLL file. It will replace all the missing and damaged DLL files related to your operating system.
Trying to download Microsoft PC Manager, but every time you try to install it, the installation either gets stuck at 32% or comes up with Failed to download and unpack the installation files. Please try again later message. Trust me; you are not alone.
This guide will help you resolve this error and successfully install Microsoft PC Manager on your Windows 10 and 11 computer. Let’s begin!
Why Microsoft PC Manager is not installing on my Windows computer?
There could be several reasons behind Windows PC Manager not installing. Some of them are listed below:
Your Windows is not up to date: Before starting the process, ensure your Windows is up to date. If you are using a Windows 10 computer, make sure it runs the 1809 version or above. For Windows 11, ensure no updates are pending.
Slow internet connection: Sometimes slow internet connection can cause the installation to fail, so make sure your internet connection is working correctly.
Low disk space: Check whether you have enough space on your C drive; if not, try to clear the disk and recover space. Then try to install the app.
Unnecessary Startup apps & Services: Some startup apps and services run unnecessarily and make the computer respond slowly to other actions and this could be the reason for the issue.
How do I fix Microsoft PC Manager is Not Installing?
Before diving into troubleshooting steps, let us check out what else we can do:
Ensure you use a user profile with administrator rights before downloading Windows PC Manager.
Locate the downloaded file for PC Manager, right-click on it, and choose Run as administrator.
Install the app from a trusted source.
If you are using VPN, please close it and try to install the app.
Remove all the external hardware devices except the ones needed for basic functionality.
Restart your computer.
1. Clean boot
Press Windows + R key to get the Run console.
Now type msconfig to get the System Configuration window.
Go to the Services tab and click on Hide all Microsoft services.
Now click Disable all.
Go to the Startup tab, and click on Open Task Manager.
On the Startup tab in Task Manager, for each Enabled item, select the item and choose Disable.
Close Task Manager and return to the System Configuration window.
There, click Apply, and then OK.
On the next window, click Restart.
2. Create a new user account with administrator rights
Press Windows + I to get Settings.
Go to Accounts, then Family.
Under Your Family, click Add someone button.
Enter the email address and click Next.
Choose Organizer from What role should they have window and click Invite.
You can now see the account in the list. Click to expand. From Account options, click Change account type.
On the next window, click on the drop-down menu and select Administrator.
Now sign out from the existing profile and sign in on the new profile and try to install the app.
Toggle off the switch under Real-time protection to disable it and then try to install the app.
Note: For Windows 10, instead of Privacy & Security, look for Update & Security.
Tip
Please turn on the Real-time protection to ensure the security of your device, once you install the app.
4. System File Checker Scan
Press the Windows key and type CMD and select Run as Administrator.
On the command prompt window, type the following commands and press Enter after every command.
sfc /scannow
DISM /Online /Cleanup-Image /CheckHealth
DISM /Online /Cleanup-Image /ScanHealth
DISM /Online /Cleanup-Image /RestoreHealth
5. Enable Secure boot
Press Windows + I to get Settings.
Go to System, then Recovery.
Now navigate to Advanced startup, and click Restart Now.
On the Choose an option screen, choose Troubleshoot.
Click on Advanced Options.
Now, select UEFI Firmware Settings.
On the next screen, click Restart.
Your computer will start up and show you options; choose the one that opens BIOS.
On the BIOS Utility screen, go to Boot Options or a similar option.
Now look for Secure Boot and check if it is Enabled. If not, enable it.
Click the Exit option, choose Save changes and Exit, and select Yes to let your computer start normally.
So, these are fixes that you can try to resolve Microsoft PC Manager not installing on Windows 11. Feel free to let us know any of the methods that are not mentioned here but worked for you in the comments section below.
We are connected to the Internet for most of the day, for work, shopping, or recreational purposes. But, several users, after upgrading to Windows 11 have reported slow Internet.
A slow speed affects the whole user experience, whether browsing or downloading web files. With the increase in the size of web pages and dependence on downloads, you must look for ways to resolve the problem.
But before we head to the fixes, you must understand the underlying causes to troubleshoot the problem effectively.
Why is my Internet slow in Windows 11?
You should know that when several apps run in the background and consume data, it could lead to slow Internet problems in Windows 11.
Now, circling back to your question, know that download files can be large, especially when downloading a new operating system.
Thus, a large file is going to take longer to download than a smaller one, and seeing how the setup file is about 4GB in size, be prepared to wait for a while.
As you already know, your device’s memory (RAM) also plays a part in the download time, so having a lot at your disposal will ensure shorter, more efficient downloads.
Does Windows 11 cause Internet problems? Not really, but there have been cases where the new OS interfered with Internet quality if we go back in time just a little bit.
It is widely known that, on Windows 11, Wi-Fi connectivity is one of the most common Internet-related problems. The system uses too much data owing to all the new features, which can affect the Internet quality.
There are a lot of reports of users complaining about slow Wi-Fi speeds and error messages like Limited access, Unidentified Network, or No Internet access.
Be sure to check the Windows 11 network throttling index, especially if you have any Windows 11 Internet issues.
What causes slow Internet issues in Windows 11?
While most of us blame the ISP (Internet Service Provider), the other issues are often the real culprit. We have listed some of the prominent ones in the following section:
Weak signal: When on wireless networks, the farther the device is from the router, the weaker the signal and, subsequently, the slower the Internet.
A high number of devices connected to the router: If too many devices are connected to the router, it will lead to slow Internet in Windows 11.
Problems with the DNS server: A DNS server locates the website on the web, and if it’s not set up properly or is facing an outage, it will take longer to load a website.
Misconfigured settings: The network settings are closely linked to the Internet speed, and any misconfiguration with the former will affect the latter.
Background processes consuming high data: If you have several background processes consuming data, especially a Windows update being downloaded, you will have a slow download speed in Windows 11.
Issues with the ISP: For users who face the issue at specific times each day, the problem could be traced to your ISP. A simple method to identify this is to perform a Windows 11 Internet speed test. If the speed is slow at a fixed point every day, contact your ISP.
Delivery Optimization is consuming bandwidth: The Delivery Optimization service is used for updating other devices in your network and it is using some of your bandwidth.
For Windows 11, or any other version of the OS, you can perform Internet speed tests to determine if your internet is slower after the Windows 11 update.
Thus, we made this guide to help you speed up your internet on Windows 11. That being said, if you need some internet optimizer advice for your Windows 11 device, you came to the right place.
Now that you thoroughly understand the causes, we head to the solutions for slow internet speed.
How can I fix my Windows 11’s slow download speed?
Here’s what you should first do
One of the most effective solutions to most problems encountered in Windows 11 is to restart the computer. If a background process or bug leads to a problem, rebooting the OS will eliminate it, thereby fixing the error.
Most devices display signal strength after you connect to a wireless network. Make sure it’s maximum.
Also, we now have dual-band routers that support 5 GHz and the standard 2.4 GHz, which offers a higher Internet speed. In case your router supports both, make sure you are connected to the 5 GHz network.
1. Update your network drivers
1.1 Use Device Manager
1. Press the Win + X keys simultaneously to open a Windows 11 shortcut menu. 2. Select Device Manager from the list. 3. In the device list, locate and double click Network Adapters. 4. Then right-click on your Internet network adapter and select Update driver. 5. Select Search automatically for drivers and wait for the process to complete. 6. If the Windows 11 utility detects new drivers, it will automatically install them on your machine.
Corrupt or out-of-date drivers can have a negative impact on overall Internet performance. Many users report noticeable improvements after they update their network drivers in Windows 11 and it can also help you fix slow internet issues while using wired access points.
1.2 Use an automated solution
If you want a quicker solution to keep your drivers in check regularly, we recommend you try a lightweight utility such as Outbyte Driver Updater.
To update singular drivers, as in this case, the process is pretty similar. Select your network driver from a list and wait for the process to complete.
The benefit of this application, however, is that you can let it run in the background, and it will automatically find up-to-date replacements for any outdated or corrupt drivers on your PC and install them without any effort on your part.
Outbyte Driver Updater
A quick and safe tool to update all your outdated drivers.
Select Windows Update from the tabs listed in the navigation pane on the left.
Click on Windows Update on the right.
Click on Advanced options.
Next, click on Delivery Optimization.
Disable the toggle for Allow downloads from other PCs.
Now, click on Advanced options.
Under Absolute Bandwidth, tick the checkboxes for allocation of bandwidth to downloading of updates in the background and foreground, and enter the desired value the respective fields.
You can also go with the Percetange of measured bandwidth method and use the slider to set the desired setting.
Scroll down and tick the two checkboxes under Upload settings.
Now use the slider to set the desired bandwidth for Uploading Updates and Monthly Upload Limit.
After changing the bandwidth settings, check if the slow download speed problem in Windows 11 is resolved.
A certain amount of bandwidth is allocated to Windows Update for both download and update. You can lower the bandwidth in order to maximize the bandwidth allocation to other tasks.
Also, Windows sends updates to other PCs on the network, which decreases the Internet speed. Disabling the setting might also help eliminate the problem.
3. Terminate processes consuming data
Press Ctrl + Shift + Esc to launch the Task Manager.
Navigate to the Performance tab.
Click on Open Resource Monitor at the bottom.
Go to the Network tab in the Resource Monitor window.
Locate the programs that are consuming way too much data, right-click on them, and select End process.
Certain processes that consume a considerable amount of data can be terminated to fix the Windows 11 slow Internet. However, remember not to end any critical tasks, such as Windows Update.
If you couldn’t find any such tasks or terminating some didn’t help, head to the next fix.
Select Apps from the list of tabs in the navigation pane on the left.
Click on Installed apps on the right.
Locate the app that you don’t want running in the background, click on the ellipsis next to it and then select Advanced options from the menu that appears.
Next, click on the Let this app run in the background dropdown menu.
Select Never from the list of options.
Disabling background apps in Windows 10 is a lot different than the process in Windows 11. In the case of the former, you could easily disable them all in one go, while for the latter, the settings are specific to each app.
When several apps run in the background and consume data, it is bound to lead to a slow Internet problem in Windows 11. Also, some of these may download files or updates.
It would be best if you disabled the non-critical apps from running in the background to increase the download speed since these also lead to slow Windows 11 Ethernet. Whenever you need to work on any of these, launch them.
5. Run the Internet Connections troubleshooter
Press Windows + I to launch the Settings app.
Click on Troubleshoot on the right in the System tab.
Now, click on Other troubleshooters.
Click on Run next to Internet connections to launch the troubleshooter.
Choose the appropriate response, if and when prompted, to complete the troubleshooting process.
Microsoft offers a bunch of troubleshooters that can identify and eliminate some of the commonly known issues. Before going with the intricate methods, it’s recommended that you run these, in case one is available for the problem.
There are various ways you can disable the Windows Defender Firewall in Windows 11, and we have listed one of them. In case you are comfortable with the others, go ahead and use them since the result would be the same.
Press Windows + S to launch the Search menu.
Enter Control Panel in the text field at the top, and click on the relevant search result that appears.
Click on System and Security from the list of options that appear.
Select Windows Defender Firewall.
Click on Turn Windows Defender Firewall on or off from the list of options on the left.
Now, tick the checkboxes for Turn off Windows Defender Firewall (not recommended) under both Private network settings andPublic network settings, and then click on OK at the bottom.
Choose the appropriate response in case a prompt appears.
Windows Defender Firewall is a critical part of the OS that protects your device from unauthorized traffic, both to and from the computer. However, it’s known to cause slow Internet at times in Windows 11, thus disabling it could work as a fix in this case.
But, do remember that you would be losing out on critical security aspects, and the computer would be exposed to risks. Therefore, if disabling Windows Defender Firewall does not work, re-enable it immediately.
Select Network & internet from the list of tabs in the navigation pane on the left.
Click on Wi-Fi or Ethernet depending on the network type.
Click on the network that you are connected to.
Disable the toggle for Metered connection.
8. Change the DNS server
The DNS server is used to locate the IP address corresponding to the domain name. Whenever you enter the domain name, it’s respective IP is located and the website launched.
Windows is set to choose the DNS server by default but due to issues with it, the Internet speed may be slow. Therefore, it’s recommended that you switch to an open-source DNS for better Internet speed.
1. PressWindows+Rto launch theRuncommand.
2. Enter appwiz.cpl in the text field and either click on OK or hit Enter to launch the Network Connections window.
3. Right-click on the connected network adapter, and select Properties from the context menu.
4. Select Internet Protocol Version 4 (TCP/IPv4) from the list of options and click on Properties.
5. Tick the checkbox for Use the following DNS server addresses.
6. Enter the following the respective fields and click on OK to save the changes:
Preferred DNS server: 8.8.8.8
Alternative DNS server: 8.8.4.4
7. After making the changes, restart the computer.
Can I go back to Windows 10 from Windows 11?
It is really important to know that rolling back to Windows 10 after trying out Windows 11 can be done within the first ten days, which is considered a trial period.
That being said, if the rollback period has passed, the only method to go back to Windows 10 is to install a fresh copy of the OS.
What do I do if none of the methods listed fix slow Internet issues?
This is a highly likely scenario primarily due to problems from the ISP’s end. In this case, you can either check the connections for faults or choose another plan with a higher Internet speed. Also, you can switch to a faster and safer web browser to resolve the slow Internet problem in Windows 11.
But before making the upgrade, remember to identify your requirements and choose the plan that best suits them.
Wi-Fi or Ethernet: Which is better?
Both have their own set of advantages and disadvantages. As the name suggests, Wi-Fi offers wireless connectivity, while Ethernet connections use cables. The former offers mobility, while the latter offers stability.
Regarding speed, Ethernet no doubt emerges as the winner, but the margin is getting narrower by the day due to advancements in wireless technology. So, if you are facing slow Internet problems in Windows 11, switching to Ethernet might work.
These are the most effective fixes for this inconvenience in Windows 11 and all the other relevant information that might be useful when facing it.
You may be at your workplace or home, and you’d like to extend your desktop display but your laptop won’t detect the second monitor. This can be frustrating especially if you’re pressed for time.
If this is your situation or experience, there are lots of ways you can solve it. Maybe you are a graphic designer, a coder, or a content developer who uses two monitors in order to view more information and content on your screen.
And if your laptop won’t detect the second monitor, then this could be frustrating. Thankfully, this guide is here to save you time and help you fix the problem with some of the best solutions. Let us check them out.
Why is my laptop not detecting my second monitor?
Some of the most common reasons your laptop won’t detect your second monitor is because of the below-mentioned reasons.
There is a driver-related issue. – If you are experiencing issues after recently updating your driver, then there could be a bug in the latest version.
You haven’t updated your drivers. – There are chances that you haven’t updated your graphics driver to the latest version, which possibly resolves the underlying problems.
Some important system files are corrupt. – Chances are some program has replaced or corrupted the important system file related to it.
The installed driver isn’t compatible. – You haven’t installed the compatible version of the driver on your PC.
The second monitor is having issues. – There might be a problem with the second monitor itself or you haven’t enabled the second monitor.
Why does my monitor say no signal when HDMI is plugged in?
Check out the reasons your monitor says no signal when you connect the HDMI cable to it.
The connection is loose.
Your HDMI cable is faulty.
The graphics and chipset drivers aren’t up to date.
You forgot to switch to the appropriate input source on your monitor.
There is some issue with your monitor.
How can I fix my computer not detecting a second monitor?
1. Check the Display settings
1. Press theWin+Ikeys to openSettings.
2. Select Display.
3. Check the option for Multiple Displays.
4. If your laptop doesn’t detect the second display, the option will not show. In this case, make sure the monitor is turned on and plugged into your video port.
5. Then, press Detect.
6. Select the correct source labeled on your monitor’s controls so that you’re using the correct video port.
If your computer is not detecting your second monitor, the first thing you need to do is check your Display Settings. It is possible they aren’t properly configured, and this might be the cause for your issue.
2. Perform a System Restore
Click Start.
Type Create a System Restore point and open it.
Click System Restore.
Enter your administrator account password or grant permissions if prompted.
In the System Restore dialog box, click Choose a different restore point.
Click Next.
Select a restore point created before you experienced the problem.
Click Next.
Click Finish.
Use System Restore to create restore points when you install new apps, drivers, or Windows updates, or when you create restore points manually.
If the laptop won’t detect the second monitor, try and restore the system and see if it helps.
Restoring doesn’t affect your files. It, however, removes apps, drivers, and updates installed after the restore point was created.
Right-click Start.
Select Control Panel.
Select Recovery.
Click Open System Restore.
Click Next.
Choose the restore point related to the problematic program/app, driver or update.
Click Next.
Click Finish.
Since you won’t be manually fiddling with important system files, there is 0 chance you will mess things up if you use a third-party tool, therefore we strongly encourage you to use one.
3. Run the Hardware and Devices troubleshooter
Right-click Start.
Select Control Panel.
Go to the View by the option on the top right corner.
Click the drop-down arrow and select Large icons.
Click Troubleshooting.
Click the View all option on the left pane.
Click Hardware and Devices.
Click Next to run the troubleshooter.
If your laptop won’t detect the second monitor, then run the Hardware and Devices troubleshooter to resolve the issue.
This checks for commonly occurring issues and ensures any new device or hardware is correctly installed on your computer.
Follow the instructions to run the Hardware and Device troubleshooter. The troubleshooter will begin detecting any issues that may be causing your laptop not to detect the second monitor.
In the Windows Update settings window, click Check for Updates.
Then, install all updates listed.
If you check Windows Updates and find that driver updates are available, install them and check if it helps fix the problem.
Windows will immediately detect your system’s configuration and download appropriate drivers for it.
Install drivers from Device Manager
Right-click Start.
Select Device Manager.
Select the device.
Right-click on it.
Select Update Driver.
The update driver wizard will launch.
Select either Search automatically for updated driver software, or Browse my computer for driver software.
In case of Windows Update does not detect your driver, or you can’t get it from the manufacturer’s website, you can try using Device Manager on your laptop.
5. Scan for hardware changes
Right-click Start.
Select Device Manager.
Go to Monitors and click to expand the list.
You’ll see two monitors, right-click the second monitor’s driver.
Select Uninstall.
Click Scan for the hardware changes icon.
If it shows generic PnP, uninstall the driver and download the latest driver from the manufacturer’s website as explained in solution 4 above.
Check the box that says Include subfolders.
Click Next and wait for the wizard to complete.
Note: If your monitor doesn’t support adapters, then the laptop won’t detect the second monitor. This ideally means then that your monitor can run through straight connections only.
Download the latest driver from the manufacturer’s website.
Save it on your local disk.
Right-click on the driver set up file.
Click Properties.
Click the Compatibility tab.
Check the box next to Run this program in Compatibility mode.
Select the Operating System from the drop-down list.
The driver will install, then check its functionality.
Restart the computer and check if the issue persists.
7. Update basic video driver
Log in as administrator.
Right-click Start.
Select Control Panel.
In the Control Panel search box, type Windows Tools.
Click Windows Tools.
Double click Computer Management.
Select Device Manager.
Locate Display adapters.
Select the arrow to drop down devices
if it says Windows Basic Video, download the driver by right-clicking on it, and then select Update driver software.
Let it run, then when complete, check if the second monitor will work.
8. Check if the second monitor is enabled
Press the Win + P buttons to open the Project menu.
Click Extend.
Then Under the Multiple Displays drop-down list.
Click Extend These Displays.
Click Apply.
Click OK.
Note: If the two monitors are not visible on this screen, click Detect button.
Once you enable the second monitor, right-click your Desktop screen and it will display the second monitor. The above steps are for Windows 10, but if you have a Windows 11 PC, you can check out this guide.
If you choose Show Desktop only on 1, then the laptop won’t detect the second monitor in the Display Settings menu.
How do I force the monitor to detect?
Press the Win + I keys to open Settings.
Select Display.
Check the option for Multiple Displays.
If your laptop doesn’t detect the second display, the option will not show.
In this case, make sure the monitor is turned on and plugged into your video port.
That’s about it for this article. We hope these solutions will help you fix your laptop not detecting a second monitor issue. Let us know in the comments section whether any of these solutions worked to resolve the issue.
Consider replacing Windows Defender with a more advanced antivirus solution to reduce memory usage effectively. We recommend TotalAV.
It employs the latest technologies for identifying and eliminating the latest malware, and it will protect all your devices, including your webcam and router.
TotalAV
Get rid of any high memory usage issues and protect all your devices with this great antivirus.
Go to Settings then select Update & Security and click on Recovery.
Under Advanced startup, click Restart now.
On the Choose an option screen, select Troubleshoot > Advanced options > Startup Settings and click Restart.
Press F4 to start your PC in Safe Mode.
5. Reschedule Windows Defender
Press Windows and enter task scheduler. Select Task Scheduler from the list of results.
Navigate to Task Scheduler Library > Windows Defender.
In the right pane, double click on Windows Defender Scheduled Scan.
When the Properties window opens, go to the Conditions tab. Make sure that Start the task only if the computer is idle, Start the task only if the computer is on AC power, and Start only if the following network connection is available options are disabled. Click OK to save the changes.
Open the Properties window again and go to the Triggers tab. Click on New.
Choose Weekly or Monthly and select the desired properties. Once you’re done, click the OK button to save the changes.
Now go back to Task Scheduler and make the same changes for all Windows Defender tasks. You should have these tasks remaining: Windows Defender Cache Maintenance, Windows Defender Cleanup, and Windows Defender Verification.
6. Try to disable Windows Defender
6.1 Use the Group Policy Editor
Press Windows + R and enter gpedit.msc. Press Enter or click OK.
Navigate to Computer Configuration > Administrative Templates > Windows Components > Windows Defender Antivirus.
In the right pane, double-click on Turn off Windows Defender Antivirus.
When the Properties window opens, select Enabled and click on Apply and OK to save the changes.
If you have a Home version of Windows, you will not have the Group Policy Editor available and you need to use Registry Editor instead.
6.2 Use the Registry Editor
Press Windows + R and enter regedit. Press Enter or click OK.
When the Registry Editor opens, navigate to the following path in the left pane: Computer\HKEY_LOCAL_MACHINE\SOFTWARE\Policies\Microsoft\Windows Defender
In the right pane, look for DisableAntiSpyware DWORD. If this DWORD isn’t available, right-click the empty space and choose New and select DWORD (32-bit) Value from the menu. Now enter DisableAntiSpyware as the name of the new DWORD and double-click it.
Set the Value data to 1 and click on OK to save the changes.
Msmpeng.exe high memory usage isn’t the only Windows Defender problem, and many reported that Windows Defender caused high HDD and CPU usage, but we have a guide that addresses those issues.
The error code 0x80073cf9 in Windows is usually triggered when you try to install a new application from the Microsoft Store.
This error code prevents you from installing the app and will give you two options. You may either relaunch or cancel the installation process, but unfortunately, neither option will work.
The Microsoft Store error 0x80073cf9 may also appear when you try to update an application to make it suitable for Windows 10.
We will show you how to permanently fix this issue and prevent it from happening again.
What does error 0x80073CF9 mean?
If you get this error message, it signifies that Windows 10 is preventing you from installing specific programs.
Most users who experienced this error said it is not a widespread issue since some users may experience it while installing specific applications. However, others say they cannot access the Store because of error code 0x80073cf9.
There could be a variety of reasons that trigger this error, including:
Problematic applications – Some third-party software may trigger the error, so you must uninstall the app.
Malware infection – In this case, you will need a full computer scan to eliminate any malware or virus on the computer.
Compatibility issues with antivirus software – Third-party antivirus software may not be compatible with the OS. Therefore, we suggest temporarily disabling it or switching to a different solution in this case.
Microsoft Store apps – Windows comes with a built-in store troubleshooter. So it would help if you run it to resolve the problem.
Users have faced different variations of this 0x80073cf9 error, including in games and applications like Sea of Thieves, Intune, Autopilot, Minecraft, Game Pass, and Forza Horizon 5.
This is not an exhaustive list of triggers, but regardless, using the solutions we recommend would help fix the issue.
How do I fix the error code: 0x80073cf9?
1. Clean the cache
1. Open the Run dialog usingWindows+R.
2. Paste the script below inside the Run dialog box: WSReset.exe
3. Hit Enter to run the command.
4. The Windows Store command prompt should appear; wait for it to disappear automatically.
5. Check whether the issue persists.
The first easy fix you should try out to solve code: 0x80073cf9 is to clear your Windows PC’s cache. You can easily do this via the Run dialog.
2. Uninstall problematic apps
Open up the Settings app.
Click on Apps on the left pane, then select Apps & features from the right.
Scroll down to your most recently added app, click on the ellipses and select Uninstall.
3. Use specialized software to repair Store apps
Although updating your system is always a good idea, things can go south. For example, there have been numerous instances when Windows updates caused issues, from incompatibility between system features to outdated drivers, etc.
You can always rely on specialized repair software to fix system files. These tools are able to scan and automatically replace any corrupted file they may encounter.
4. Use System Restore
Click the Start menu, type system protection, and select the Create a restore point app.
Click on the System Restore button.
On the restore window, click the Next button.
Select a restore point, and click Next again.
You will need to follow the screens’ instructions to complete the process.
Note: Before performing the system restore, we suggest you write down the apps you installed so that you can get them back after this process.
5. Create the AUInstallAgent folder
Open the File Explorer, click on This PC, and select the partition where you have Windows 10 installed.
Double-click on the Windows folder you have in the partition.
Check the Windows folder and see if you have another folder named AUInstallAgent.
If you don’t have the AUInstallAgent folder, you need to right-click the Windows directoryand create a new folder with that name.
Open the third-party antivirus and access the Protection or Security menu. We offer Bitdefender as an example, but all antiviruses can be disabled from their menus.
Click the Open button under antivirus.
Lastly, select the Advanced tab and click the switch to turn off Bitdefender Shield.
Check if the 0x80073cf9 error still exists.
If you have an antivirus, you need to disable it and check if your apps install correctly afterward.
If they install correctly, it is an issue related to your antivirus, as it blocks the app installation process.
7. Turn off your firewall
Click the Start button, type windows security, then select the Windows Security app.
Click Firewall & network protection in the left pane, then select Public network from the right pane.
Toggle off Microsoft Defender Firewall.
Check if the 0x80073cf9 error still exists.
Your firewall may also trigger the annoying Microsoft Store error 0x80073cf9. As a result, one of the quickest and safest solutions is to disable it.
Once you’ve disabled your firewall, download and install the app that initially triggered this error code, and then you can re-enable your firewall.
8. Run the Microsoft Store troubleshooter
If the problem persists, try running Windows 10’s built-in troubleshooter. This tool can fix general technical issues affecting your Microsoft Store Apps.
Open the Settings app, scroll through the right pane and click on Troubleshoot.
Click on Other troubleshooters.
Scroll down to Windows Store Apps and click Run.
How do I fix the 0x80073cf9 Microsoft Store error on Windows 11?
Except for a few minor differences, the abovementioned steps will work in Windows 10 and 11. Since, on both OS versions, users experience the code: 0x80073cf9 error for the same reasons.
It would help if you only adapt the solutions to your specific situation. So, for example, if you get this error after installing a new Windows 11 application, you should uninstall it.
Other solutions that will also work on Windows 11 include:
Disabling your antivirus
Deactivating your firewall
Using specialized restore tools
How do I run WSReset EXE?
Open the Run dialog using Windows + R.
Paste the script below and hit Enter. WSReset.exe
The Windows Store command prompt should appear; wait for it to disappear automatically.
Running this tool is an easy way of clearing the Microsoft Store app cache on Windows 10 and 11.
There you go; these are a few options that you can try to fix the error code 0x80073cf9 and get back to your daily activity.
These solutions will work if you encounter the error messages error 0x80073cf9 this app couldn t be installed, 0x80073cf9 intune, and HRESULT: 0x80073CF9.
As always, we have not written these fixes in any particular order, so you should try what seems the most appropriate to your specific situation.
If you have any questions, let us know in the comments below.



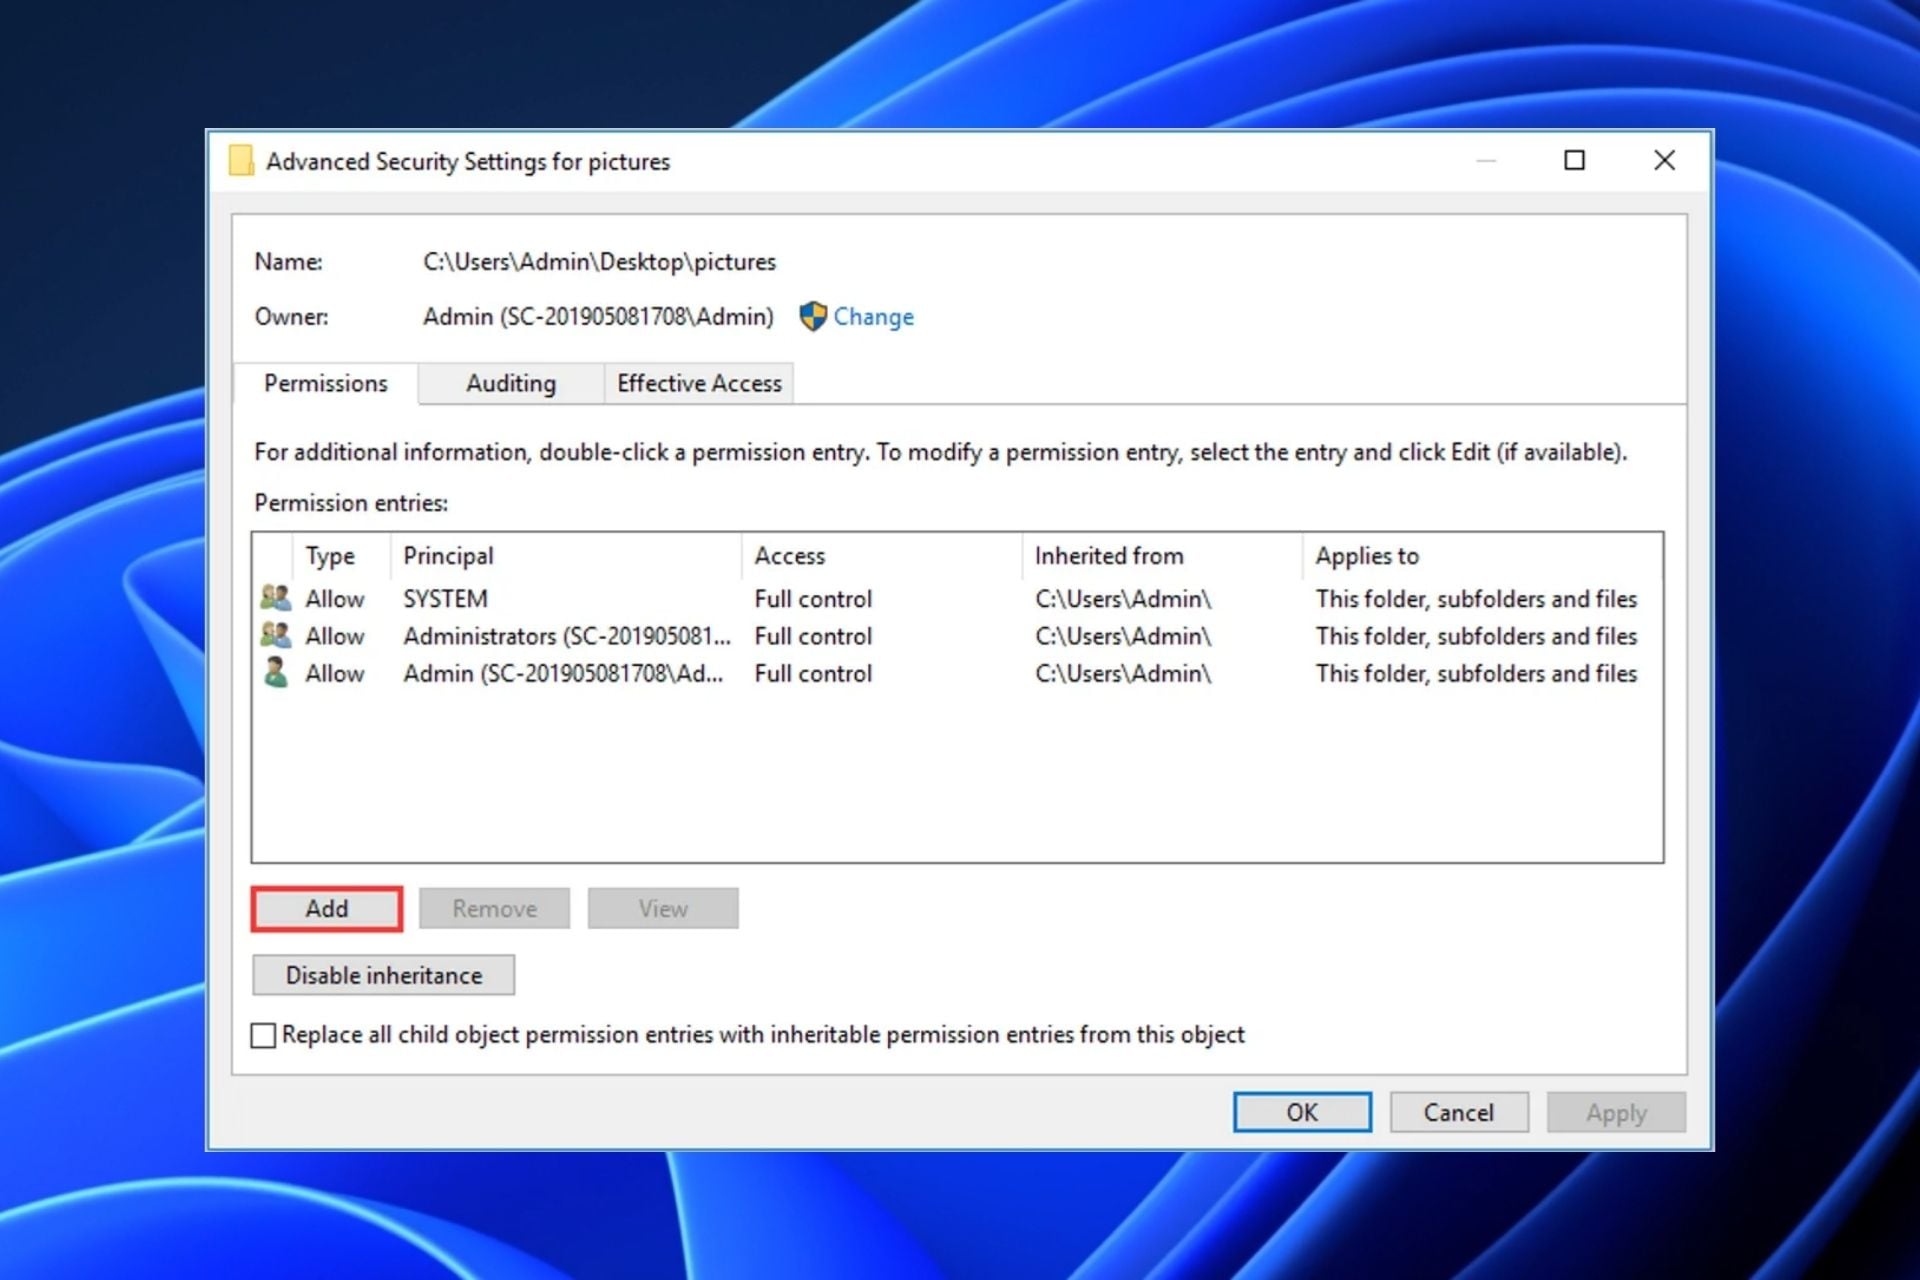


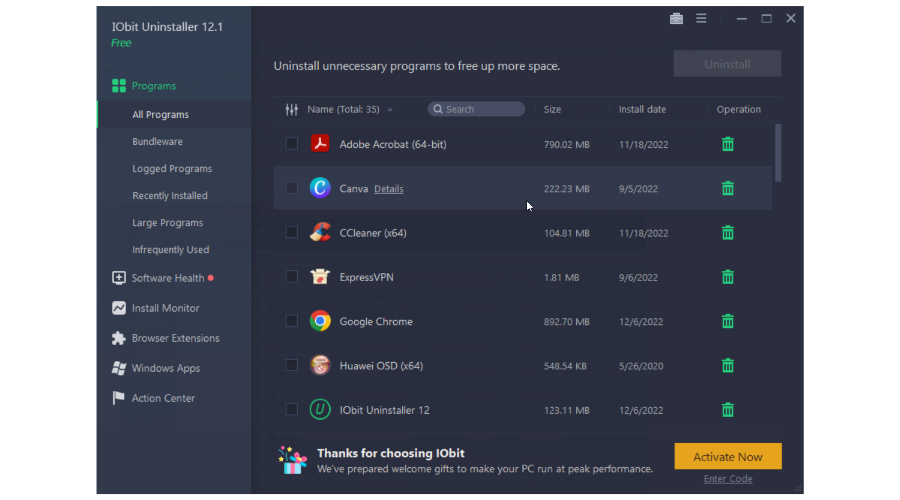
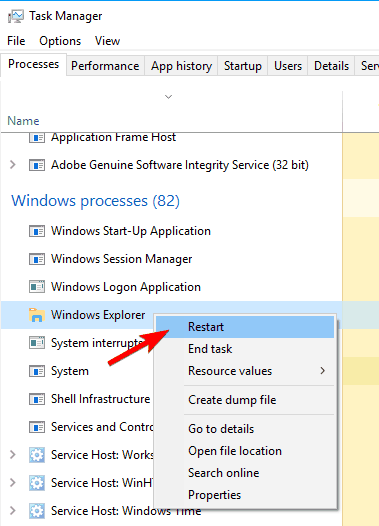
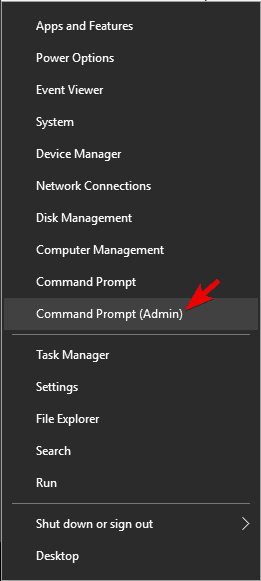
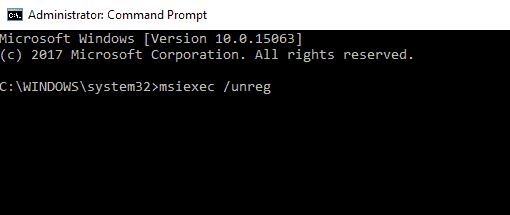
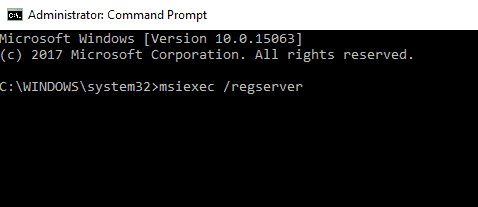
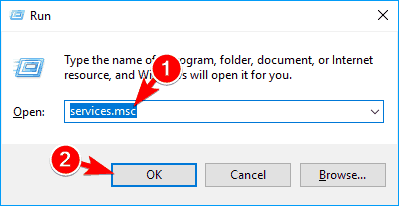
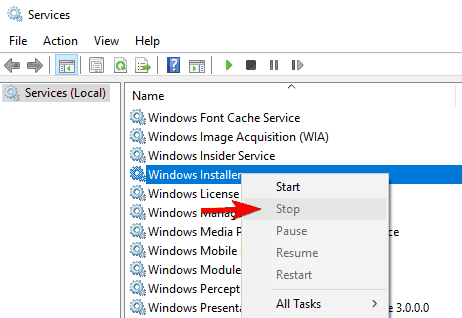


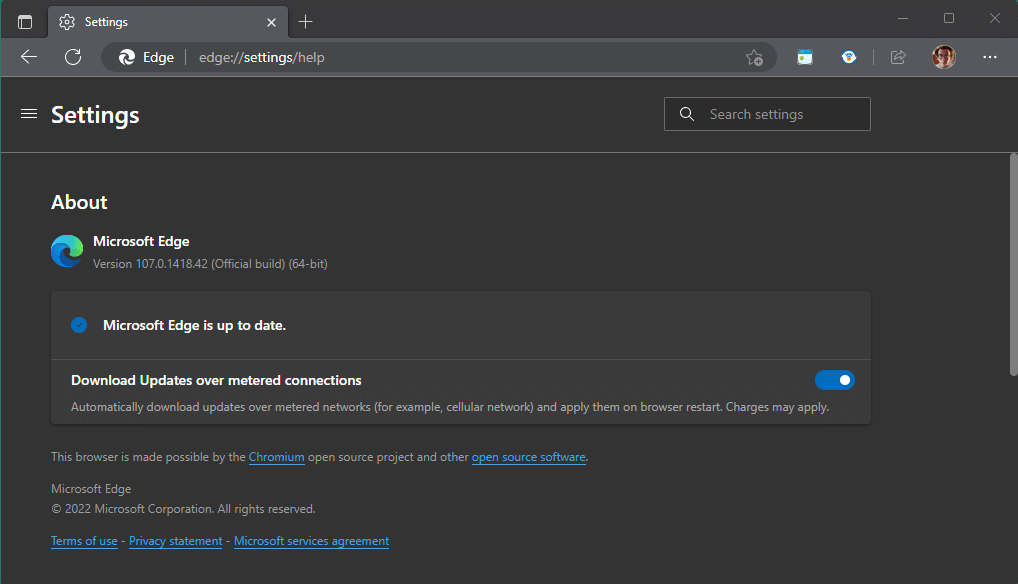

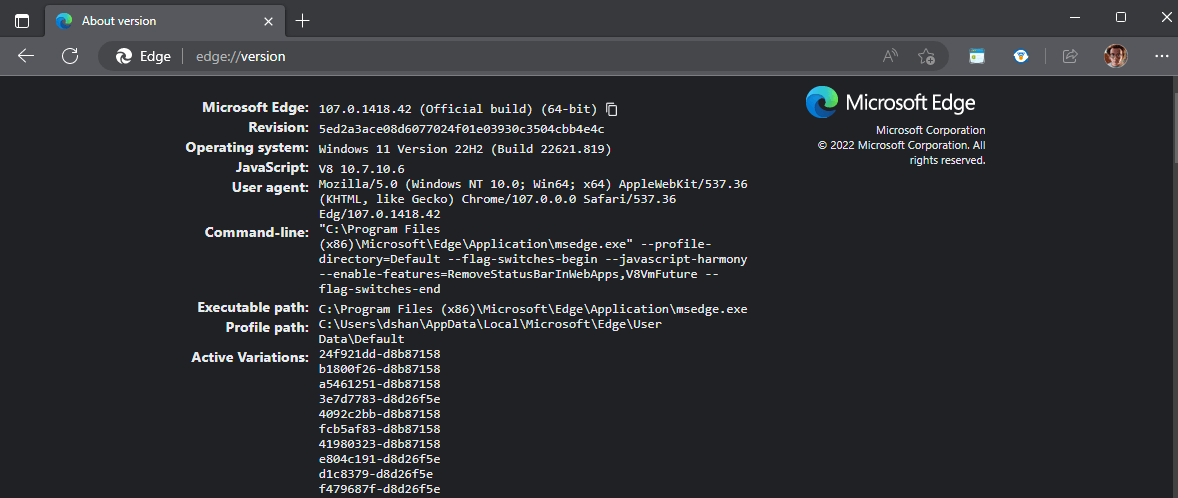 Other pertinent Edge browser version number information includes the executable path to Edge, the operating system you are running, active variations (tabs or pages open) in Edge you are running, and more. You can use a variation of this command to check the version information in
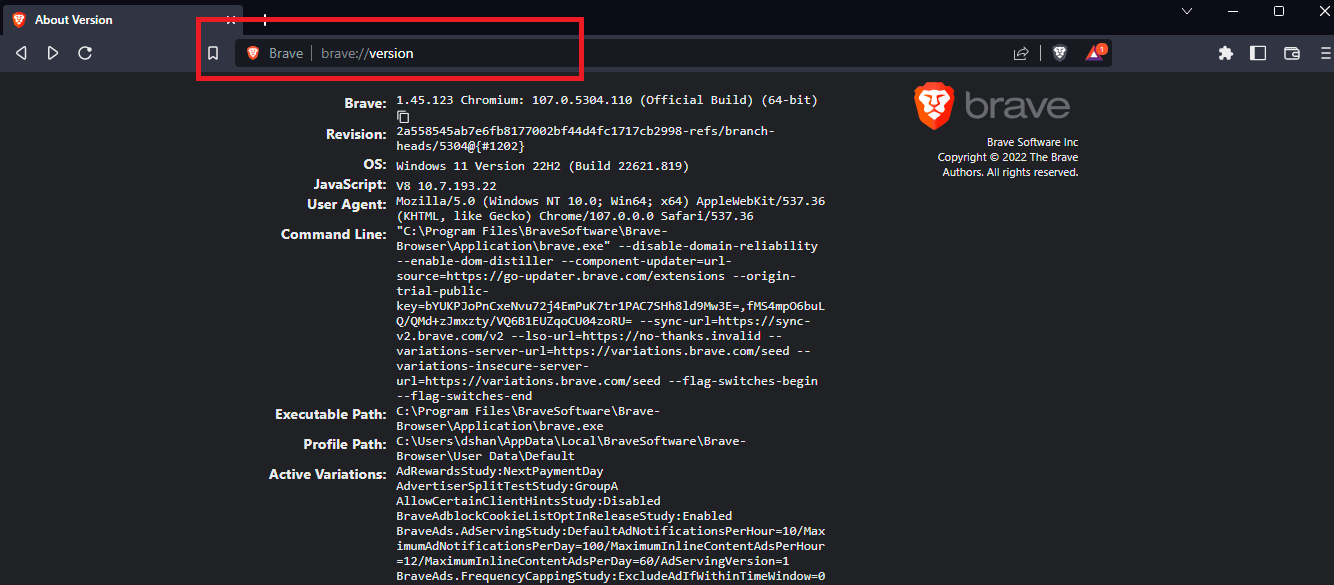


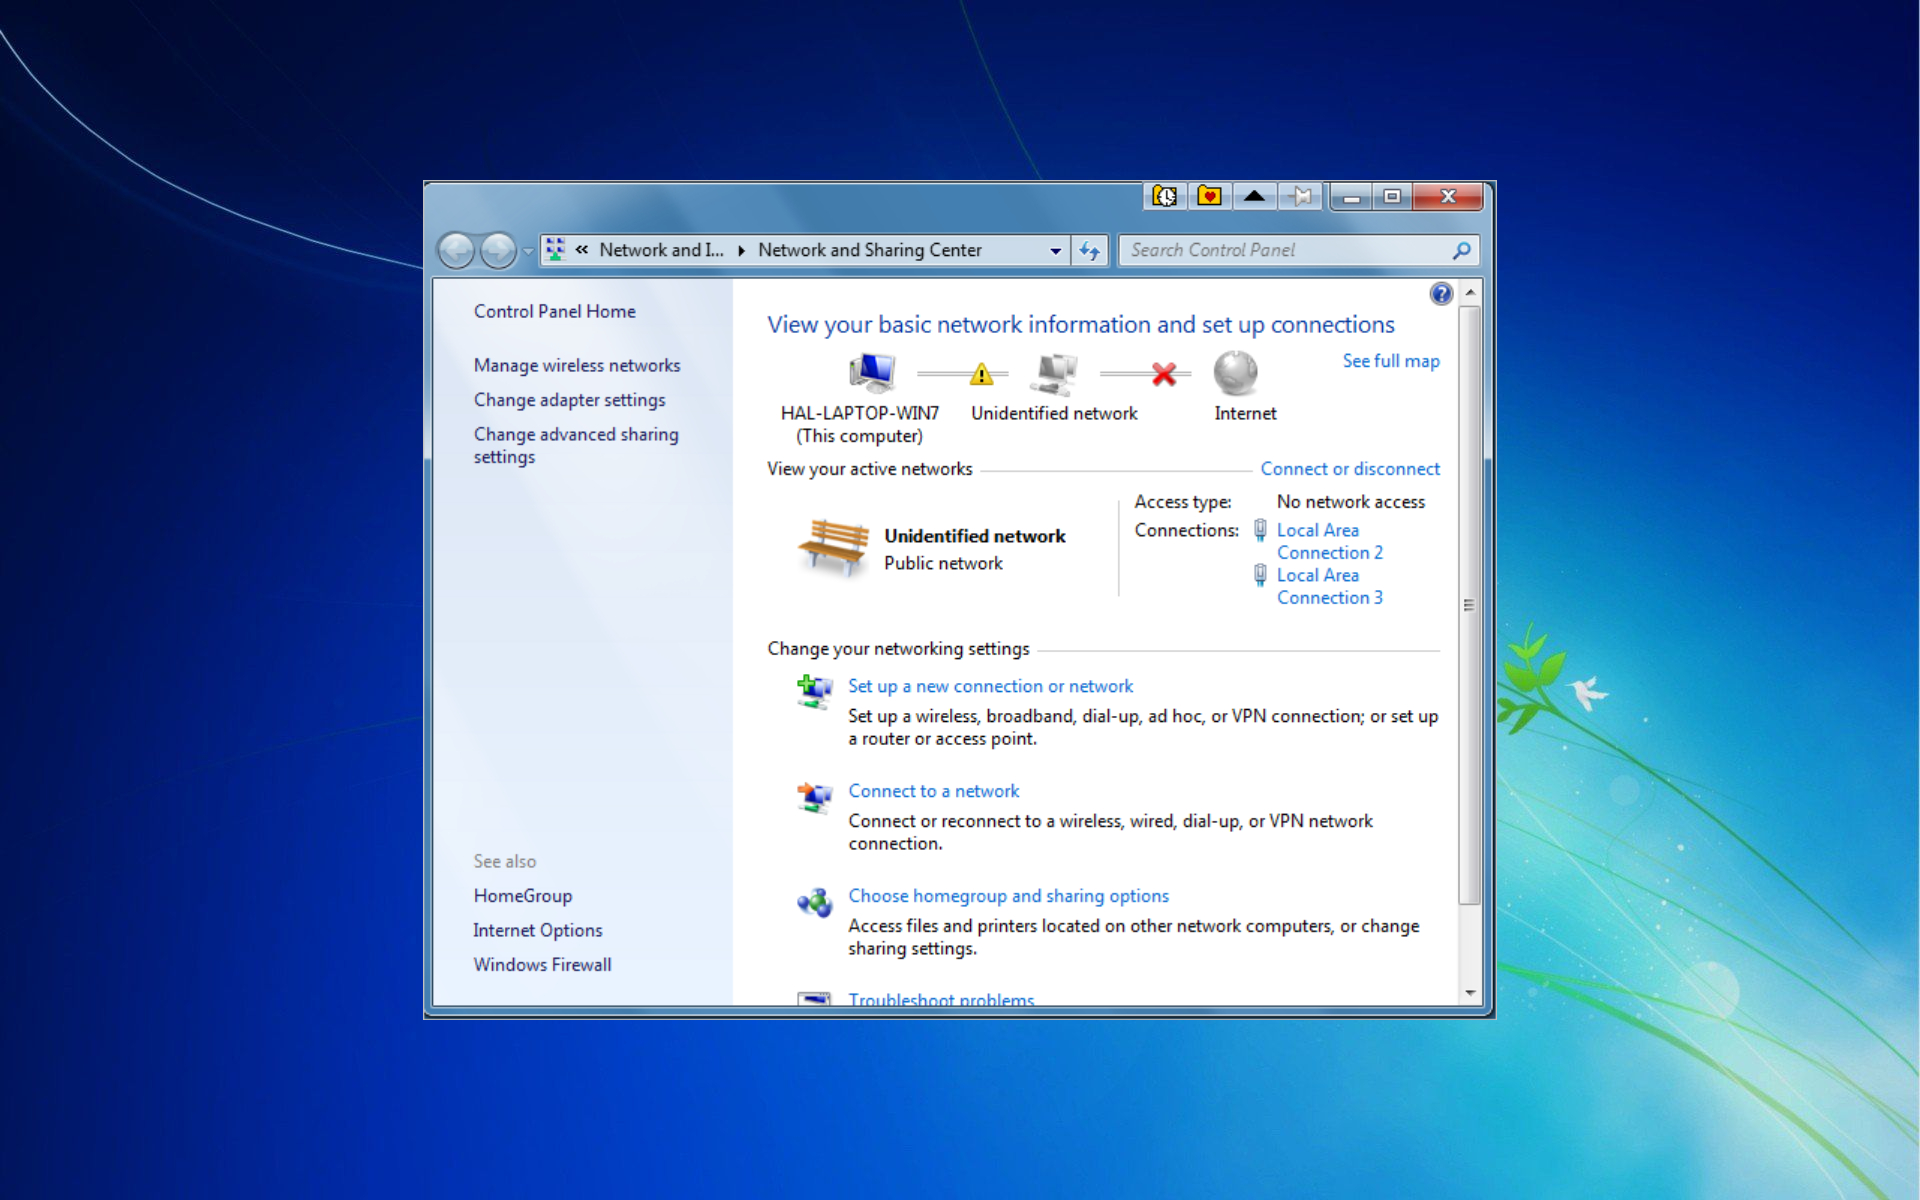





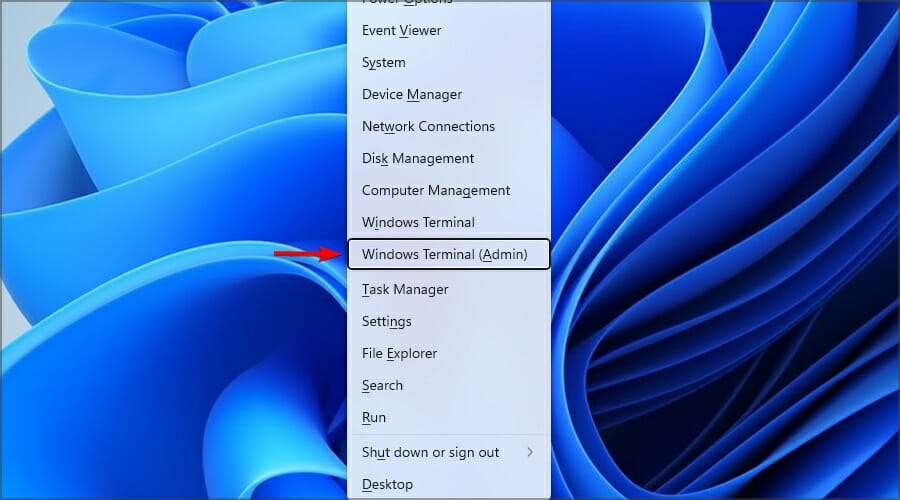
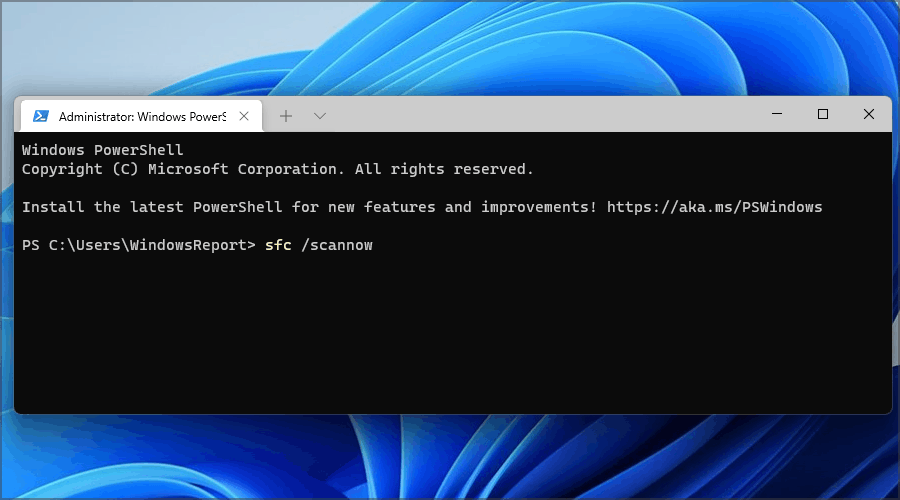
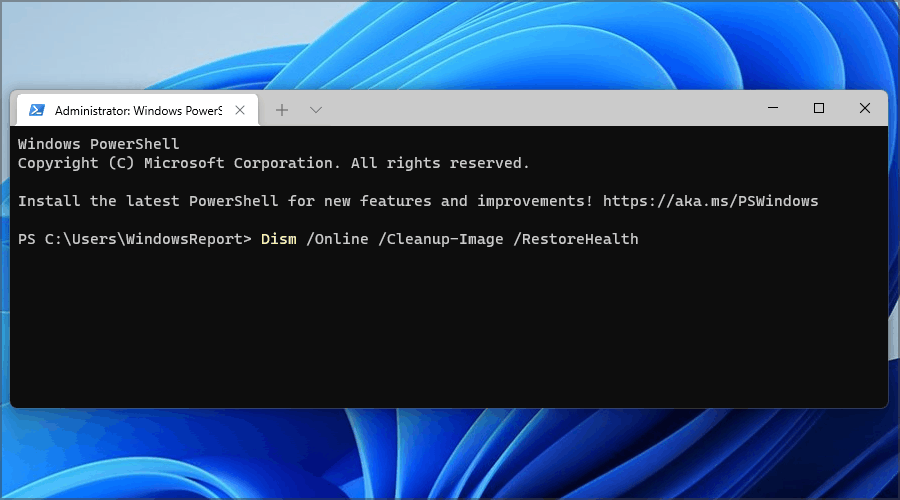
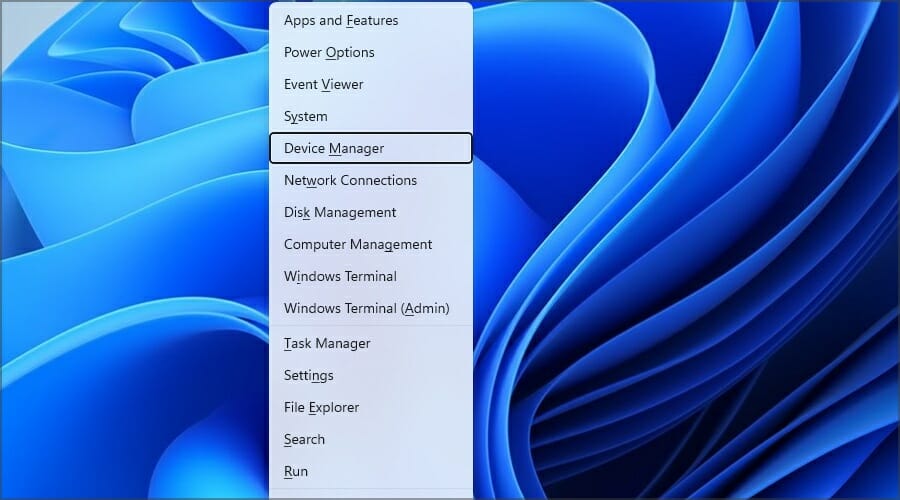
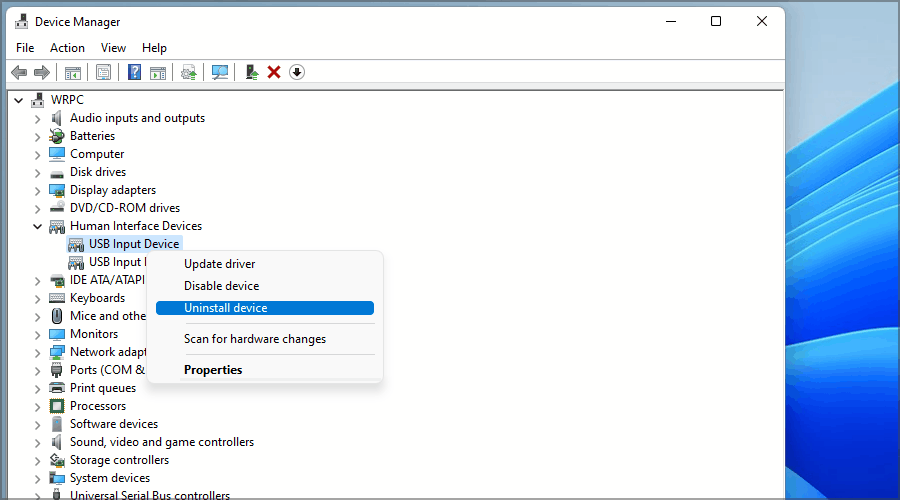
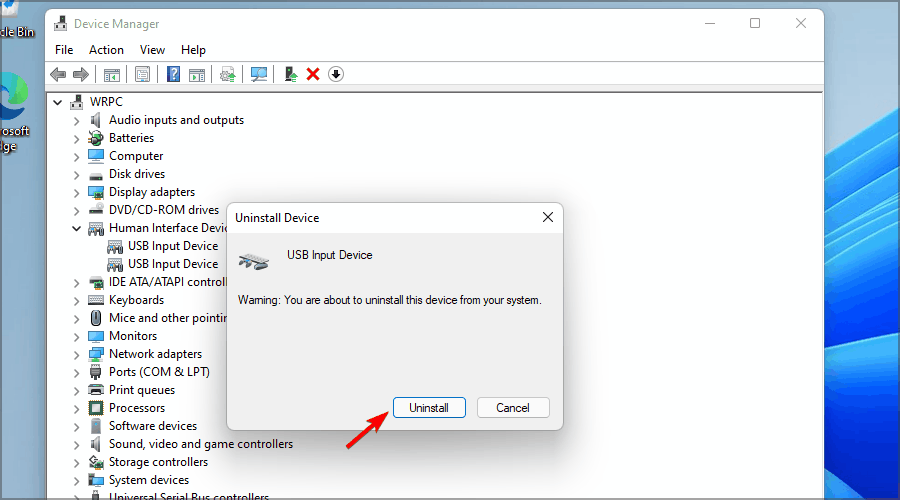


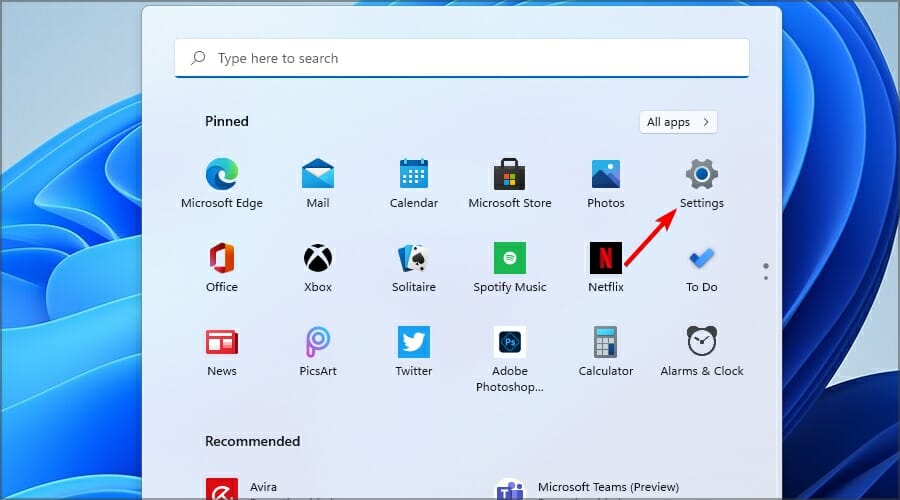
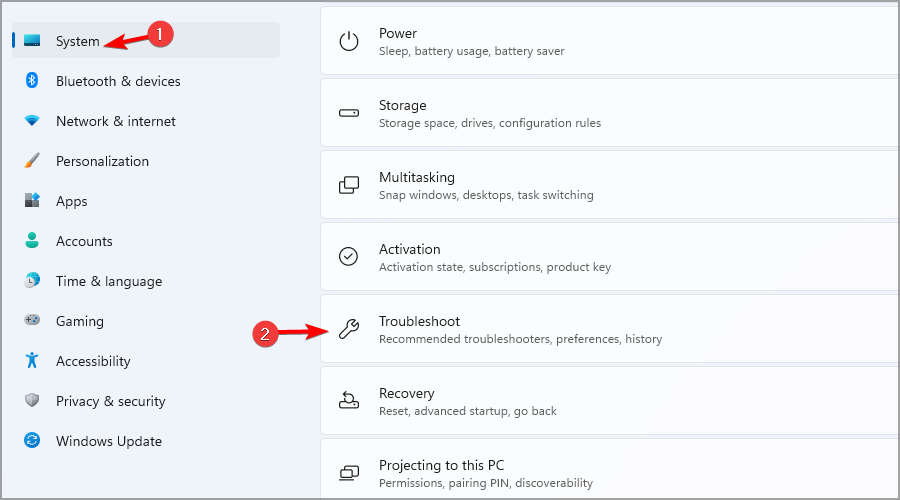
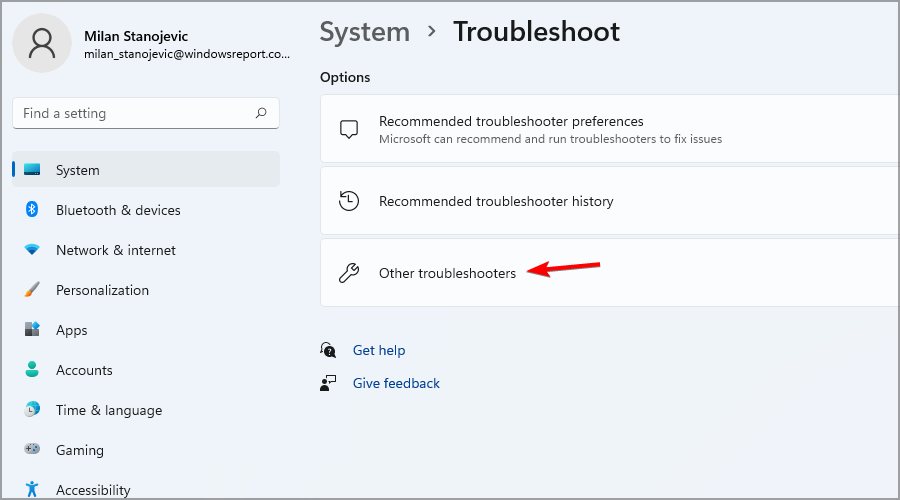
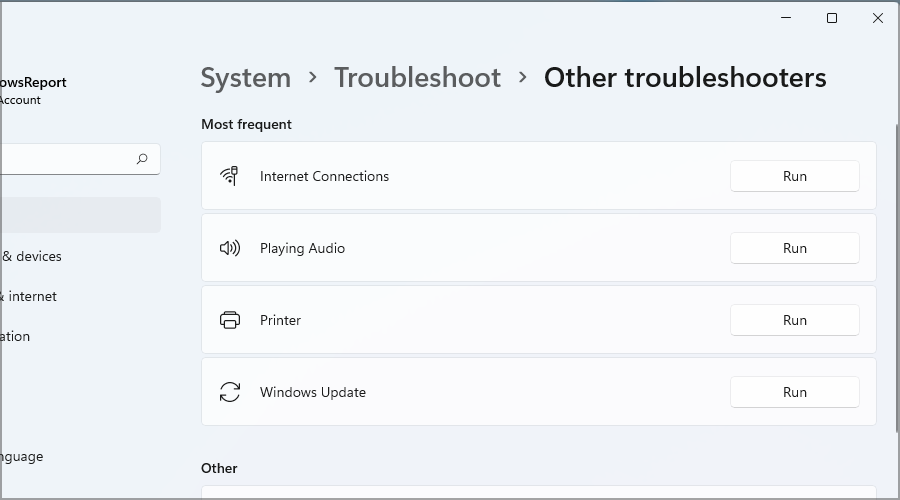
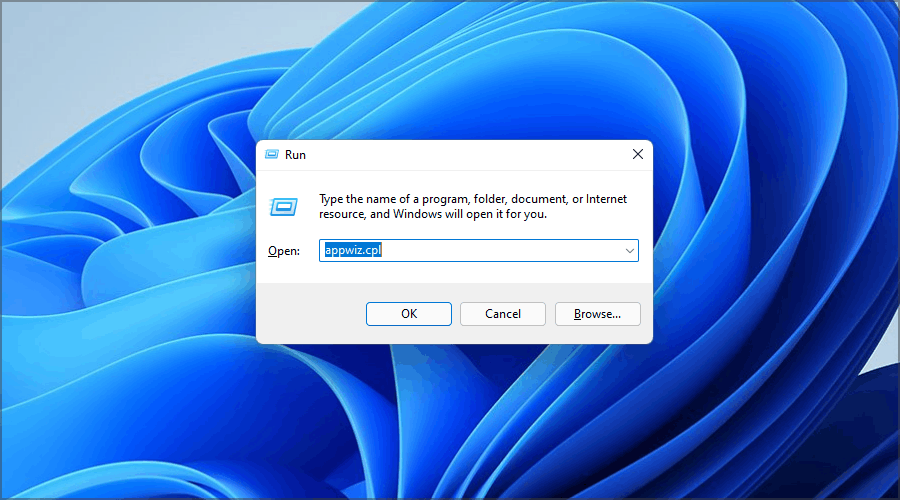
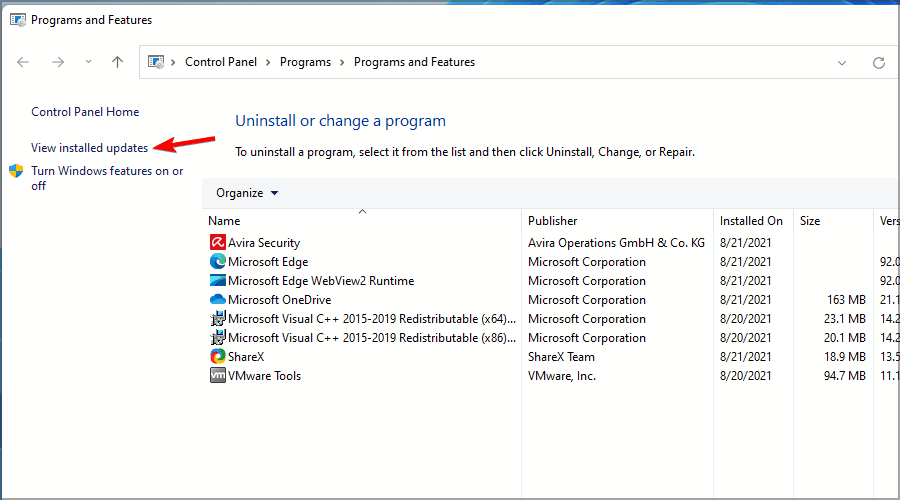
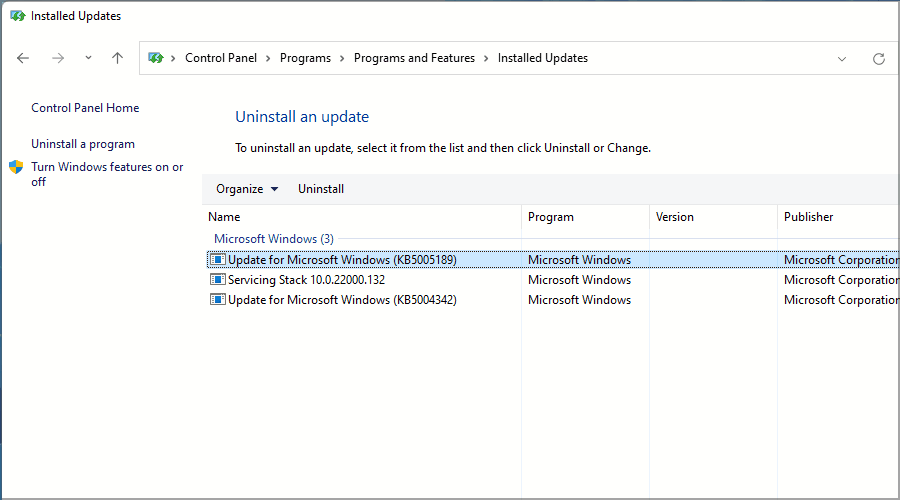
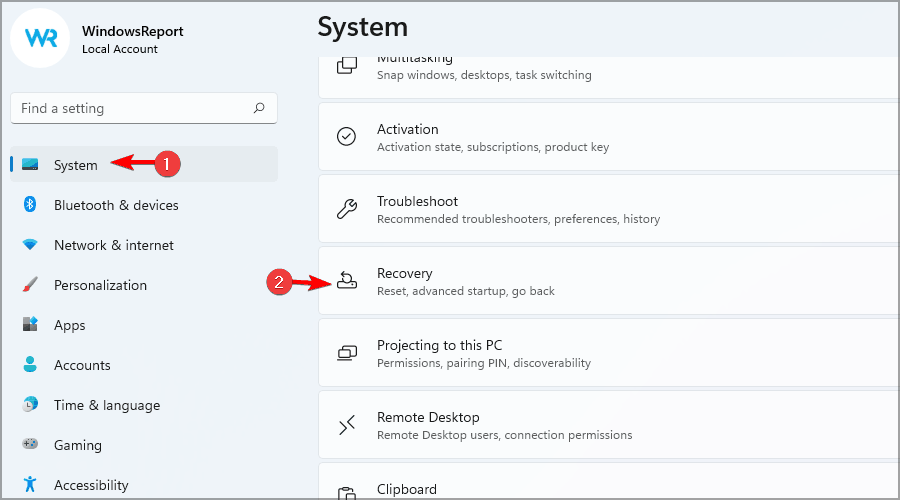
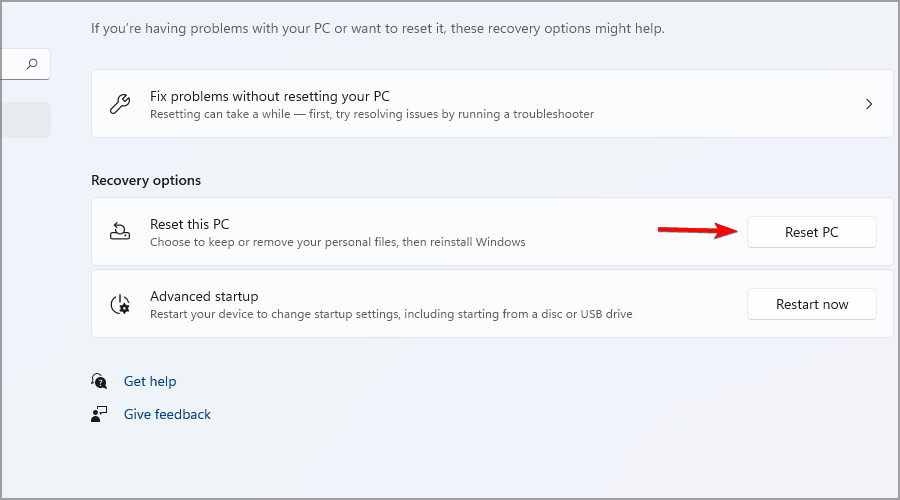
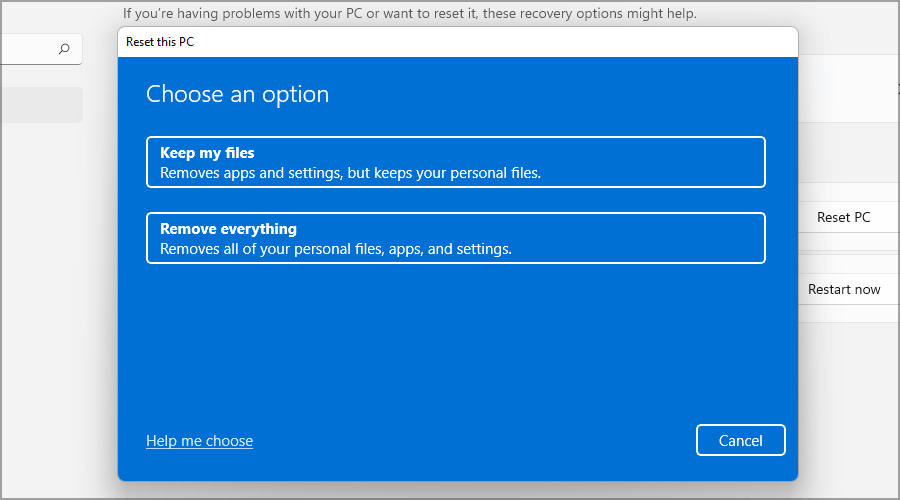
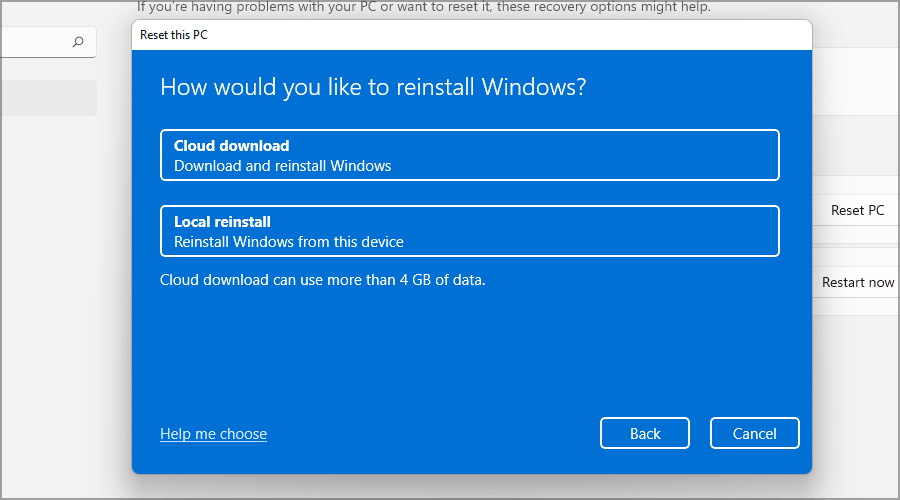
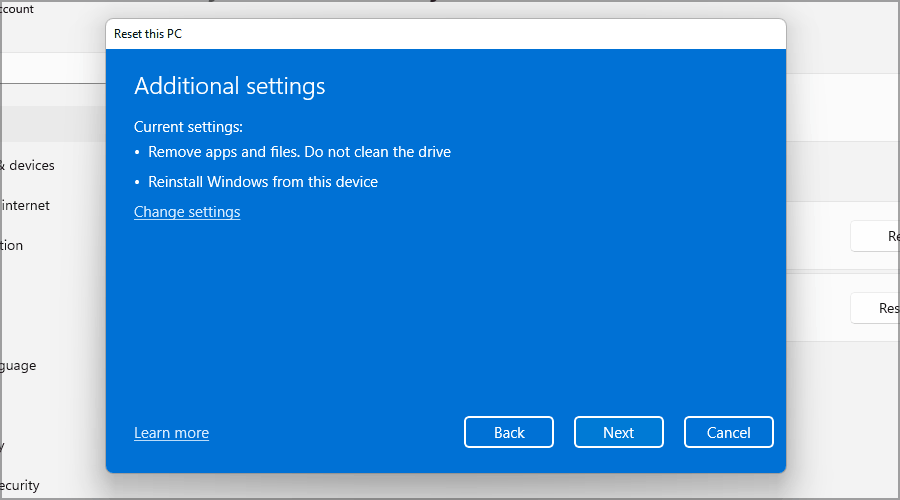
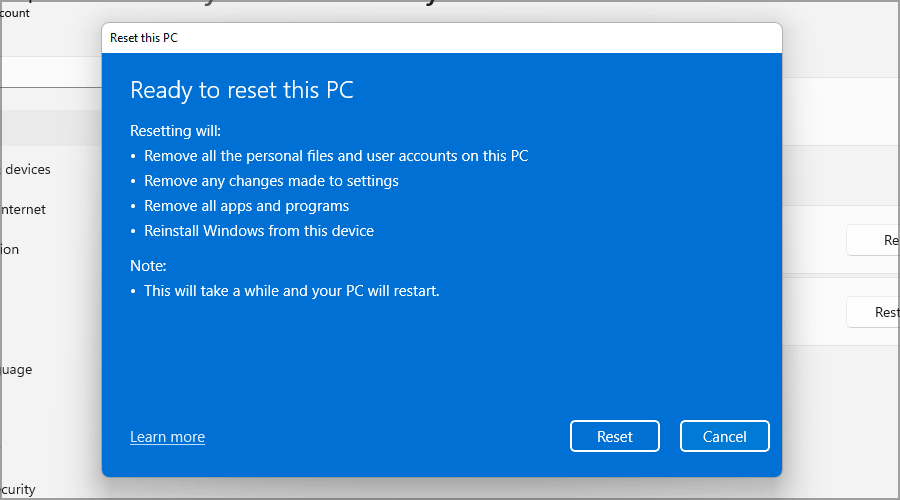
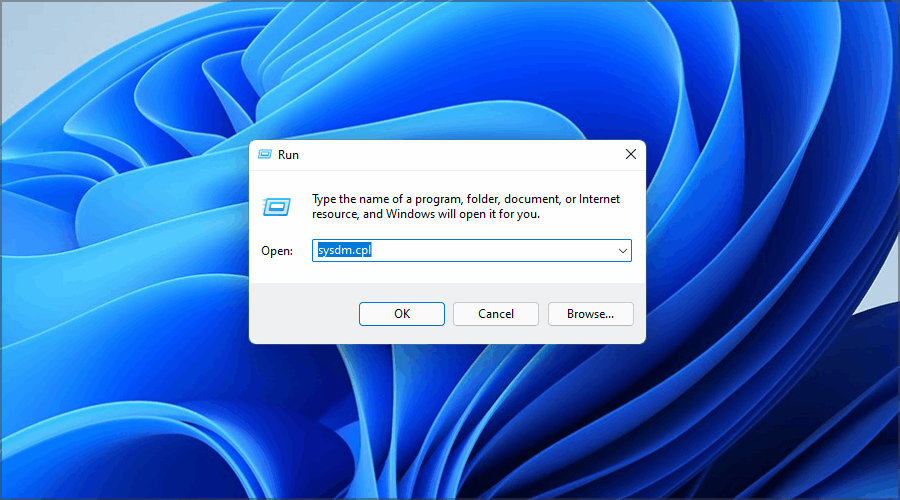
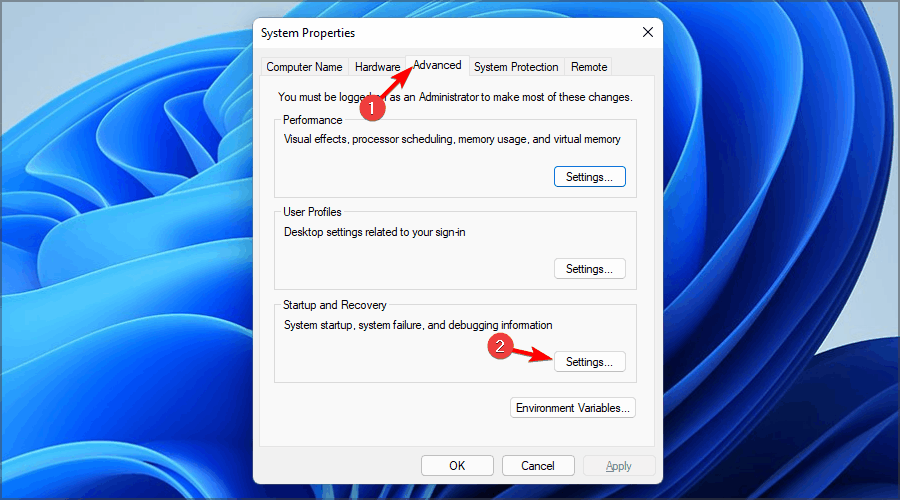
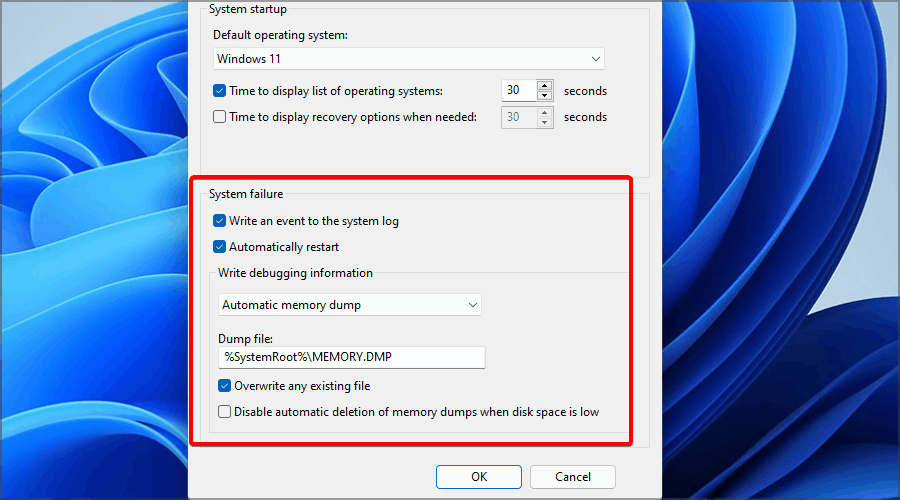






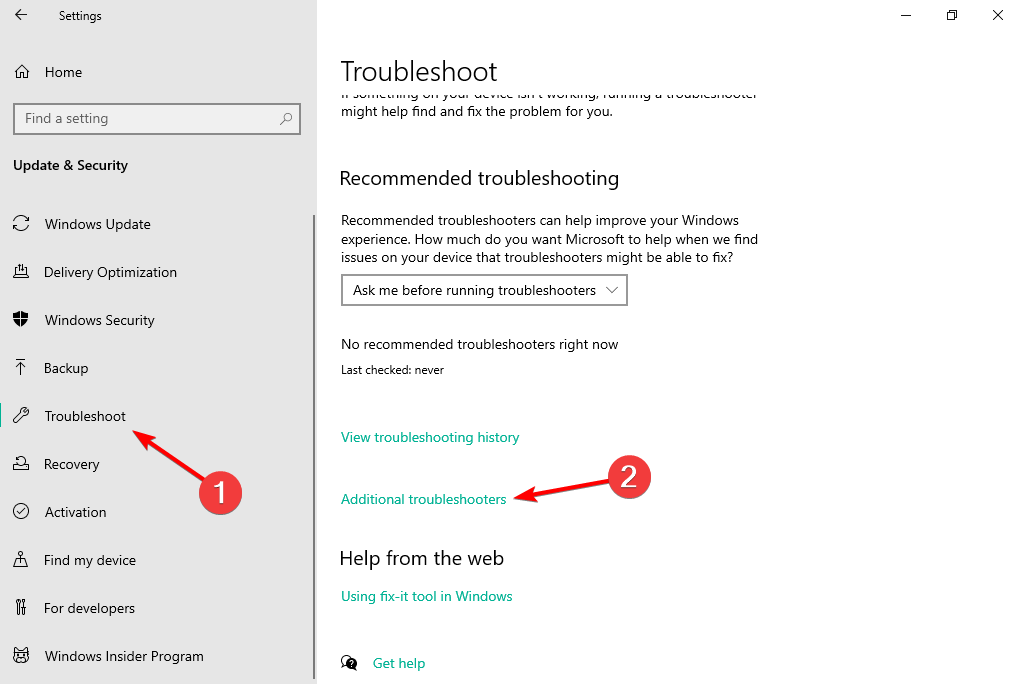

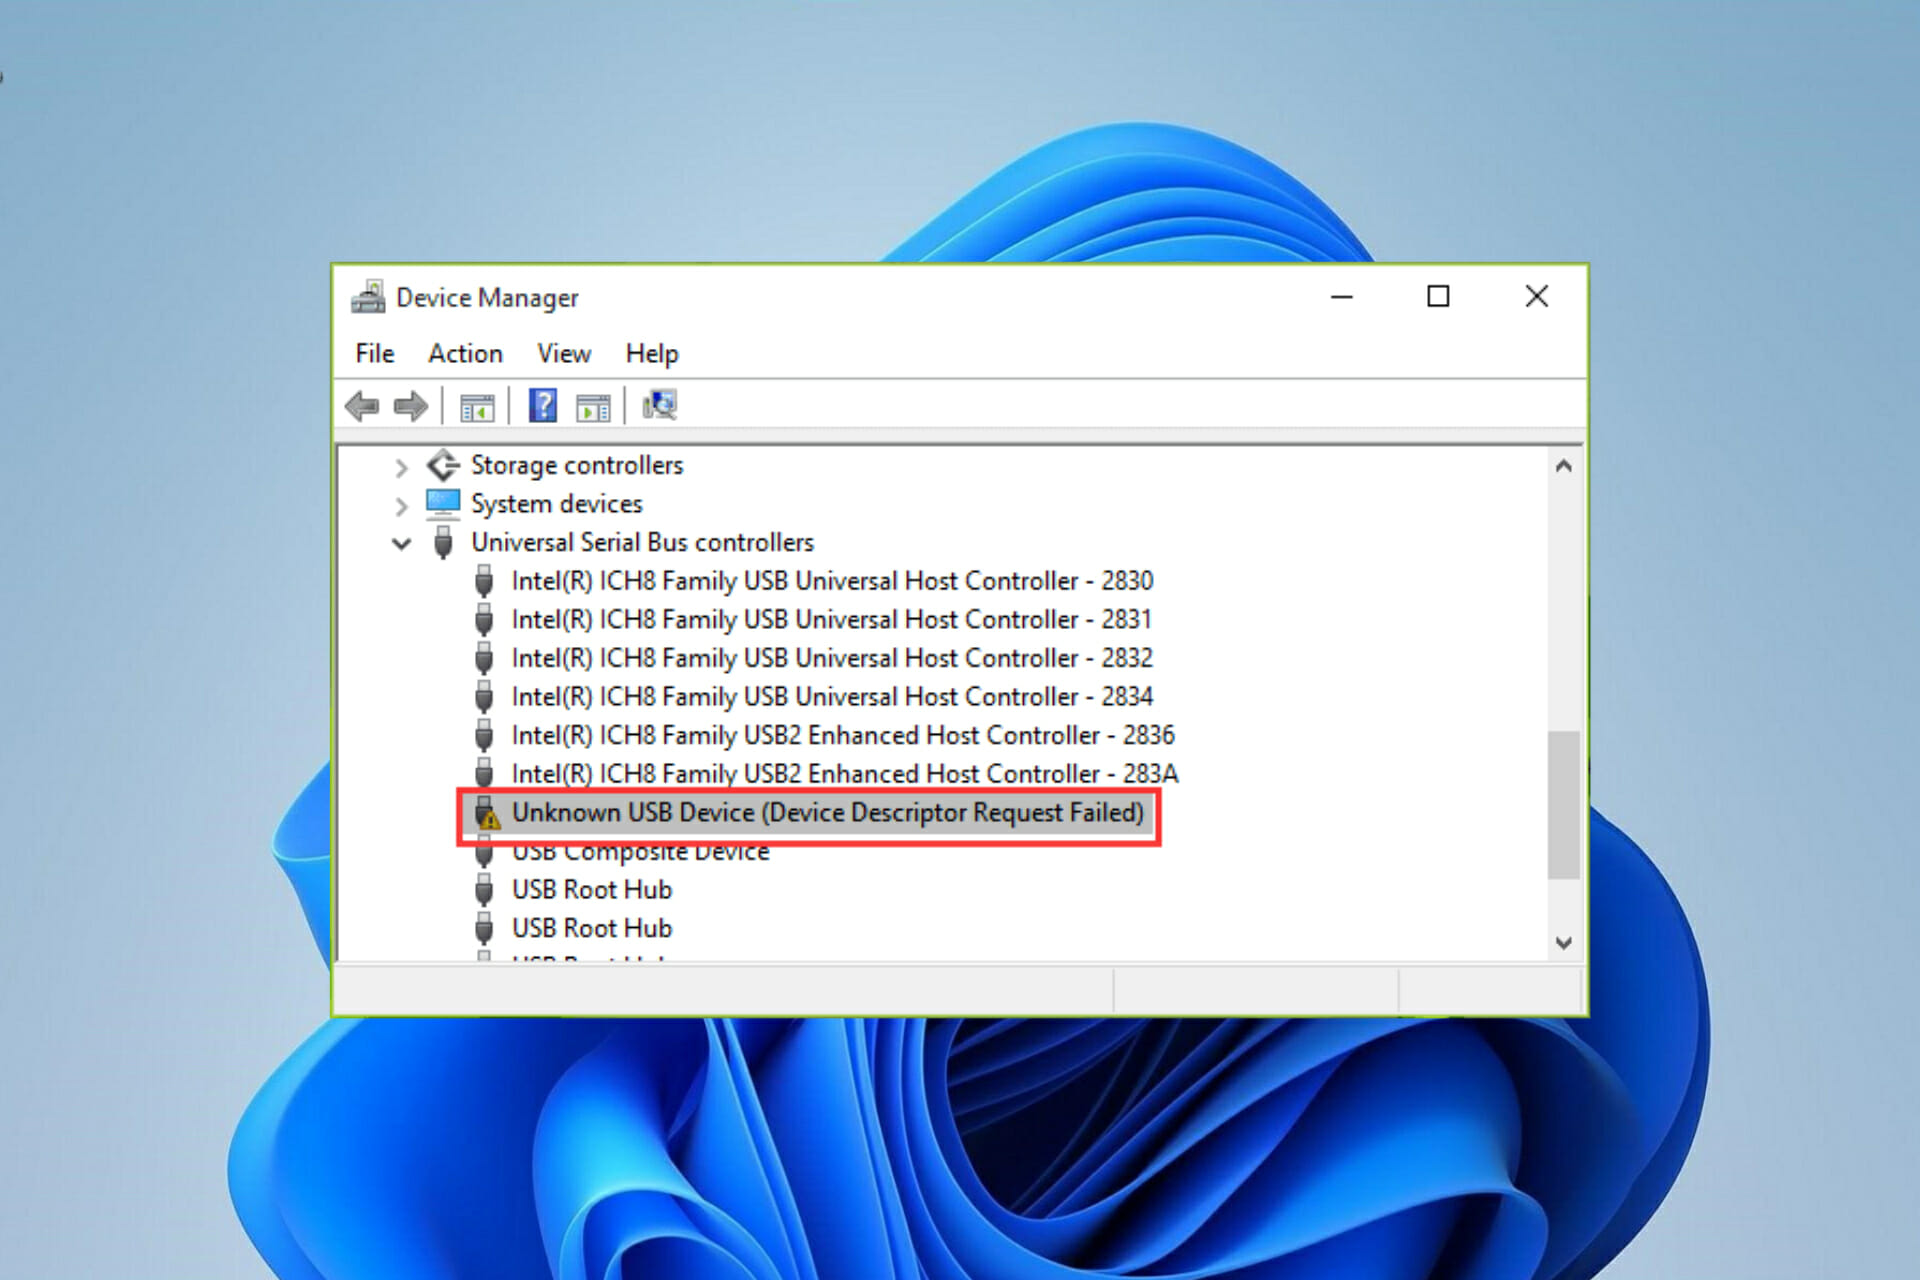


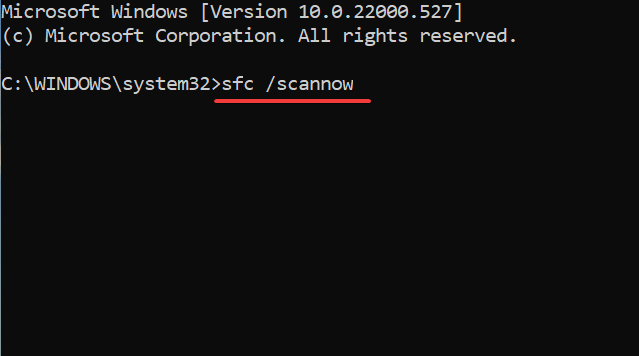


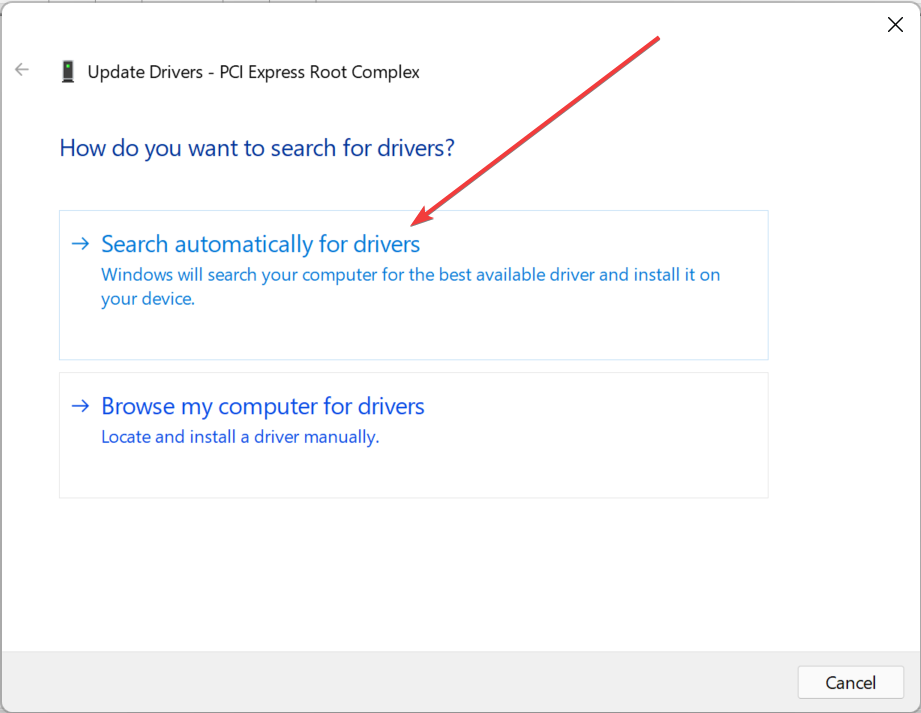


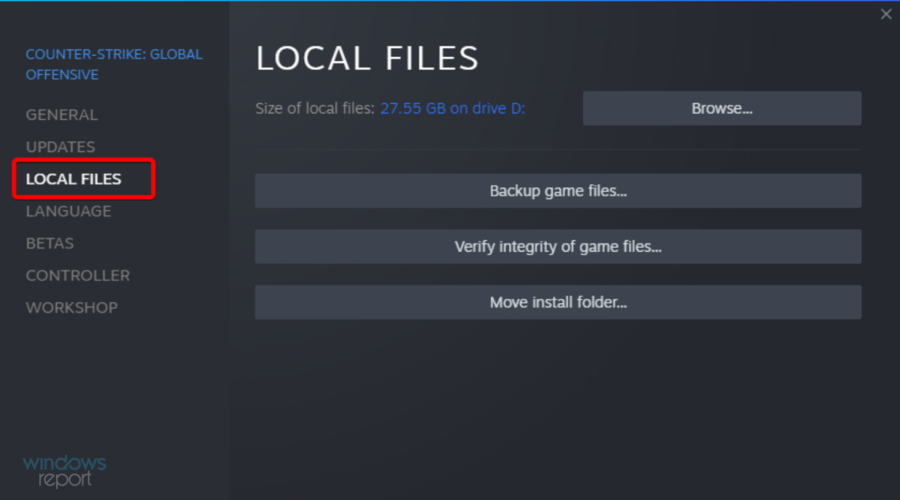


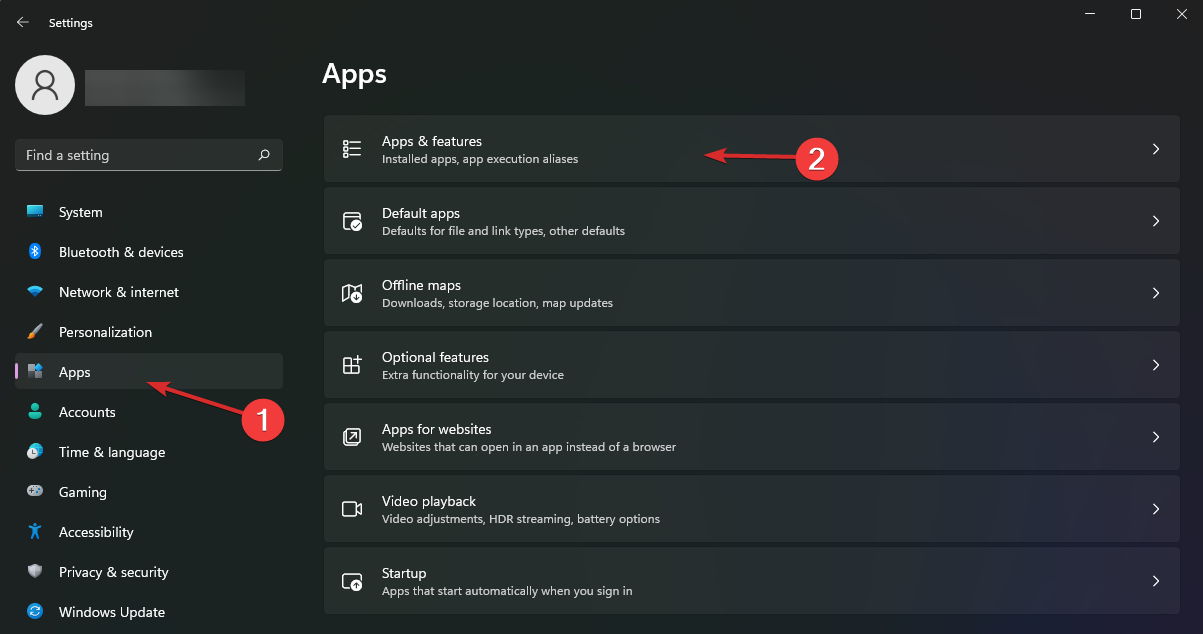


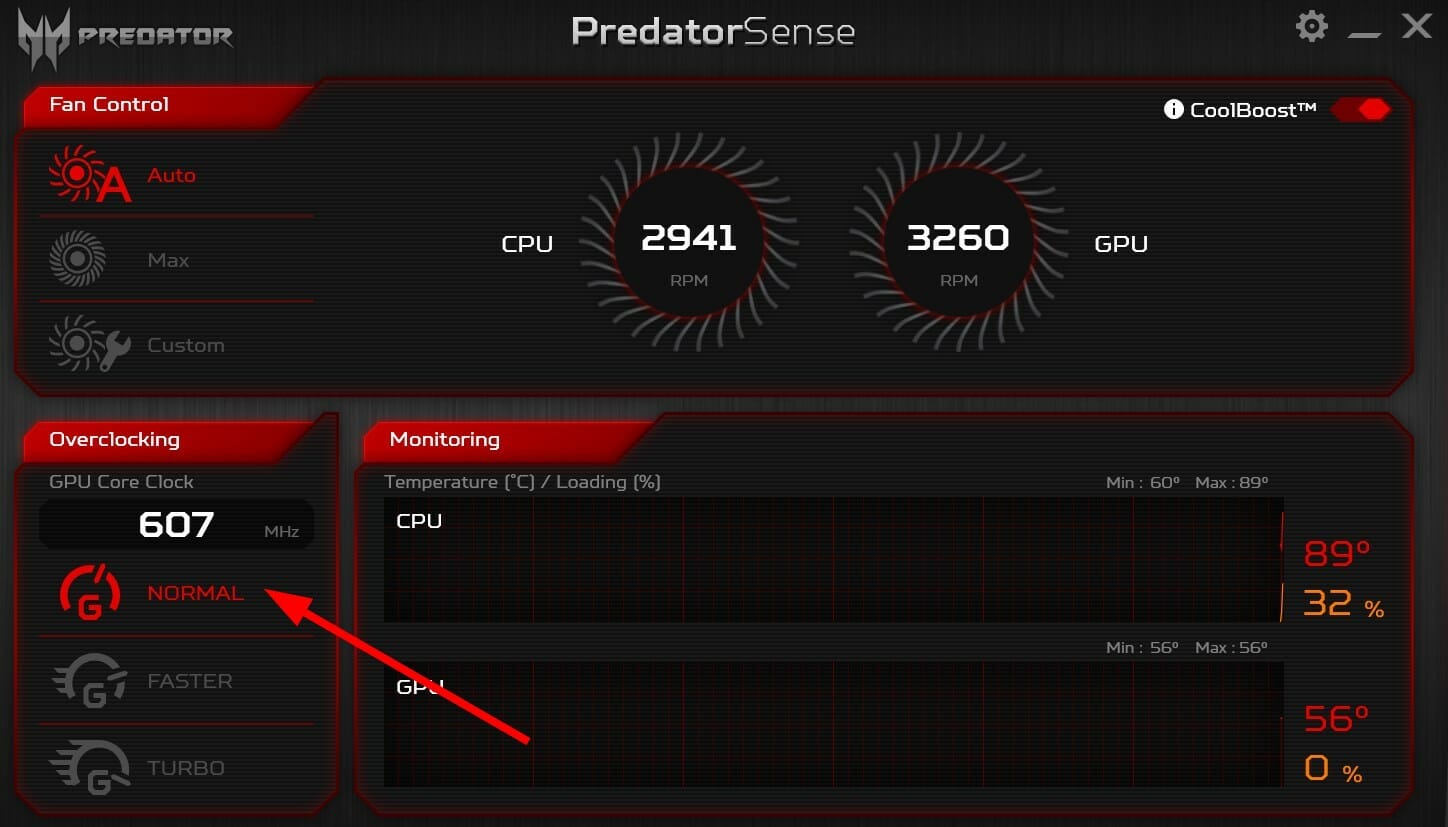

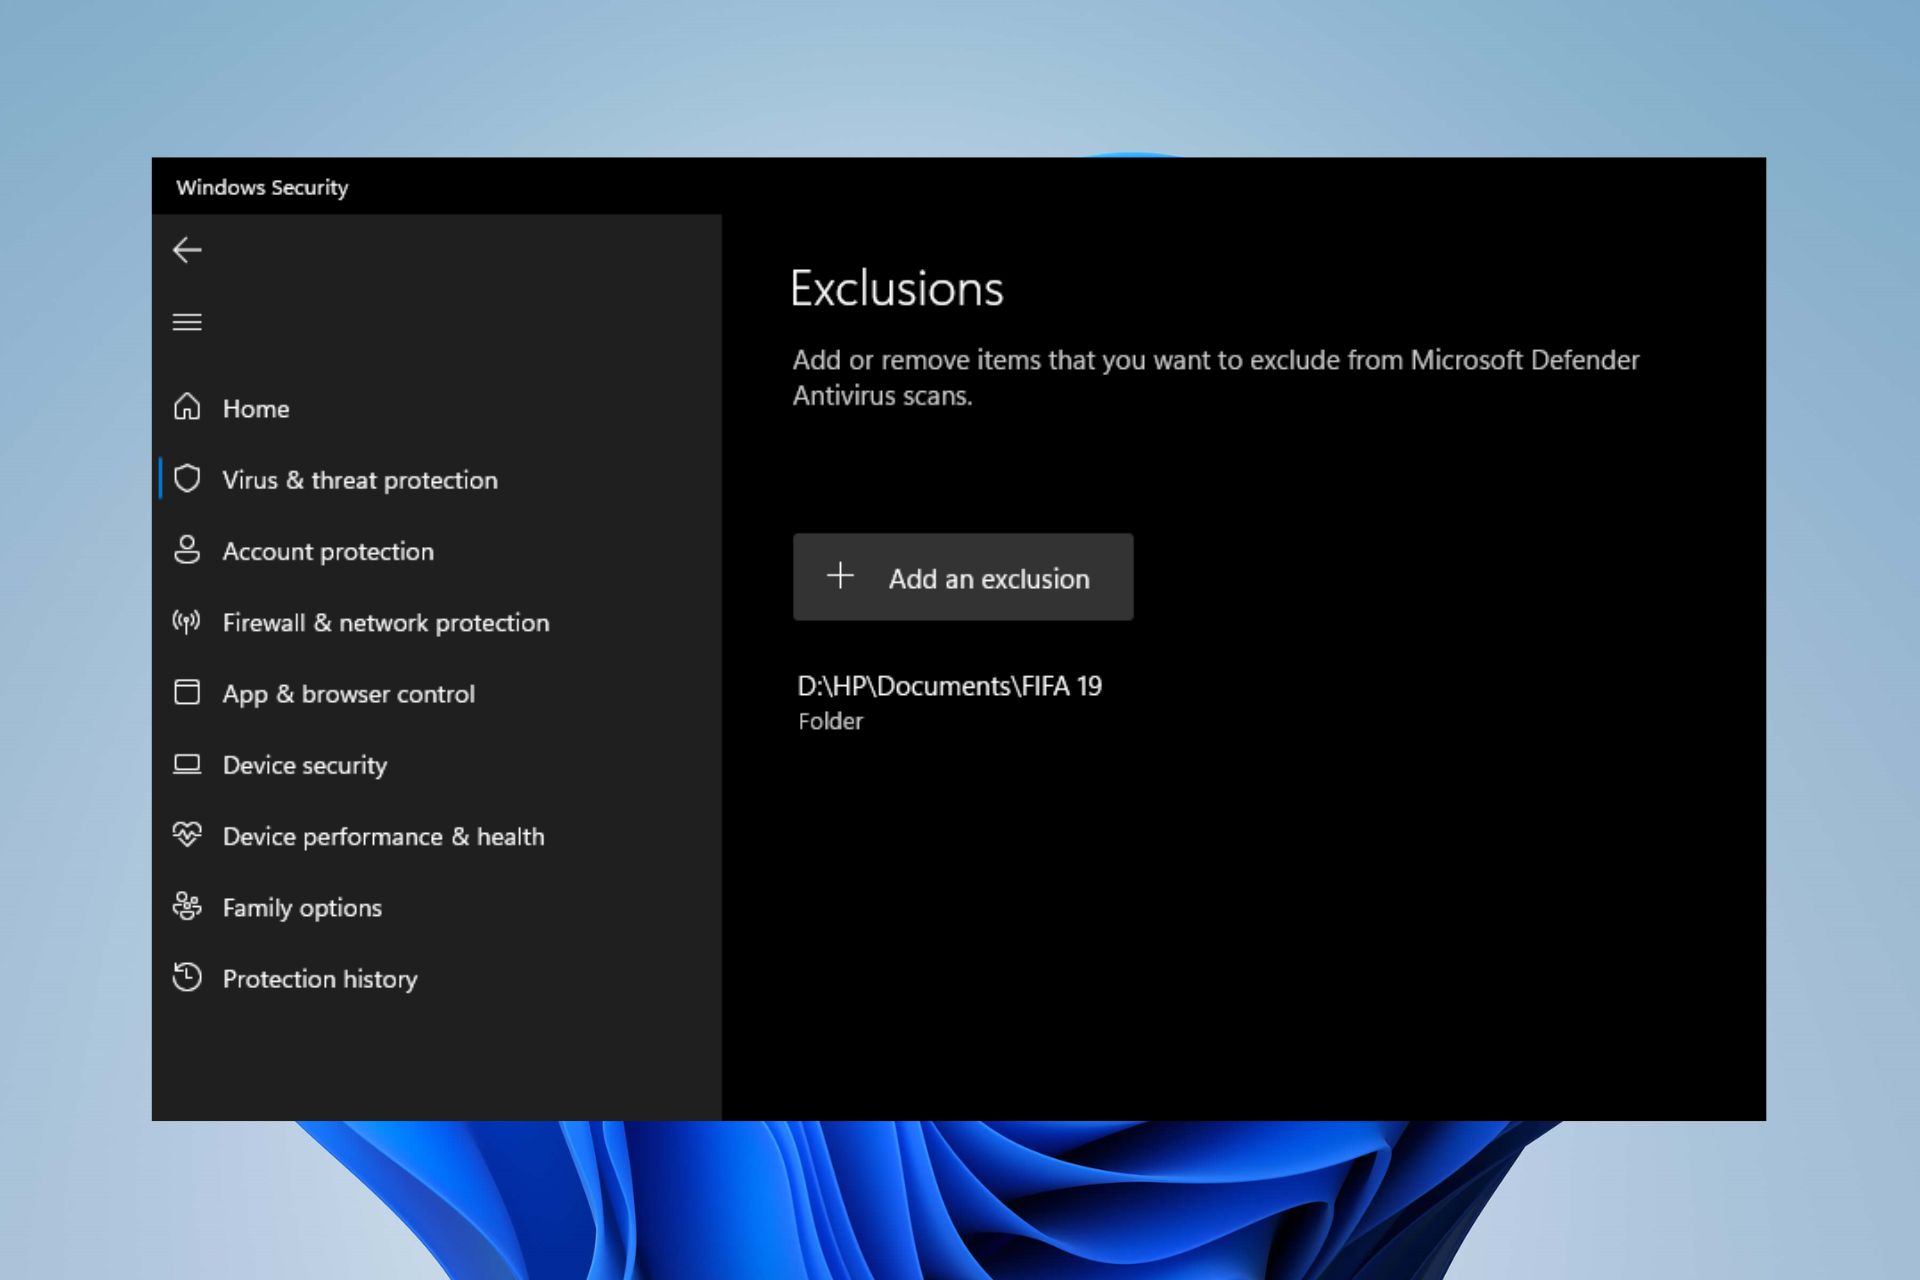


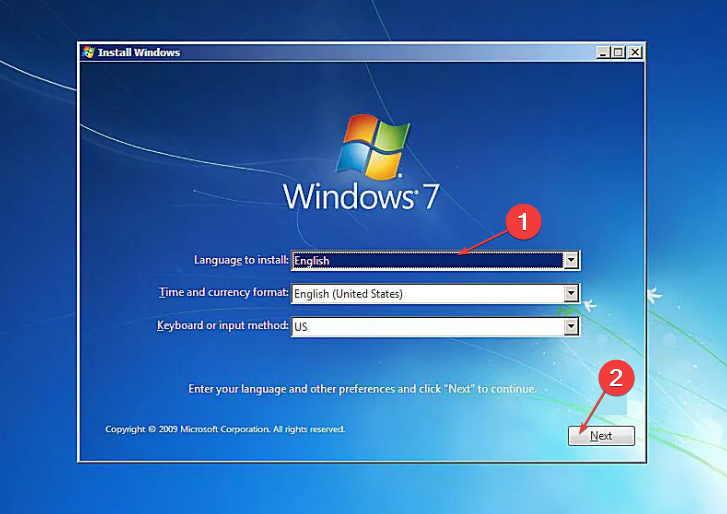

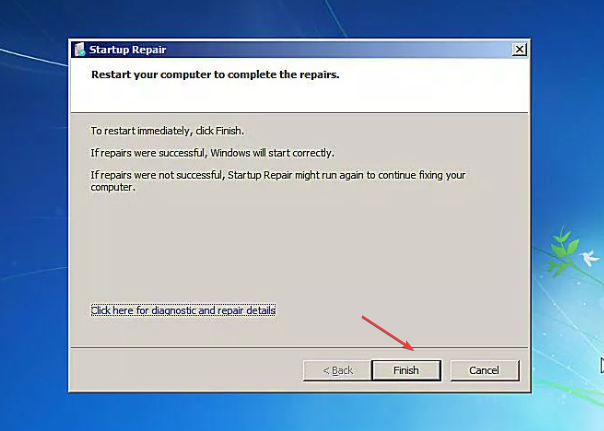


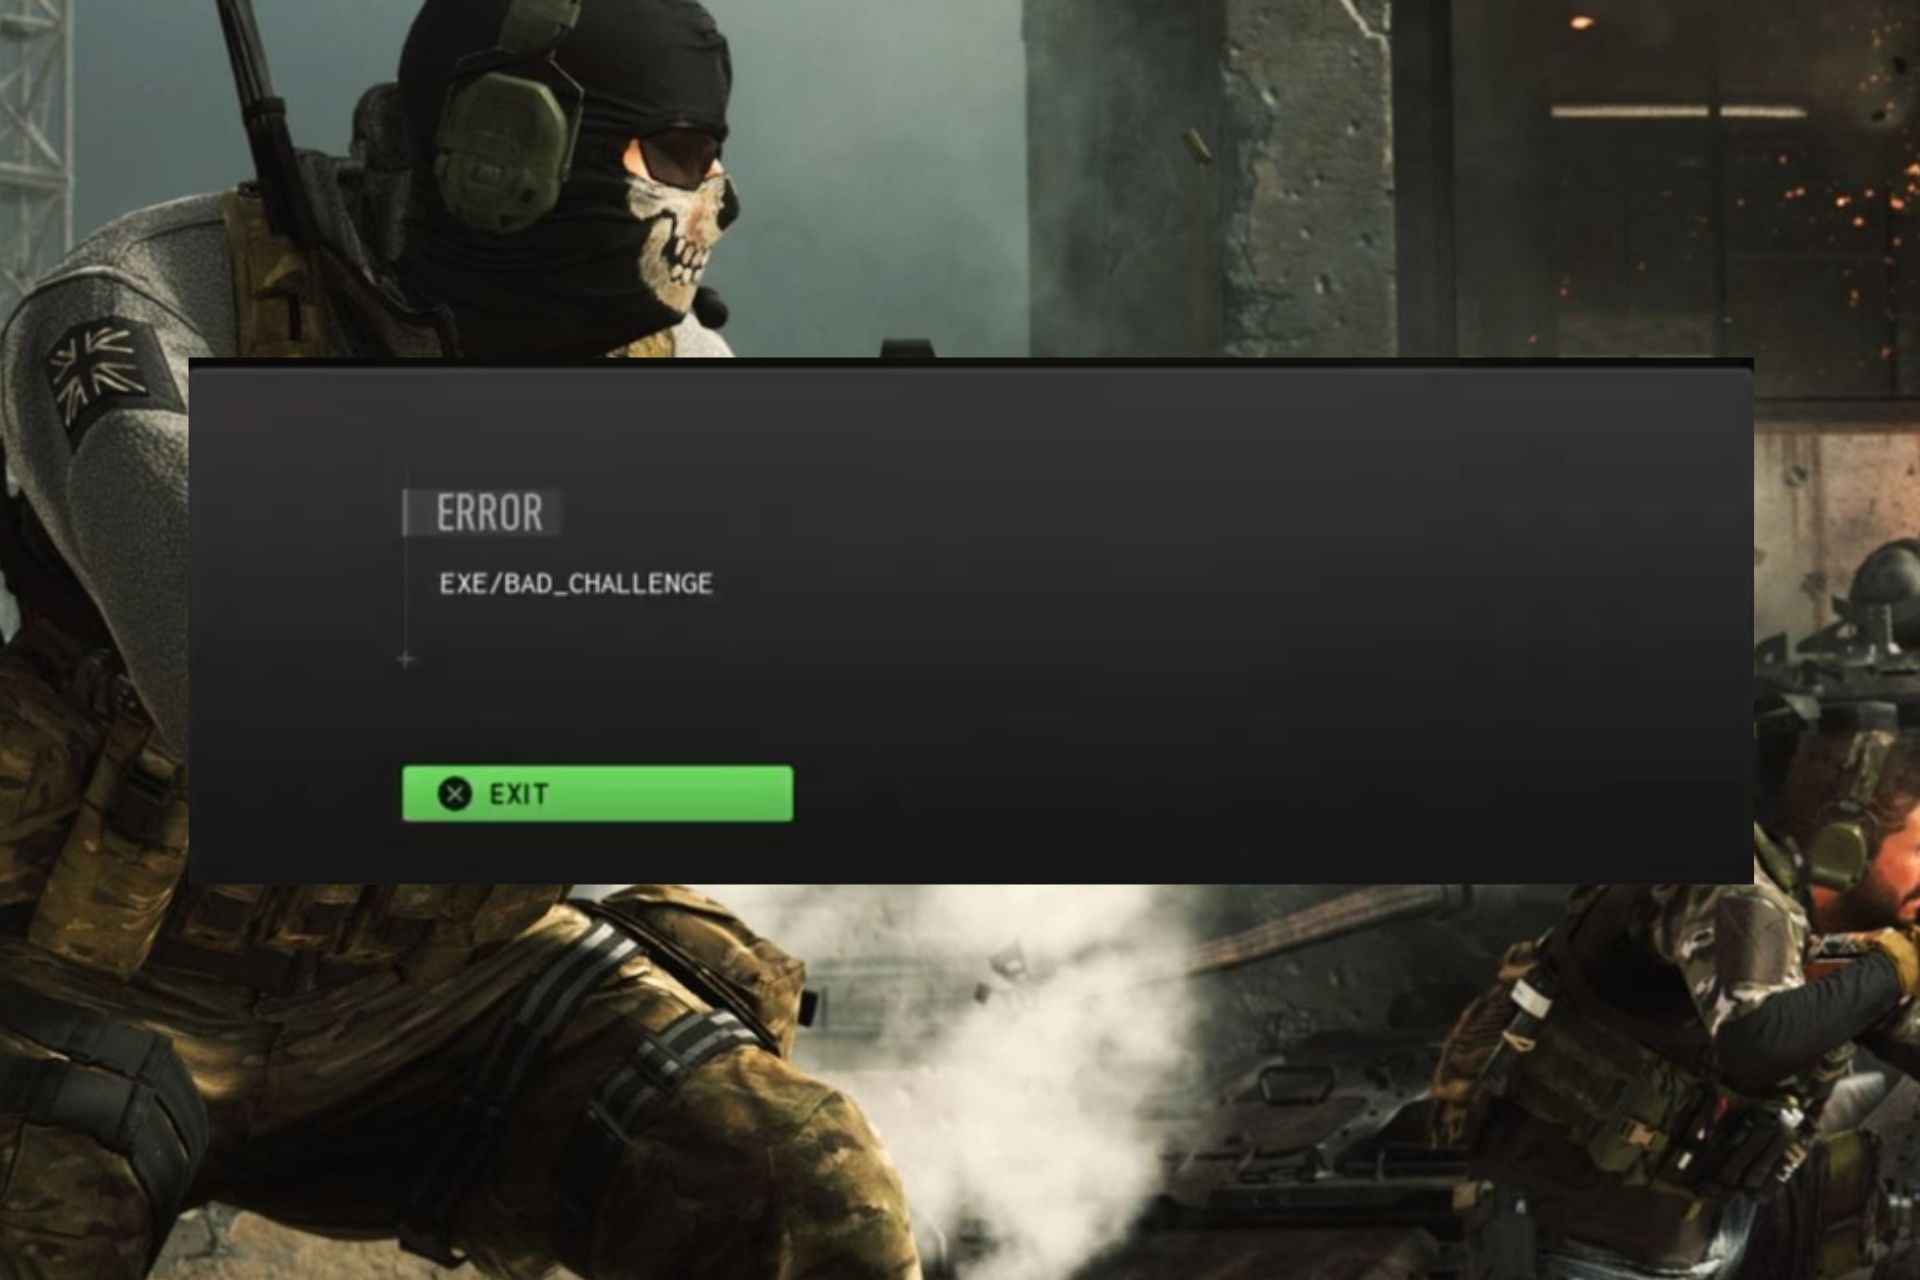


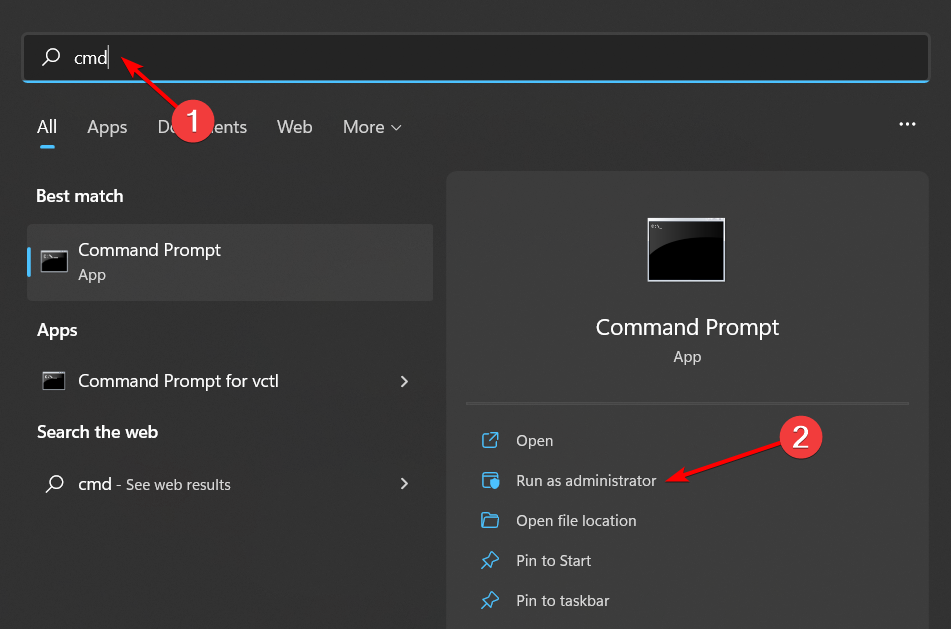

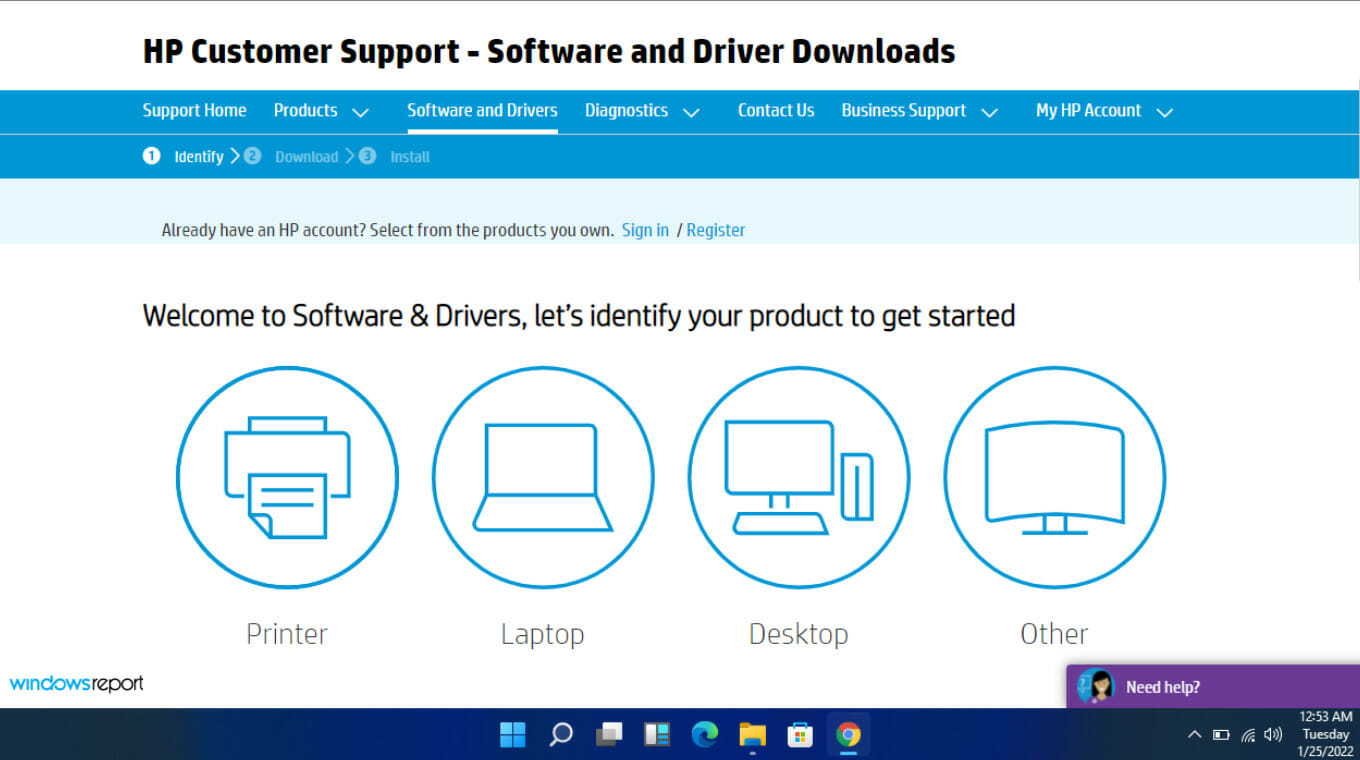
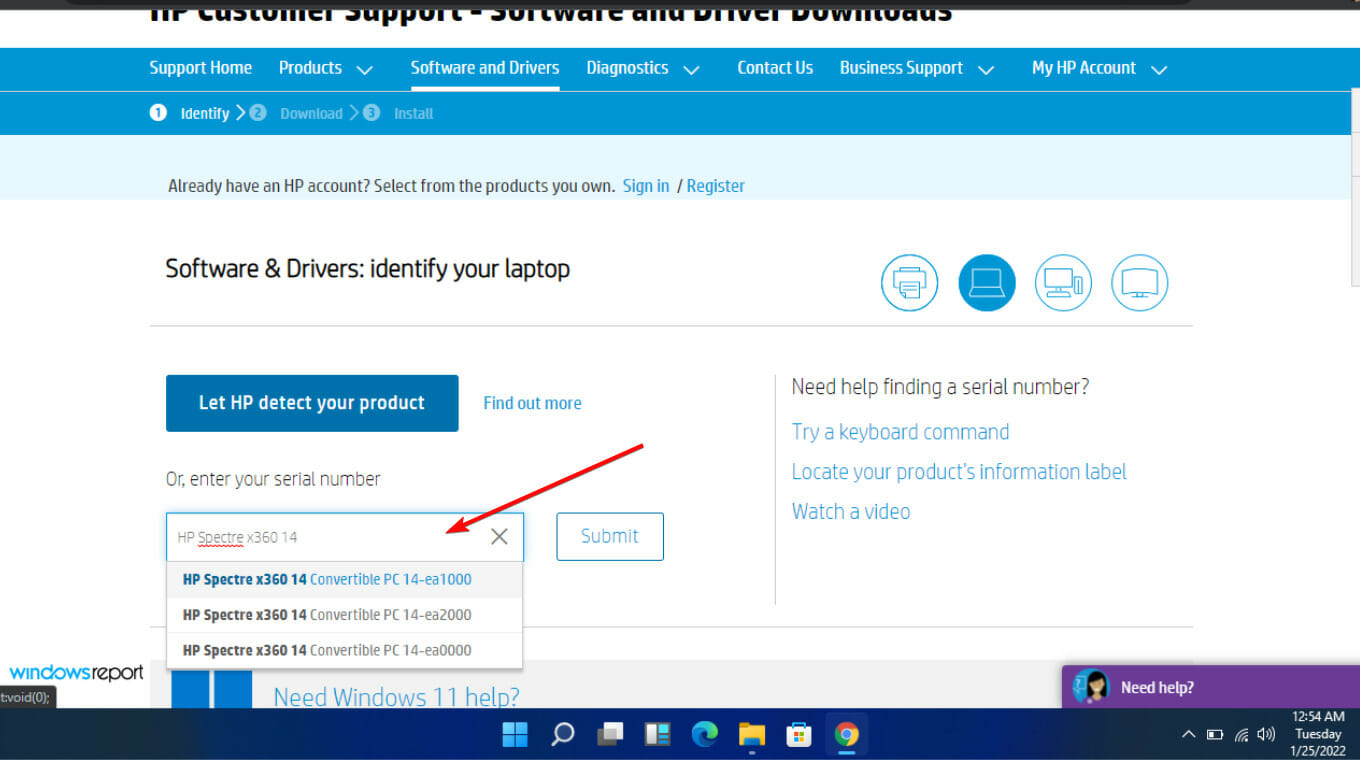
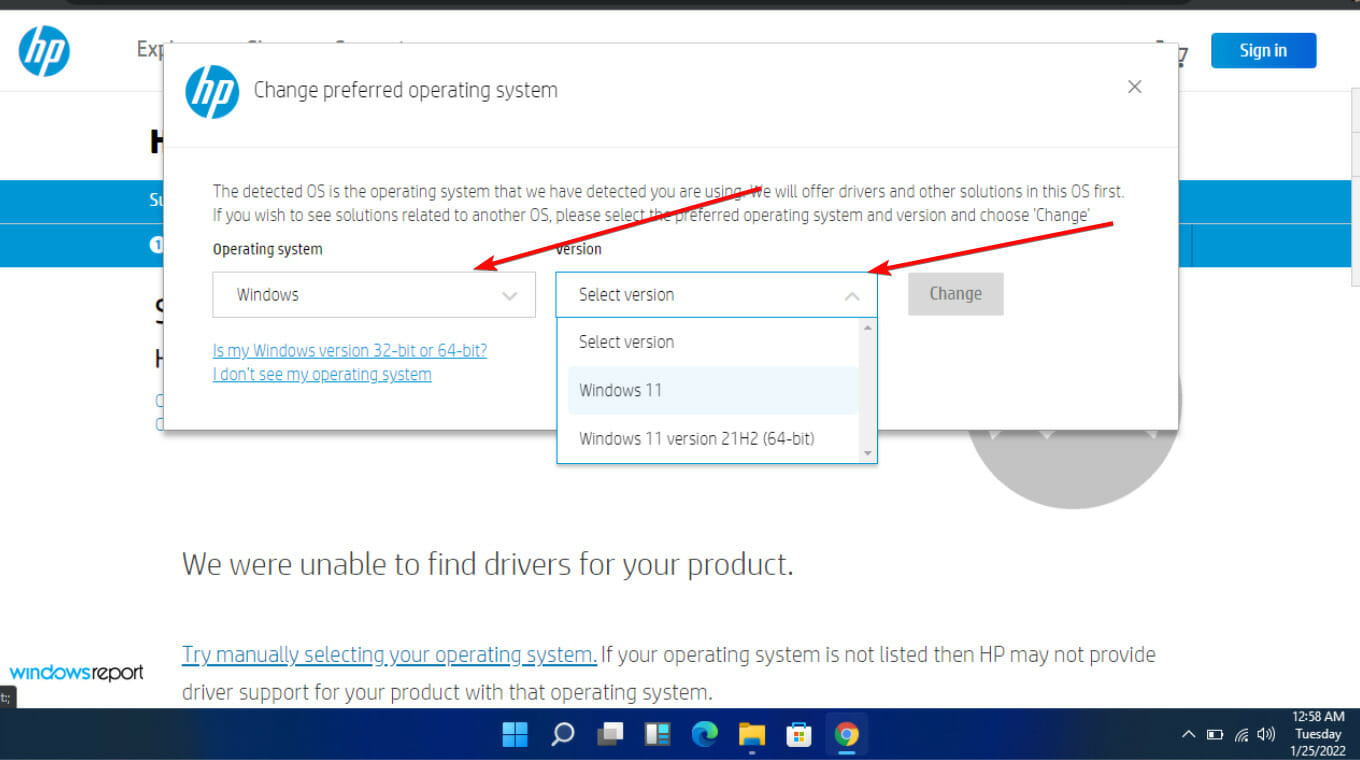
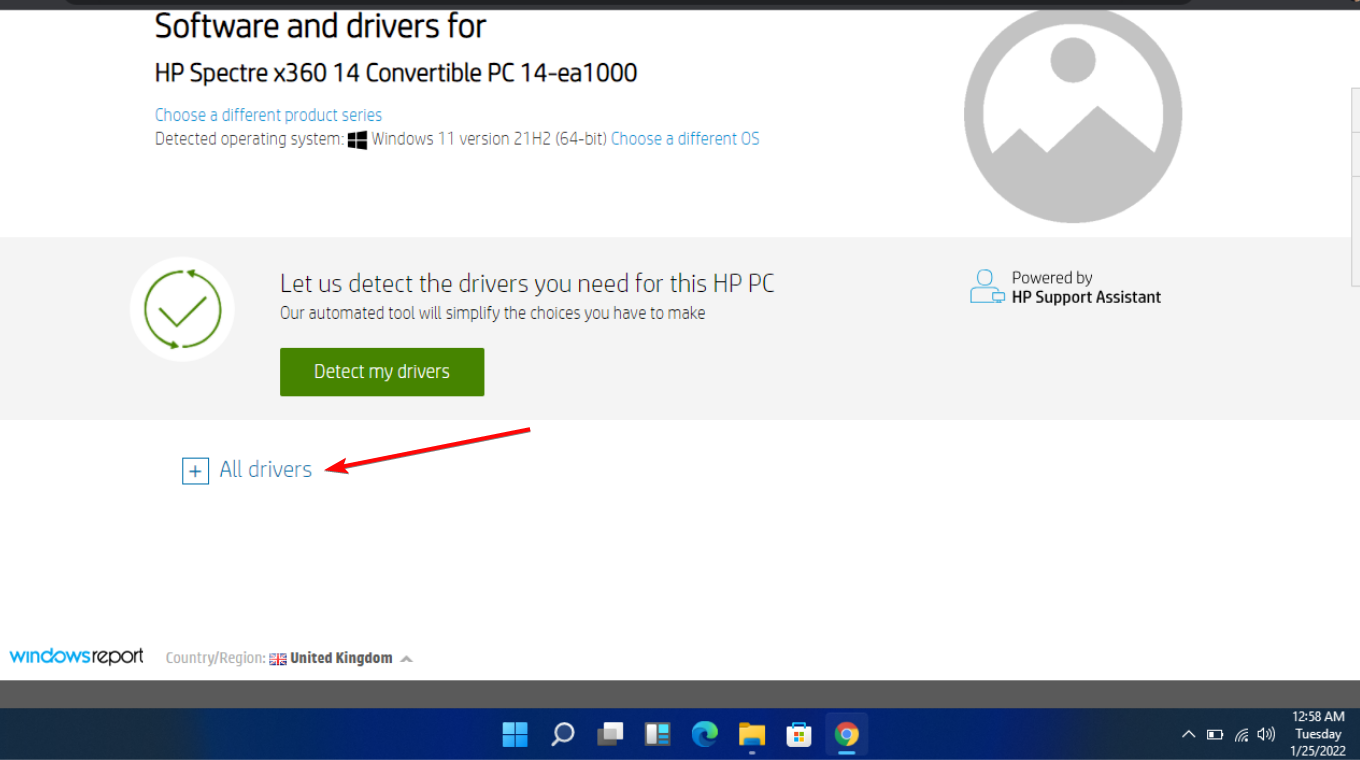
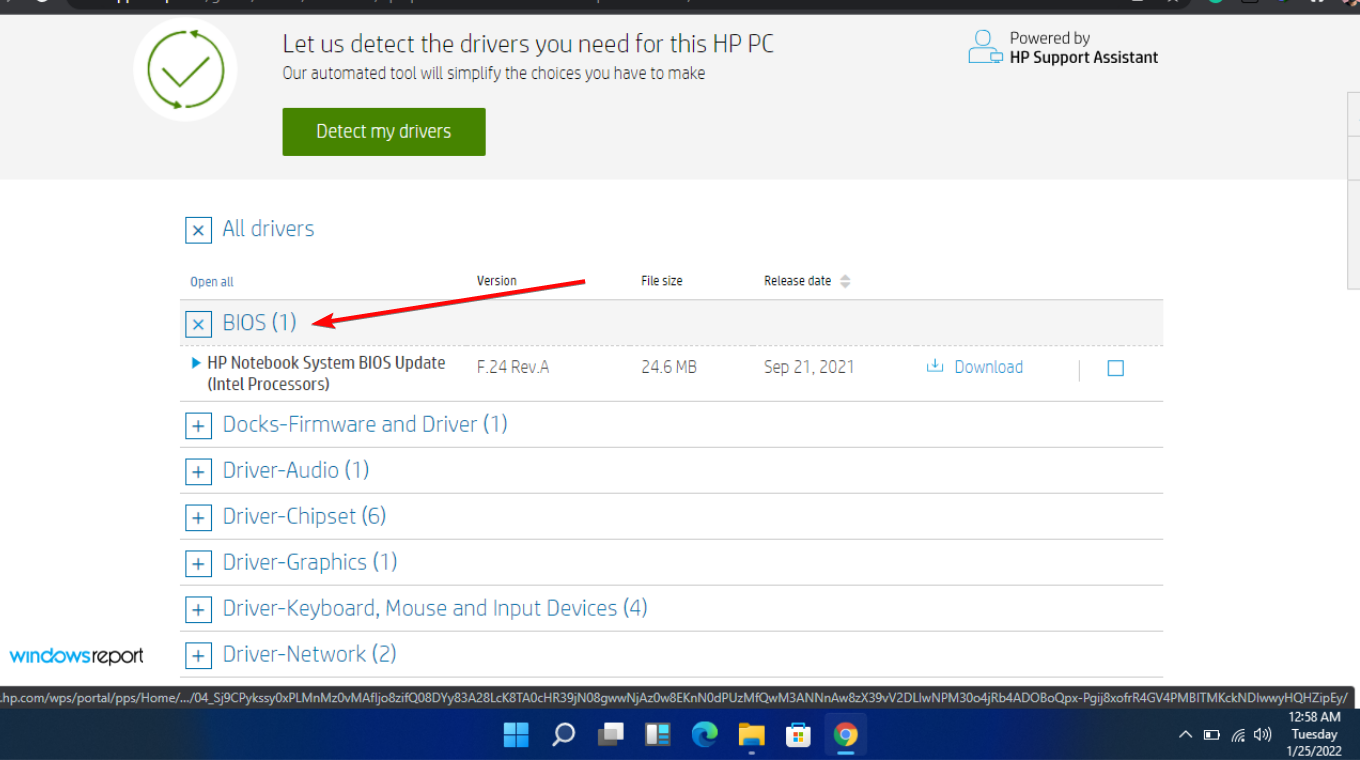


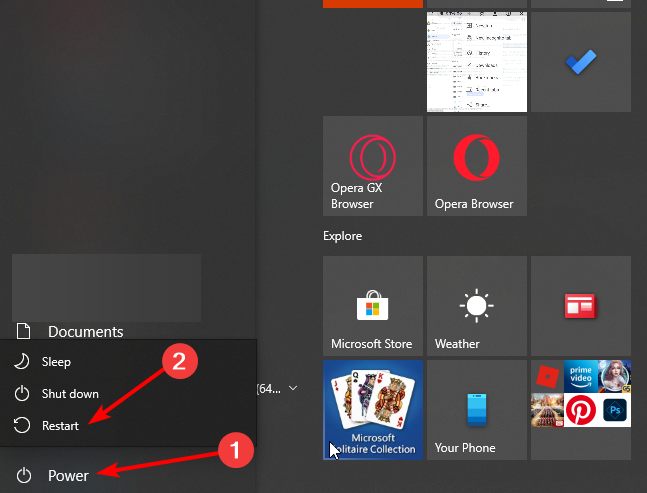

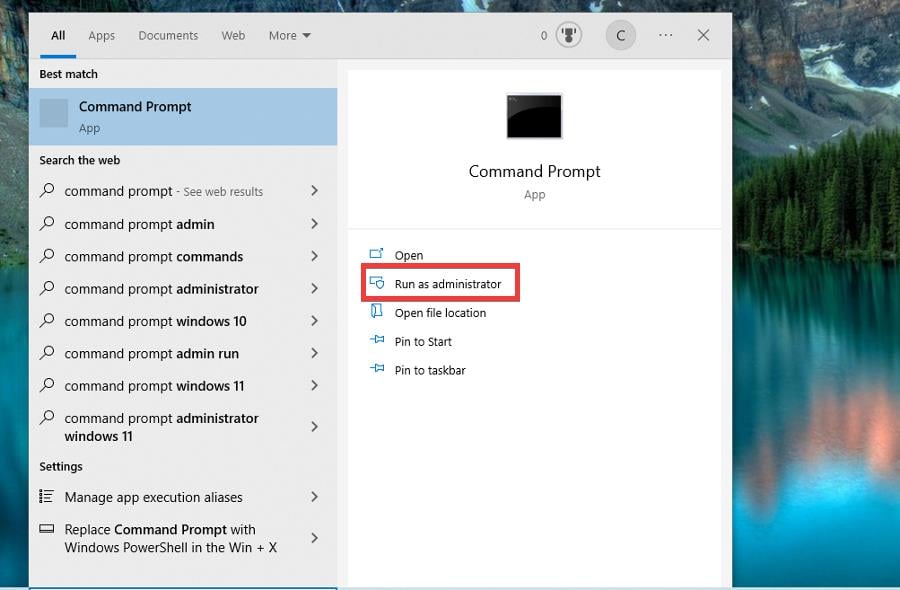
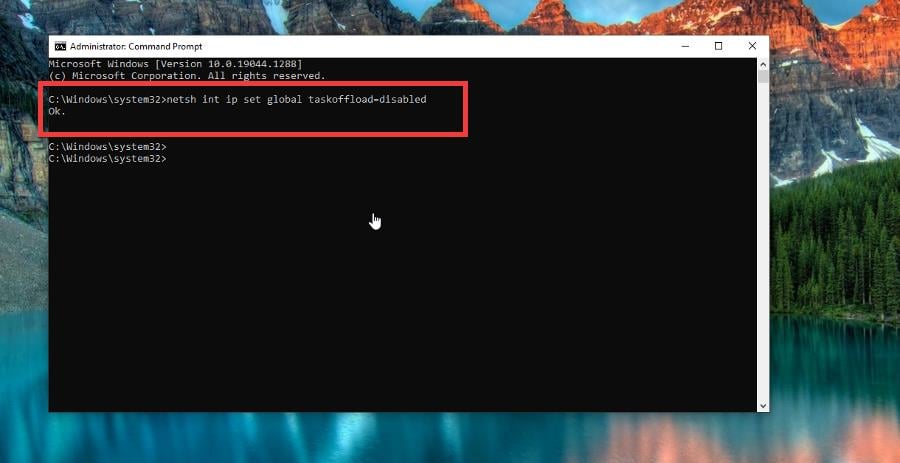
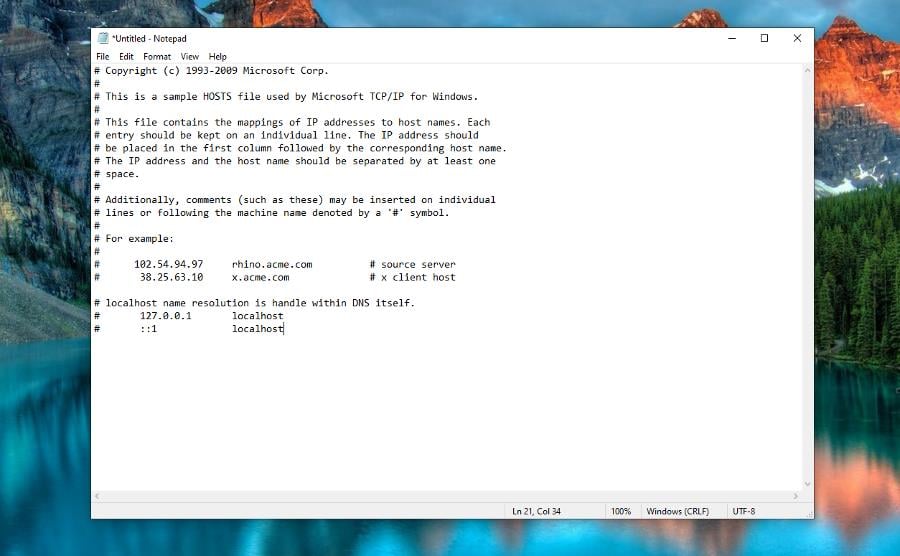
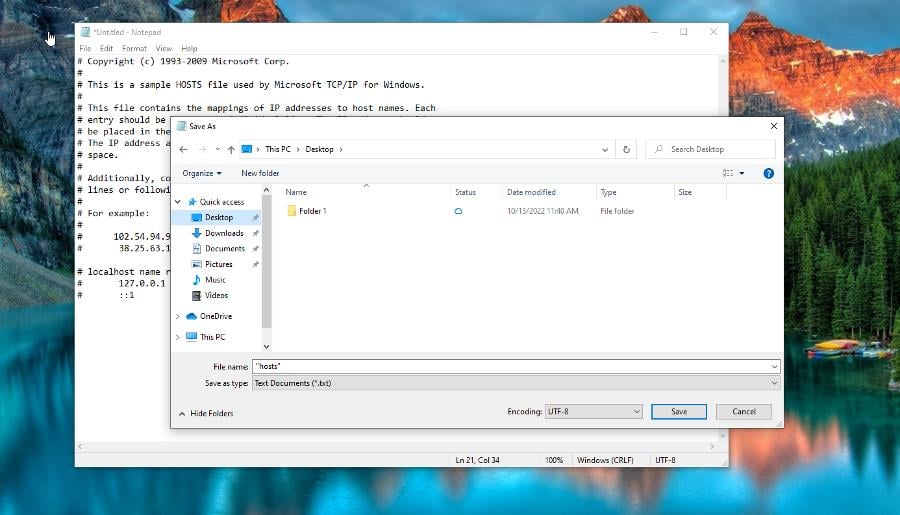
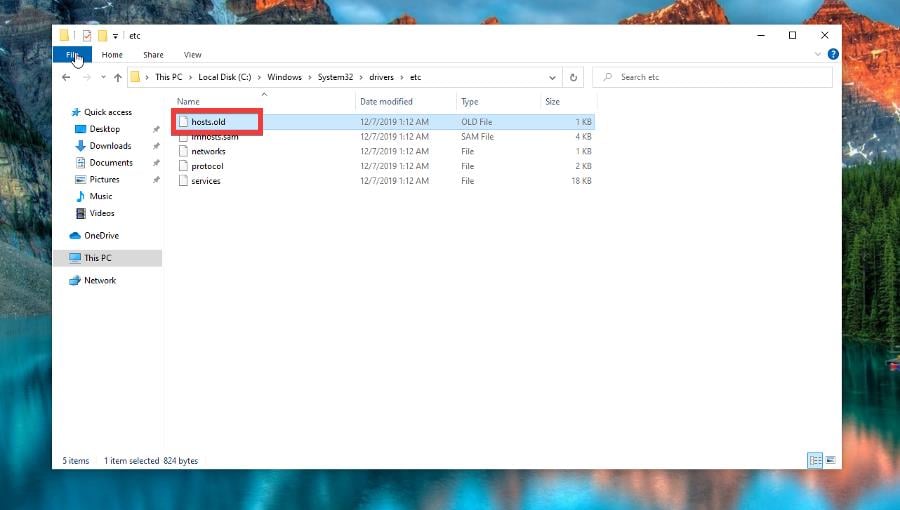
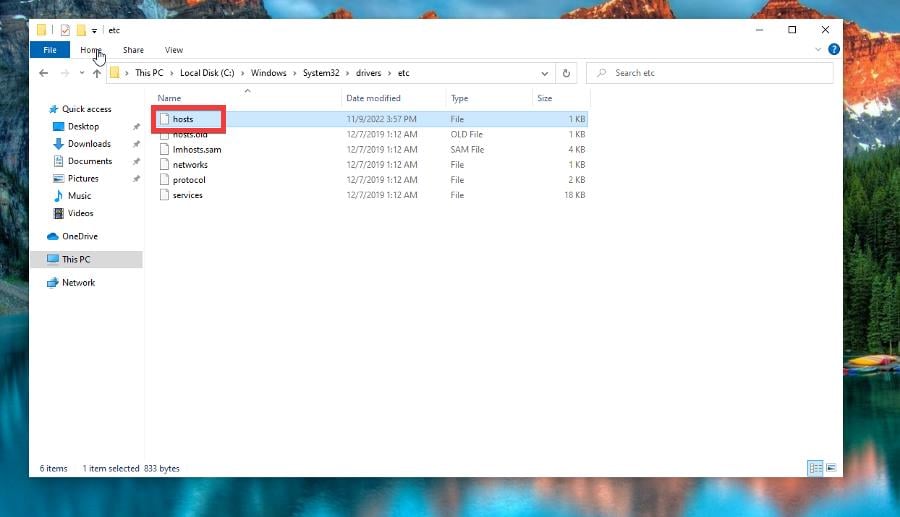
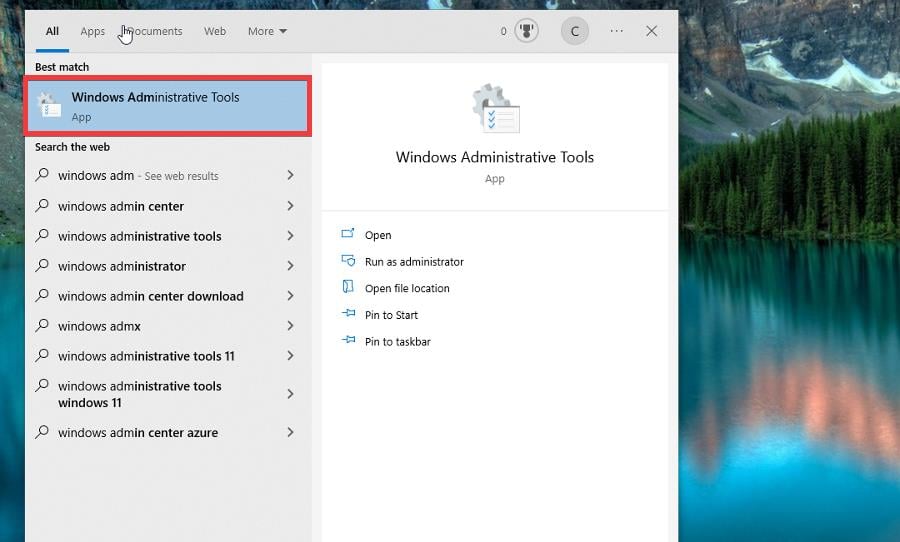
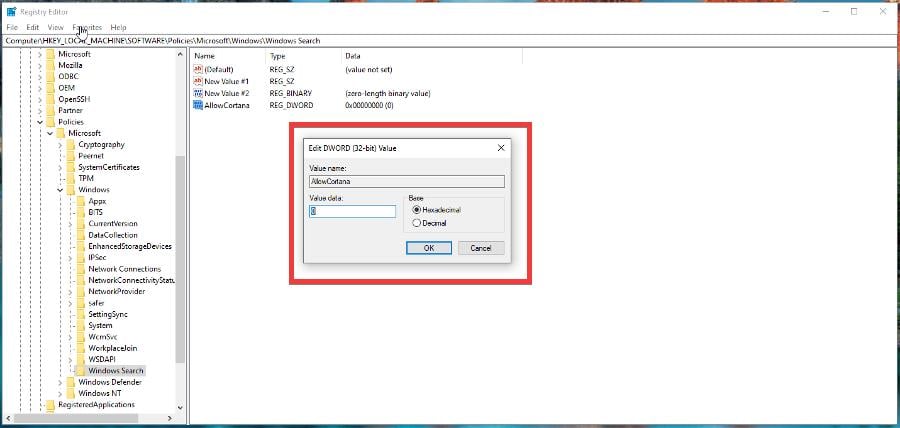
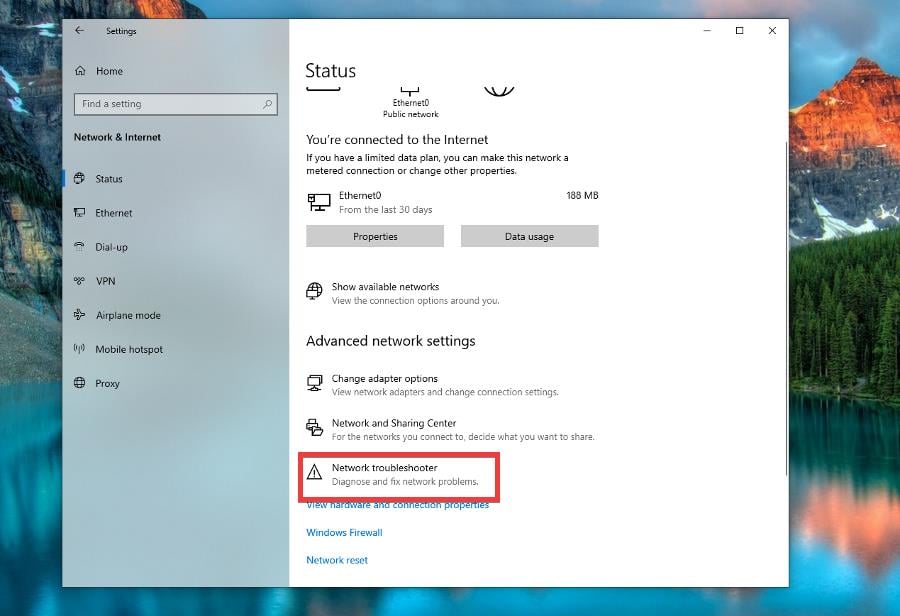
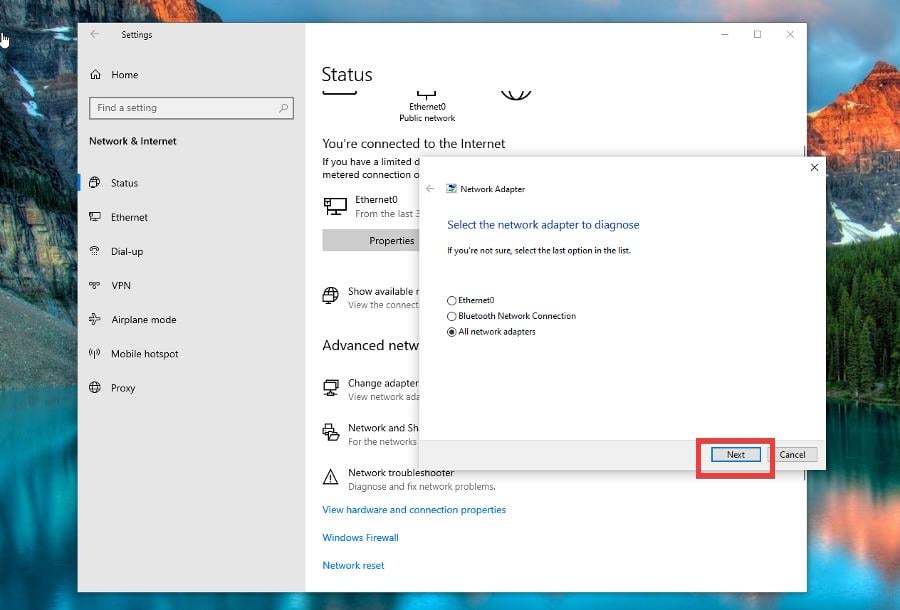
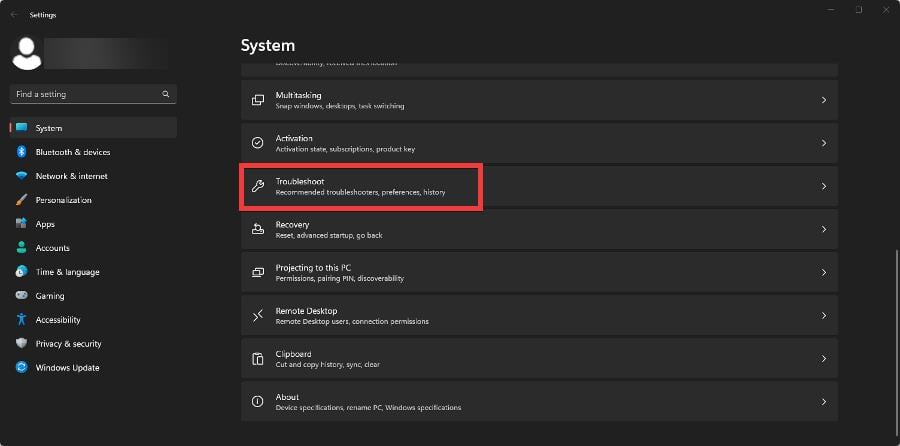
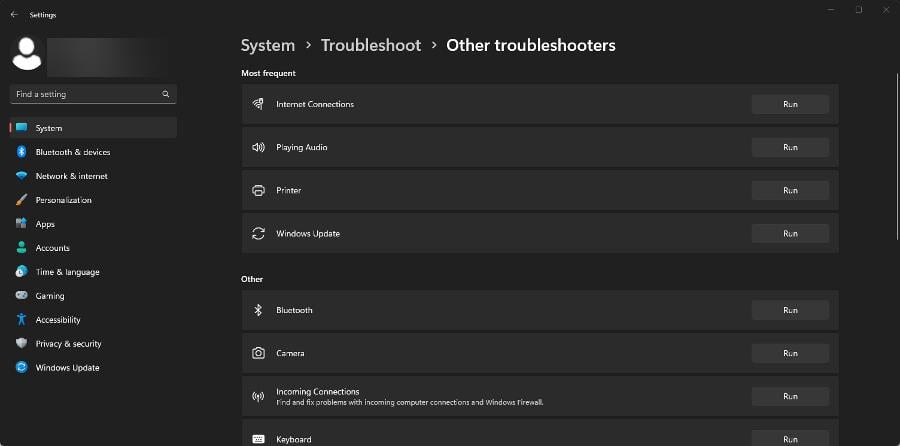

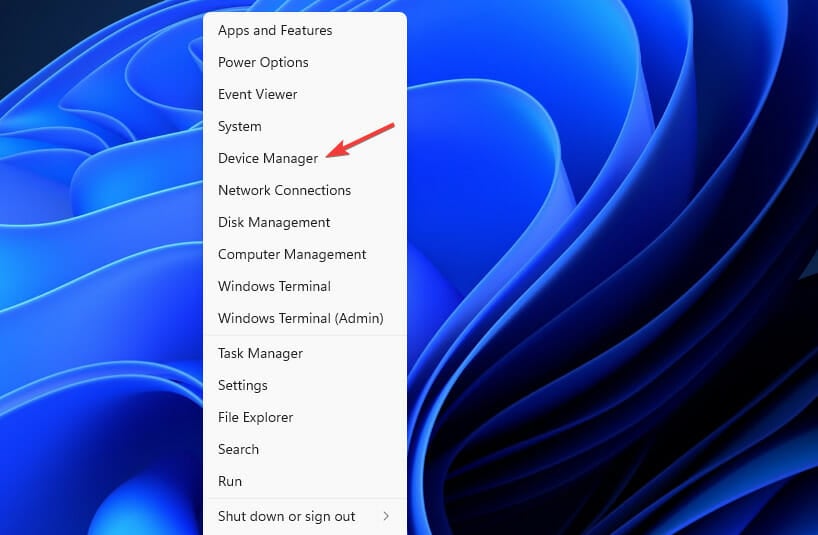


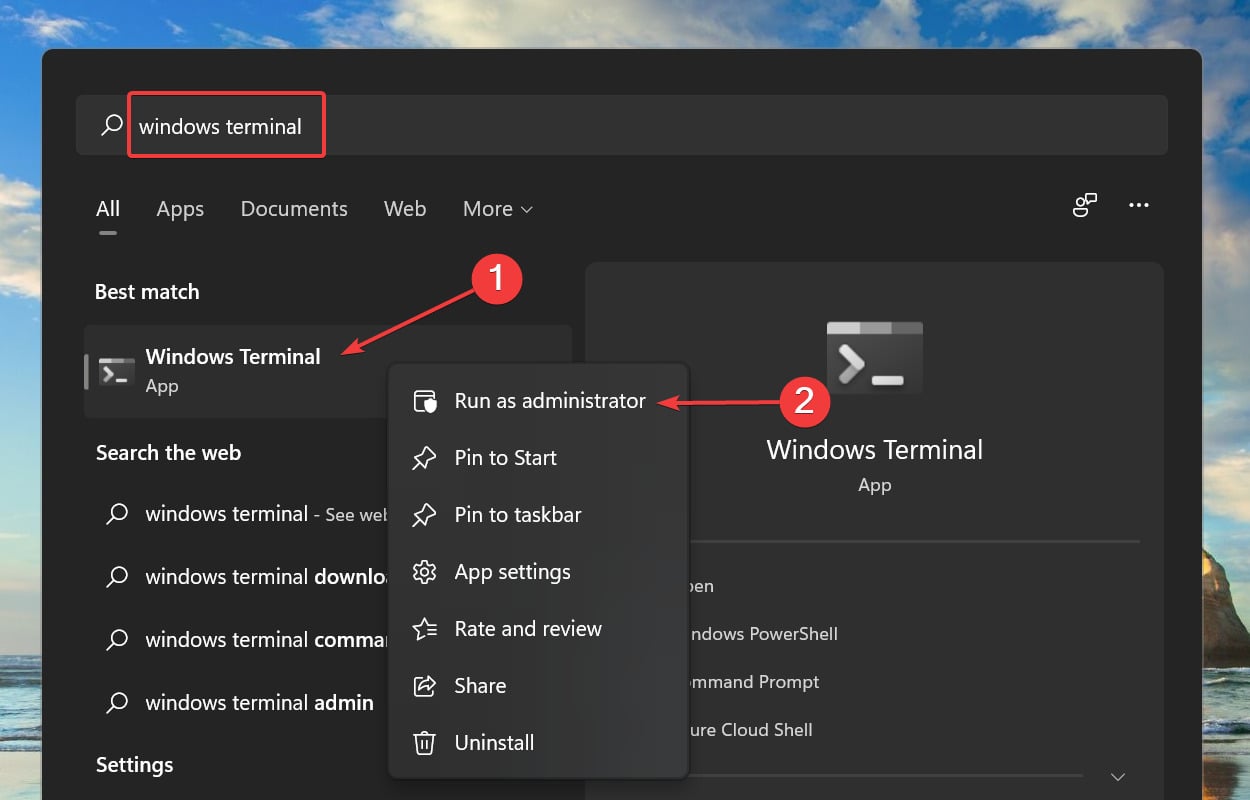
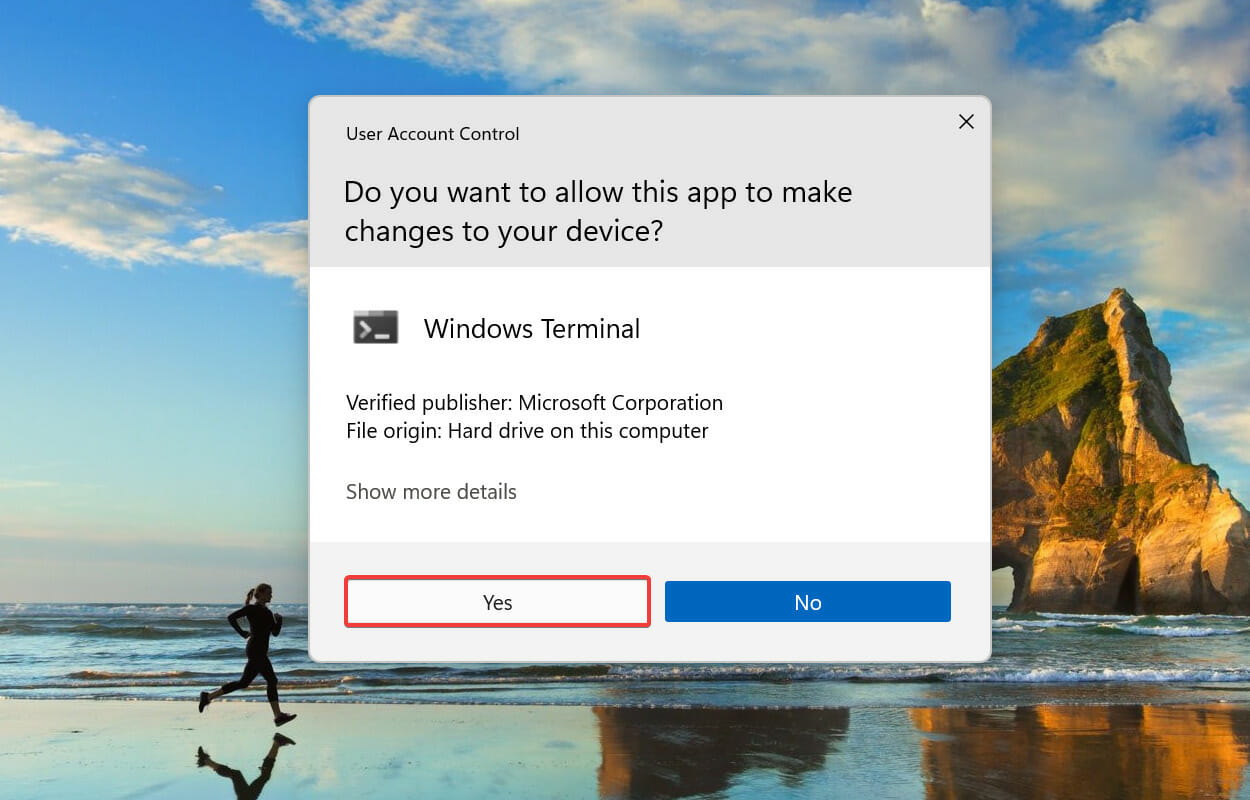


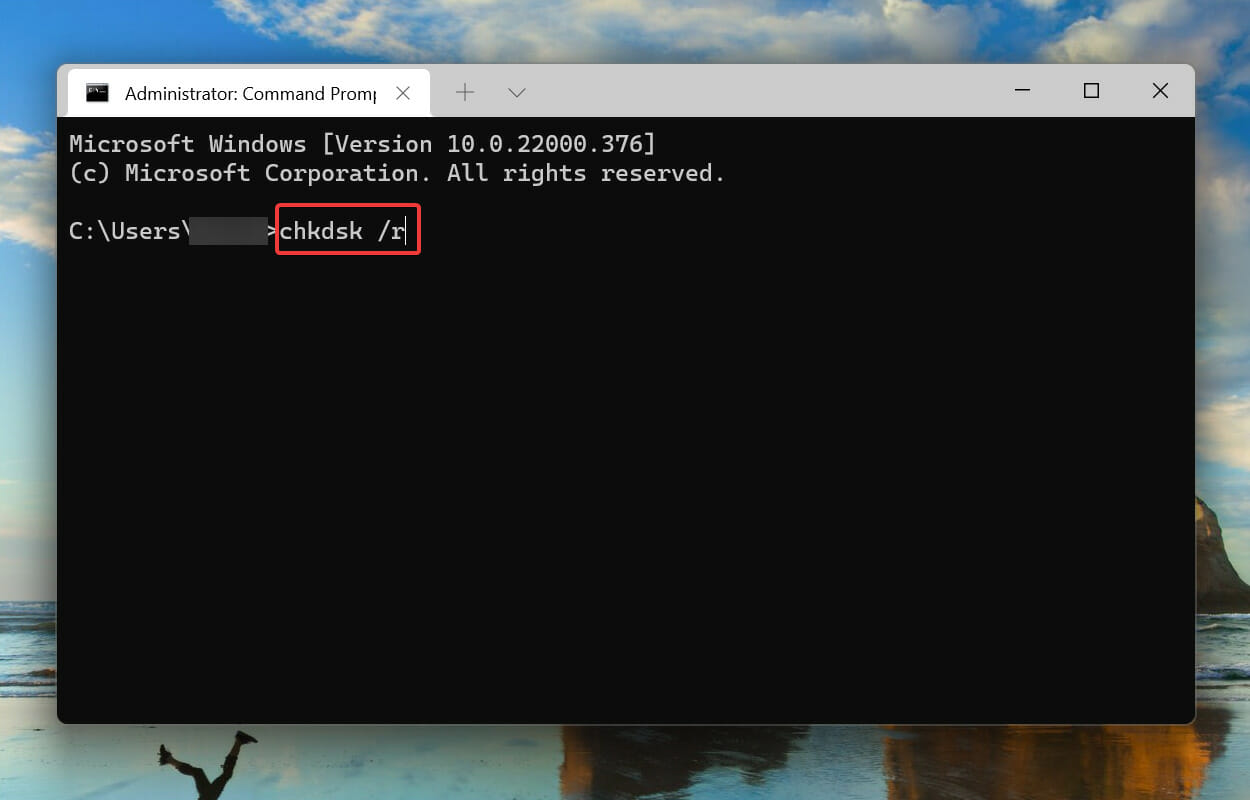

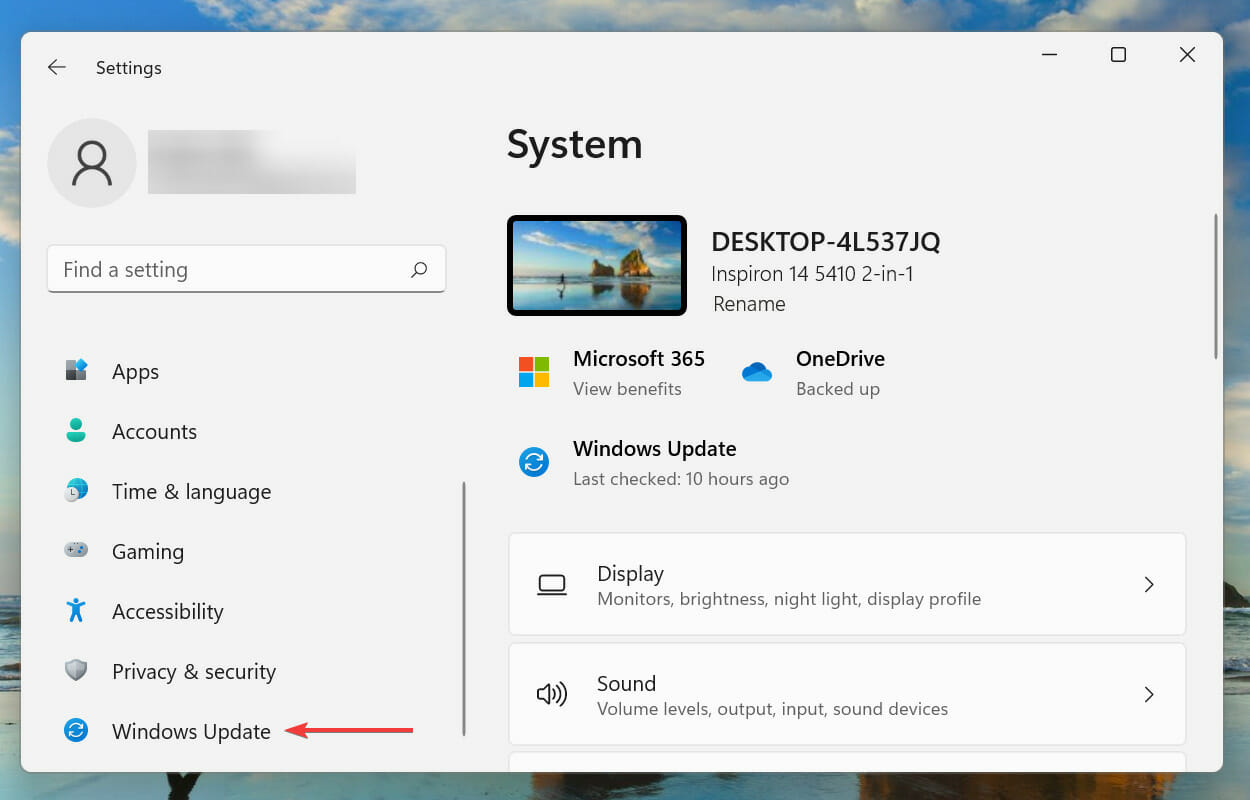
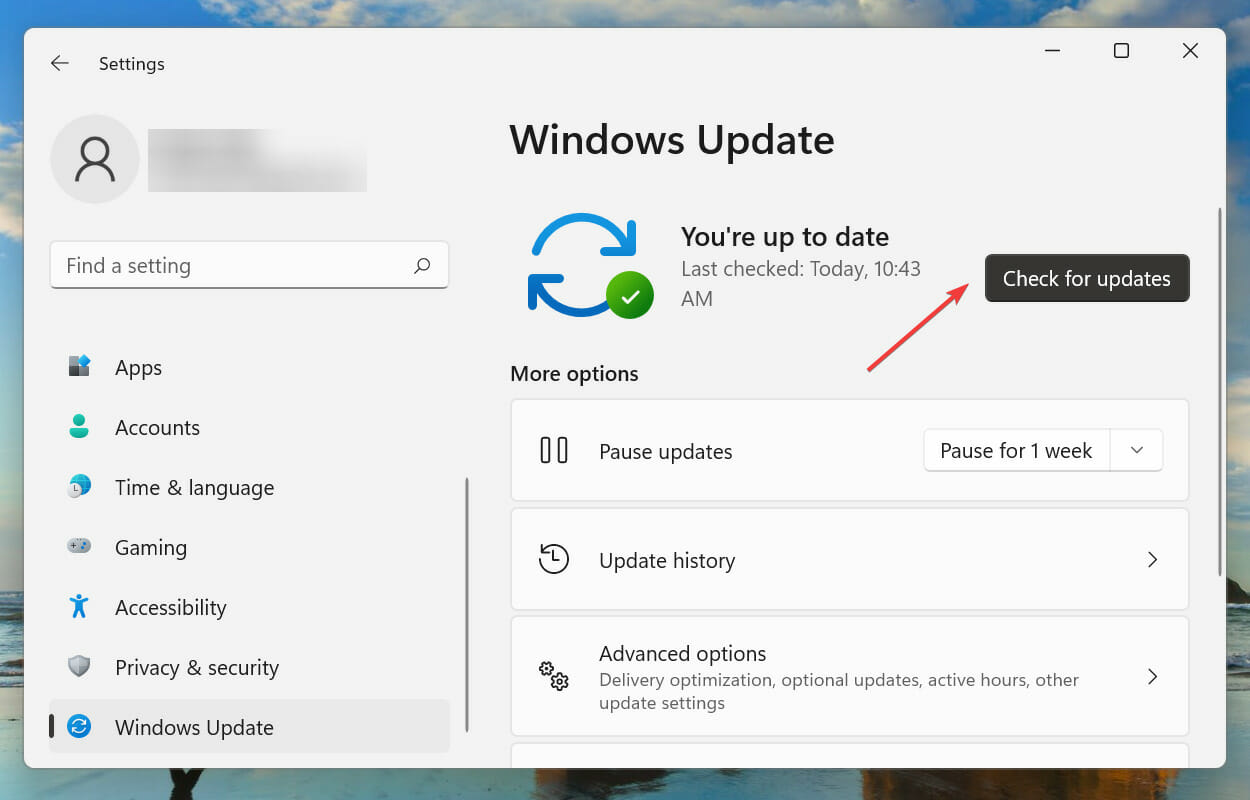
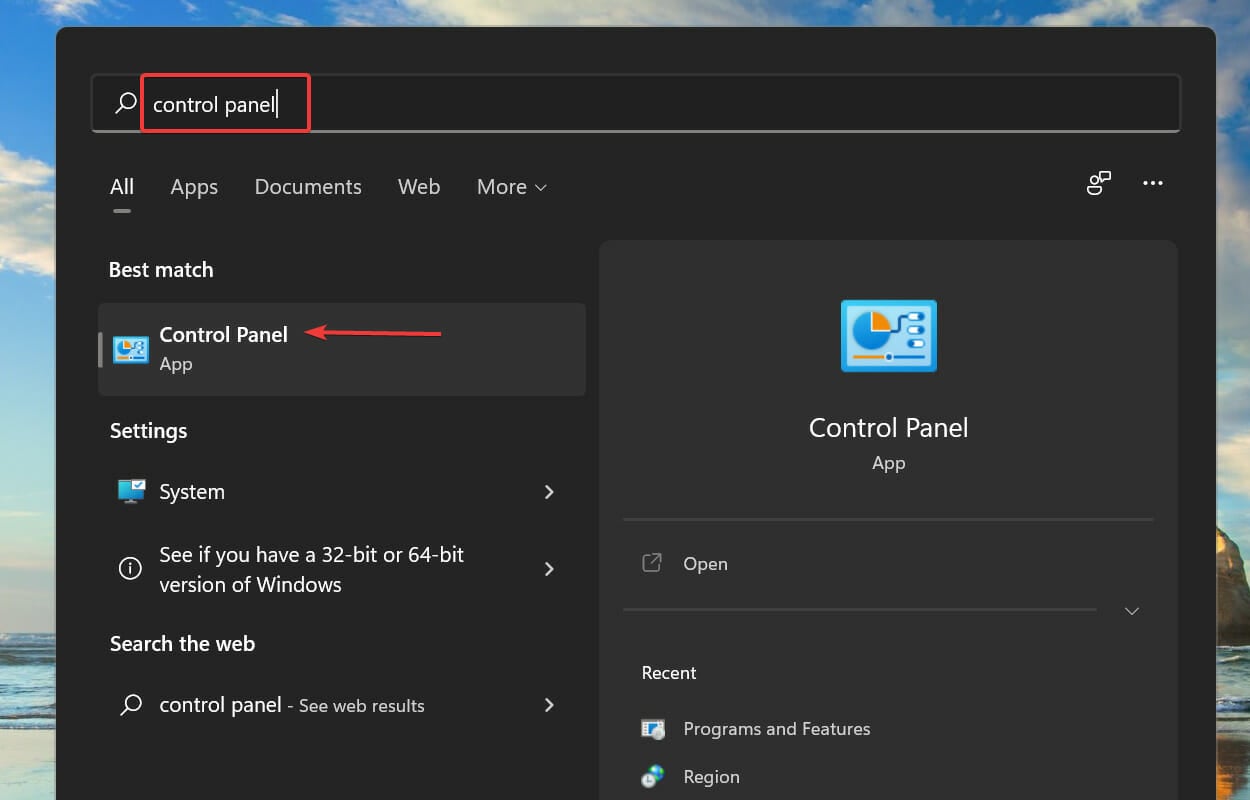
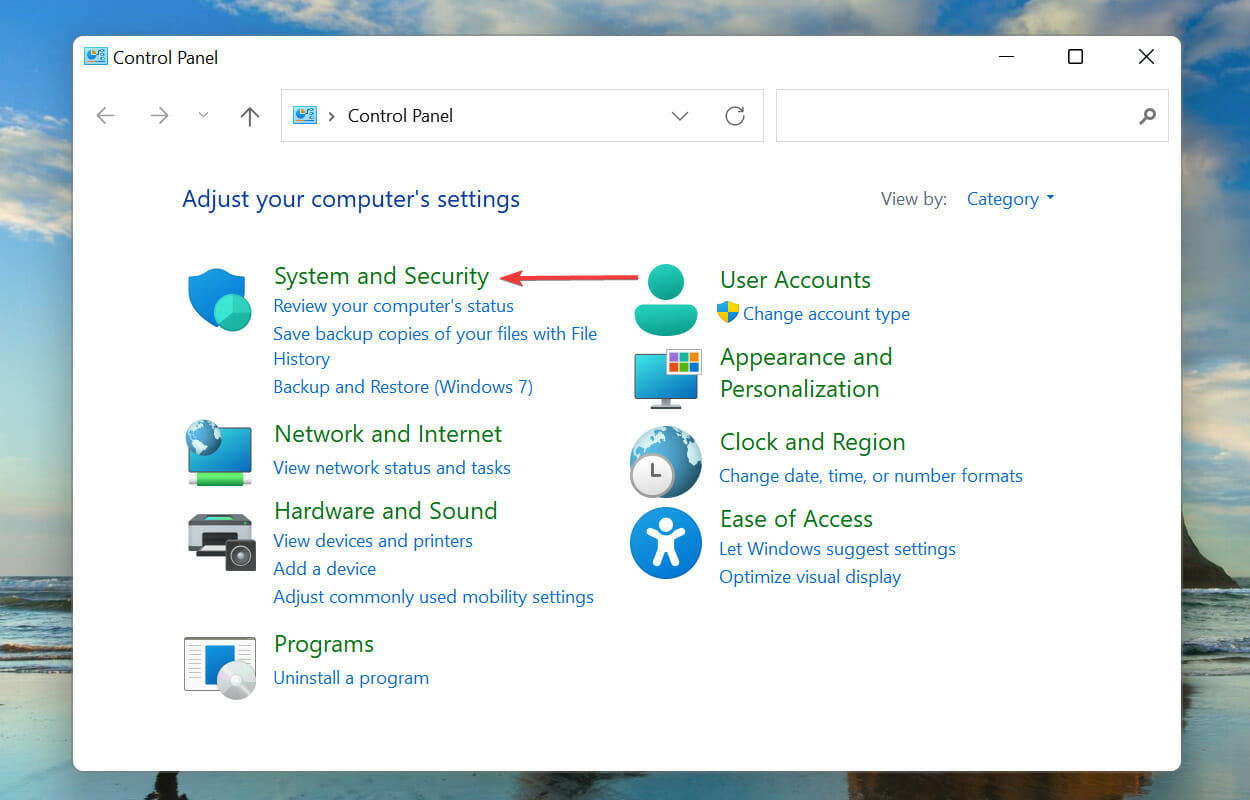
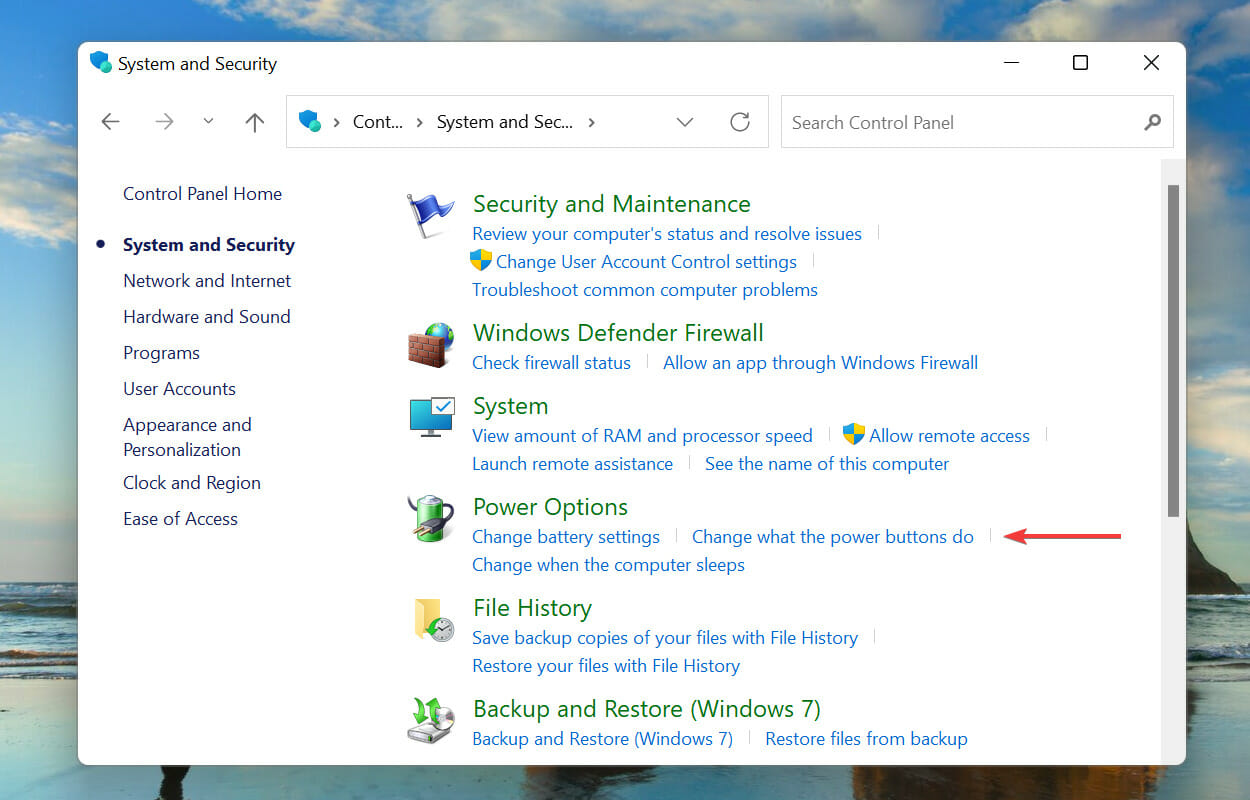
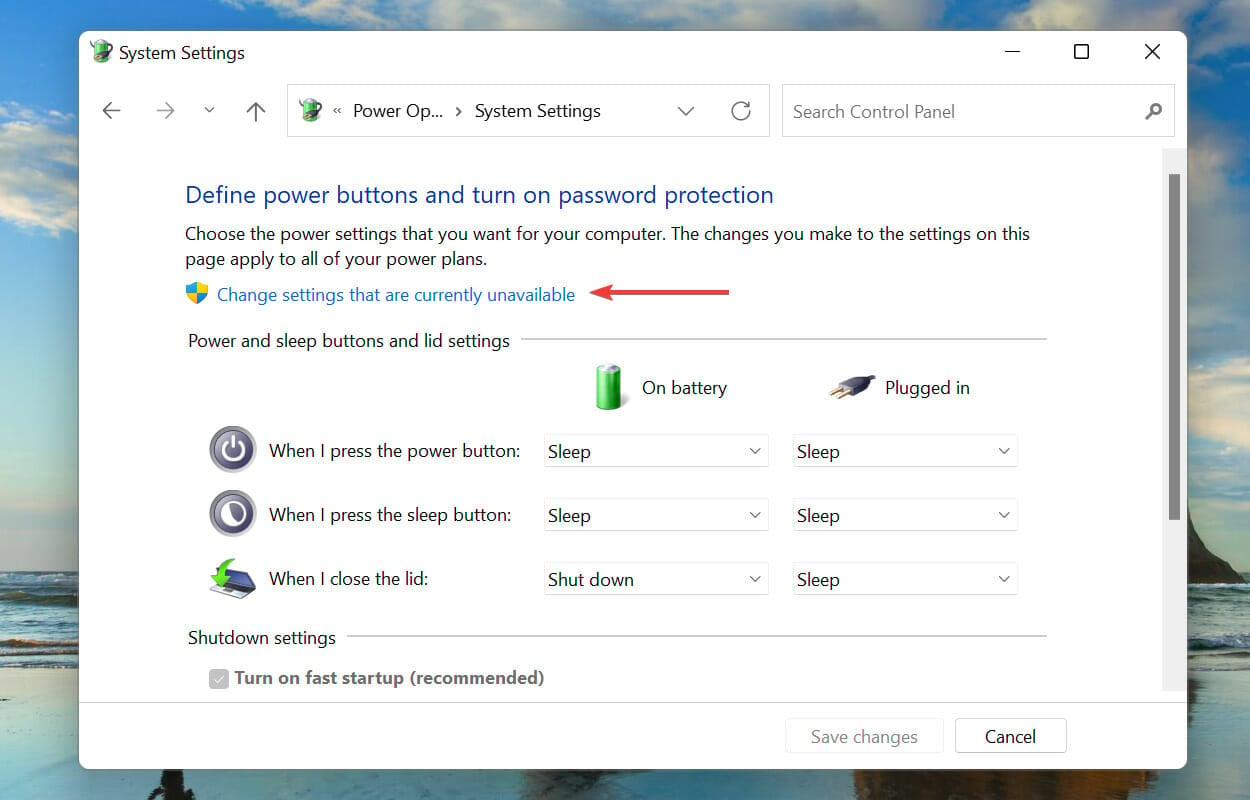
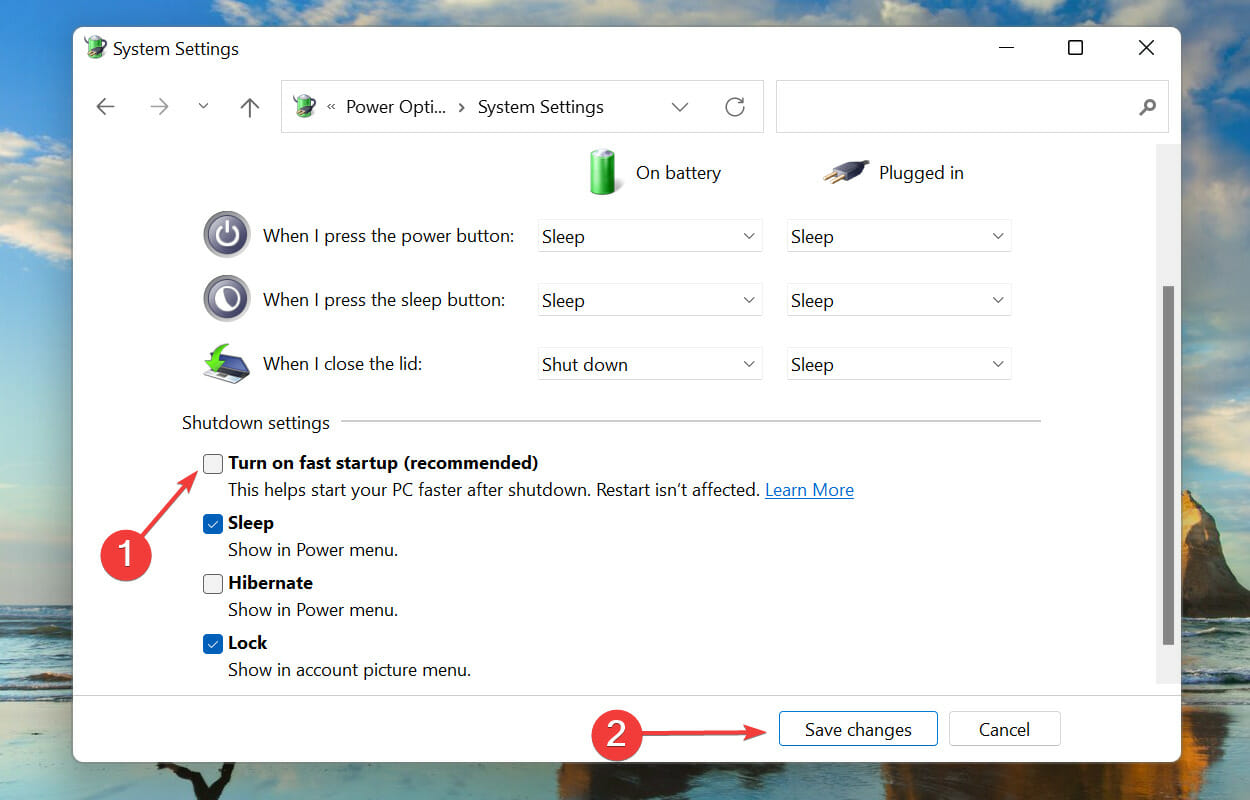
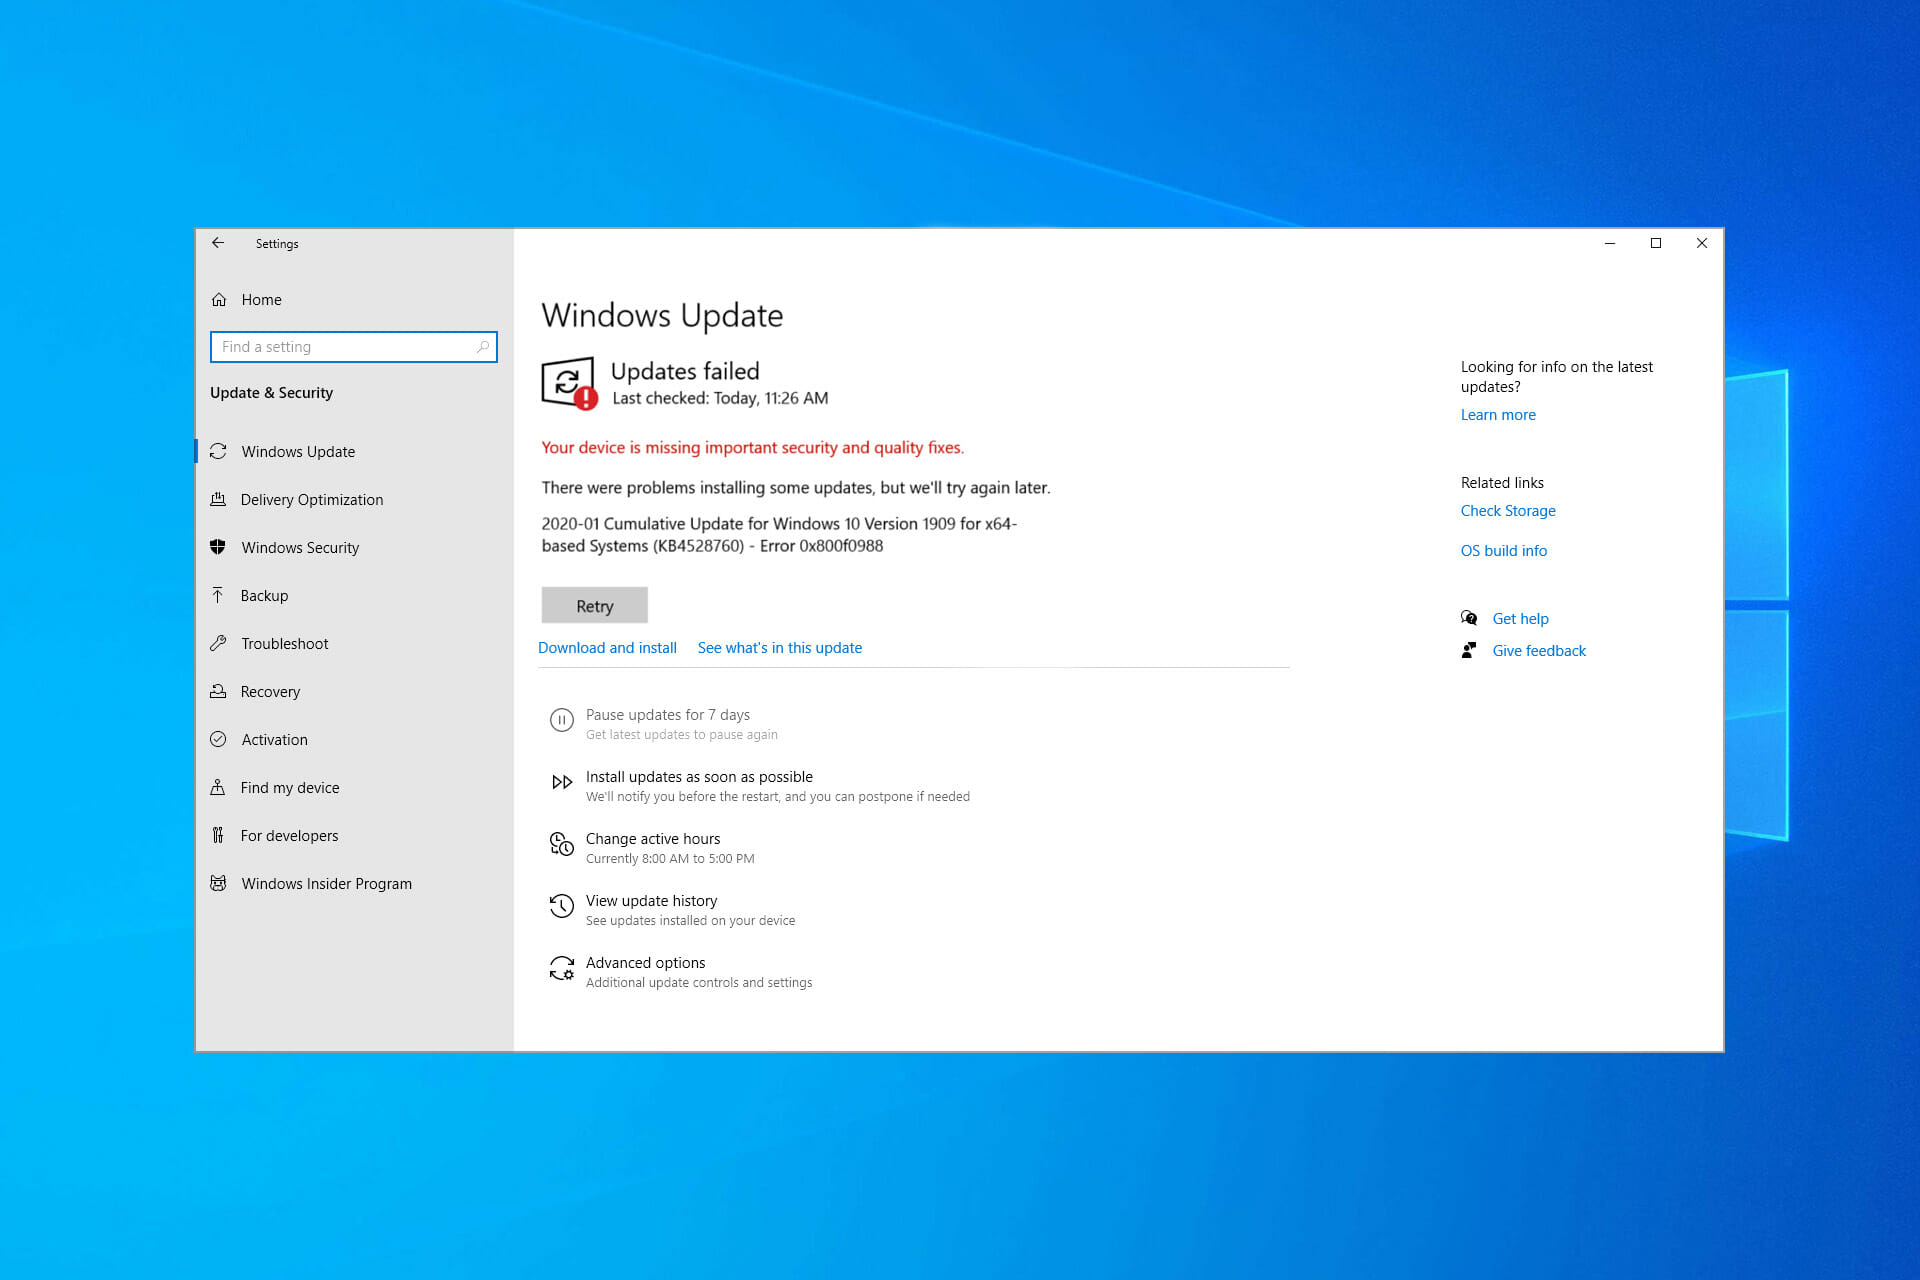


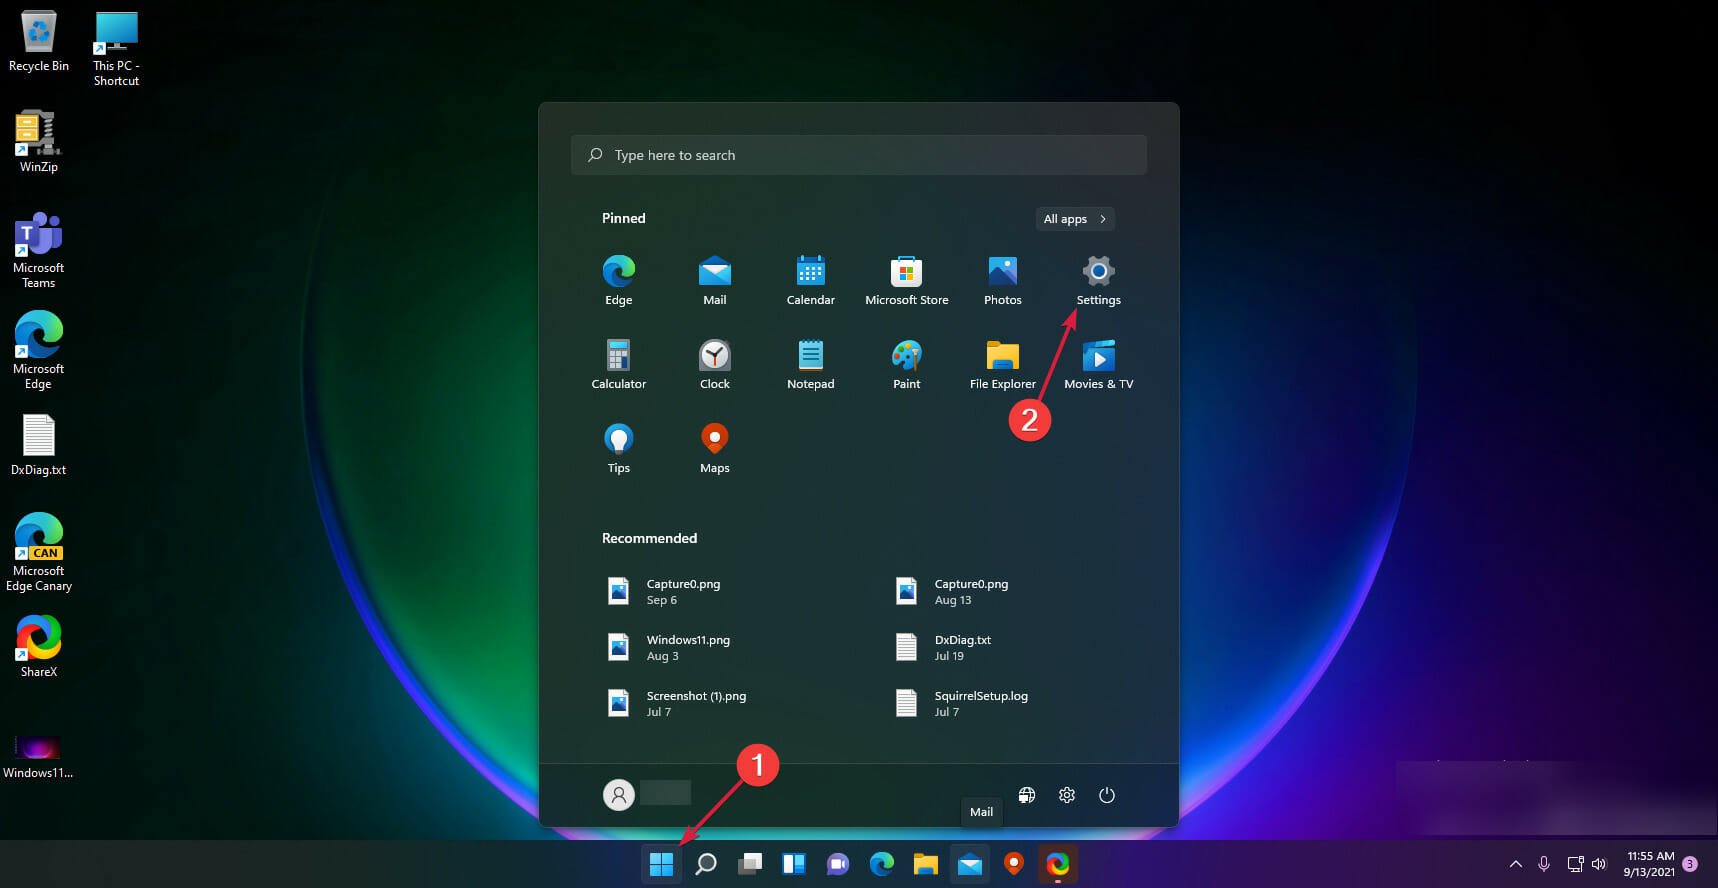
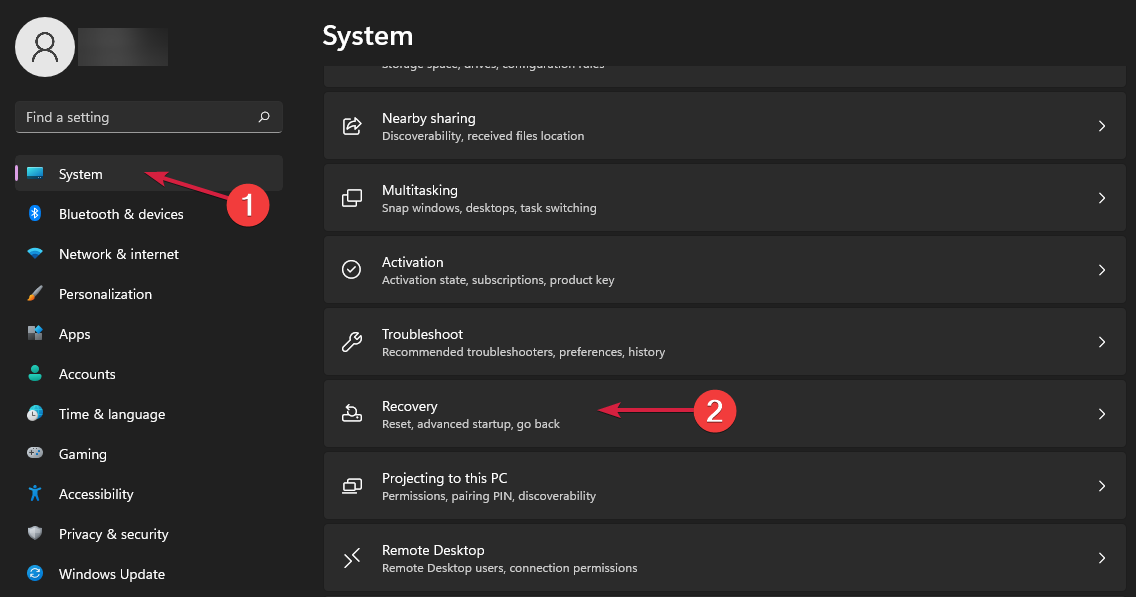




 or